Introduction
This article introduces how to use SEGGER’s official software JFlash for program downloading, supporting Hex and Bin files.
Downloading and Installing JFlash
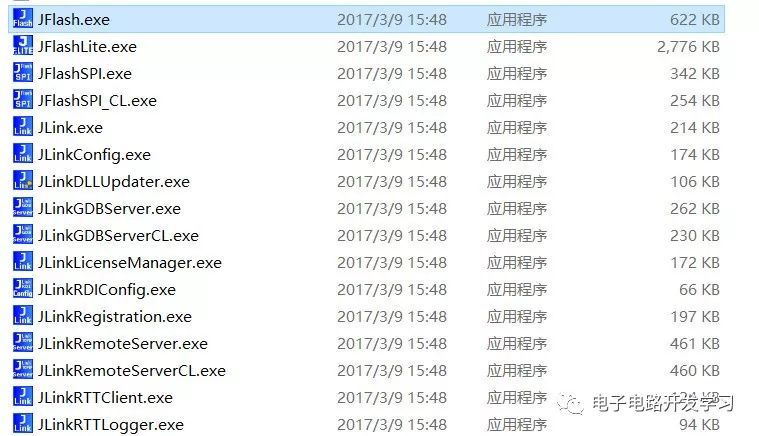
First, install the JFlash software. After installation, the JLink driver will be installed by default, which includes the following tools:
-
JFlash, primarily used for program downloading and reading.
-
JFlashLite, a mini version of JFlash.
-
JFlashSPI, used for downloading programs to SPI memory, such as W25Q128.
-
JLinkGDBServer, used for third-party software debuggers. For example, when setting up an STM32 development environment using Eclipse, you will need to use the GDB Server for debugging.
-
JLink Command, a command operation window for entering commands to execute connections, erasures, downloads, runs, etc.
Software Preparation
-
Jlink software
-
Hex file or Bin file
-
Jlink debugger, such as Jlink V9
1. Open JFlash
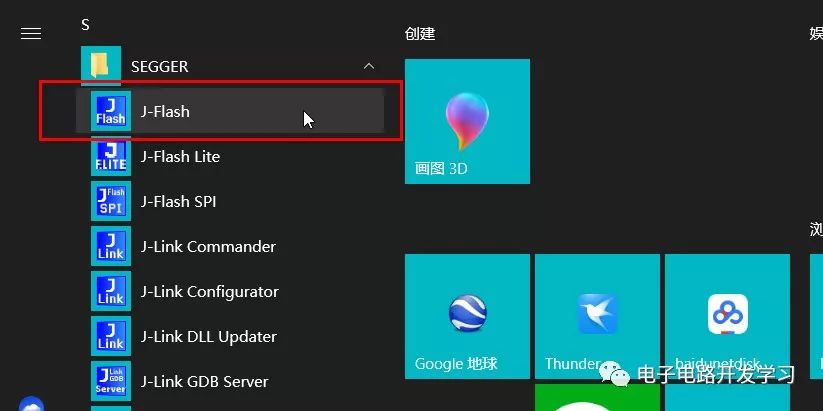
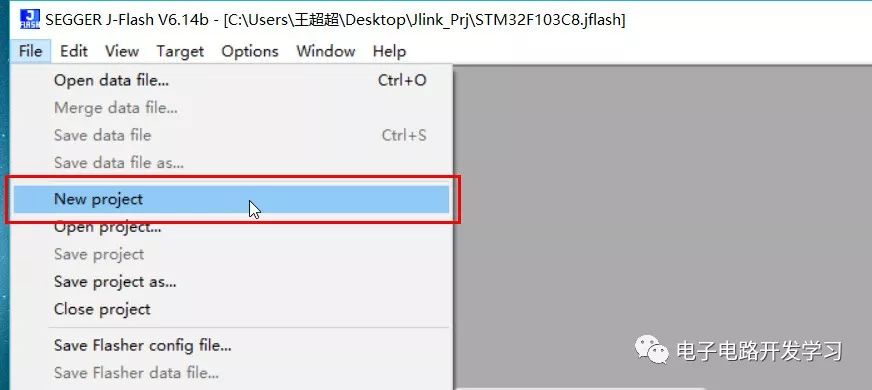
2. Create a New Project
Click File->NewProject
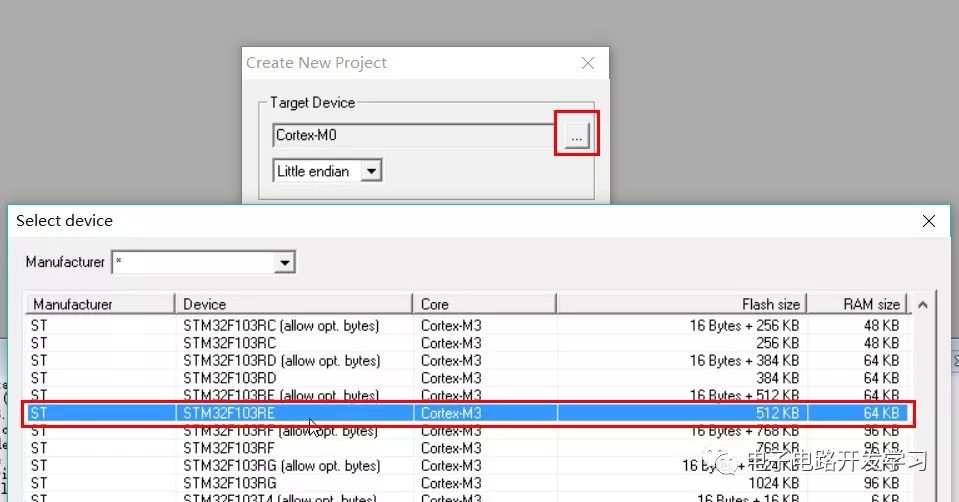
3. Select the Chip Model
Many ARM Cortex core chips are supported here. Select the corresponding chip; I choose the STM32F103RE series.
4. Connect the Chip
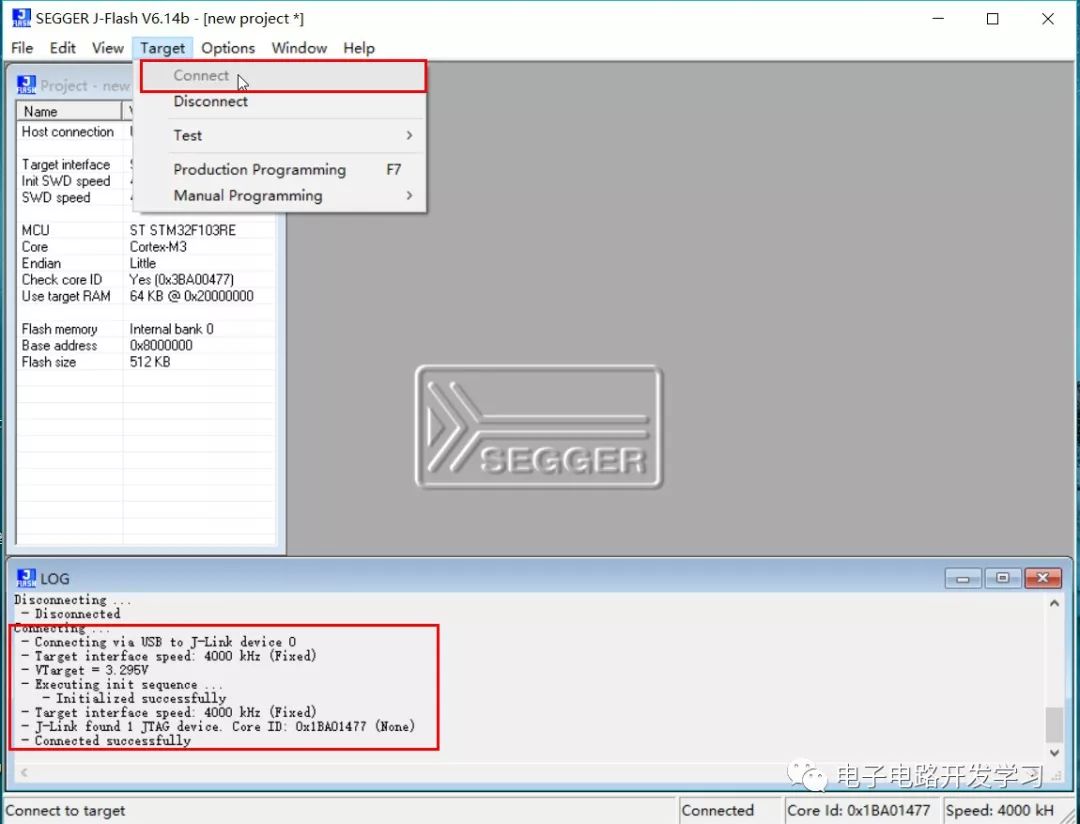
If SWD mode is selected, connect the SWDIO, SWCLK, and GND lines. After connecting, click Target->Connect. If the connection is successful, it will display “Connected” in the LOG window below.
5. Open the Programming File
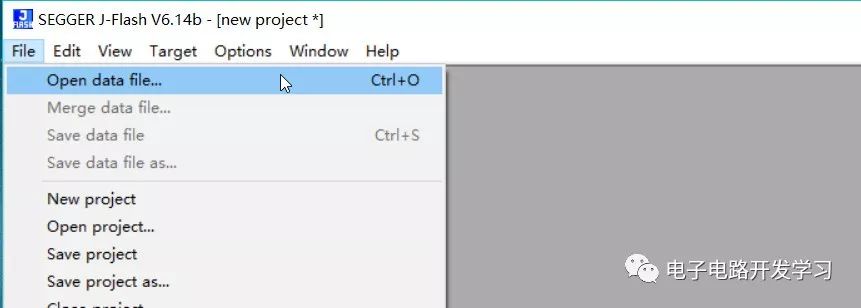
JLink supports various file types such as Hex and Bin.
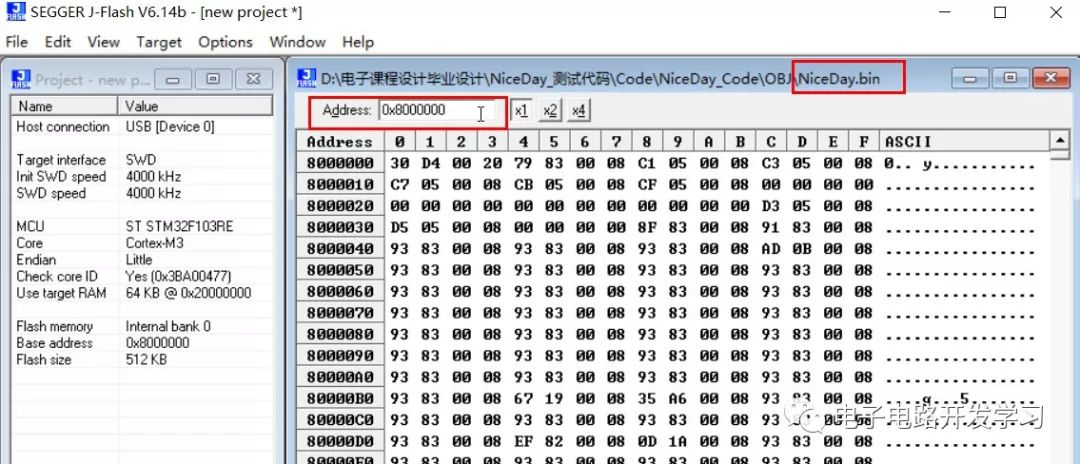
If a Bin file is selected, you also need to specify the starting address for programming, as Bin files do not contain programming addresses, while Hex files do. The specific differences can be found in a previous article: What Are the Differences Between BIN, HEX, AXF, and ELF File Formats.
6. Start Programming
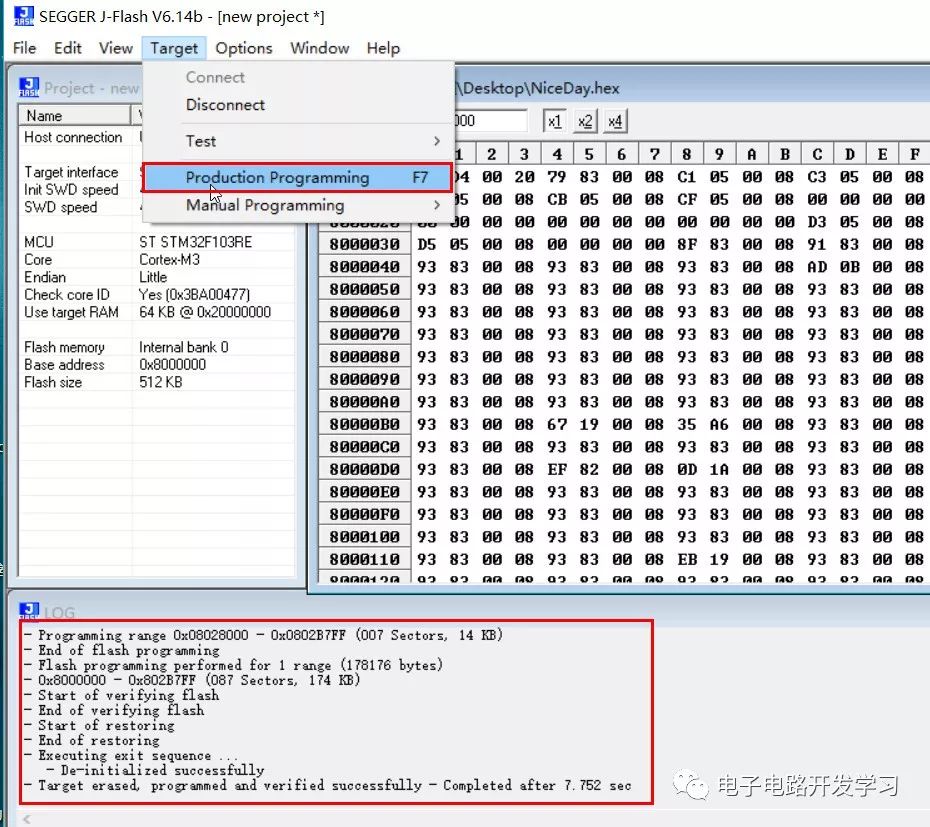
After opening the Hex file, click Target->Production Programming, or use the shortcut key F7. After a few seconds, the program will be downloaded, and a success message will appear in the bottom window.
7. Start Running
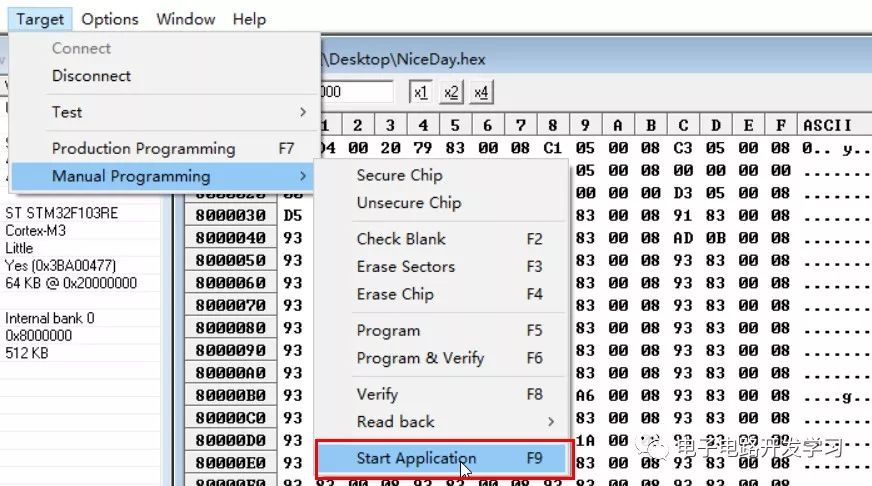
After successful programming, the program will not run immediately. Click Target->Manual Programming->Start Application, or press the shortcut key F9 for the program to start running, or pressing the reset button will also start the program.
8. Configure the Project for Automatic Running
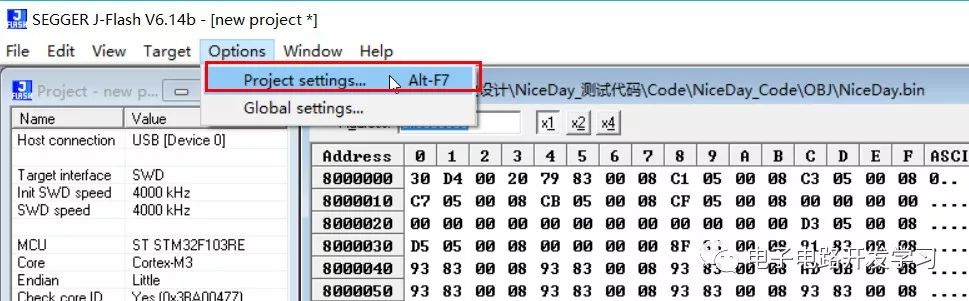
If you want the program to run automatically after each download without needing to reset, you can use the automatic run option in the project configuration. Open Option->Project Setting, switch to the Production option, and check Start Application to allow the program to run automatically.
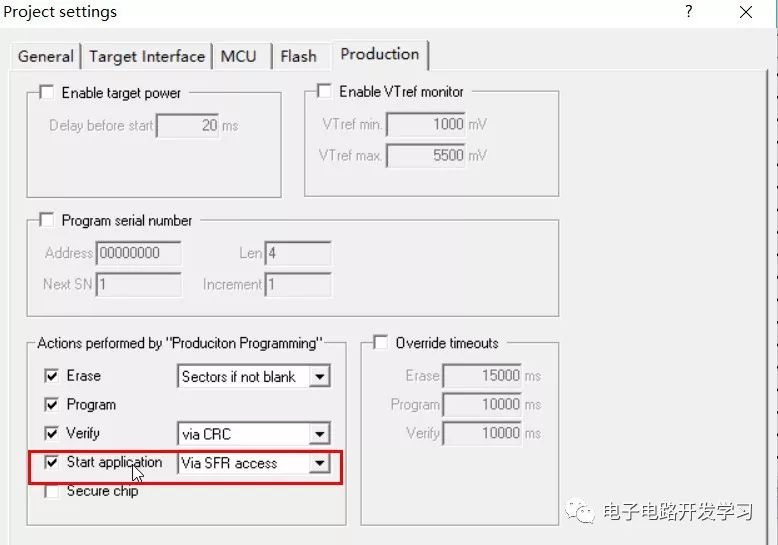
You can save the current project configuration as a file, such as STM32F103RE.jflash, and the next time you need to download, just open this project.

This article is authorized for publication by the author ‘wcc149’, from the public account ‘Electronic Circuit Development Learning‘.