When developing with Java 8, if you wanted to run your application on a machine without Java installed, you always had to copy the JRE along with your program. What could originally be a program of a few kilobytes ballooned to over a hundred megabytes with the JRE included, and even after maximum compression with 7z, it still was around 40 MB.
However, Java 11 solved this problem. Java 11 no longer comes with a JRE; instead, it allows you to generate a slimmed-down JRE on demand, including only the required modules.
Java 11 introduced the jlink tool, which enables developers to create a customized Java Runtime Environment (JRE) that contains only the components necessary to run specific applications, thus reducing the size of the JRE. Below are the basic steps to customize a slimmed-down JRE using the jlink command.
Determine Modules
First, you need to identify the Java modules your application depends on. You can list all available modules by running java --module -list.
Create jlink Configuration File
Create a jlink configuration file (for example, jlink-image-config.txt) using a text editor, specifying the modules to include in this file. For example:
# List of modules to include in the image
modules = \
java.base \
java.sql \
java.naming \
java.desktop \
Replace <your application specific modules> with the other modules your application depends on.
Run jlink Command
Use the following command to create a slimmed-down JRE image:
jlink --module-path <path-to-jdk-jmods> --add-modules <comma-separated-modules> --output <output-directory>
Where:
-
<path-to-jdk-jmods>is the path to thejmodsdirectory in your JDK. -
<comma-separated-modules>are the modules you want to include in the JRE, separated by commas. -
<output-directory>is the directory where you want to generate the JRE image.
If you have a configuration file, you can specify the configuration file path using the --config option:
jlink --module-path <path-to-jdk-jmods> --config <path-to-config-file> --output <output-directory>
Test the JRE
After creating the JRE image, you can find tools like java and javac in the <output-directory>/bin directory. Use these tools to run your application to ensure the JRE is functioning correctly.
Optimize and Adjust
Based on the test results, you may need to adjust the configuration file and rerun the jlink command to ensure all necessary modules are included while removing unnecessary modules to further reduce the JRE size.
Please note that the usage and options of the jlink tool may change with updates to the Java version, so it is recommended to consult the official documentation for the Java version you are using for the latest and most accurate information.
Case Study
Now, let’s go through a practical example.
After configuring the JDK 11 environment variables, you can proceed to customize and generate the JRE.
I have a app.jar file, and I will use the jdeps command to see what modules are needed to run this JAR package.
The command format is:
jdeps --list-deps jar-file.jar
The output of the command is as follows:
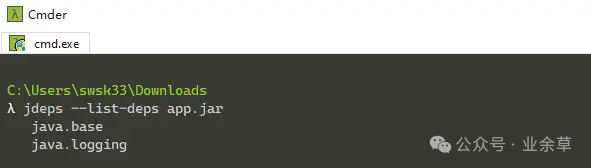
This indicates that the java.base and java.logging modules are required.
Now, use the jlink command to customize the JRE, with the command format:
jlink --module-path "java module location" --add-modules required modules, separated by commas --output "specified generated jre folder path"
The Java module location is generally found under jdk installation directory\jmods, and in the command line we can use "%JAVA_HOME%\jmods" to represent it.
Here is my command execution:

This created the jre11 folder in the current directory, which is our customized JRE, and its size is much smaller.
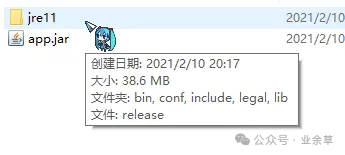
Run our program using generated jre folder\bin\java.exe.