Click on the top ” Technical Training ” and select “Pin to Top“
Over 160,000 industrial control professionals are following this WeChat platform: technical sharing, learning exchange, industrial control videos.
In practical project applications, it is often necessary to use a single touch screen to monitor and operate multiple devices. This is commonly referred to as one screen controlling multiple machines. The principle is quite simple. Let’s demonstrate how to achieve one screen controlling multiple machines with a Wecon touch screen through a case study.
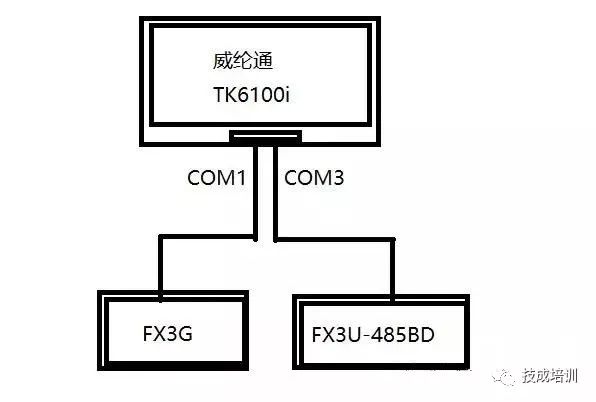
Taking a Wecon touch screen TK6100i as an example, we will communicate with one FX3U and one FX3G PLC to demonstrate this process, as shown in the figure below:
The Wecon touch screen TK6100i has two communication ports, one male and one female, with the pin distribution as follows:
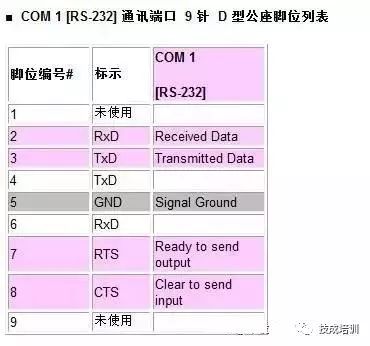
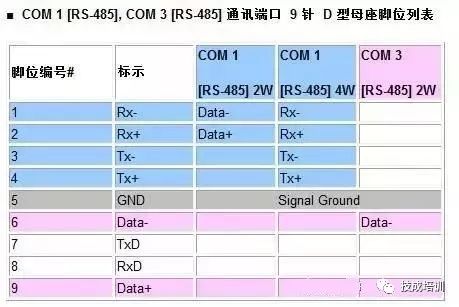
From the above image, it can be seen that its male connector only has a 232 interface, while the Mitsubishi serial port method is 422. Therefore, the 485 4W method must be selected, so only the female connector can be used. The female COM1 communication port supports 485 communication in both two-wire and four-wire modes, i.e., 2W and 4W, as well as the two-wire mode of COM3.
The 3U PLC uses 485BD as the connection object. The communication method can choose either two-wire or four-wire. The 3G PLC communicates through the programming port and can only choose four-wire mode. Since this touch screen’s female connector only supports four-wire communication, the 3G PLC is set to COM1 communication port four-wire mode, and the 3U PLC to COM3 communication port two-wire mode.
Touch Screen Settings:
Create a new file, select the touch screen model, and add PLC 1, FX3G. The PLC settings are as follows:
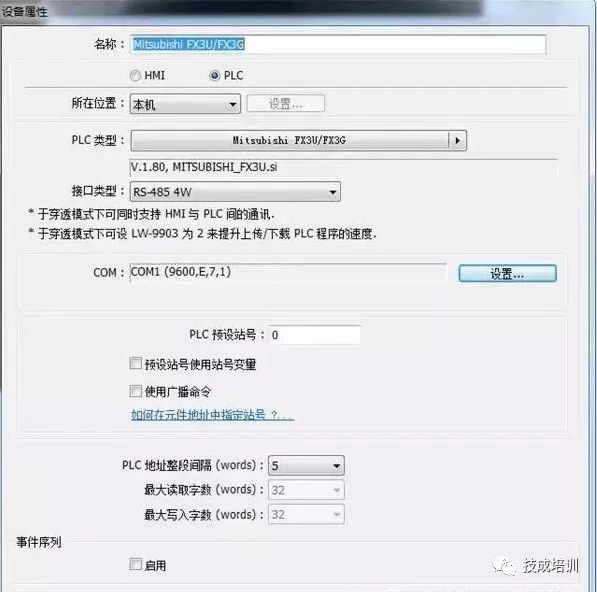
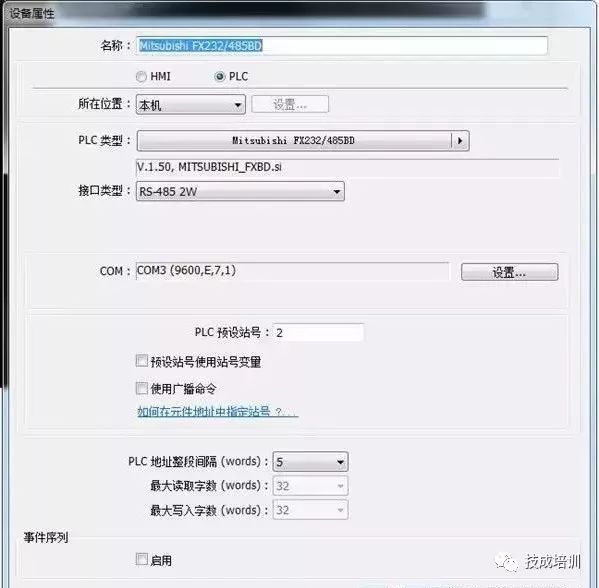
After clicking OK, click to add new. At this point, select FX2332/485BD, with the settings as follows:
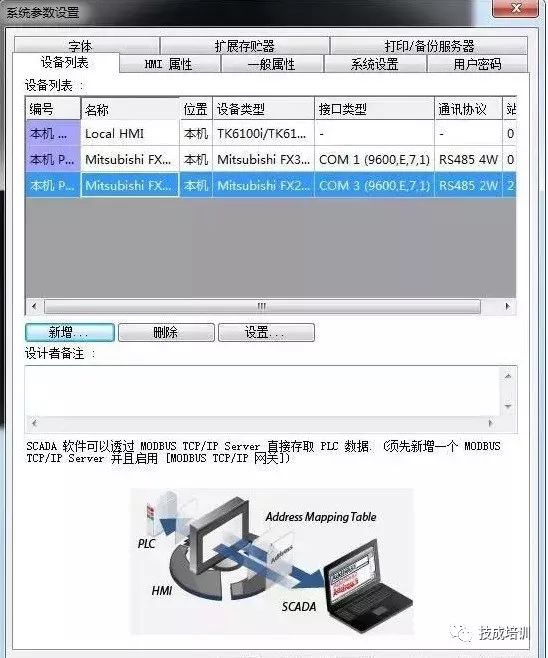
The devices after setting are as follows:
PLC Settings:
The 3G PLC, being a programming port, does not require settings.
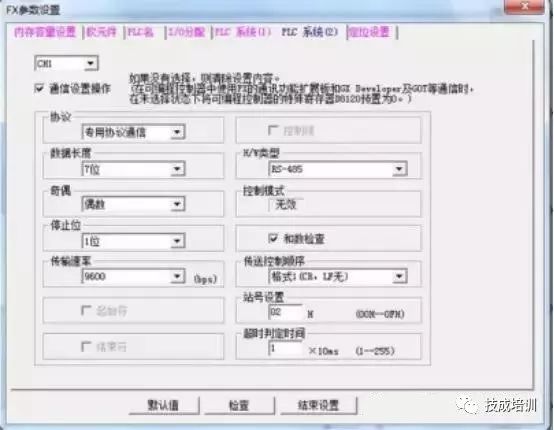
The 3U PLC uses 485BD, so communication parameters need to be set.
Open the Mitsubishi programming software, create a new 3U PLC file, open parameter settings, and set as follows:
Write the PLC program, using a button to light up an indicator light.
FX3G:

FX3U:

Touch Screen Screen Creation
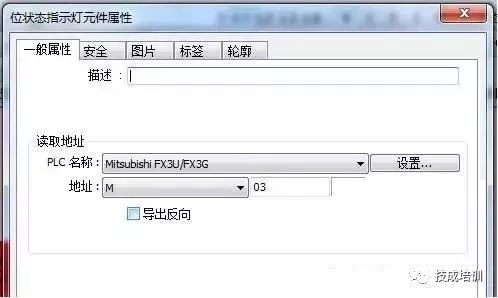
Control the 3U PLC
Create a new button and indicator light
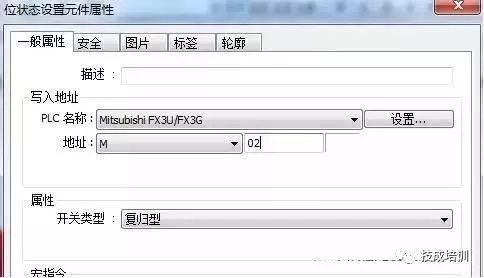
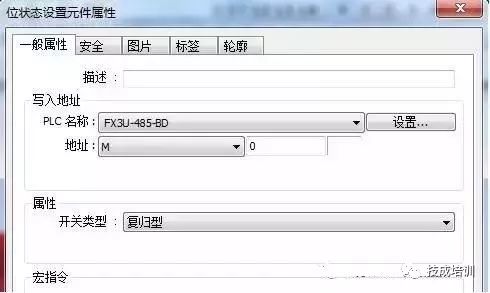
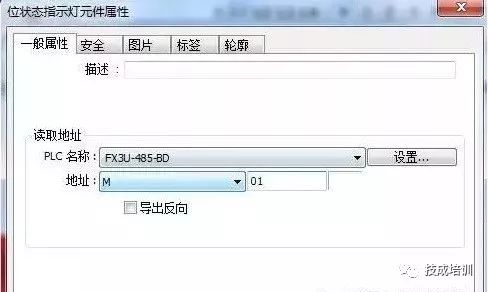
Control the 3G PLC
Create a new button and indicator light
The effect is as follows:
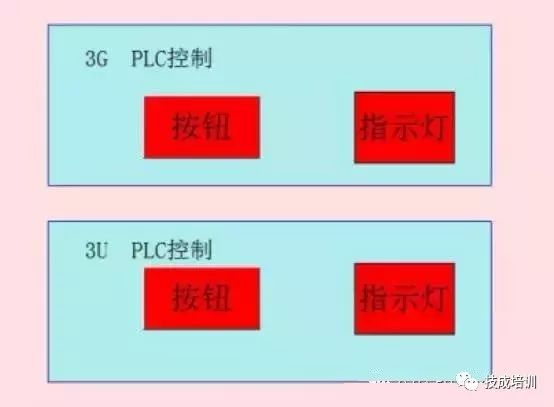
Up to this point, the settings and programs for the touch screen and PLC are all completed. You can follow the steps to operate it again. Isn’t the principle very simple?
 Reposting is a kind of motivation, sharing is a virtue
Click to read the original text and learn about electrical engineering, PLC, frequency servo, CNC robots, and other knowledge.