*Content in the Submission Section comes from user contributions, and we will present the unique personalities of the contributors, as well as their feelings and enthusiasm for the platform. We welcome everyone to participate actively and receive 10,000 star wishes! (^_-)
The following content is the main text
The content today is relatively complex but detailed enough. If you lack patience, you can directly purchase the pre-configured products from the app.
First, let me describe the environment:
Main Router: Industrial PC with ROS routing system installed (64-bit, non-virtual) – Dial-up router
Secondary Router: KVM virtual OpenWRT (64-bit) within ROS
PS: Why use the ROS routing system? It’s stable.
To deploy the ROS environment and enable 64-bit, please search on Baidu… or directly buy an SSD with L6 authorization to use as the main hard drive. For OpenWRT firmware, choose one with Docker plugin, and ensure the kernel does not exceed 4.19. There are plenty available in the forum, or you can compile your own. For how to KVM OpenWRT, please search on Baidu.
This post mainly explains how to deploy the Docker version of the platform under ROS + OpenWRT. Please prepare the main system yourself.
———————————————–
Thanks to the following authors for providing the Docker version of the platform image:
Items to prepare:
1. A SATA SSD of 32GB or larger, or an M.2 interface, depending on your industrial PC’s interface, as long as it can be recognized. This will be used for Docker and the platform environment deployment (Note: why prepare another hard drive? Most authorized SSDs have a capacity of no more than 8GB, which is insufficient for caching).
2. DiskGenius (to create an empty IMG disk, please download it yourself from Baidu).
3. WinSCP (to connect to ROS and upload the IMG, as uploading via WinBox is too slow). Please download it yourself from Baidu.
The tutorial officially begins:
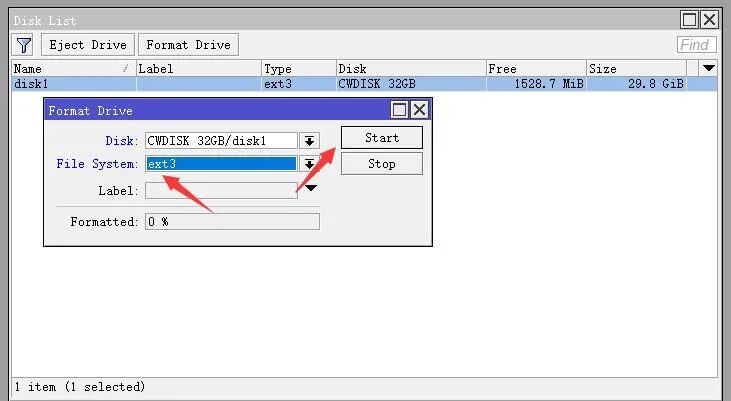
1) Format the second hard drive in System → Disks. Choose ext3 for the file system (if ext4 is not available, choose ext3!) and then click Start and wait for it to complete.
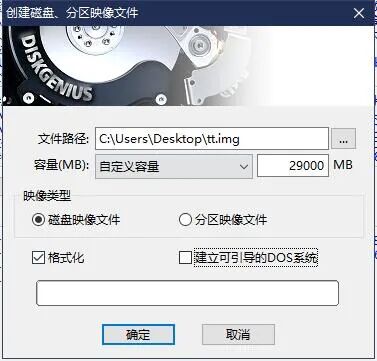
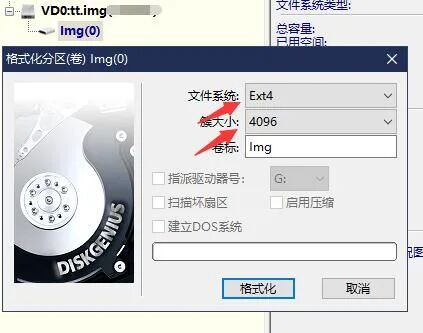
2) Use DiskGenius to create an empty IMG file on the second hard drive and format it to ext4, filling in the capacity based on your actual disk size – 1GB.
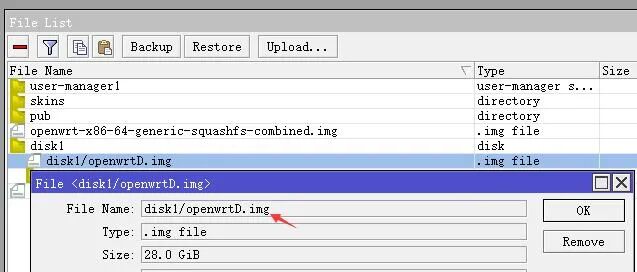
3) Use WinSCP to upload the created IMG file to the second hard drive in the ROS system. For example, here the path of the second hard drive is disk1.

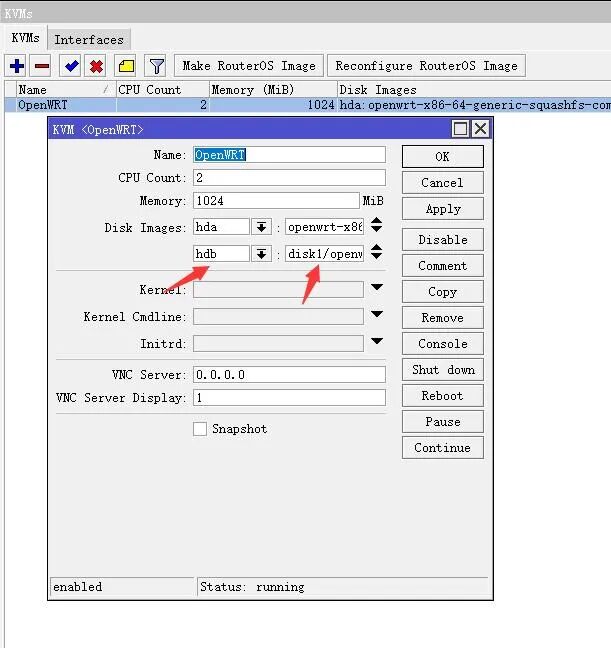
4) Add the second hard drive to the KVM-created OpenWRT virtual machine, select HDB, then fill in the path where the empty IMG is stored, and apply to boot.
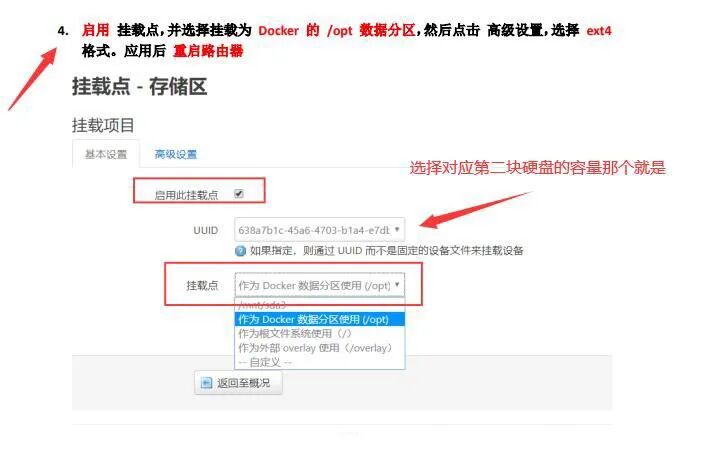
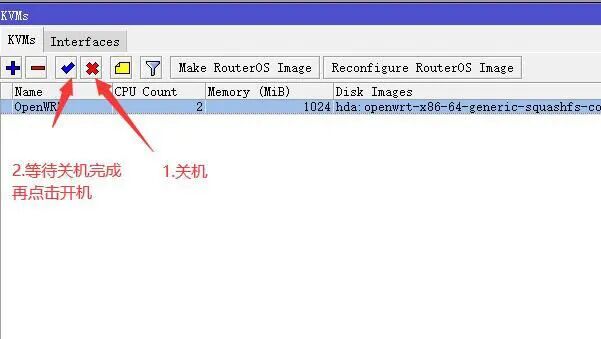
5) Initialize Docker CE. Check the OpenWRT Docker CE plugin for configuration tutorials, starting from step 4! Follow step by step, and restart the router using the TTYD command in OpenWRT to input reboot. Note that when you see the device disconnect from the network, manually shut down and restart in the KVM management to complete the reboot. Once the device has network access, proceed with the remaining steps of the Docker CE plugin configuration tutorial.
6) Download the platform Docker image and set up the environment. Use the TTYD command in OpenWRT to input:
docker run -v /opt:/mnts -d --name ttnode --net=host -i -t --privileged=true --restart=always registry.cn-hangzhou.aliyuncs.com/744287383/linux_ttnode:latest /start.sh #/opt is the mount path of the hard drive, where the cache is stored, :/mnts this colon and path cannot be changed, ttnode is the name of the container. docker logs ttnode # In the command, ttnode refers to the container name, change it to your own container name. Executing this command will get the QR code for binding the platform and the service port number, which can be scanned by the app to bind the device.Following the author’s method, there should be no errors. Since the author has already set it up, I won’t provide the execution result images to avoid doing it a second time…

7) Add the mapping port for the platform in ROS. Go to IP → Firewall → NAT, click + to add the first default rule, and set it as shown in the image. Remember to add the network interface you use for dialing.
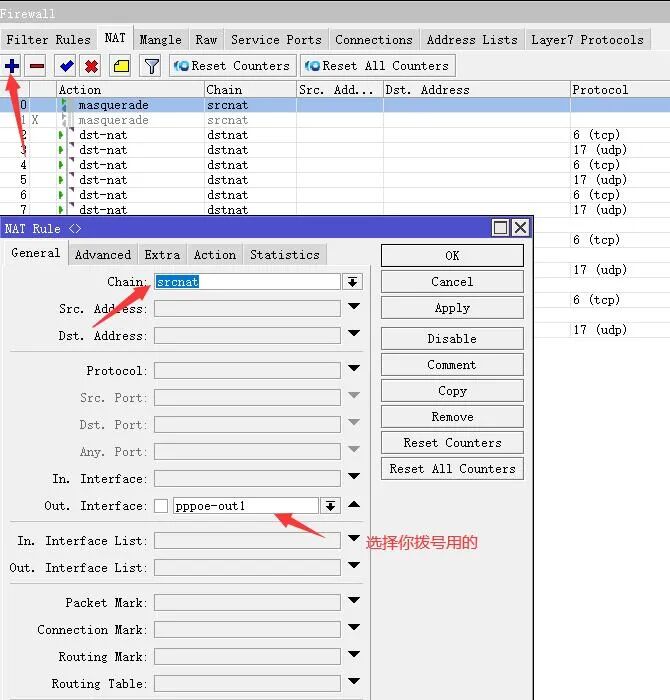
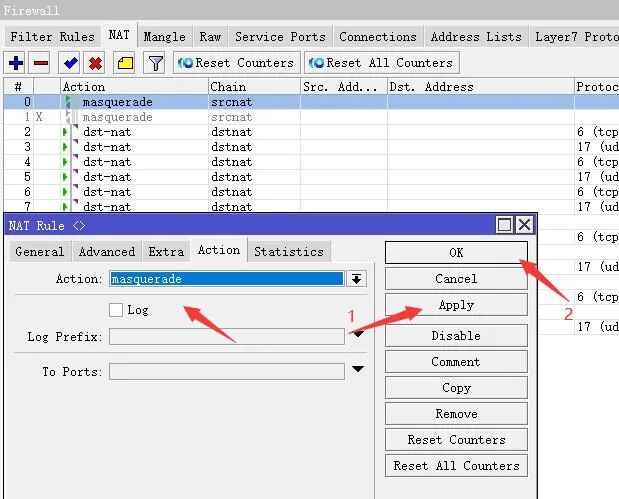
Then click Action to set it as shown in the image, apply it, and then disable or delete the NAT rule we used to initialize the ROS internet environment. This completes the setup.
Next, add the mapping ports for the platform according to the three ports provided.

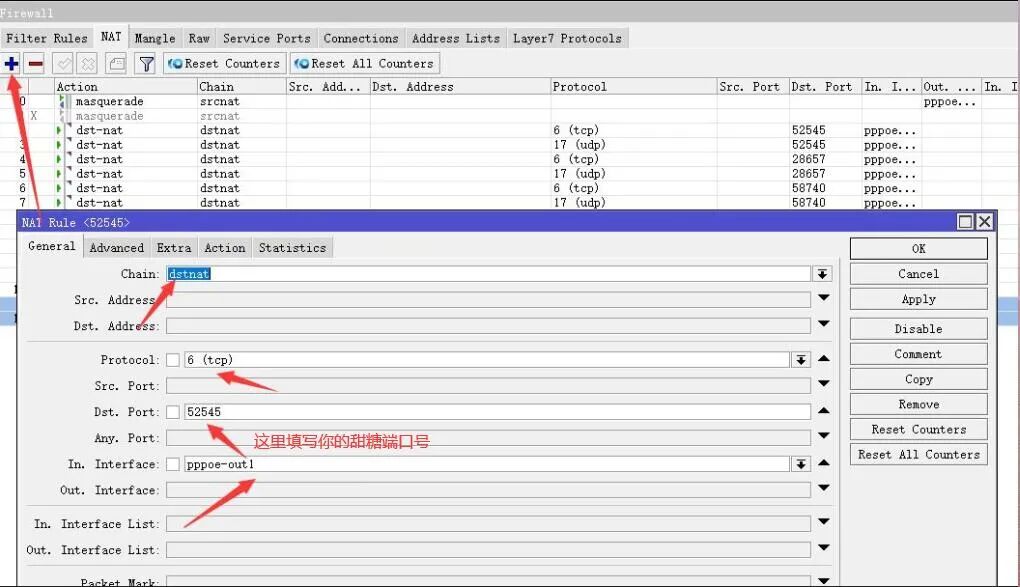
Click + to add the TCP mapping port, set it as shown in the image, and fill in the port number provided by the platform. Each person’s port number is different, so do not copy the author’s.
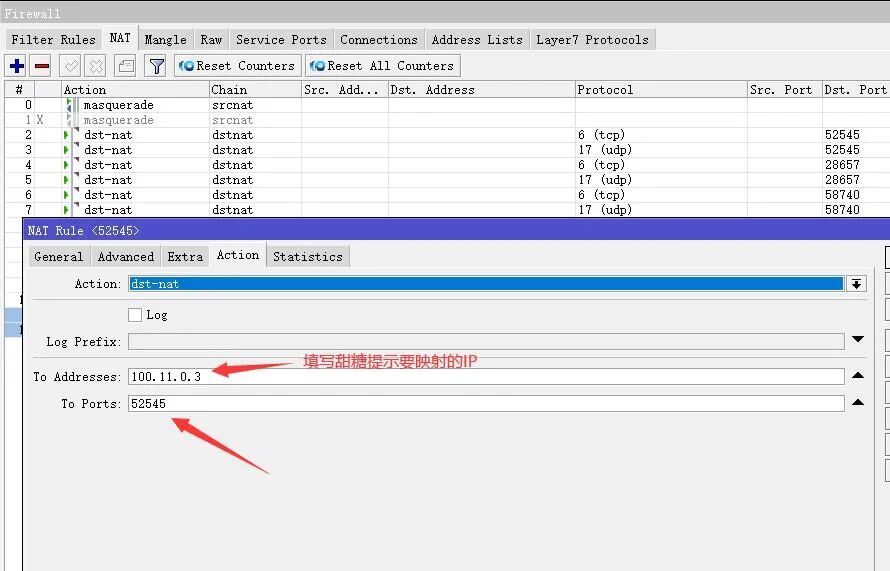
Then click Action to set it as shown in the image. After applying, click OK, and the first TCP mapping port is complete.
Next, we will add the UDP mapping port. Click + to add the UDP mapping port, and set it as shown in the image. Similarly, click Action to set it as shown in the image.
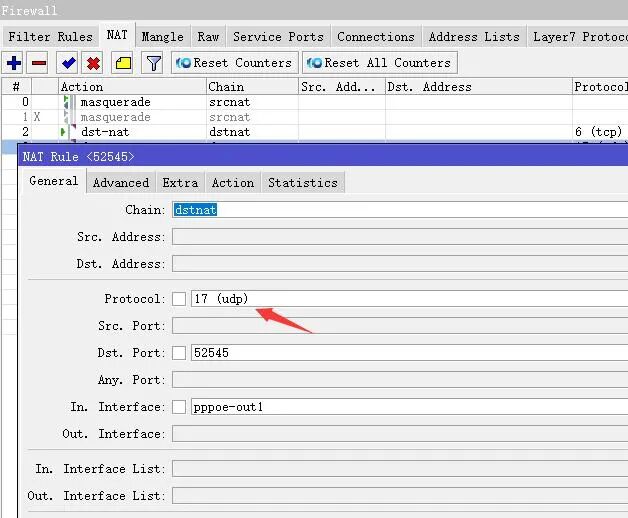
This completes the first of the three required mapping ports. The remaining two can be added following the same steps for TCP and UDP mapping, just changing the port numbers. A total of 6 mappings are required.

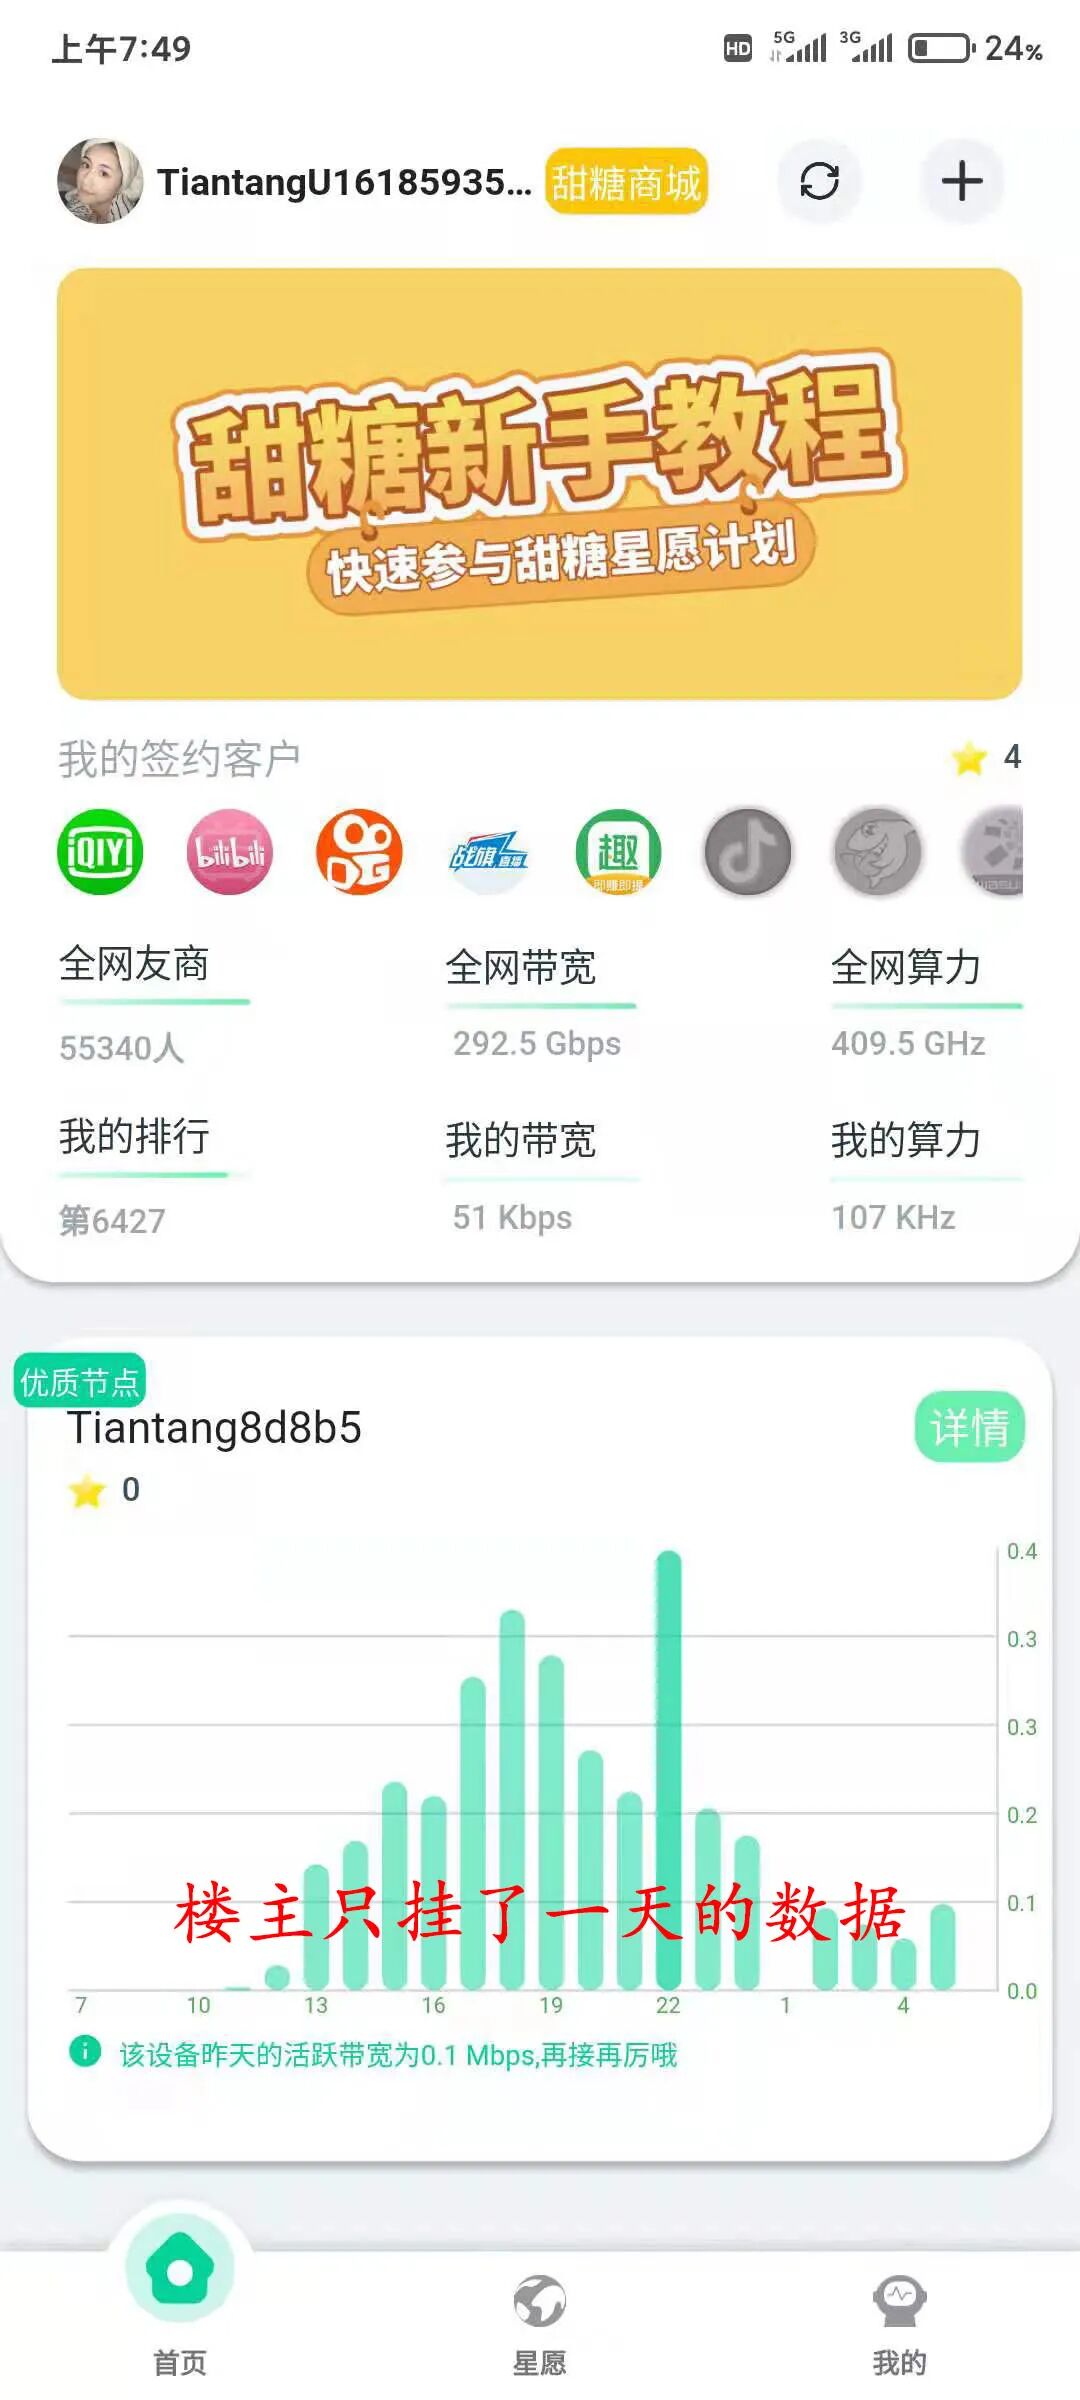
Finally, wait about 10 minutes to add the platform node on your phone. The registration steps are very simple, so I won’t describe them all here.

The main text is complete.
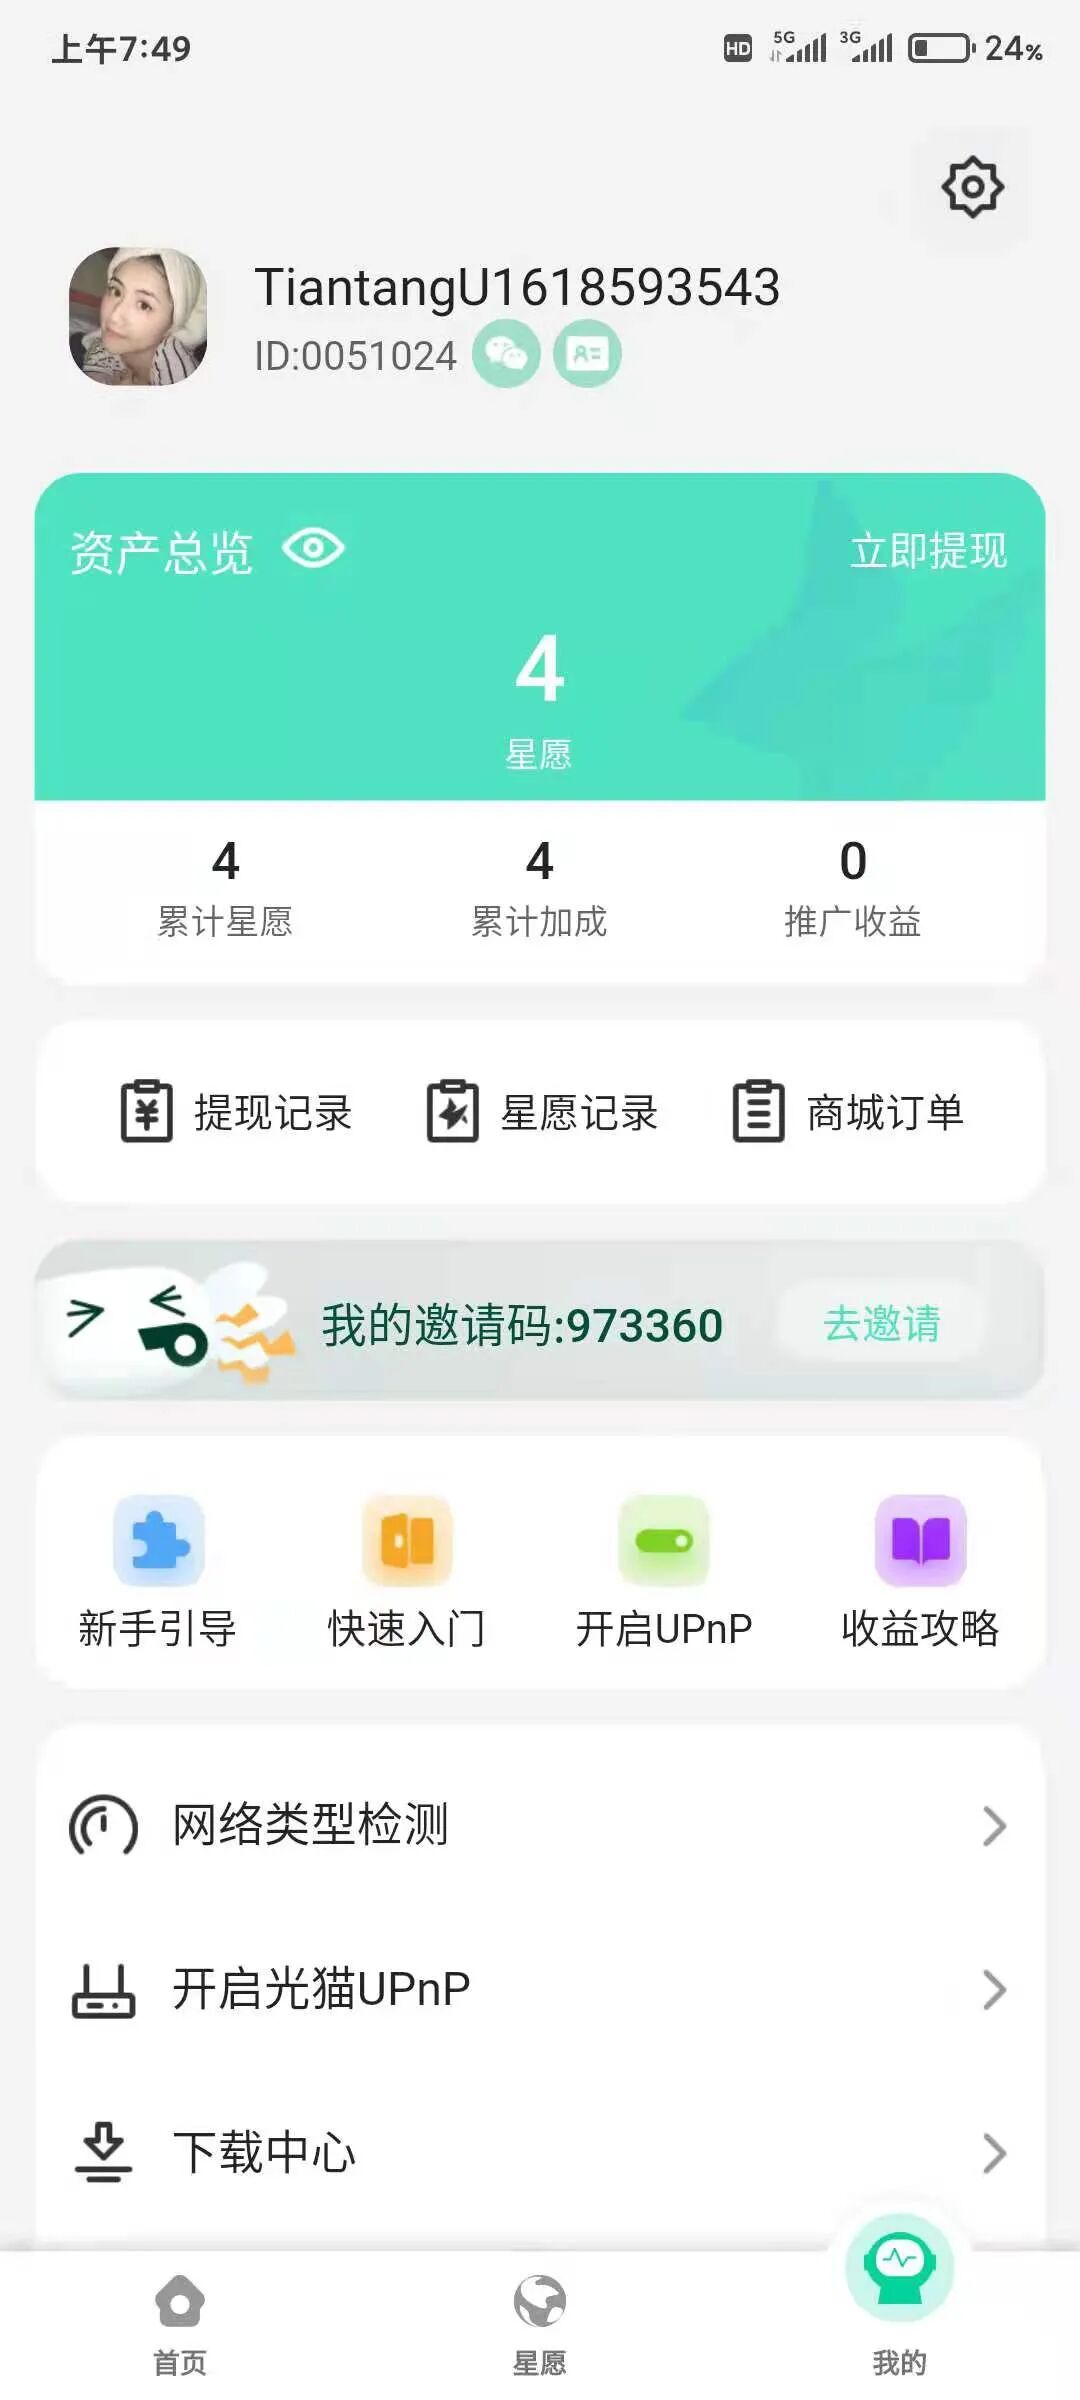
Thanks to the contributors. If you like or find this helpful, please remember to fill in the author’s invitation code: 973360 to support them! (*^▽^*) After filling in the invitation code, you can immediately receive a star wish bonus card!
Finally, we welcome more users to join the platform’s Submission Section (click the blue text to jump to the submission activity page). Once adopted and shared, you can receive 10,000 star wishes. Don’t hesitate, come join us! (σ゚∀゚)σ..:*☆
The latest communication QQ group: 758098517