-
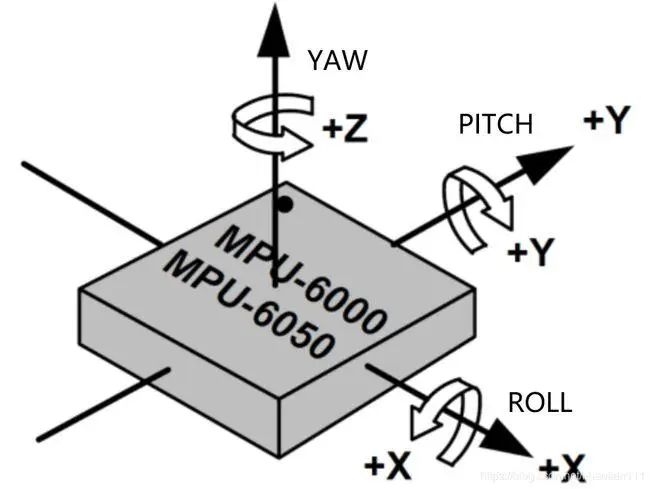
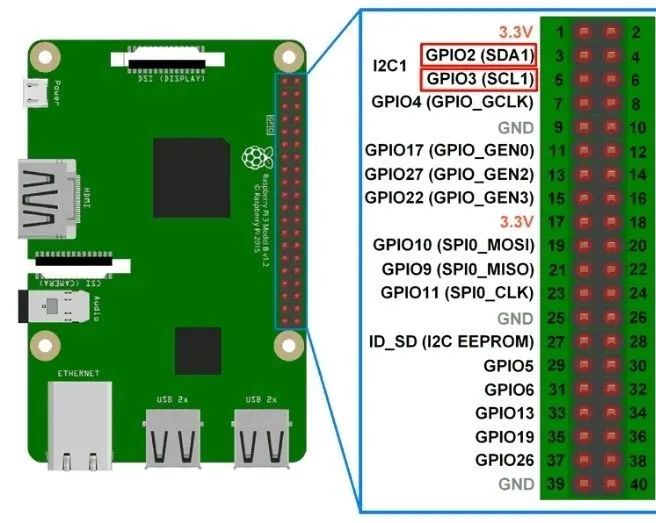
Connect Hardware: Connect the MPU6050 sensor to the Raspberry Pi. The MPU6050 typically communicates via the I2C bus, so you need to connect its SCL pin to the GPIO SCL pin of the Raspberry Pi (usually BCM 3), connect its SDA pin to the GPIO SDA pin of the Raspberry Pi (usually BCM 2), and share the ground connection.
-
Configure Raspberry Pi: Make sure the I2C functionality is enabled. You can use the
raspi-configcommand to configure it. Select “Interfacing Options”, then select “I2C” and enable it. -
Install Required Packages: Install the necessary packages on the Raspberry Pi to support I2C communication and read MPU6050 data. Execute the following commands to install the relevant packages:
sudo apt-get update
sudo apt-get install python-smbus
sudo apt-get install i2c-toolsimport smbus
# Initialize I2C bus
bus = smbus.SMBus(1)
# MPU6050 I2C address
address = 0x68
# Configure MPU6050
bus.write_byte_data(address, 0x6B, 0)
# Read accelerometer and gyroscope data
def read_sensor_data(reg):
high_byte = bus.read_byte_data(address, reg)
low_byte = bus.read_byte_data(address, reg + 1)
value = (high_byte << 8) + low_byte
if value > 32767:
value -= 65536
return value
while True:
accel_x = read_sensor_data(0x3B)
accel_y = read_sensor_data(0x3D)
accel_z = read_sensor_data(0x3F)
gyro_x = read_sensor_data(0x43)
gyro_y = read_sensor_data(0x45)
gyro_z = read_sensor_data(0x47)
print("Accelerometer data: X={0}, Y={1}, Z={2}".format(accel_x, accel_y, accel_z))
print("Gyroscope data: X={0}, Y={1}, Z={2}".format(gyro_x, gyro_y, gyro_z))

Want to learn more?
Quickly scan the code to follow us.