Part One: Design Guidelines for Mixed-Signal Circuit Boards
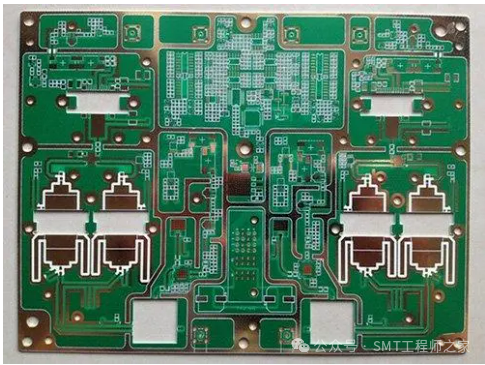
The operation of analog circuits relies on continuously varying currents and voltages. Digital circuits operate by detecting high or low levels at the receiving end based on predefined voltage levels or thresholds, which corresponds to determining the logical states of “true” or “false”. Between the high and low levels of digital circuits, there exists a “gray” area where digital circuits sometimes exhibit analog effects. For example, when transitioning from low to high (state), if the speed of the digital signal transition is fast enough, overshoot and ringing reflections can occur. For modern board-level design, the concept of mixed-signal PCB is somewhat vague, as even in purely “digital” devices, there are still analog circuits and analog effects present. Therefore, during the early design phase, it is essential to simulate analog effects to reliably achieve strict timing allocations. In fact, in addition to the reliability required for communication products to operate without failure for years, there is a particular need to simulate analog effects in mass-produced low-cost/high-performance consumer products. Another challenge in modern mixed-signal PCB design is the increasing number of different digital logic devices, such as GTL, LVTTL, LVCMOS, and LVDS logic. Each type of logic circuit has different logic thresholds and voltage swings, yet these circuits with different logic thresholds and voltage swings must be designed together on a single PCB. Through a thorough analysis of the layout and routing design of high-density, high-performance mixed-signal PCBs, you can master successful strategies and techniques.1. Fundamentals of Mixed-Signal Circuit Routing When digital and analog circuits share the same components on the same board, the layout and routing of the circuits must be methodical. The matrix shown in Figure 1 is helpful for the design planning of mixed-signal PCBs. Only by revealing the characteristics of digital and analog circuits can the required PCB design goals be achieved in actual layout and routing.Figure 1: Analog and Digital Circuits: Two Aspects of Mixed-Signal Design In mixed-signal PCB design, there are special requirements for power routing, and it is necessary to isolate analog noise from digital circuit noise to avoid noise coupling. This increases the complexity of layout and routing. The special requirements for power transmission lines and the need to isolate noise coupling between analog and digital circuits further complicate the layout and routing of mixed-signal PCBs. If the power supply for the analog amplifier in the A/D converter is connected to the digital power supply of the A/D converter, it is very likely to cause mutual interference between the analog and digital circuit parts. Perhaps due to the position of the input/output connectors, the layout scheme must mix the routing of digital and analog circuits together. Before layout and routing, engineers need to clarify the basic weaknesses of the layout and routing scheme. Even in the presence of false judgments, most engineers tend to use layout and routing information to identify potential electrical impacts.2. Layout and Routing of Modern Mixed-Signal PCBs The following will illustrate the technology of mixed-signal PCB layout and routing through the design of an OC48 interface card. OC48 represents the optical carrier standard 48, primarily aimed at 2.5Gb serial optical communication, which is a high-capacity optical communication standard in modern communication devices. The OC48 interface card contains several typical layout and routing issues of mixed-signal PCBs, and its layout and routing process will indicate the order and steps to solve mixed-signal PCB layout schemes.Figure 2: Logic of OC48 Interface Card As shown in Figure 2, the OC48 card contains an optical transceiver that implements bidirectional conversion between optical signals and analog electrical signals. The analog signals input or output to the digital signal processor (DSP) convert these analog signals into digital logic levels, allowing connection to microprocessors, programmable gate arrays, and system interface circuits on the OC48 card with DSP and microprocessor. Independent phase-locked loops, power filters, and local reference voltage sources are also integrated together. Among them, the microprocessor is a multi-power device, with the main power supply at 2V, and the 3.3V I/O signal power is shared by other digital devices on the board. An independent digital clock source provides clock signals for OC48 I/O, the microprocessor, and system I/O. After checking the layout and routing requirements of different functional circuit blocks, it is initially recommended to use a 12-layer board, as shown in Figure 3. The configuration of microstrip and stripline layers can safely reduce coupling between adjacent routing layers and improve impedance control. A ground layer is set between the first and second layers, which will isolate the wiring of sensitive analog reference sources, CPU cores, and PLL filter power from the microprocessor and DSP devices on the first layer. Power and ground layers always appear in pairs, as done for the shared 3.3V power layer on the OC48 card. This will reduce the impedance between power and ground, thereby reducing noise on the power signal. To avoid routing digital clock lines and high-frequency analog signal lines near adjacent power layers, otherwise, noise from the power signal will couple into sensitive analog signals. According to the needs of digital signal routing, careful consideration should be given to utilizing openings (splits) in the power and analog ground layers, especially at the input and output ends of mixed-signal devices. Routing through an opening adjacent to signal layers can cause impedance discontinuities and poor transmission line loops. These can lead to signal quality, timing, and EMI issues. Sometimes adding several ground layers or using several peripheral layers for local power or ground layers beneath a device can eliminate openings and avoid the aforementioned problems. Multiple ground layers are used on the OC48 interface card. Maintaining the stacking symmetry of opening layers and routing layers can avoid card deformation and simplify the manufacturing process. Since 1-ounce copper boards have a strong capacity for large currents, the 3.3V power layer and the corresponding ground layer should use 1-ounce copper boards, while other layers can use 0.5-ounce copper boards, thus reducing voltage fluctuations caused by transient high currents or spikes. If you design a complex system from the ground layer upwards, you should use cards with thicknesses of 0.093 inches and 0.100 inches to support routing layers and ground isolation layers. The thickness of the card must also be adjusted according to the routing characteristics of via pads and holes to ensure that the drill hole diameter does not exceed the width-to-height ratio provided by the manufacturer for metallized holes. If you want to design a low-cost, high-yield commercial product with the minimum number of routing layers, you must carefully consider the wiring details of all special power supplies on the mixed-signal PCB before layout or routing. Before starting layout and routing, have the target manufacturer review the preliminary layering scheme. The layering should fundamentally be based on the thickness of the finished product, the number of layers, the weight of copper, impedance (with tolerances), and the minimum sizes of via pads and holes, and the manufacturer should provide written layering recommendations. Recommendations should include examples of all controlled impedance stripline and microstrip configurations. You should combine your impedance predictions with the manufacturer’s impedance considerations, and then use these impedance predictions to validate the signal routing characteristics in the simulation tools used to develop CAD routing rules.3. Layout of the OC48 Card The high-speed analog signals between the optical transceiver and DSP are very sensitive to external noise. Similarly, all special power and reference voltage circuits also create significant coupling between the analog and digital power transmission circuits of the card. Sometimes, due to the shape of the enclosure, it is necessary to design high-density boards. Due to the orientation of the external optical cable connecting to the card and the relatively high component sizes in the optical transceiver section, the position of the transceiver on the card is largely fixed. The positions of the system I/O connectors and signal distribution are also fixed. This is the foundational work that must be completed before layout (see Figure 4). Like most successful high-density analog layout and routing schemes, the layout must meet routing requirements, and the requirements of layout and routing must be mutually considered. For a mixed-signal PCB, the analog part and the local CPU core operating at 2V do not recommend the “layout first, then routing” method. For the OC48 card, the DSP analog circuit part, which includes analog reference voltage and analog power bypass capacitors, should first interactively route. After routing is completed, the entire DSP with analog components and routing should be placed as close as possible to the optical transceiver to ensure that the routing length of high-speed analog differential signals to the DSP is minimized, with the fewest bends and vias. The symmetry of differential layout and routing will reduce the impact of common-mode noise. However, it is difficult to predict the best layout scheme before routing (see Figure 5). Consult the chip distributor for PCB layout design guidelines. Before designing according to the guidelines, communicate thoroughly with the distributor’s application engineers. Many chip distributors have strict time limits for providing high-quality layout suggestions. Sometimes, the solutions they provide are feasible for “first-tier customers” using the device. In the field of signal integrity (SI) design, the signal integrity design of new devices is particularly important. By combining the distributor’s basic guidelines with the specific requirements of each power and ground pin in the package, you can begin to layout and route the OC48 card integrated with DSP and microprocessor. Once the position and routing of the high-frequency analog part are determined, the remaining digital circuits can be placed according to the grouping method shown in the block diagram. Careful design is required for the following circuits: the position of the power filter circuit for the PLL in the CPU, which is sensitive to analog signals; the local CPU core voltage regulator; and the reference voltage circuit for the “digital” microprocessor. The electrical and manufacturing criteria for digital routing can only be appropriately applied to the design at this time. The aforementioned signal integrity design for high-speed digital buses and clock signals reveals some special routing topology requirements for delay matching of processor buses, balanced Ts, and certain clock signal routings. However, you may not know that there are also newer suggestions to add several termination resistors. During the problem-solving process, making some adjustments at the board layout stage is natural. However, an important step before starting routing is to verify the timing of the digital part according to the layout scheme. At this moment, a complete DFM/DFT layout review of the board will help ensure that the card meets customer needs.4. Digital Routing of the OC48 Card For the power lines of digital devices and the digital part of the mixed-signal DSP, digital routing should start from the SMD escape patterns. The shortest and widest printed lines allowed by the assembly process should be used. For high-frequency devices, the printed lines of power are equivalent to small inductances, which will worsen power noise and create unwanted coupling between analog and digital circuits. The longer the power printed lines, the larger the inductance. Using digital bypass capacitors can achieve the best layout and routing scheme. In short, fine-tune the position of the bypass capacitors as needed, making them easy to install and distributed around the digital components and the digital part of mixed-signal devices. The same “shortest and widest routing” method should be applied to the routing of bypass capacitor escape patterns. When power branches need to cross continuous planes (such as the 3.3V power layer on the OC48 interface card), the power pins and the bypass capacitors themselves do not need to share the same escape pattern, which can achieve the lowest inductance and ESR bypass. On a mixed-signal PCB like the OC48 interface card, special attention should be paid to the routing of power branches. Remember to place additional bypass capacitors in a matrix arrangement across the entire card, even near passive components (see Figure 6). Once the power escape pattern is determined, automatic routing can begin. The ATE test points on the OC48 card should be defined during logical design. Ensure that ATE touches 100% of the nodes. To achieve ATE testing with a minimum probe size of 0.070 inches, the positions of breakout vias must be reserved to ensure that the power layer is not interrupted by the antipads of the vias. If a power and ground layer split scheme is to be used, offset layers should be selected on the adjacent routing layers parallel to the split. Define prohibited routing areas on the adjacent layers according to the perimeter of the split area to prevent routing from entering. If routing must cross the split area to another layer, ensure that the adjacent layer to the routing is a continuous ground layer. This will reduce reflection paths. Allowing bypass capacitors to cross the split power layer is beneficial for some digital signal routing, but bridging between digital and analog power layers is not recommended, as noise will couple through the bypass capacitors. Several of the latest automatic routing applications can route high-density multilayer digital circuits. The initial routing phase should use 0.050-inch large via spacing in SMD escapes and consider the type of package used. The subsequent routing phase should allow the positions of vias to be relatively close to each other, so that all tools can achieve the highest throughput and the lowest number of vias. Since the OC48 processor bus uses an improved star topology, it has the highest priority during automatic routing (see Figure 7).Summary After completing the OC48 card layout, signal integrity checks and timing simulations should be performed. Simulations prove that the routing guidelines meet the expected requirements and improve the timing metrics of the second-layer bus. Finally, design rule checks, final manufacturing reviews, photomasks, and reviews must be completed and issued to the manufacturer before the board layout task is officially concluded.
Part Two: Partition Design
Abstract: The design of mixed-signal circuit PCBs is complex, and the layout of components, routing, and handling of power and ground will directly affect circuit performance and electromagnetic compatibility. The partition design of ground and power introduced in this article can optimize the performance of mixed-signal circuits. How can we reduce mutual interference between digital and analog signals? Before designing, it is essential to understand the two basic principles of electromagnetic compatibility (EMC): the first principle is to minimize the area of current loops as much as possible; the second principle is that the system should use only one reference plane. Conversely, if the system has two reference planes, it may form a dipole antenna (Note: the radiation size of a small dipole antenna is proportional to the length of the wire, the magnitude of the current flowing through it, and the frequency); if the signal cannot return through the smallest loop possible, it may form a large loop antenna (Note: the radiation size of a small loop antenna is proportional to the loop area, the magnitude of the current flowing through the loop, and the square of the frequency). In design, it is essential to avoid both situations as much as possible. Some suggest separating digital ground and analog ground on mixed-signal circuit boards to achieve isolation between digital and analog grounds. Although this method is feasible, it has many potential problems, especially in complex large systems.The most critical issue is that routing cannot cross the split gap, as once routing crosses the split gap, electromagnetic radiation and signal crosstalk will increase sharply. The most common problem in PCB design is that signal lines crossing the split ground or power generate EMI issues. As shown in Figure 1, we adopt the above splitting method, and the signal line crosses the gap between the two grounds. What is the return path for the signal current? Assuming the split grounds are connected somewhere (usually at a single point), in this case, the ground current will form a large loop. High-frequency currents flowing through the large loop will produce radiation and high ground inductance, and if the current flowing through the large loop is low-level analog current, it can easily be affected by external signal interference. The worst case is when the split grounds are connected together at the power supply, forming a very large current loop. Additionally, connecting the analog ground and digital ground with a long wire will create a dipole antenna. Understanding the path and method of current returning to ground is key to optimizing mixed-signal circuit board design. Many design engineers only consider where the signal current flows, neglecting the specific path of the current. If it is necessary to split the ground layer and routing must cross the gap between the splits, a single-point connection should first be made between the split grounds to form a bridge between the two grounds, and then routing can be done through this bridge. This way, a direct current return path can be provided beneath each signal line, minimizing the area of the formed loop. Using optical isolators or transformers can also achieve signal crossing over split gaps. For the former, the signal crossing the split gap is optical; in the case of using transformers, the magnetic field crosses the split gap. Another feasible method is to use differential signals: the signal flows into one line and returns from another signal line, in which case ground is not needed as a return path. To delve into the interference of digital signals on analog signals, one must first understand the characteristics of high-frequency currents. High-frequency currents always choose the path with the least impedance (lowest inductance), directly located beneath the signal, so the return current will flow through adjacent circuit layers, whether that adjacent layer is a power layer or a ground layer. In practice, it is generally preferred to use a unified ground while partitioning the PCB into analog and digital sections. Analog signals are routed within the analog area of the circuit board, while digital signals are routed within the digital circuit area. In this case, the return current of digital signals will not flow into the ground of analog signals. Only when digital signals are routed above the analog section of the circuit board or analog signals are routed above the digital section will interference from digital signals on analog signals occur. This problem does not arise from the lack of ground separation; the real reason is improper routing of digital signals. PCB design adopts a unified ground, and through partitioning of digital and analog circuits and appropriate signal routing, it can usually solve some difficult layout and routing issues without causing potential troubles brought by ground separation. In this case, the layout and partitioning of components become the key to determining the quality of the design. If the layout and routing are reasonable, the digital ground current will be confined to the digital section of the circuit board and will not interfere with the analog signals. Such routing must be carefully checked and verified to ensure 100% compliance with routing rules. Otherwise, a single improperly routed signal line can completely ruin an otherwise excellent circuit board. When connecting the analog ground and digital ground pins of an A/D converter, most A/D converter manufacturers will recommend: connecting the AGND and DGND pins to the same low-impedance ground through the shortest leads (Note: because most A/D converter chips do not internally connect analog ground and digital ground, the connection must be made through external pins), any external impedance connected to DGND will couple more digital noise into the analog circuits inside the IC through parasitic capacitance. Following this recommendation, the AGND and DGND pins of the A/D converter need to be connected to the analog ground, but this method raises questions such as whether the ground of the digital signal decoupling capacitor should connect to the analog ground or the digital ground. If the system has only one A/D converter, the above problem is easy to solve. As shown in Figure 3, the ground is split, and the analog ground and digital ground sections are connected together beneath the A/D converter. When adopting this method, it is essential to ensure that the width of the bridge connecting the two grounds is equal to that of the IC, and no signal lines can cross the split gap. If there are multiple A/D converters in the system, for example, how to connect 10 A/D converters? If the analog ground and digital ground are connected together beneath each A/D converter, it will create multiple connections, and the isolation between analog ground and digital ground will be meaningless. If not connected this way, it violates the manufacturer’s requirements. The best approach is to start with a unified ground. As shown in Figure 4, the unified ground is divided into analog and digital sections. This layout and routing satisfy the IC manufacturer’s requirement for low-impedance connections of analog ground and digital ground pins while avoiding the formation of loop antennas or dipole antennas that cause EMC issues. If there are doubts about adopting a unified ground for mixed-signal PCB design, the method of splitting ground layers can be used for the entire circuit board layout and routing, paying attention to ensure that the circuit board is easy to connect the split grounds together with jumpers or 0-ohm resistors with a spacing of less than 1/2 inch during later experiments. Pay attention to partitioning and routing, ensuring that no digital signal lines are located above the analog section on any layer, and no analog signal lines are located above the digital section. Moreover, no signal lines can cross the gaps between grounds or the gaps between split power supplies. Testing the functionality and EMC performance of the circuit board, then connecting the two grounds together with 0-ohm resistors or jumpers, and retesting the functionality and EMC performance of the circuit board. Comparing the test results, it will be found that in almost all cases, the unified ground scheme is superior in functionality and EMC performance compared to split ground. This method can be used in the following three situations: some medical devices require very low leakage currents between the circuit and systems connected to patients; some industrial process control devices may connect to noisy and high-power electromechanical devices; another situation is when the layout of the PCB is subject to specific constraints. In mixed-signal PCBs, there are usually independent digital and analog power supplies, and they can and should use split power planes. However, signal lines adjacent to power layers cannot cross the gaps between power supplies, and all signal lines crossing that gap must be located on the circuit layers adjacent to large ground areas. In some cases, designing the analog power as a PCB connection line rather than a plane can avoid the problem of splitting power planes. Mixed-signal PCB design is a complex process, and the design process should pay attention to the following points:1. Partition the PCB into independent analog and digital sections.
2. Appropriate component layout.
3. A/D converters placed across partitions.
4. Do not split the ground. Lay a unified ground beneath the analog and digital sections of the circuit board.
5. On all layers of the circuit board, digital signals can only be routed in the digital section of the circuit board.
6. On all layers of the circuit board, analog signals can only be routed in the analog section of the circuit board.
7. Implement separation of analog and digital power supplies.
8. Routing cannot cross the gaps between split power planes.
9. Signal lines that must cross the gaps between split power supplies must be located on routing layers adjacent to large ground areas.
10. Analyze the actual paths and methods of return ground current.
11. Use correct routing rules.——————————————————————————————————————–
Part Six: PCB Routing Techniques to Reduce Signal Coupling in RF Product Design
The surge in demand for Bluetooth devices, cordless phones, and cellular phones is prompting Chinese electronic engineers to pay more attention to RF circuit design techniques. RF circuit board design is one of the most challenging aspects for design engineers. To achieve success at once, careful planning and attention to detail are two critical design rules that must be highly emphasized. RF circuit board design is often described as a “black art” due to the many uncertainties in theory, but this view is only partially correct. RF circuit board design also has many guidelines that can be followed and rules that should not be overlooked. However, in practical design, the truly practical skills lie in how to compromise these guidelines and rules when they cannot be accurately implemented due to various design constraints. Of course, there are many important RF design topics worth discussing, including impedance and impedance matching, insulation layer materials and stacked boards, as well as wavelength and standing waves. However, this article will focus on various issues related to RF circuit board partition design. Today’s cellular phone designs integrate everything in various ways, which is detrimental to RF circuit board design. The industry is now highly competitive, and everyone is looking for ways to integrate the most functions in the smallest size and at the lowest cost. Analog, digital, and RF circuits are tightly packed together, with very little space to separate their respective problem areas, and considering cost factors, the number of circuit board layers is often minimized. It is incredible that multi-purpose chips can integrate multiple functions on a very small die, and the pins connecting to the outside are arranged very closely, so RF, IF, analog, and digital signals are very close together, but they are usually electrically unrelated. Power distribution can be a nightmare for designers, as different parts of the circuit operate in a time-sharing manner based on need, controlled by software. This means you may need to provide 5 to 6 different operating power supplies for your cellular phone.1. RF Layout Concepts When designing RF layouts, several general principles must be prioritized: Isolate high-power RF amplifiers (HPA) from low-noise amplifiers (LNA) as much as possible, simply put, keep high-power RF transmission circuits away from low-power RF receiving circuits. If your PCB has plenty of physical space, you can easily do this, but usually, there are many components, and the PCB space is small, making this often impossible. You can place them on opposite sides of the PCB or have them operate alternately rather than simultaneously. High-power circuits may also include RF buffers and voltage-controlled oscillators (VCO). Ensure that the high-power area on the PCB has at least one solid ground plane, preferably without vias on top, and of course, the more copper, the better. Later, we will discuss how to break this design principle as needed and how to avoid potential problems that may arise from it. Chip and power decoupling are also extremely important, and we will discuss several methods to achieve this principle later. RF outputs typically need to be kept away from RF inputs, which we will discuss in detail later. Sensitive analog signals should be kept as far away as possible from high-speed digital signals and RF signals.2. How to Partition? Design partitioning can be broken down into physical partitioning and electrical partitioning. Physical partitioning mainly involves component layout, orientation, and shielding issues; electrical partitioning can further be broken down into power distribution, RF routing, sensitive circuits and signals, and grounding. First, we will discuss physical partitioning issues. Component layout is key to achieving an excellent RF design. The most effective technique is to first firmly position the components located on the RF path and adjust their orientation to minimize the length of the RF path, keeping inputs away from outputs and separating high-power circuits from low-power circuits as much as possible. The most effective PCB stacking method is to arrange the main ground plane (main ground) on the second layer beneath the surface layer and route RF lines as much as possible on the surface layer. Minimizing the size of vias on the RF path not only reduces path inductance but also minimizes the chances of cold solder joints on the main ground and reduces the opportunity for RF energy to leak into other areas of the stacked board. In physical space, linear circuits like multi-stage amplifiers are usually sufficient to isolate multiple RF areas from each other, but duplexers, mixers, and intermediate frequency amplifiers/mixers always have multiple RF/IF signals interfering with each other, so this impact must be carefully minimized.RF and IF routing should cross as much as possible and be separated by a ground plane. The correct RF path is crucial for the performance of the entire PCB board, which is why component layout often takes up most of the time in cellular phone PCB design. On cellular phone PCBs, low-noise amplifier circuits can often be placed on one side of the PCB, while high-power amplifiers are placed on the other side, and ultimately connected to the RF end and baseband processor end antennas through duplexers on the same side. Some techniques are needed to ensure that through vias do not transfer RF energy from one side of the board to the other, commonly used techniques include using blind vias on both sides. The adverse effects of through vias can be minimized by arranging them in areas of the PCB that are not affected by RF interference. Sometimes it is not possible to guarantee sufficient isolation between multiple circuit blocks; in this case, it is necessary to consider using metal shielding to contain RF energy within the RF area. However, metal shielding also has its problems, such as: high costs for both the shield itself and assembly; irregularly shaped metal shields are difficult to ensure high precision during manufacturing; rectangular or square metal shields impose some restrictions on component layout; metal shields are not conducive to component replacement and fault location; and since metal shields must be soldered to the ground, they must maintain a proper distance from components, thus occupying valuable PCB space. It is crucial to ensure the integrity of the shielding, and digital signal lines entering the metal shield should be routed as much as possible on inner layers, and preferably the layer beneath the routing layer is a ground layer. RF signal lines can exit from small notches at the bottom of the metal shield and the ground notch on the routing layer, but as much ground as possible should be routed around the notch, and grounds on different layers can be connected through multiple vias. Despite the above issues, metal shielding is very effective and is often the only solution for isolating critical circuits. Additionally, proper and effective chip power decoupling is also very important. Many RF chips integrated with linear circuits are very sensitive to power noise, and typically each chip requires up to four capacitors and an isolation inductor to ensure all power noise is filtered out (see Figure 1). The minimum capacitance value usually depends on its self-resonant frequency and low lead inductance, and the value of C4 is chosen accordingly. The values of C3 and C2 are relatively larger due to their own lead inductance, making the RF decoupling effect somewhat poorer, but they are more suitable for filtering lower frequency noise signals. The inductor L1 prevents RF signals from coupling into the chip from the power line. Remember: all routing is a potential antenna that can receive and transmit RF signals, and it is also necessary to isolate induced RF signals from critical lines. The physical location of these decoupling components is often critical, and Figure 2 illustrates a typical layout method. The layout principle for these important components is: C4 should be as close to the IC pins as possible and grounded, C3 must be closest to C4, C2 must be closest to C3, and the routing connecting the IC pins to C4 should be as short as possible. The ground terminals of these components (especially C4) should typically connect to the chip’s ground pin through the next ground layer. The vias connecting the components to the ground layer should be as close as possible to the component pads on the PCB, preferably using blind vias drilled on the pads to minimize connection line inductance, and the inductance should be close to C1.A chip or amplifier often has an open-drain output, so a pull-up inductor is needed to provide a high-impedance RF load and a low-impedance DC power supply. The same principle applies to decoupling the power of this inductor.Some chips require multiple power supplies to operate, so you may need two to three sets of capacitors and inductors to decouple them separately. If there is not enough space around the chip, this may cause some trouble. Remember that inductors should rarely be placed in parallel, as this will form an air-core transformer and induce interference signals, so they should be spaced at least equal to the height of one of the devices or arranged at right angles to minimize mutual inductance. The principles of electrical partitioning are generally the same as those of physical partitioning, but they also include some other factors. Certain parts of modern cellular phones operate at different working voltages and are controlled by software to extend battery life. This means that cellular phones need to operate with multiple power supplies, which brings more issues for isolation. Power is usually introduced from the connector and immediately decoupled to filter out any noise from outside the circuit board, and then distributed after a set of switches or regulators. Most circuits in cellular phones have relatively small DC currents, so routing widths are usually not an issue. However, it is essential to route a separate wide current line for the power supply of the high-power amplifier to minimize transmission voltage drop. To avoid excessive current loss, multiple vias should be used to transfer current from one layer to another. Furthermore, if sufficient decoupling is not provided at the power pin of the high-power amplifier, high-power noise will radiate across the entire board, causing various problems. The grounding of the high-power amplifier is critical and often requires designing a metal shield for it. In most cases, it is equally critical to ensure that RF outputs are kept away from RF inputs. This also applies to amplifiers, buffers, and filters. In the worst case, if the outputs of amplifiers and buffers feedback to their inputs with appropriate phase and amplitude, they can potentially cause self-oscillation. In the best case, they will work stably under any temperature and voltage conditions. In practice, they may become unstable and add noise and intermodulation signals to the RF signal. If RF signal lines must loop back from the input of the filter to the output, this can severely damage the passband characteristics of the filter. To ensure good isolation between inputs and outputs, a ground plane should first be routed around the filter, and a ground area should also be laid beneath the filter and connected to the main ground surrounding the filter. Keeping signal lines that need to pass through the filter as far away from the filter pins as possible is also a good practice. Additionally, careful attention must be paid to grounding throughout the board; otherwise, you may inadvertently introduce an unwanted coupling path. Figure 3 illustrates this grounding method. Sometimes, you can choose to route single-ended or balanced RF signal lines, and the principles of cross-interference and EMC/EMI apply here as well. Balanced RF signal lines, if routed correctly, can reduce noise and cross-interference, but they typically have higher impedance and must maintain a reasonable line width to achieve matched impedance for the signal source, routing, and load, making actual routing somewhat challenging. Buffers can be used to improve isolation, as they can split the same signal into two parts and drive different circuits, especially since the local oscillator may need a buffer to drive multiple mixers. When mixers reach common-mode isolation at RF frequencies, they will not function properly. Buffers can effectively isolate impedance changes at different frequencies, preventing interference between circuits. Buffers are very helpful in design; they can be placed right behind the circuits that need to be driven, allowing the high-power output routing to be very short. Since the input signal levels of buffers are relatively low, they are less likely to interfere with other circuits on the board. There are also many very sensitive signals and control lines that require special attention, but they are beyond the scope of this article, so they will only be briefly mentioned without further elaboration. Voltage-controlled oscillators (VCO) can convert varying voltages into varying frequencies, a feature used for high-speed channel switching, but they also convert minute noise on the control voltage into slight frequency variations, adding noise to the RF signal. Overall, after this stage, you can no longer remove noise from the RF output signal. So where is the difficulty? First, the expected frequency bandwidth range of the control line may range from DC to 2MHz, and it is almost impossible to filter out noise across such a wide frequency band; second, VCO control lines are usually part of a feedback loop that controls frequency, which can introduce noise in many places, so it is essential to handle VCO control lines with great care. Ensure that the ground beneath RF routing is solid, and all components are firmly connected to the main ground and isolated from other lines that may introduce noise. Additionally, ensure that the power supply of the VCO is adequately decoupled, as the RF output of the VCO is often at a relatively high level, making it easy to interfere with other circuits, so special attention must be paid to the VCO. In fact, VCOs are often placed at the end of the RF area, and sometimes they require a metal shield. Resonant circuits (one for the transmitter and another for the receiver) are related to VCOs but have their own characteristics. Simply put, a resonant circuit is a parallel resonant circuit with a capacitive diode that helps set the operating frequency of the VCO and modulate voice or data onto the RF signal. All design principles for VCOs also apply to resonant circuits. Since resonant circuits contain a considerable number of components, have a wide distribution area on the board, and typically operate at a very high RF frequency, they are usually very sensitive to noise. Signals are usually arranged on adjacent pins of the chip, but these signal pins need to work with relatively large inductors and capacitors, which in turn requires these inductors and capacitors to be placed very close together and connected back to a noise-sensitive control loop. Achieving this is not easy. Automatic gain control (AGC) amplifiers are also a common problem area, whether in transmission or reception circuits. AGC amplifiers can effectively filter out noise, but since cellular phones are designed to handle rapidly changing transmission and reception signal strengths, AGC circuits require a relatively wide bandwidth, which makes AGC amplifiers on certain critical circuits prone to introducing noise.Designing AGC lines must adhere to good analog circuit design techniques, which relate to short operational amplifier input pins and short feedback paths, both of which must be kept away from RF, IF, or high-speed digital signal lines. Similarly, good grounding is essential, and the chip’s power supply must be well decoupled. If a long line must be routed at the input or output, it is best to do so at the output, as the output’s impedance is usually much lower and less likely to induce noise. Generally, the higher the signal level, the more likely it is to introduce noise into other circuits. In all PCB designs, keeping digital circuits as far away from analog circuits as possible is a general principle that also applies to RF PCB design. Common analog ground and grounds used for shielding and separating signal lines are usually equally important. The problem is that if there is no foresight and careful planning, there is little you can do in this regard. Therefore, careful planning, thoughtful component layout, and thorough layout evaluation are crucial in the early stages of design, as changes due to negligence can lead to a design that is nearly complete needing to be redone. This serious consequence due to negligence is not a good thing for your personal career development. Similarly, RF lines should be kept away from analog lines and some critical digital signals, and as much ground copper as possible should be filled around all RF routing, pads, and components, connecting as much as possible to the main ground. Breadboard-like micro-via construction boards are very useful during the RF routing development phase. If you choose a construction board, you can use many vias without incurring any costs; otherwise, drilling holes on a regular PCB board will increase development costs, which will increase costs during mass production.If RF routing must cross signal lines, then try to route a layer of ground connected to the main ground between them along the RF routing. If this is not possible, ensure that they cross at right angles, which can minimize capacitive coupling while providing as much ground as possible around each RF routing and connecting them to the main ground.Additionally, minimizing the distance between parallel RF routings can minimize inductive coupling. A solid ground plane directly placed beneath the surface layer is the best isolation effect, although careful design of other methods can also be effective. I have tried splitting the ground plane into several sections to isolate analog, digital, and RF lines, but I have never been satisfied with the results, as there always seem to be some high-speed signal lines crossing these separated grounds, which is not a good thing. On every layer of the PCB, as much ground as possible should be laid and connected to the main ground. Try to keep routing close together to increase the number of ground blocks in the internal signal layers and power distribution layers, and adjust routing appropriately so that you can arrange ground connection vias to the isolated ground blocks on the surface layer. Avoid generating floating grounds on various layers of the PCB, as they will act like small antennas that pick up or inject noise. In most cases, if you cannot connect them to the main ground, it is better to remove them.Conclusion When receiving an engineering change order (ECO), remain calm and do not easily eliminate all the hard work you have completed. An ECO can easily throw your work into chaos, regardless of how minor the modifications needed are. When you must complete a task within a certain timeframe, it is easy to forget some key elements, let alone make changes. Whether or not it is a “black art”, adhering to some basic RF design rules and paying attention to some excellent design examples will help you complete your RF design work. Successful RF design requires careful attention to every step and detail throughout the design process, which means thorough and careful planning must be done at the beginning of the design, and comprehensive and continuous evaluation of the progress of each design step is necessary.