I know that for us electronics enthusiasts, who wouldn’t want a Tektronix or Agilent oscilloscope at hand? But those things are incredibly expensive and take up half a desk. A few days ago, while browsing GitHub, I stumbled upon a gem—Esp32_oscilloscope. I looked at the code for a while and couldn’t help but exclaim: this is tailor-made for engineers like us who love tinkering but don’t want to spend a fortune.
I truly didn’t expect these geeks to squeeze the ESP32 to this extent.
What exactly is this?
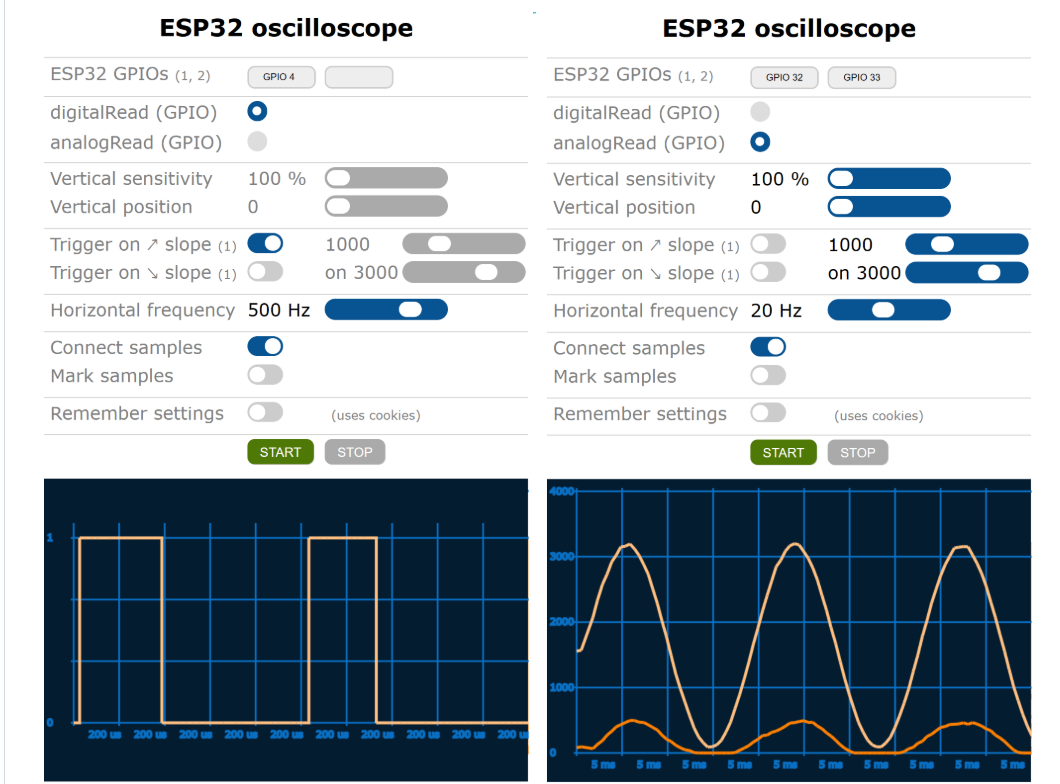
In simple terms, this is an oscilloscope that can run on the ESP32.
But the coolest part is that it doesn’t require you to install any host software or connect via USB to view serial plots. It directly runs a web server on the ESP32. You can use your phone, iPad, or computer; as long as you’re connected to the same WiFi, the waveform will be right in your face.
What it sees is the “truth”
I must remind everyone that this project has a philosophy that particularly resonates with me. The author, Bojan Jurca, says:“See the signals the way ESP32 sees them.” (See the signals through the eyes of the ESP32).
This statement is quite philosophical.
Sometimes, when we use oscilloscopes worth tens of thousands of dollars to view waveforms, they look perfect, and a square wave is just a square wave. But what your microcontroller reads might be garbage. The data displayed by this Esp32_oscilloscope is what the ESP32 samples. If there are glitches or if the sampling rate can’t keep up, leading to distortion, that’s the real “mess” your program needs to handle.
This is far more valuable than a perfect waveform, truly.
Technical Details: Let’s See What It Can Do
As tech enthusiasts, we can’t just boast. Can this thing really perform? I carefully examined its underlying logic.
First of all, it has recently been updated to supportESP-IDF 5.x. This is important; many older projects are still limping along on IDF 4.x, and the author is still maintaining this, which deserves a thumbs up.
However, we must be realistic; after all, this is a chip that costs just a few bucks, not an FPGA.
- • Sampling Rate Issue: It can display about 736 sample points on one screen. But! Pay attention, this sampling rate is not completely constant. Why? Because the ESP32 is dual-core but it’s busy; it also has to run the WiFi protocol stack and respond to your HTTP requests. It’s like riding a unicycle while drawing; it’s normal for your hand to shake occasionally.
- • Accuracy: 0 to 4095 corresponds to 0 to 3.3V. Is that enough? For debugging PWM, checking I2C timing, or observing the jitter of an analog sensor, it’s completely sufficient.
About the “Frustrating” ADC Limitation
I need to emphasize this; it’s a common pitfall for many beginners.
The ESP32 has two ADC units (ADC1 and ADC2), but ADC2 shares resources with WiFi. Since this project is a web oscilloscope, WiFi must be enabled, right? Once WiFi is turned on, ADC2 (like GPIO 4, 0, 2, 15) becomes unusable, and you can’t read analog values at all.
So, you can only useADC1.
I’ve compiled a table for you to save you from flipping through manuals:
| Available Pins (ADC1) | Pitfalls (ADC2 – Not usable when WiFi is on) |
| GPIO 32, 33, 34, 35 | GPIO 0, 2, 4 |
| GPIO 36 (VP), 39 (VN) | GPIO 12, 13, 14, 15 |
| GPIO 37, 38 (if available) | GPIO 25, 26, 27 |
Note: This is for the standard ESP32; if you’re using S2 or S3, the pin definitions will be different, so be mindful.
How to Tinker? A Step-by-Step Guide
To install this, the author used a somewhat “retro” method—FTP.
I see many people nowadays only know how to use OTA or serial programming, and they get confused when they hear FTP. It’s actually very simple.
- 1. Modify Configuration: Download the source code and open it in the Arduino IDE. Fill in your WiFi account and password in
<span>Esp32_servers_config.h</span>. - 2. File System: Most current ESP32 boards support LittleFS. When selecting the Partition Scheme, remember to choose one with a file system. If your board is particularly basic and lacks Flash partitions, the author has provided a fallback; you can hardcode the HTML files in the code (Progmem) by commenting out the line
<span>#define FILE_SYSTEM FILE_SYSTEM_LITTLEFS</span>. - 3. Upload Interface: After burning the code, the ESP32 will start an FTP server. You can use any FTP tool (even Windows’ built-in File Explorer works) to connect to the ESP32’s IP. Upload
<span>oscilloscope.html</span>and those two icons to the<span>/var/www/html</span>directory.
That’s it! Open your browser, enter the IP, and the waveform will appear.
Advanced Play: I2S Mode
If you find the regular<span>analogRead</span><span> too slow and not satisfying, there's an Easter egg hidden in the code.</span>
In<span>oscilloscope.h</span>, you can enableI2S mode.
We all know that I2S is generally used for audio, but it’s also great for high-speed sampling. Enabling this will improve the sampling rate and signal quality. But what’s the trade-off? You can only use one channel. This is the so-called “you can’t have your cake and eat it too” situation; it’s up to you to decide.
A Few Thoughts
To be honest, this project cannot replace our lab’s tens of thousands of dollars oscilloscope. If you try to measure signals in the tens of megahertz range with it, you’re just dreaming.
However, as a “Swiss Army knife” for embedded engineers, it is indeed appealing. Especially when you integrate this part of the code into your own projects, and later when customers say their devices aren’t working, you can have them connect to WiFi and remotely view the sensor waveforms. This troubleshooting efficiency will definitely save you several late nights.
Alright, that’s all for today. The code is on GitHub, so go check it out. Don’t just save it; get your hands dirty!
Project Address: https://github.com/BojanJurca/Esp32_oscilloscope