Follow+Star Public Account, don’t miss the exciting content

Source | STM32 Microcontroller
Many tools come with the SWV (Serial Wire Viewer) function. The previous article titled Print Output Tutorial described how to implement the “SWV” function in tools like Keil, IAR, ST-LINK Utility, STM32CubeProg, J-Link, etc. Today, I will share with you the SWV function of STM32CubeIDE.
Step 1: Enable the SWO function in the Pinout & Configuration options. This step is mandatory.
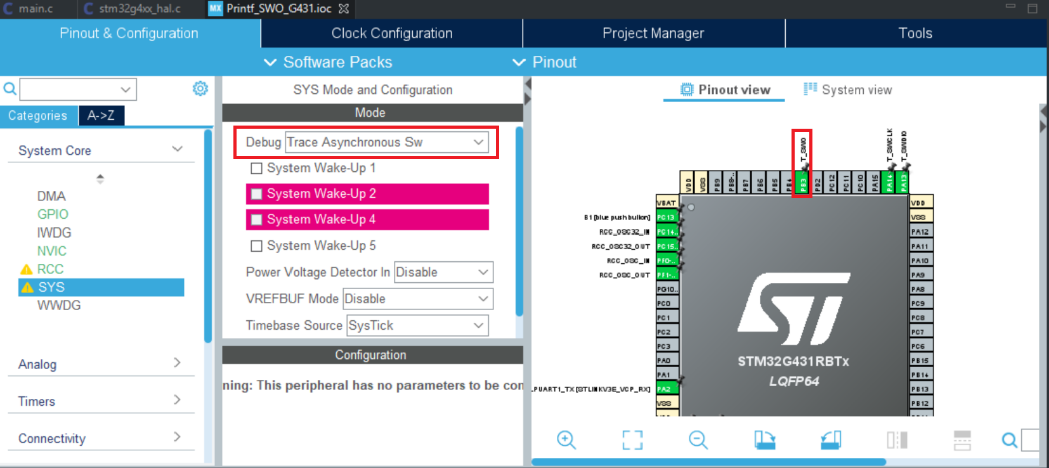 Enabling SWO function in STM32CubeIDE
Step 2: Relocate the printf interface function.
Here is a simple method: directly modify the content of the _write() function in the syscalls.c file, as shown in the code below. Also, include the header file core_cmX.h that implements ITM_SendChar in this file. This file is usually already included in the header file of the device model you choose.Here we choose stm32g431xx.h, and it can be placed at the beginning of this file.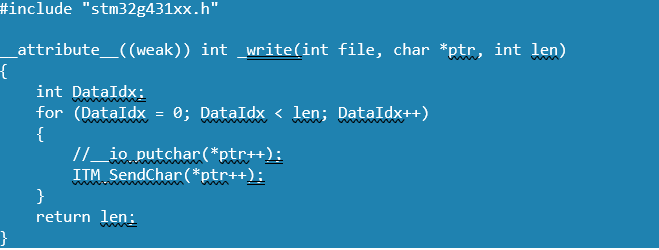
Step 3: Include the stdio.h header file in the main.c file and try to print using printf. Note that printing cannot be too frequent, so a delay is needed.
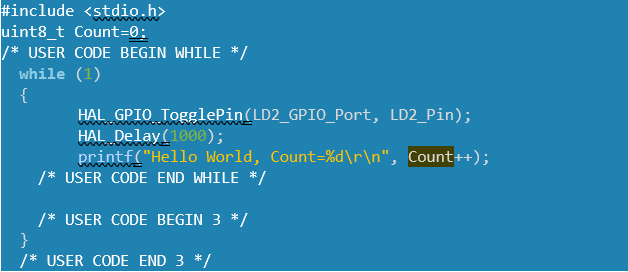 Compile globally and check for errors. If there are errors, please modify according to the prompt information. After compiling without errors, we can proceed to the next step.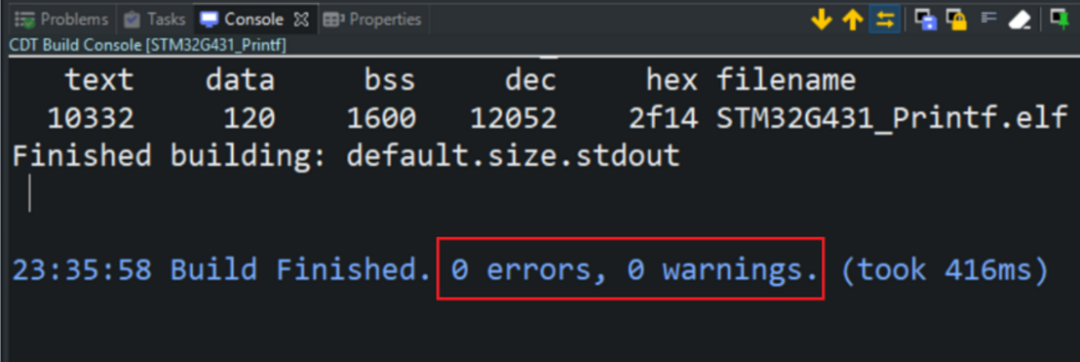
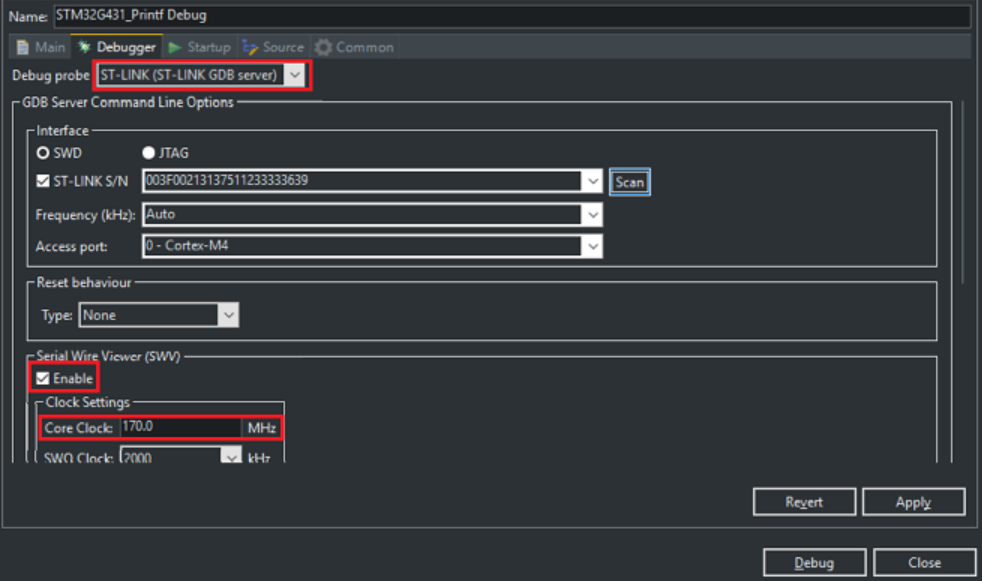
Step 4: Configure the simulation debugging parameters. Open the SWV debugging function. Note that the Core Clock must match the clock you configured. I configured it to 170MHz, which is consistent with my system clock.
Step 5: Start entering the debugging interface, and in the debugging interface, open Windows–>Show; View–>SWV ITM Data Console window. Note that the entire SWV actually shares a configuration file, so you can configure SWV by opening any window within SWV. Here we only want to view the content of Printf, so we chose the SWV ITM Data Console window. For detailed explanations of other parts here, refer to section 4.3 of UM2609.
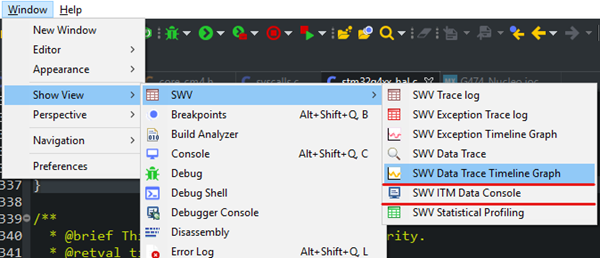
Open SWV ITM Data Window
After opening this window, you need to add a Port. The default port used in TIM is port 0, so we can select 0 directly.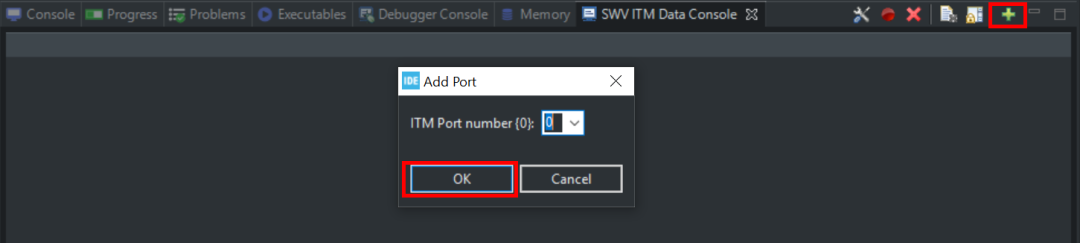
Add Output Port
Select the configuration button to configure the parameters. The configuration is as follows: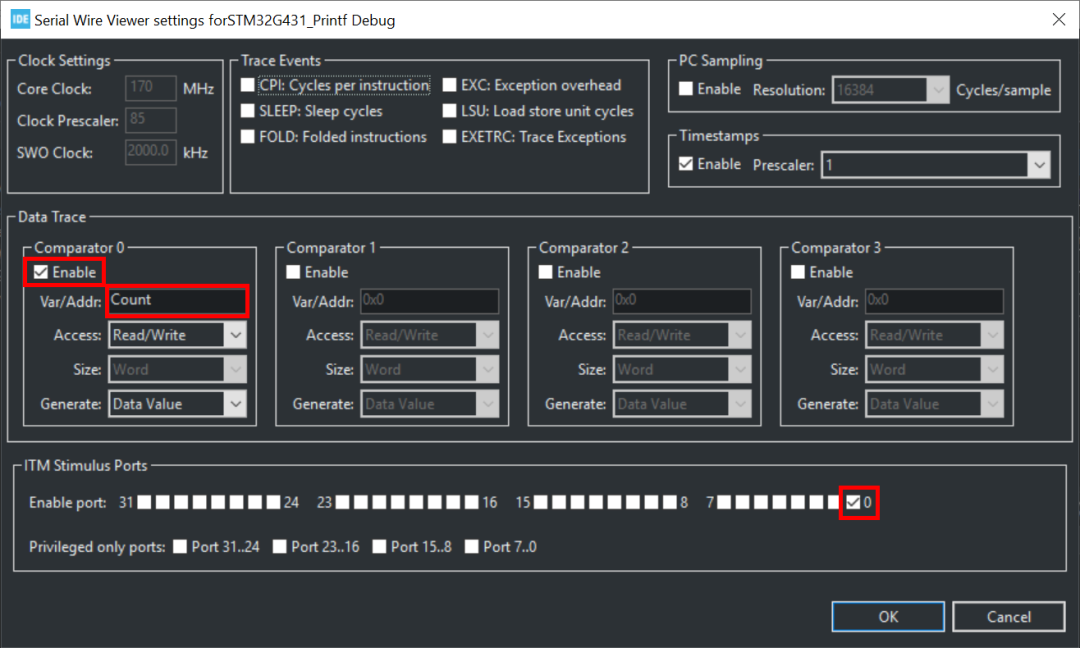
SWV Window Configuration Interface
It is recommended to reset the project first (optional), then “Start Trace/start trace”. Note: here, you should start tracing first, and then let the program run; it cannot be in reverse order.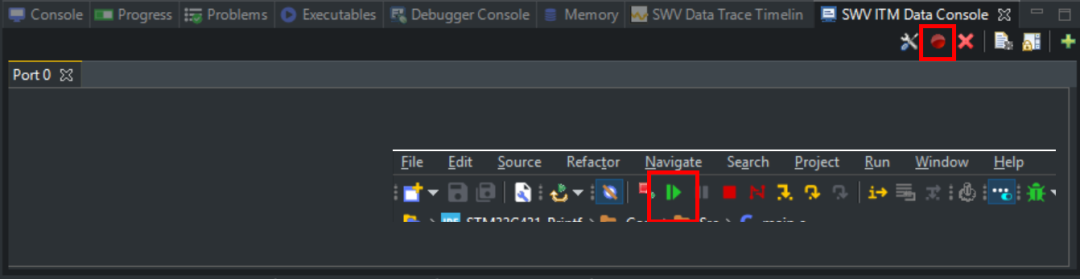
Start Trace and Begin Running
At this point, you will be able to see the printed content.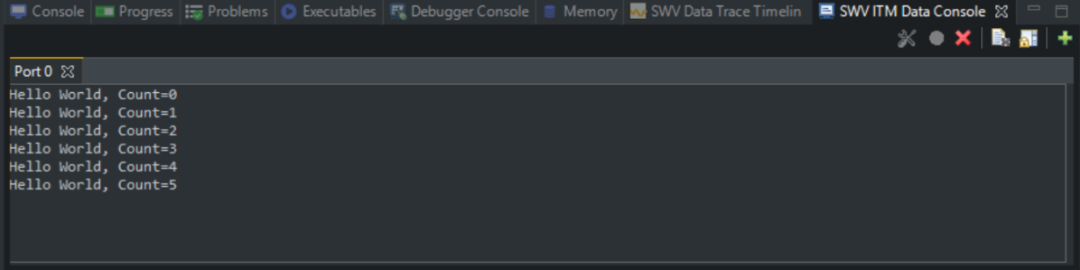
Final Print Output Status
———— END ————

● Column “Embedded Tools”
● Column “Embedded Development”
● Column “Keil Tutorial”
● Selected Tutorials from Embedded Column
Follow the public account and reply “Add Group” to join the technical exchange group according to the rules, reply “1024” to see more content.

Click “Read the Original Text” to see more shares.