Follow/Star Public Account to not miss any updates
STM32CubeIDE is an all-in-one tool, and this article will guide you through its powerful features: installation and setup, code generation, and online hardware debugging.
1Introduction
STM32CubeIDE has been updated to version V1.6.1, and this development environment created quite a stir when it was launched in the community.
STM32CubeIDE was officially released with the upgrade of STM32CubeMX to V5.2.0
When STM32CubeIDE was first released, many friends were curious about this tool and suggested that I write a tutorial.
This article provides a simple tutorial (from installation to debugging) to guide beginners.
If the version stabilizes in the future, I will consider writing a more detailed tutorial.
2Introduction to STM32CubeIDE
Official website:
https://www.stmicroelectronics.com.cn/en/development-tools/stm32cubeide.html
STM32CubeIDE is a multi-functional integrated development tool that combines TrueSTUDIO and STM32CubeMX, and it is part of the STM32Cube software ecosystem.
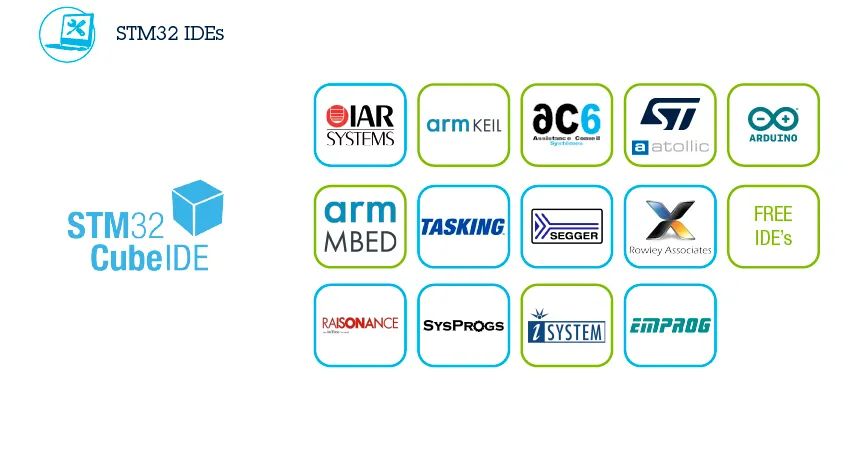
STM32CubeIDE is an advanced C/C++ development platform with IP configuration, code generation, code compilation, and debugging capabilities for STM32 microcontrollers.
It is based on the ECLIPSE™/CDT framework and uses the GCC toolchain for development, along with GDB for debugging. It allows for the integration of hundreds of existing plugins, enhancing the functionality of ECLIPSE™IDE.
Main Features:
1. Integrated STM32CubeMX:
-
Selection of STM32 microcontrollers
-
Pin assignment, clock, IP, and middleware configuration
-
Project creation and initialization code generation
2. Based on Eclipse™/CDT, supports ECLIPSE™ plugins, GNU C/C++ ARM® toolchain, and GDB debugger.
3. Other advanced debugging features:
-
CPU core, IP registers, and memory views
-
Real-time variable watch views
-
System analysis and real-time tracing (SWV)
-
CPU fault analysis tools
4. Supports ST-LINK and J-Link debugging probes
5. Import projects from TrueSTUDIO® and AC6
6. Supported operating systems: Windows®, Linux®, and MacOS®
The above information was obtained through Google Translate and may contain errors; please refer to the official website for accuracy.
3Downloading STM32CubeIDE
Visit the official website and scroll to the bottom:
https://www.stmicroelectronics.com.cn/en/development-tools/stm32cubeide.html
Download based on your computer’s operating system (using Windows as an example):
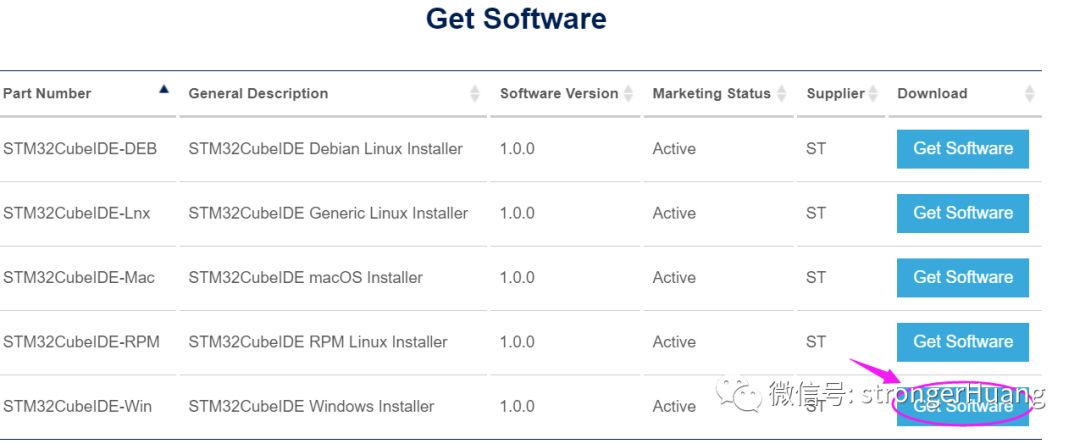
Downloading from the official website may require filling out relevant information or registering an account. If you find it troublesome, here is a Baidu Cloud Drive download:
Link:https://pan.baidu.com/s/1q3xCBs2jaMrueE4EMCtx7Q
Extraction code: os3f
4Installing STM32CubeMX
The installation of STM32CubeMX is quite simple; just click Next all the way through, checking the necessary options.
Note: It cannot be installed under a Chinese path:
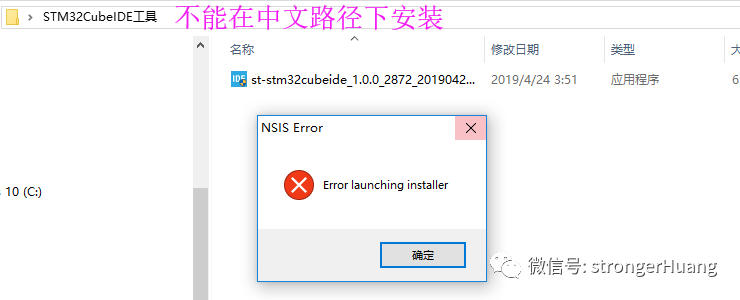
Baidu Cloud Drive download:
Link:https://pan.baidu.com/s/1600-Qdy7fP9pM4JkH17Y7A
Extraction code: 4va6
5Creating and Compiling a Project
In fact, for those who are familiar with TrueSTUDIO and STM32CubeMX, using this STM32CubeIDE tool is not difficult at all.
I recommend referring to the column articles I shared on my public account:STM32CubeMX Series Tutorials
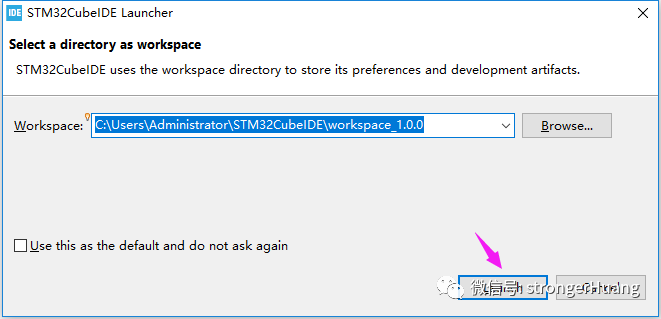
1. Open STM32CubeIDE and choose a workspace path (default is fine):
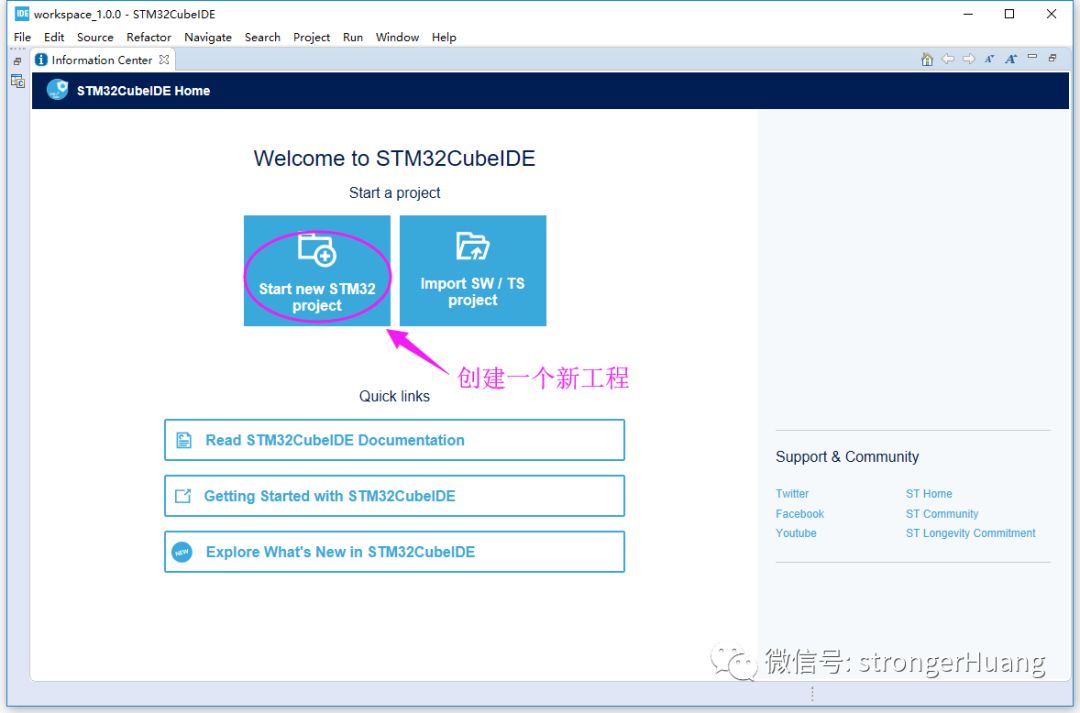
2. Create a new project
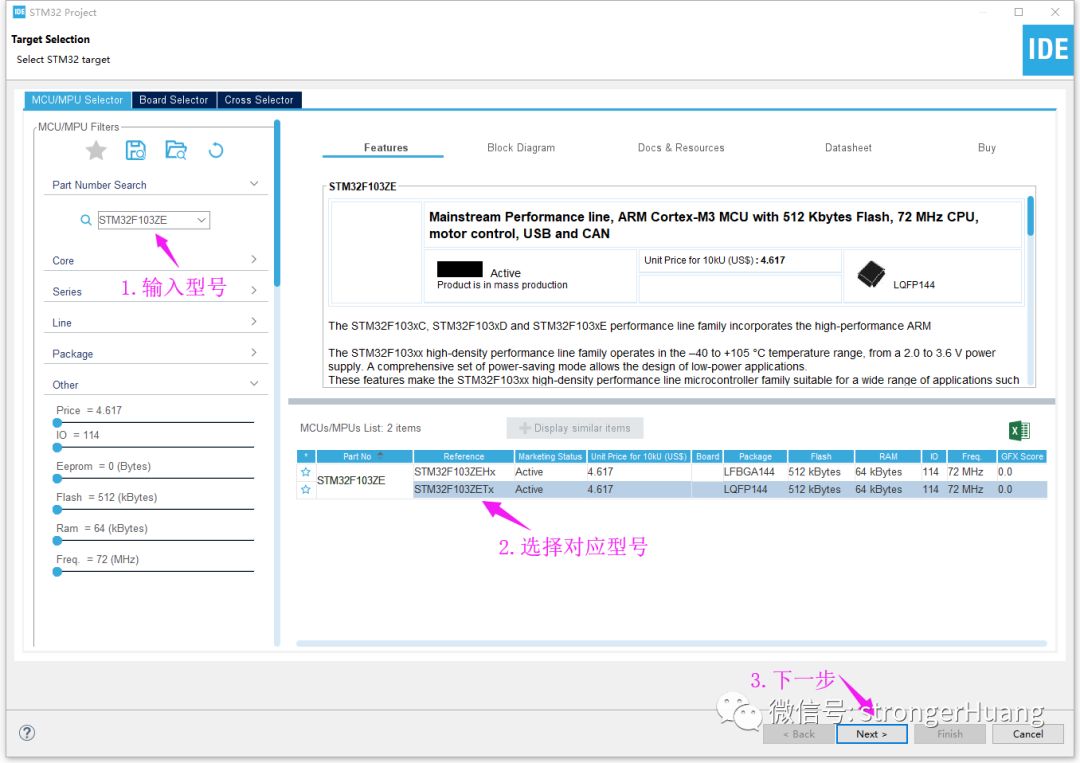
3. Select the model
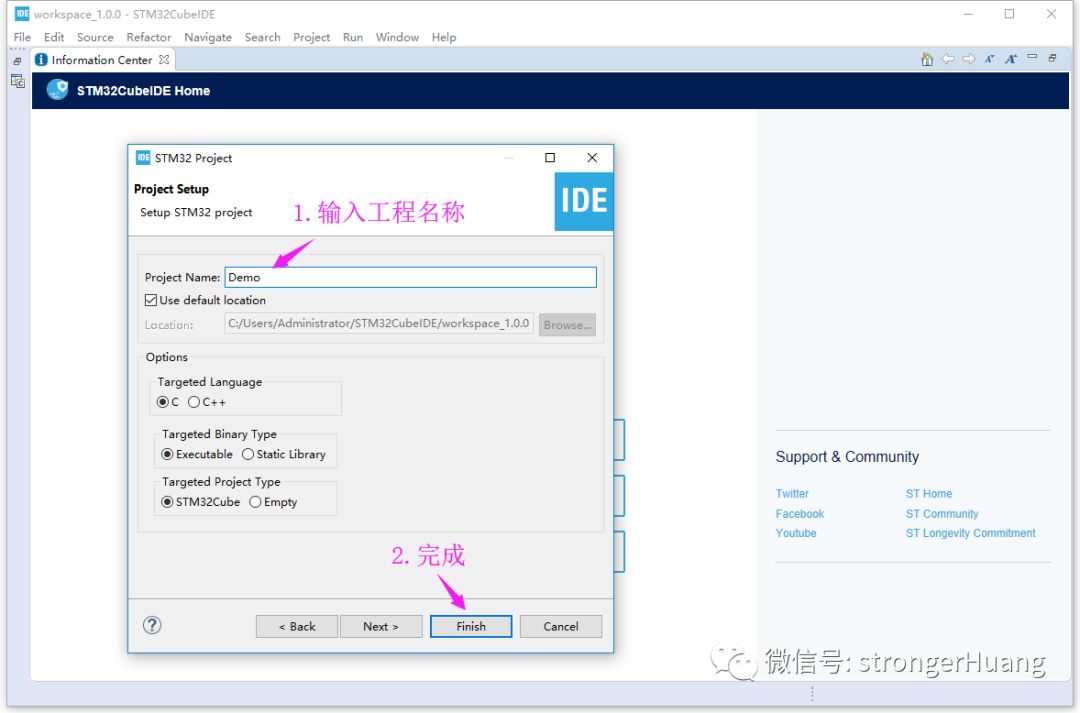
4. Enter the project name
5. Configure STM32CubeMX
As shown in the window content below, it is the same as STM32CubeMX, with only a few differences, such as: the IDE cannot be modified.
This section is recommended to refer to the column article:STM32CubeMX Series Tutorials
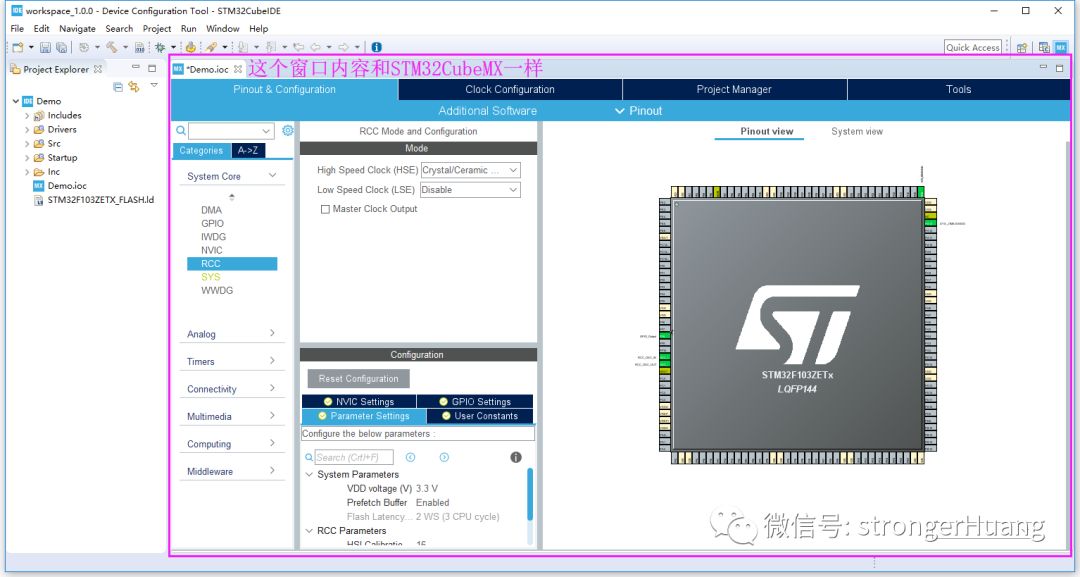
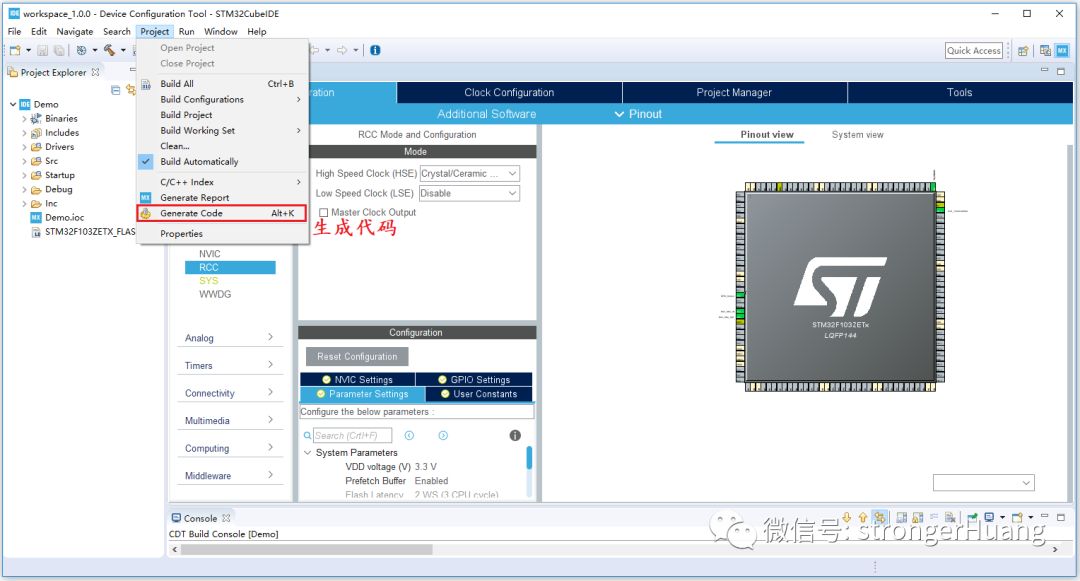
6. Generate code using the shortcut button or menu
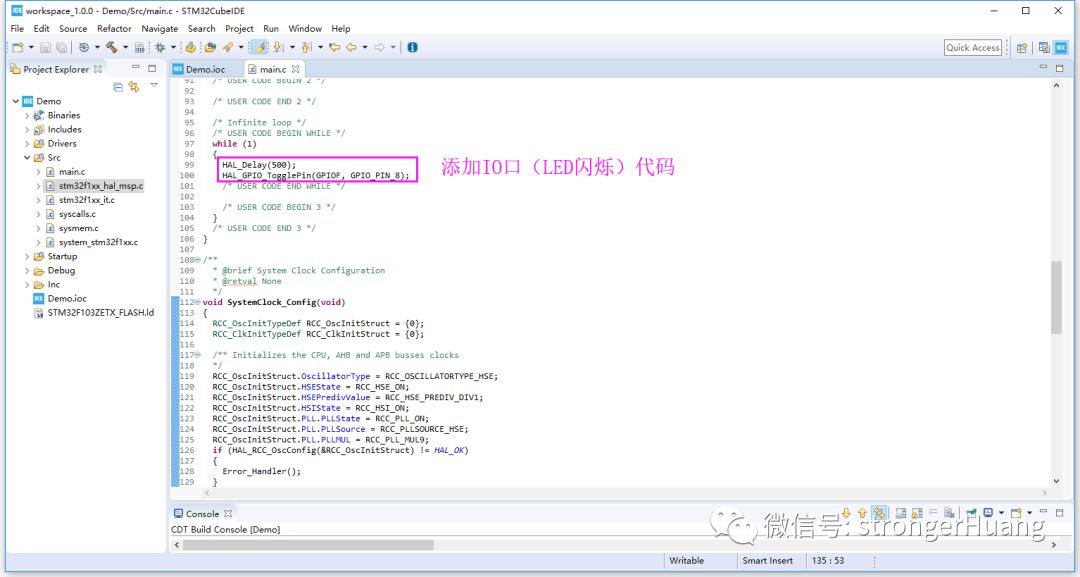
7. Add LED blinking code
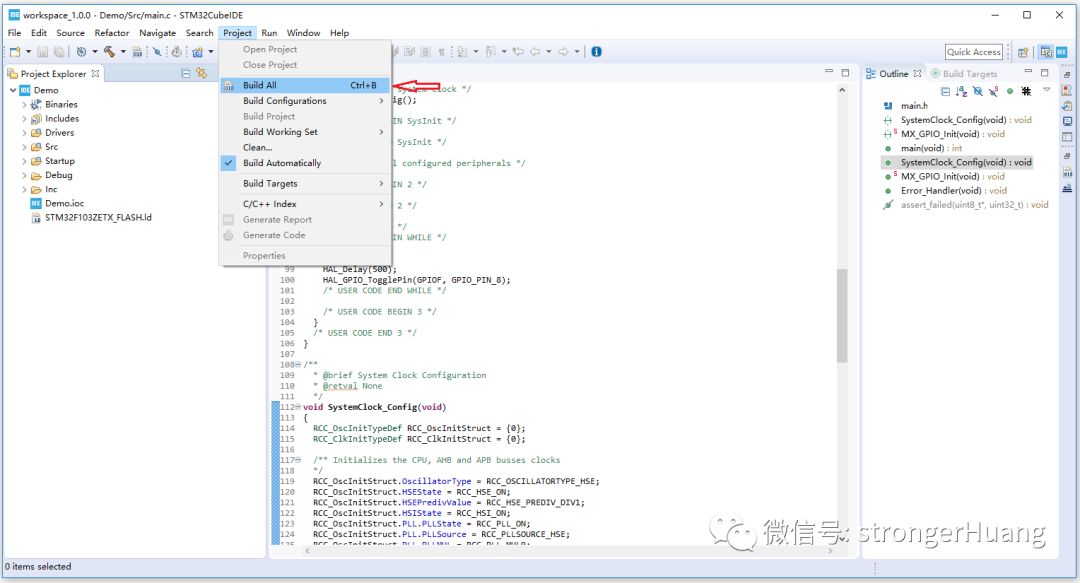
8. Compile the project
6Debugging
STM32CubeIDE has many advanced debugging features and can connect to hardware development boards for online debugging, similar to MDK-ARM, EWARM, and other IDEs.
We will take the STM32 MCU Debug tool that comes with the IDE as an example.
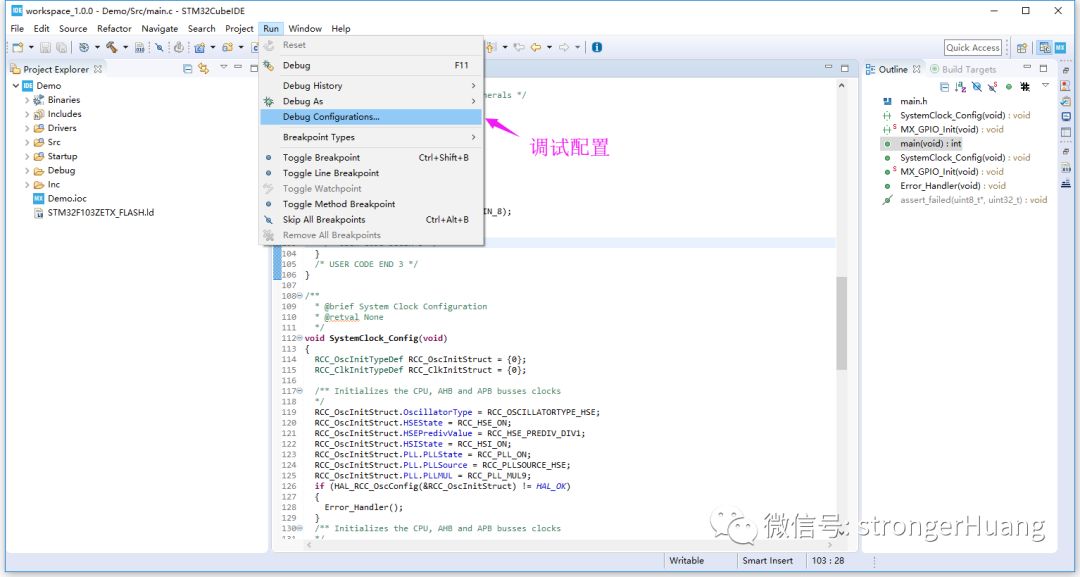
1. Enter debugging configuration
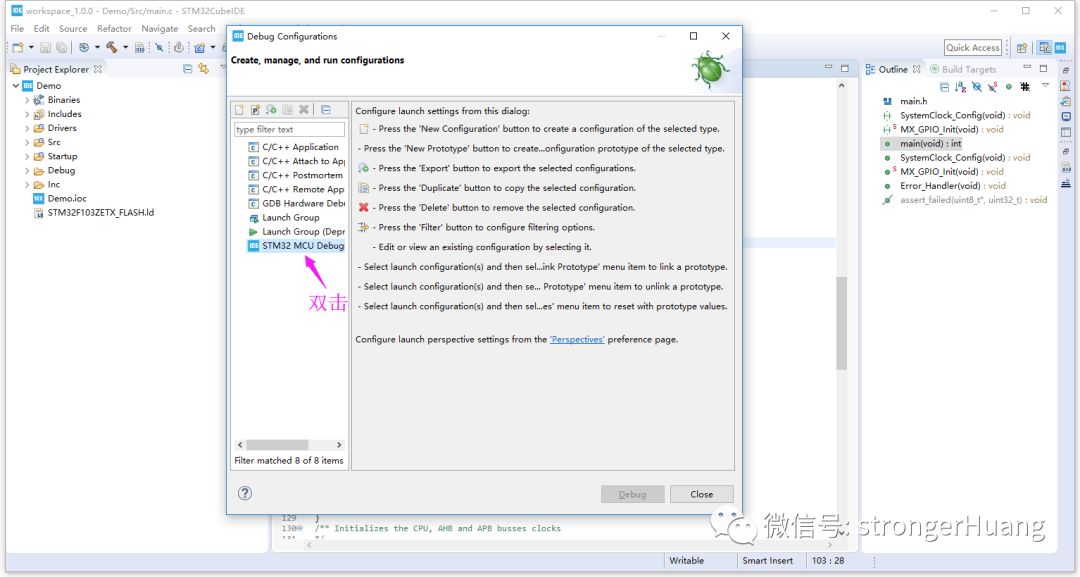
2. Configure STM32 MCU Debug
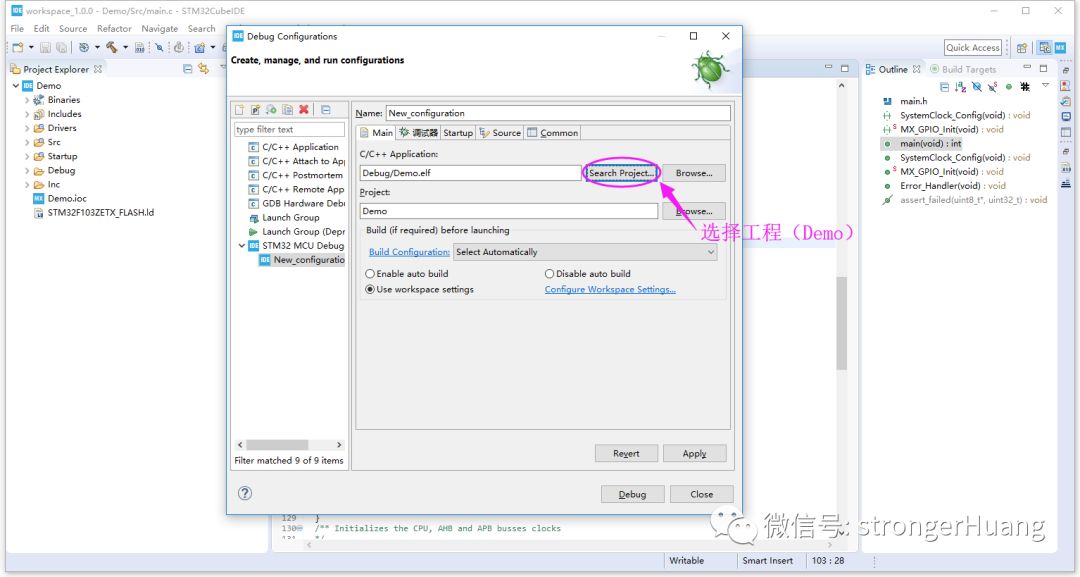
3. Select the debug project
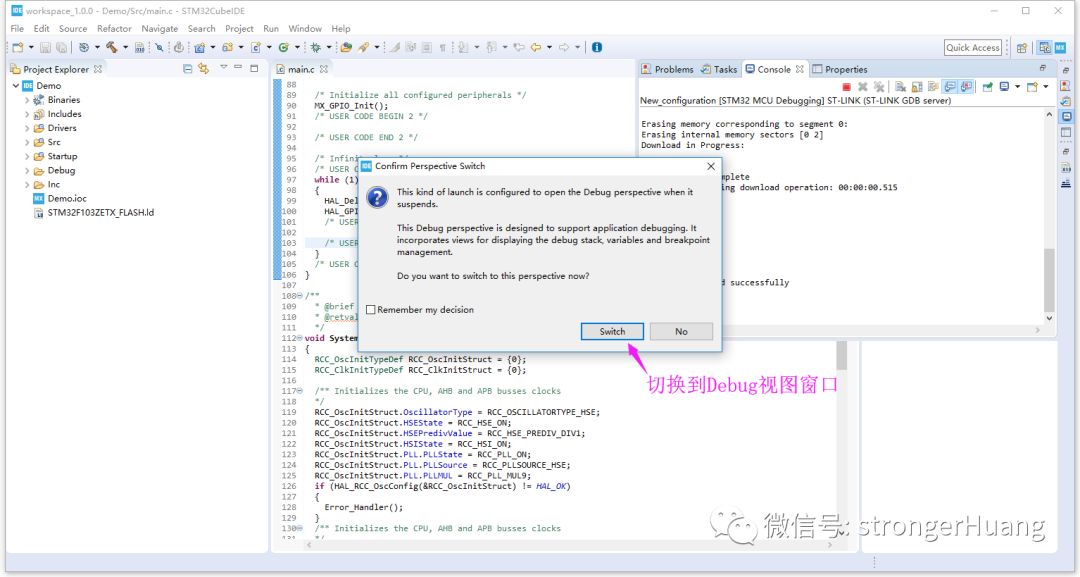
4. Switch to the Debug view window
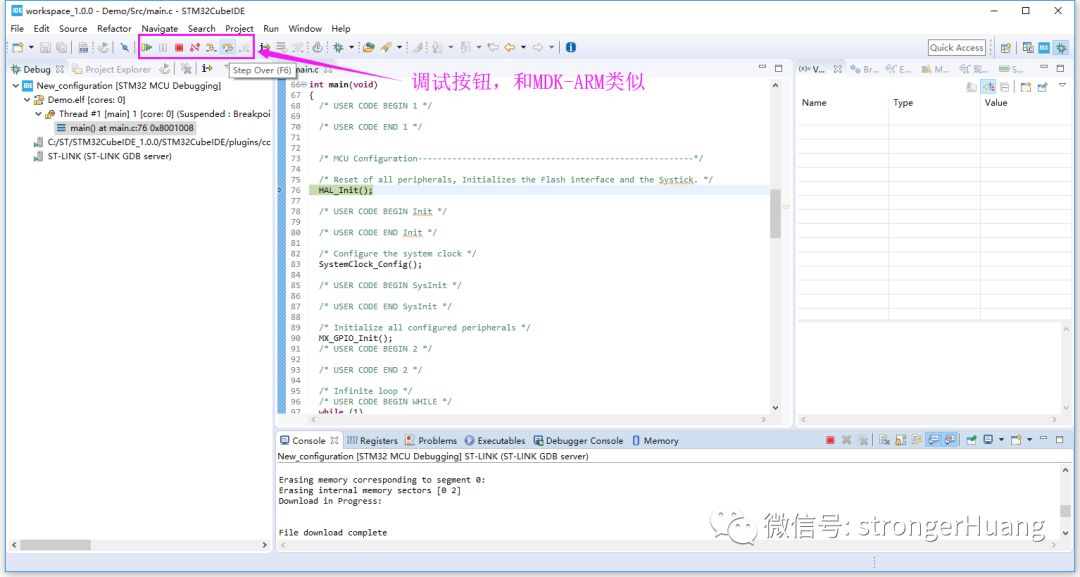
5. Online debug using the debug button (similar to MDK-ARM)
At this point, I believe everyone can create a project.
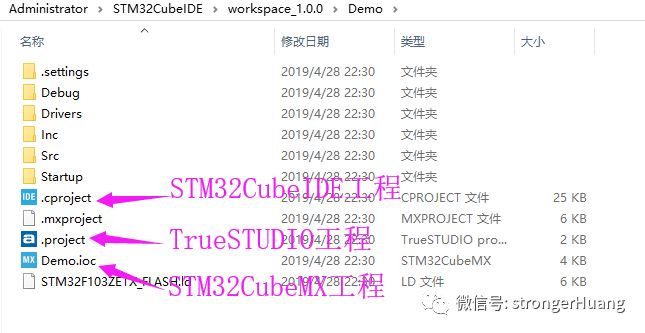
Extension: Project File Description
Recommended Reading:
1. Why STM32Cube LL is Efficient
2. STM32CubeMX Upgrade to V5.2.0, Official Launch of STM32CubeIDE
7Conclusion
My Zhihu: strongerHuang
My Website:www.strongerhuang.com
If you find this article helpful, please hit “Like” and share it, as it motivates me to continue updating.
In the future, Yinge will launch STM32 boards combined with the Electric Competition and Funpack activities, integrating many sensors with simple tasks, so stay tuned.
The STM32 embedded group chat has been prepared for you. Due to the chat being full, please follow “Yinge Academy” and reply with the keyword “STM32” to join the group chat.

Long press to recognize the QR code in the image to follow
Yinge Academy
The Yinge team is dedicated to providing standardized core skill courses for electronic engineers and students in related fields, helping everyone effectively improve their professional abilities at all stages of learning and work.

Yinge Academy
Let’s explore and advance in the field of electronics together
Follow Yinge’s public account for instant access to classes

Click to read the original text for more