User Guide for Vivado 2018.3 Software
Copyright
Beijing Zhixin Open Source Technology Co., Ltd.
Document Update Record
|
Date |
Updater |
Version |
Remarks |
|
2024.03.10 |
xxx |
V0.1 |
First Draft |
|
V0.2 |
Review |
||
|
V1.0 |
Final Draft |
Hello everyone, welcome to Zhixin Technology’s FPGA boot camp, ready to embark on our great journey! As the saying goes, “Before the troops move, the supplies must be ready,” preparation before battle is essential. In the vast battlefield of FPGA, how do we enter and achieve victory? Here we have prepared a tutorial for using Vivado 2018.3 for all comrades.
1.1 Create a New Project
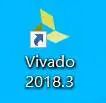
First, click the icon to open the Vivado 2018.3 software, as shown in the figure:
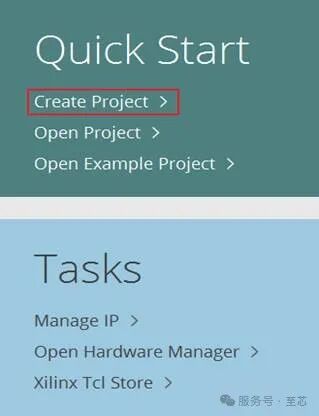
After opening, as shown in the figure, click “Create Project” to create a new project.
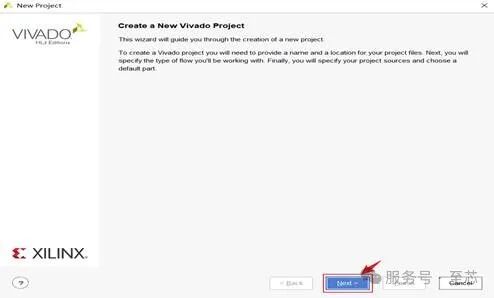
Open the new project wizard homepage, directly click “Next”, as shown in the figure:
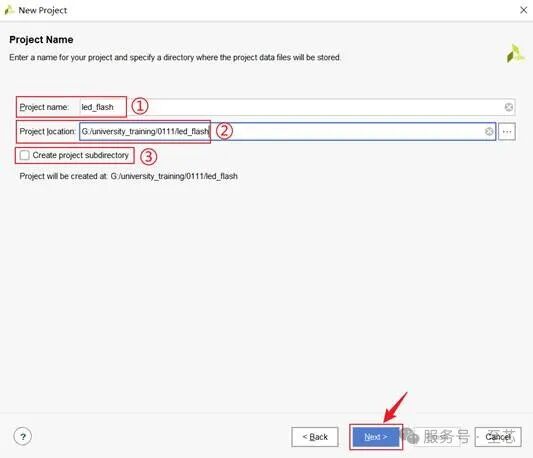
As shown in the figure: Box ① is to set the project name, here named led_flash; Box ② is to set the storage path for the new project, saved in the newly created led_flash folder; Box ③ is to choose whether to create a subfolder under Box ② for storing the project. Here, do not check.
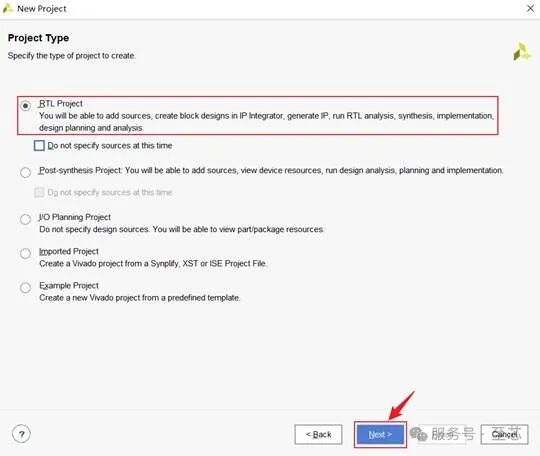
As shown in the figure, select “RTL Project” and click “Next” directly.
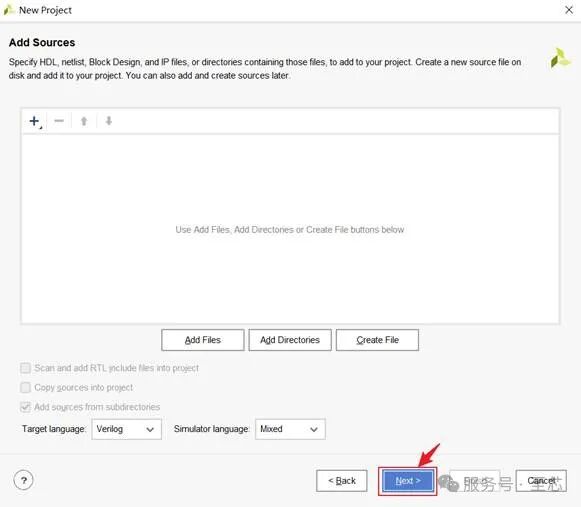
As shown in the figure, on this page, you can click “Add Files” to select and add already written source files. If there are multiple files, you can add them all to the project at once. Here, since there are no written source files, we will not add any. Just click “Next” with the default settings:
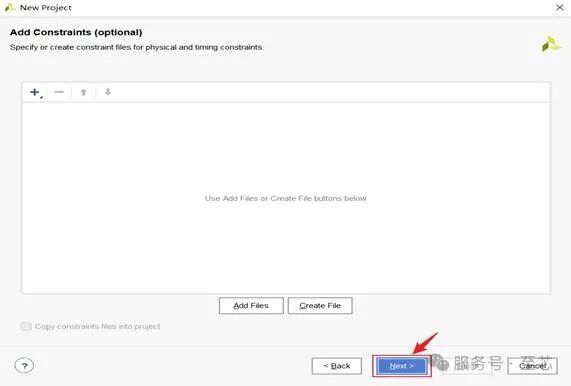
As shown in the figure, on this page, you can click “Add Files” to select and add already written constraint files. Similarly, here we choose not to add. Just click “Next” with the default settings:
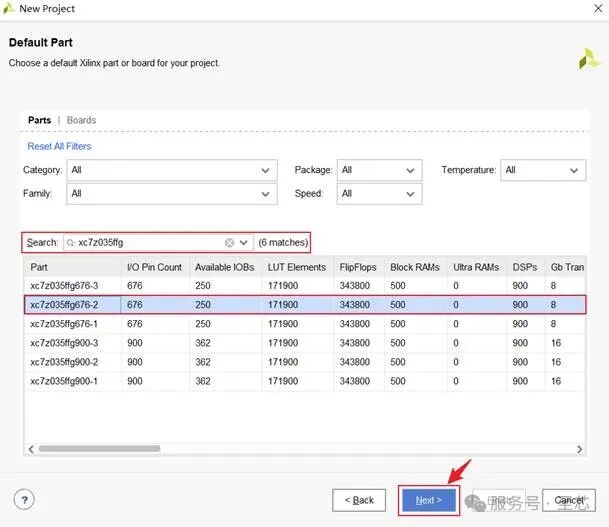
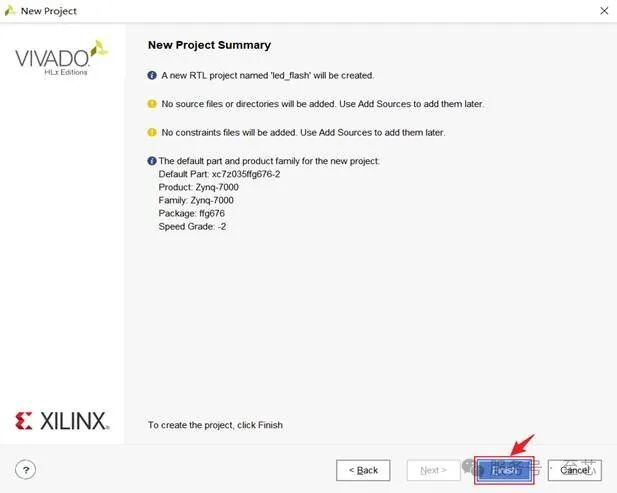
As shown in the figure, this interface is to select the model of the FPGA chip. The model of this development board is: XC7Z035FFG676-2, select the second one and click “Next”:
As shown in the figure, finally generate a summary of the entire new project wizard, you can verify whether there are any discrepancies with your initial choices. If there are no issues, click “Finish”.
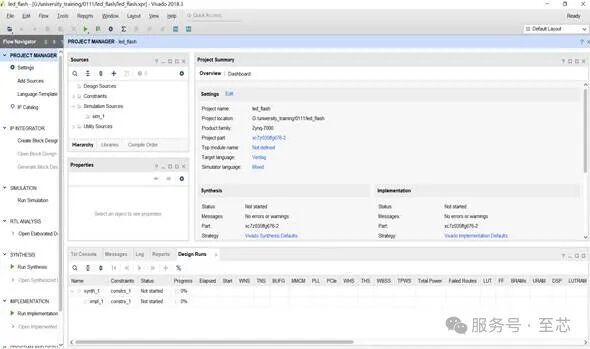
After creating the project, enter the Vivado project design interface, as shown in the figure.
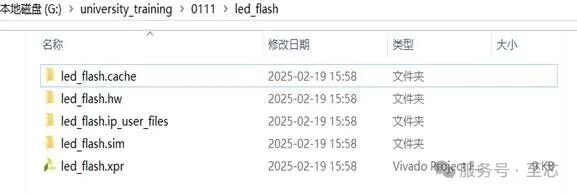
Open the led_flash folder and find that some folders and files have been generated inside. led.xpr is the project file for this project, as shown in the figure:
1.2 RTL Code Writing
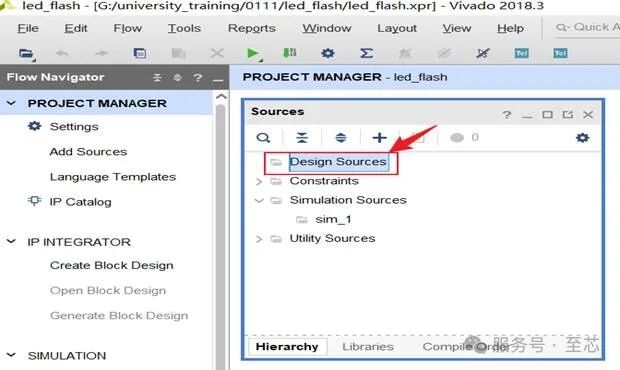
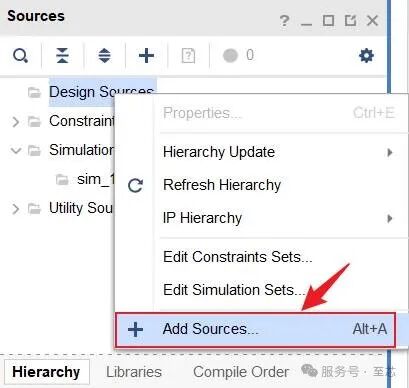
As shown in the figure, create a .v file for writing code. Find “Design Sources”, right-click, and the interface shown in the figure will pop up.
Click “Add Sources…”.
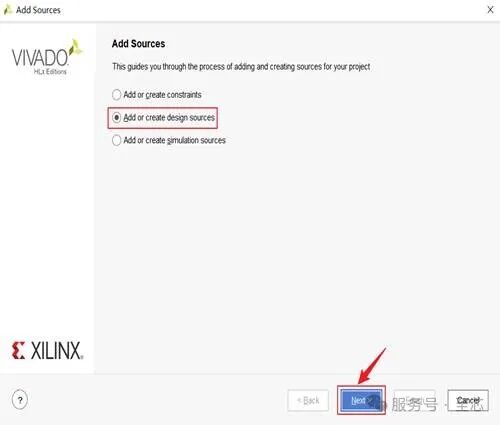
As shown in the figure, select “Add or create design sources”. Click “Next”.
As shown in the figure, select “Create File”.

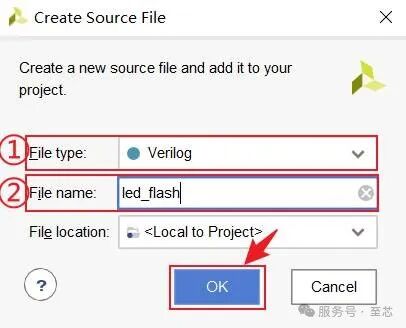
As shown in the figure, in Box ① select the language, and in Box ② enter the file name. Click “OK”.
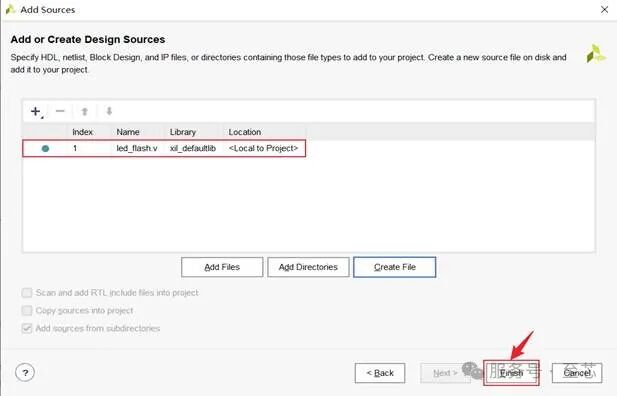
As shown in the figure, click “Finish”.
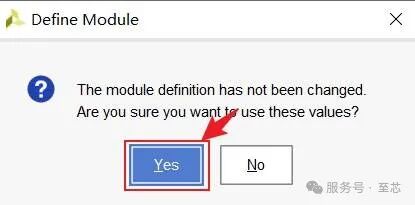
As shown in the figure, click “OK”.
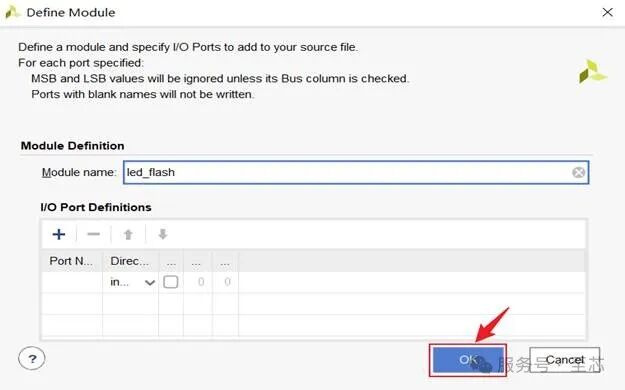
As shown in the figure, click “Yes”.
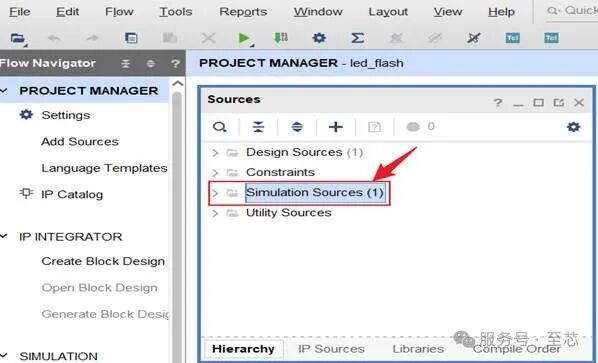
As shown in the figure, the new file has been added.

1.3 Writing Testbench Code
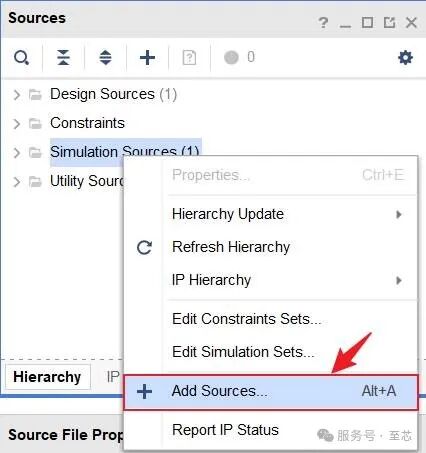
As shown in the figure, find “Simulation Sources”, right-click, and the interface shown in the figure will pop up.
As shown in the figure, click “Add Sources…”.
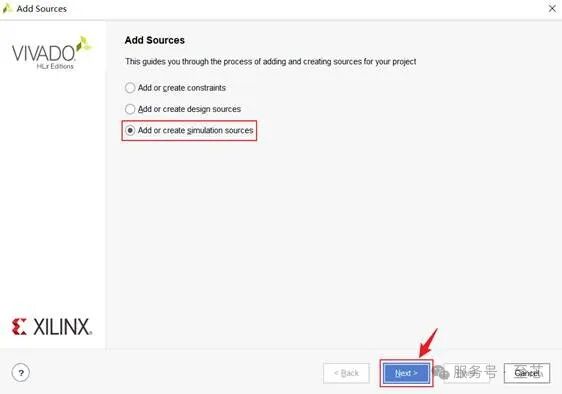
As shown in the figure, click “Add or create simulation sources”. Click “Next”.
As shown in the figure, select “Create File”.

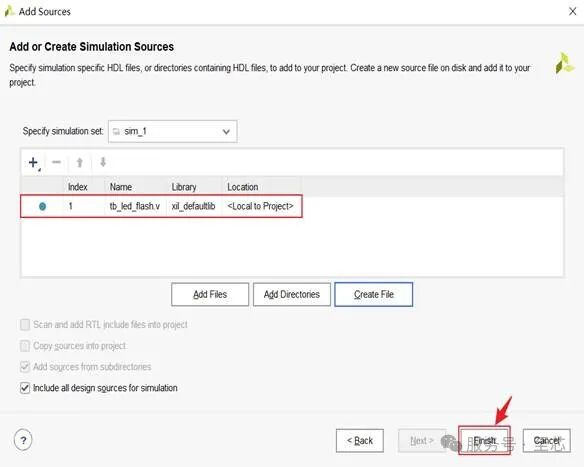
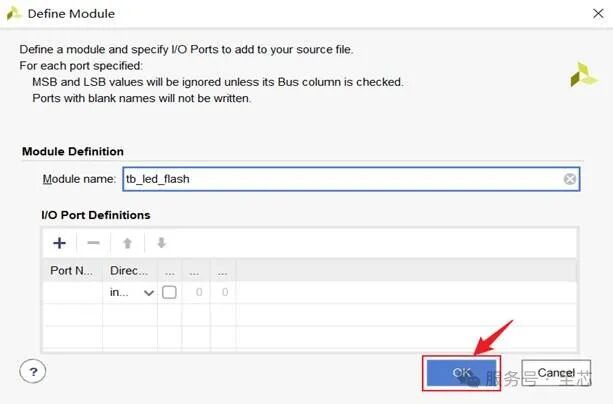
As shown in the figure, in Box ① select the file type, and in Box ② enter the name of the simulation file. Click “OK”.

As shown in the figure, click “Finish”.
As shown in the figure, click “OK”.
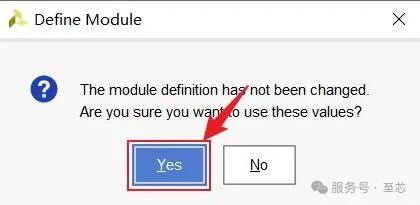
Select “Yes”.
As shown in the figure, the simulation file has been added to the project.

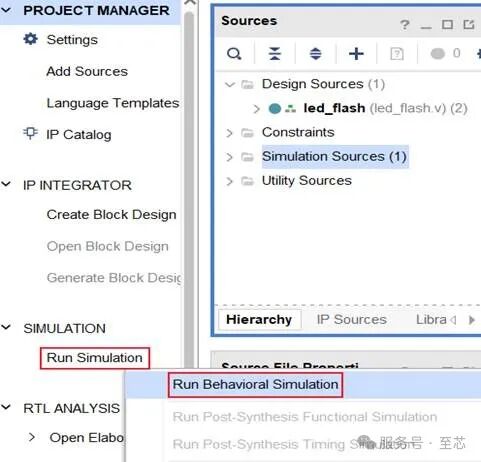
1.4 Open SIMULATION to Observe Waveforms
As shown in the figure, in the Vivado interface, left-click on “SIMULATION” and then click “Run Simulation”. The option “Run Behavioral Simulation” will appear, click this option to enter the simulation page.
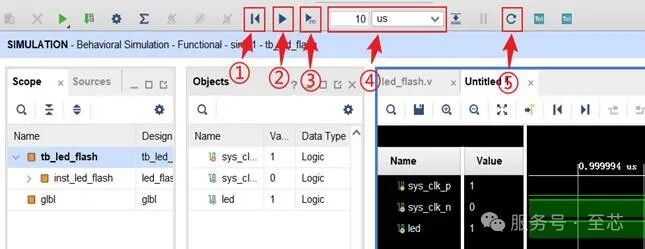
As shown in the figure, window ① shows the module division of the design, you can select the corresponding module, right-click and click “Add Wave Window” to add all signals under the module to the waveform interface for viewing; Box ② displays the signals under the selected module, and you can also select the corresponding signals to add to the simulation interface for viewing; Box ③ is the waveform display interface, where you can see the waveforms of the added signals, the initial default added signals are the port signals of the test file module.


Next, let me introduce some common operations for viewing simulation waveforms, as shown in the figure:
The icon pointed to by arrow ① is the waveform reset, clicking it will clear all waveforms on the interface.
The icon pointed to by arrow ② is to run the simulation, clicking this icon will run the simulation continuously unless interrupted by an HDL statement such as “$stop” or manually clicking the icon pointed to by the arrow shown in the figure, the simulation will stop. When using this function, be careful, if you click this icon, remember to click stop simulation, otherwise the simulation will continue running, which will consume a lot of computer memory resources.
The icon pointed to by arrow ③ is to run the simulation for a specific period, this period can be set arbitrarily in Box ④, for example, if the time set here is 1000ns, then clicking icon ③ will run the simulation for 1000ns. If we click it again, the simulation will run an additional 1000ns on top of the original.
The icon pointed to by arrow ⑤ is to recompile the simulation, after modifying the source code, you can click this icon to re-simulate.
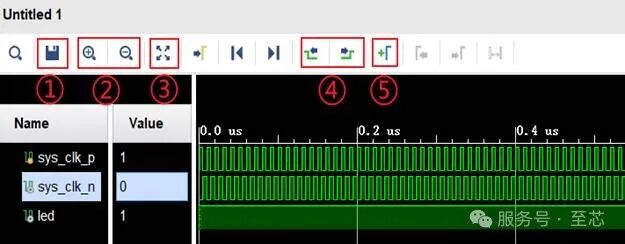
As shown in the figure, the icon in Box ① is to save the waveform, you can also use the shortcut key “Ctrl+S” to save; the icon in Box ② is to zoom in and out of the waveform; clicking icon ③ displays the waveform of the entire simulation time; the icon in Box ④ allows the reference line (the yellow line in the figure is the reference line) to locate the rising or falling edge of the selected signal; clicking the icon in Box ⑤ can add a reference line.
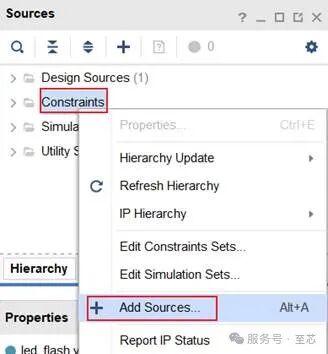
1.5 Pin Constraints
After the simulation ends, it verifies the correctness of the code design, which means it can be validated on the board. However, before going to the board, pin constraints need to be performed, determining which pins correspond to the clock and led with the FPGA chip based on the schematic.
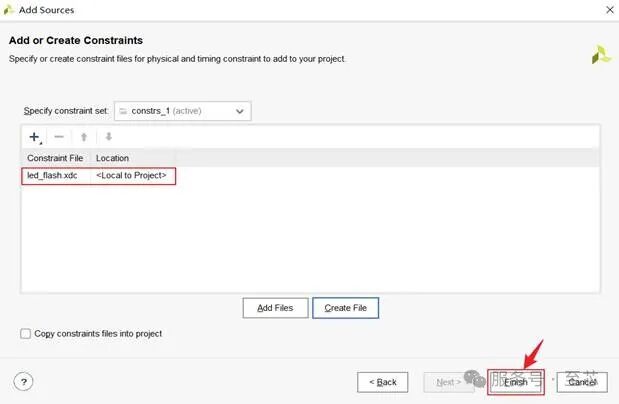
As shown in the figure, find “Constraints” à “Add Sources…”
As shown in the figure, select “Add or create constraints”, click “Next”.

As shown in the figure, select “Create File”.

As shown in the figure, give the constraint file a name, then click “OK”.
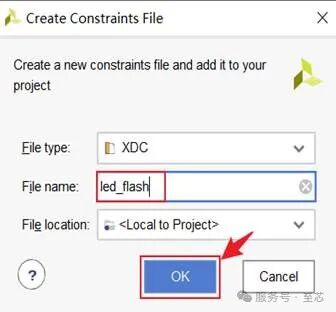
As shown in the figure, click “Finish”.
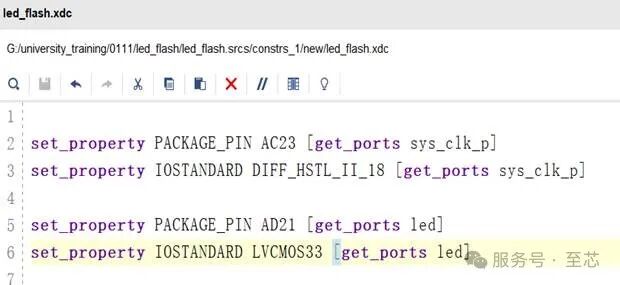
As shown in the figure, write the constraint file.
1.6 Using the Logic Analyzer
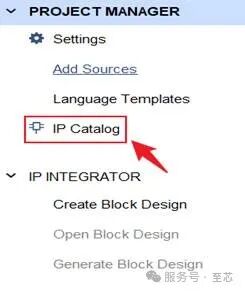
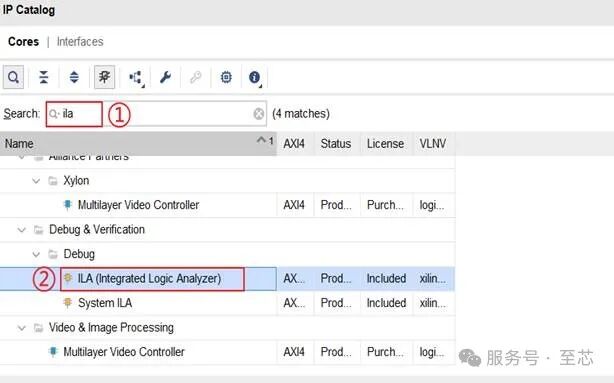
Left-click on “IP Catalog” to enter the IP core search interface.
As shown in the figure, enter “ila” in Box ①; double-click on Box ②’s “ILA (Integrated Logic Analyzer)” to enter the ila configuration interface.
As shown in the figure, enter the ila configuration interface, in the “General Options” interface, Box ① is the name of the IP core, keep it as default. Box ② is the number of probes, select according to the signals to be captured. If you want to capture 3 signals, then the number of probes is 3; if you want to capture 5 signals, then the number of probes is 5. Box ③ is the sampling depth, which can be selected as 1024, 2048, 4096, 8192…131072, etc.
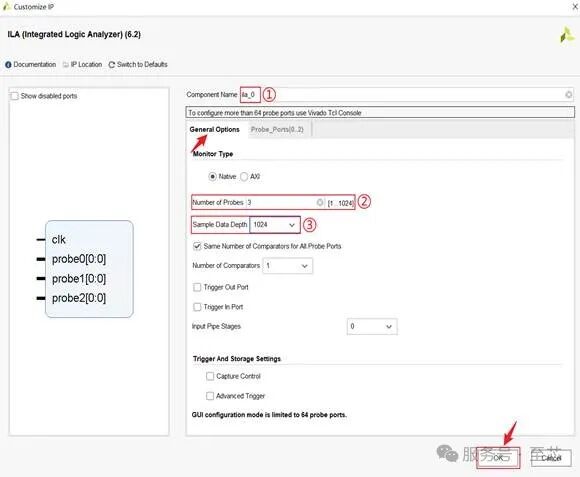
As shown in the figure, in the “Probe Ports” interface, enter the corresponding signal width. Then click “OK”.

As shown in the figure, click “Generate”.

As shown in the figure, click “OK”.

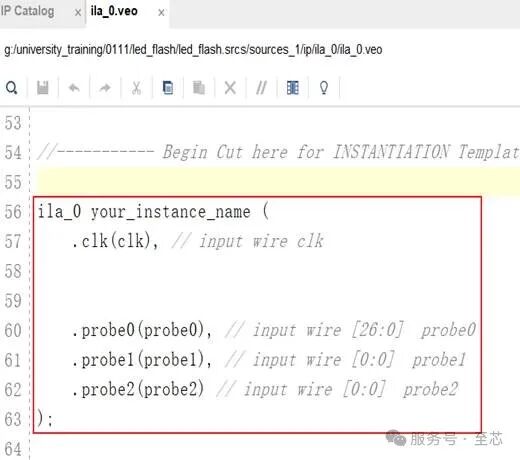
As shown in the figure, in the “IP Sources” section, find the ila instantiation template, double-click to copy the instantiation file to the module corresponding to the signal you want to observe.

As shown in the figure, copy the instantiation file.
As shown in the figure, connect the signals you want to observe to the probes. The choice of the logic analyzer clock is very important; the logic analyzer should use the clock that drives the signal.

Now, the logic analyzer has been added, recompile, and generate the bit file.

After generating the board file, connect the power and programming cable to the board.
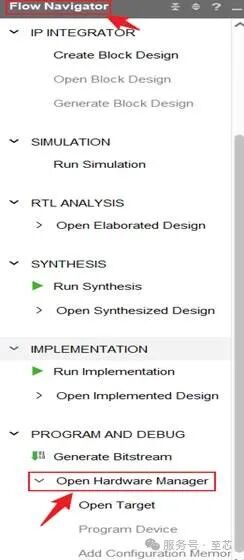
Left-click on “Open Hardware Manager”.
Left-click on “Open target”.

As shown in the figure, click “Auto Connect”.

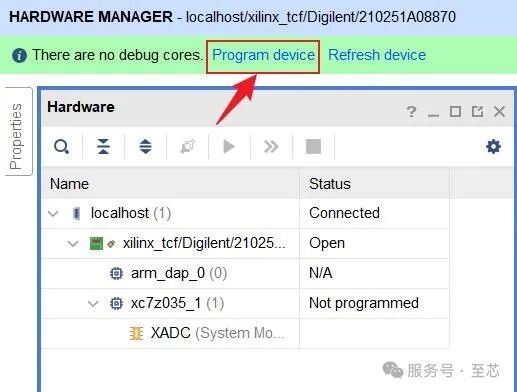
As shown in the figure, left-click on “Program device”.
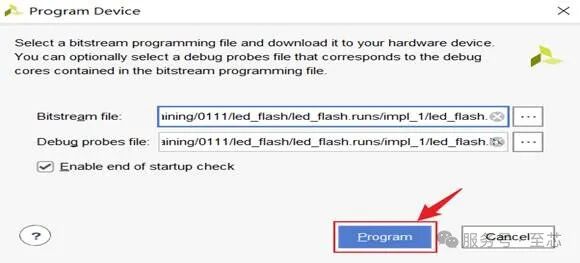
As shown in the figure, click “Program” to write the program.
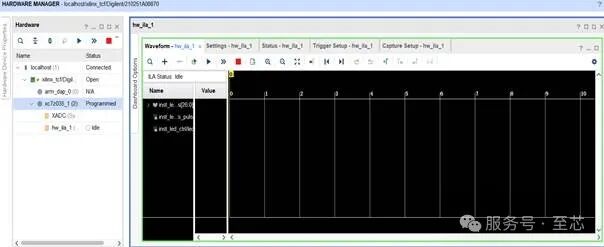
As shown in the figure, after programming, a window will pop up as shown in the figure.
As shown in the figure, Box ① is immediate trigger, no trigger conditions are needed; Box ② is conditional trigger, it will trigger only when the set conditions are met; Box ③ is cyclic trigger, it will continuously trigger when the set conditions are met.

As shown in the figure, Box ① is to set the number of trigger windows. Box ② is to set the sampling depth. Box ③ is to set the trigger position.

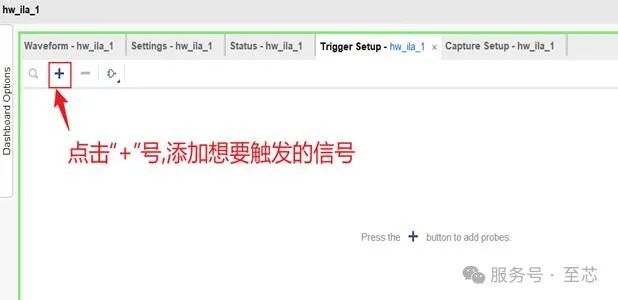
As shown in the figure, add the signals you want to trigger.
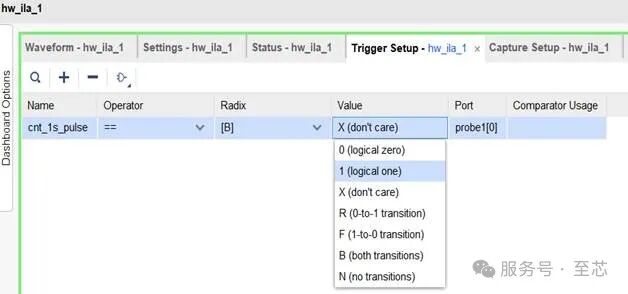
As shown in the figure, the setting method includes 0, 1, X, R (rising edge), F (falling edge).
As shown in the figure, set to trigger on the rising edge.

As shown in the figure, click on conditional trigger.

🌻Dear readers, that’s all for today’s sharing! If today’s content inspires you, remember to light up the “❤️” in the lower right corner or share it with friends who need it, let the warmth spread further! Your recognition is our charging station for late-night coding🔋
See you tomorrow! Stay curious and always vibrant~
🔍Follow us, don’t miss every encounter