Introduction
ROS2 21 Lectures is a series of introductory videos on ROS2 created by Guyueju, and many friends may have started learning ROS2 through these lectures. During the learning process, you might be running ROS2 examples on a virtual machine or PC, but if you have a development board like RDK X3/Raspberry Pi/Jeston Nano, it would be better to get hands-on experience with the development board, as we ultimately deploy ROS2 on the board to implement various functionalities.
This series will take the RDK X3/OriginBot robot as an example to implement the content from ROS2 21 Lectures on the board. Based on everyone’s feedback, this series will provide implementations in both Python3 and C++ to achieve the same functionalities for reference.
Reference Materials
ROS2 21 Lectures Video: 【Guyueju】 Guyue · Introduction to ROS2 21 Lectures | Get to Know a Brand New Robot Operating System_ Bilibili
(https://www.bilibili.com/video/BV16B4y1Q7jQ/?spm_id_from=333.337.search-card.all.click)
ROS2 21 Lectures Documentation: ROS2 Introduction Tutorial (guyuehome.com)
(https://book.guyuehome.com/)
Basic Setup
Before we officially start, please set up your environment. My current software and hardware environment is as follows:
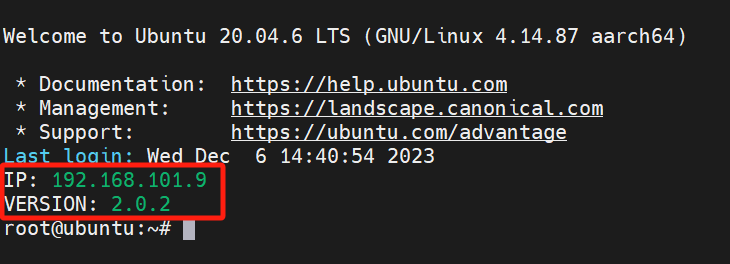
RDK X3/OriginBot, Image version: OriginBot v2.0.2
PC is running Windows 11
Connecting to the Board
If you have not previously worked with robotics, you will encounter the first challenge: how to connect to the board. I recommend two tools, and you can choose different methods based on your situation.
One option is to use MobXterm (https://mobaxterm.mobatek.net/download-home-edition.html), which supports serial, SSH, and other connection methods. The image below shows the MobXterm interface, which displays version information after entering the image.
The other option is to connect via VSCode, which is the method introduced in the ROS2 21 Lectures. You can refer to the ROS2 development environment configuration – ROS2 Introduction Tutorial (guyuehome.com)
(https://book.guyuehome.com/ROS2/1.%E7%B3%BB%E7%BB%9F%E6%9E%B6%E6%9E%84/1.5_ROS2%E5%BC%80%E5%8F%91%E7%8E%AF%E5%A2%83%E9%85%8D%E7%BD%AE/)
Configuring Network Environment
After connecting to the board, you may want to configure a network for convenience. Since this image is a server version without a GUI, you will need to connect via the command line. The commands are as follows:
# Scan for nearby WIFIsudo nmcli device wifi rescan# Print WIFI listsudo nmcli device wifi list# Connect to WIFI sudo wifi_connect "wifi_name" "password"The above operations are suitable for Ubuntu systems, and you can refer to them.
Content Overview
After completing the above configurations, we have basically set up the environment and can officially start learning from the ROS2 21 Lectures.
Again, I want to emphasize that this series of articles serves as supplementary content for watching the ROS2 21 Lectures. You can watch the videos and documents while using this article to see how operations are performed on the board.
Next, I will demonstrate the following content one by one.
Creating a Workspace
The process of creating a workspace on the board is the same as on the virtual machine; essentially, they are both running Ubuntu systems.
# Create dev_ws workspace, src folder will store subsequent packagesmkdir -p ~/dev_ws/srccd ~/dev_ws/src# Pull the basic version of the course codegit clone https://gitee.com/guyuehome/ros2_21_tutorials.git
Installing Package Dependencies
If you created the package yourself, you do not need to execute this step. But why do we need to execute this content? You may notice that there is a package.xml file in the package, which contains the following parts:
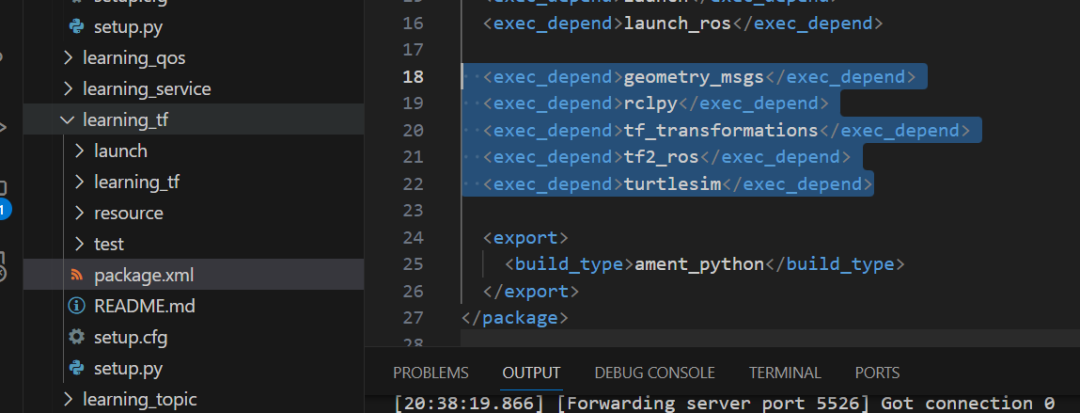
This part is what you need to pay attention to regarding dependencies. If these dependencies are not present in the current environment, the program will fail to compile. Therefore, the general practice is to install the dependencies of the package from github/gitee before installing the package itself, and the specific steps are as follows:
sudo apt install -y python3-pipsudo pip3 install rosdepcsudo rosdepc initrosdepc updatercd ..rosdepc install -i --from-path src --rosdistro humble -yWhat is rosdepc? It is a tool developed by a domestic developer, Xiaoyu, which helps users conveniently use ros/ros2. Previously, installing ros/ros2 was a significant challenge for beginners. You can execute the following command to experience it:
wget http://fishros.com/install -O fishros && . fishrosCompiling Packages
Next, we move on to the package compilation stage. Please make sure to compile in the workspace, as the compiled files will be at the same level as the src folder we created earlier.
# Install compilation tool "colcon", already downloaded in the image sudo apt install python3-colcon-roscd ~/dev_ws/# Compile all packages in the workspacecolcon buildAfter completing the above steps, you will have a basic environment deployment.
To reiterate, colcon build is a frequently used command in ROS2 development. However, since we generally do not modify many files at once during development, we usually use the command for single-package compilation after the first colcon build.
# colcon build --packages-select package_name, for example colcon build --packages-select learning_interfaceAfter compilation, the result will be as shown, where you can see install and build folders.
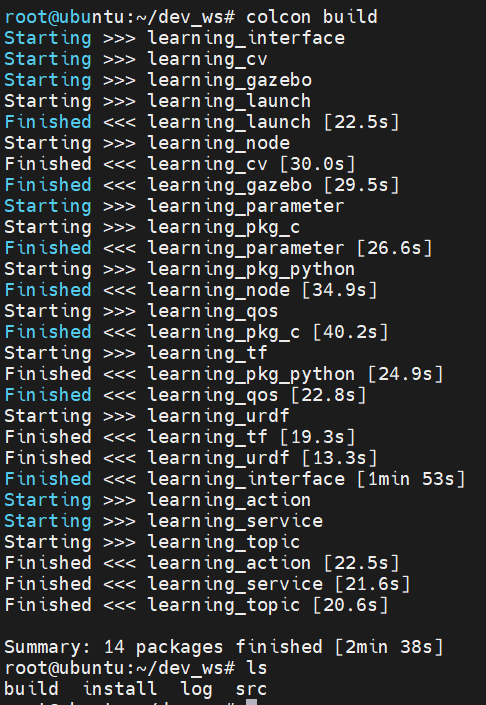
It is important to note that unlike ROS1, in ROS2, whether you are using Python or C++, you need to compile after making changes. The generated executable files will be stored in the install folder. Why is this important? If you find that the execution does not behave as expected after compilation, check the install folder to see if the executable files were indeed generated.
Setting Environment Variables
Finally, you need to set the environment variables.
source install/local_setup.sh # Only effective in the current terminal echo " source ~/dev_ws/install/local_setup.sh" >> ~/.bashrc # Effective in all terminalsTo clarify, the difference between local_setup.sh and setup.bash is that setup.bash will also source the foxy setup.bash.