Soil Moisture Monitoring System
Yuzhixuan Robotics
With the continuous development of technology, the application of smart hardware in agriculture is becoming increasingly widespread. Today, we bring you a highly practical DIY project—Arduino Soil Moisture Testing Experiment! This not only helps you take better care of your plants but also allows you to experience the convenience and innovation brought by technology.
01🧑🔬What is the Arduino Soil Moisture Testing Experiment?
Arduino is an open-source electronic prototyping platform that allows you to easily create and program various electronic devices. In this experiment, we will use Arduino and a soil moisture sensor to build a smart soil moisture monitoring system that measures soil moisture in real-time, providing tailored watering for your plants.
🌟 Why do we need this device?
Statistics show that 90% of indoor plant deaths are due to improper watering! The traditional finger test for soil moisture is neither accurate nor convenient. Our Arduino moisture detector can:
✔️ Display soil moisture digitally in real-time
✔️ Prevent overwatering or underwatering
✔️ Lay the foundation for a subsequent automatic watering system
✔️ Cultivate children’s interest in science
02📋Step-by-Step Guide: Hands-on Experiment
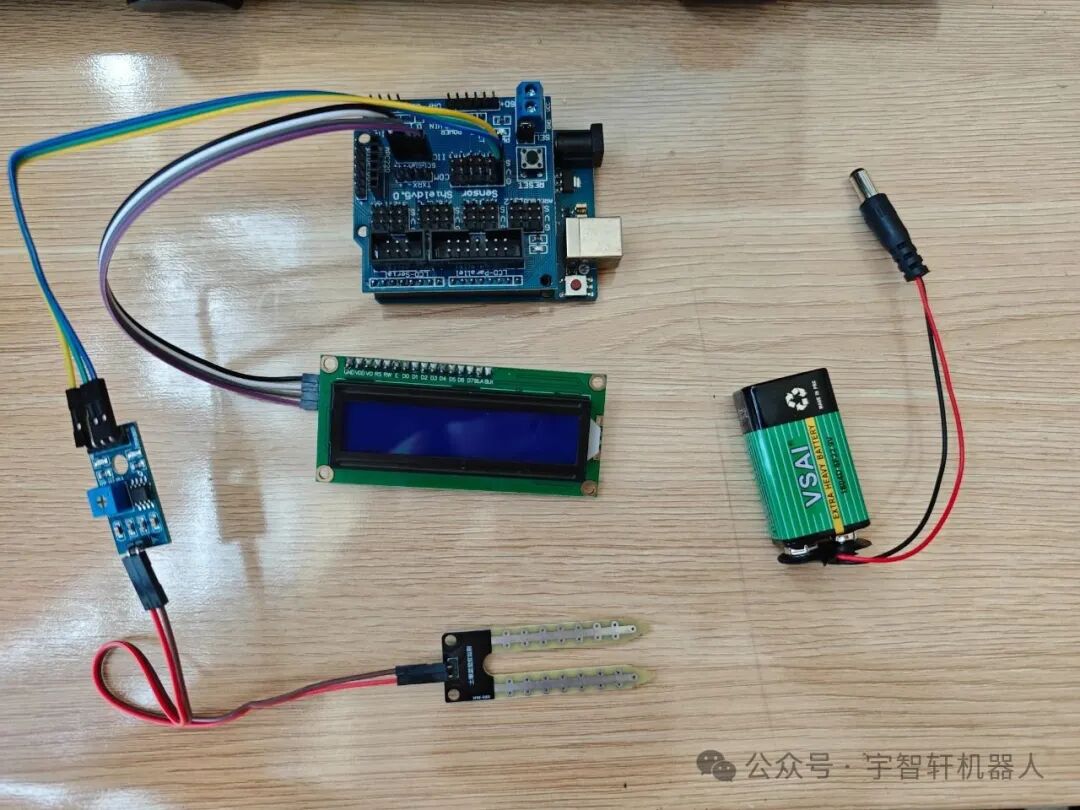
1. To embark on this fun experimental journey, the following materials are essential (total cost under 100 yuan!):
-
Arduino development board: Models like UNO, Nano, etc., can be used; it is the “smart brain” of the entire experiment.
-
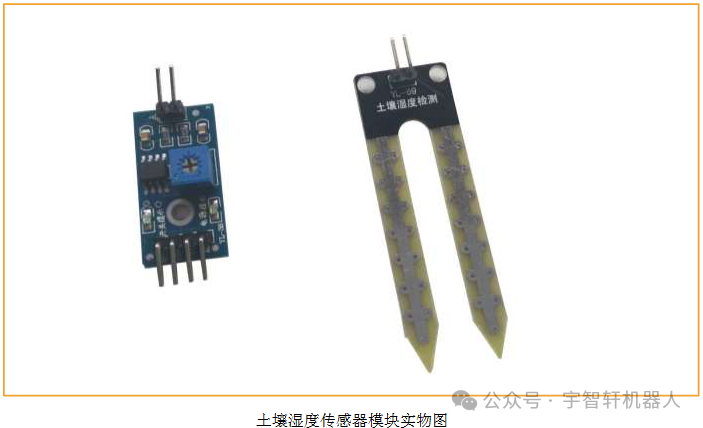
Soil moisture sensor: We recommend the capacitive SoilWatch 10, which is accurate and durable.
-
Dupont wires: Like “information bridges,” they connect various components.
-
Breadboard (optional): It helps keep the wiring organized, a “neat little helper.”
-
LCD display (optional): It can display moisture values in real-time, making it easy to understand.
-
Power supply: Connect to a computer or power bank via USB data cable to power the experiment.
2. Hardware Connection: Build the “Moisture Monitoring Station”
-
Connect the VCC pin of the soil moisture sensor to the 5V or 3.3V pin of the Arduino to “power it up.”
-
Connect the GND pin to the GND pin of the Arduino to “ground the circuit.”
-
Connect the AO (analog output) pin to an analog input pin on the Arduino (e.g., A0) to allow it to “speak.”
-
If using an LCD display, connect it to the Arduino’s I2C or other specified pins according to the instructions, allowing it to “join the conversation.”
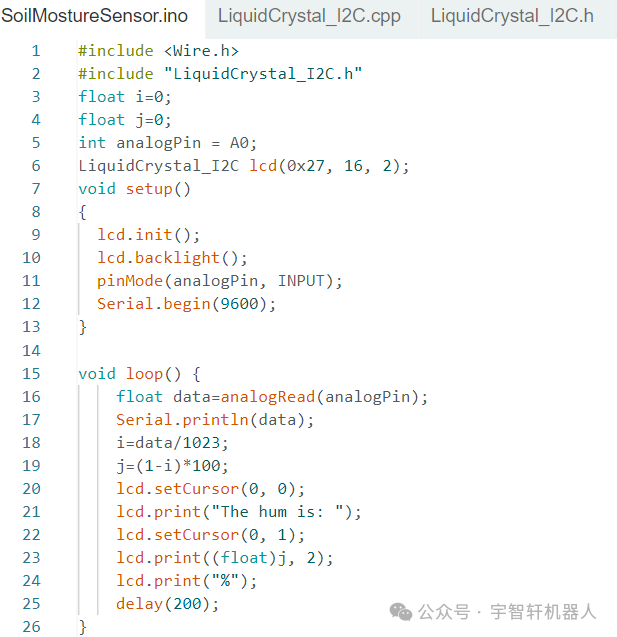
3. Write Code: Give Arduino “instructions”
-
In the Arduino IDE, write the program code to obtain soil moisture data from the sensor and set threshold ranges.
-
When the soil moisture falls below the set value, the LED light will turn on or the buzzer will sound, reminding you to water.
4. Upload and Test: Witness the “Moisture Miracle”
-
Upload the code to the Arduino development board, just like installing a new program on the “smart brain.”
-
Open the serial monitor (set baud rate to 9600) to see the readings from the soil moisture sensor.
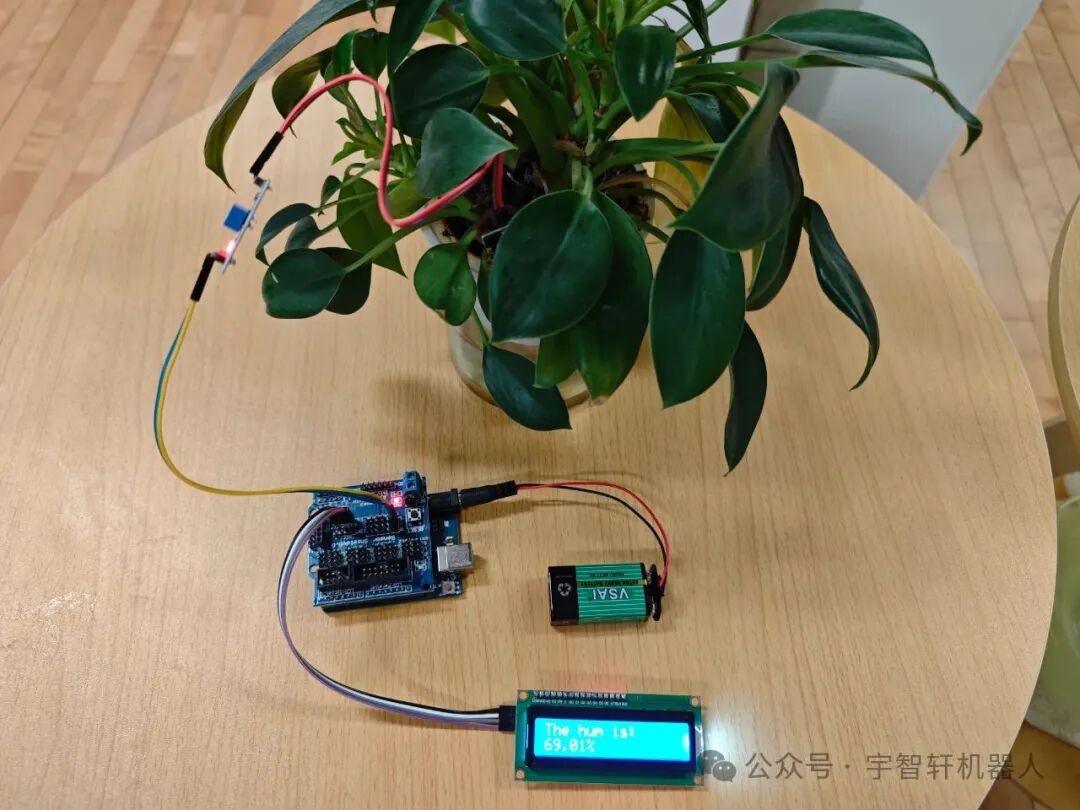
-
Insert the sensor into the soil, and the moisture value on the LCD display or serial monitor will “come to life,” changing with the soil moisture levels.
 03🎉Experiment Results: Clearly Mastering Moisture
With the development of technology, more and more smart hardware is being applied in the agricultural field, especially in precision agriculture and smart planting. The soil moisture monitoring system is just one example. By combining sensors, data collection, and remote monitoring technology, the future of agriculture will become more efficient, environmentally friendly, and sustainable.
You can further expand the project by using wireless communication technologies (such as Wi-Fi or Bluetooth) to transmit monitoring data to a mobile app, allowing you to check soil moisture changes anytime and anywhere, achieving remote monitoring and management. It can even be linked with automated irrigation systems to truly realize smart agriculture.
 So, what are you waiting for? Get started with this Arduino soil moisture testing experiment and let your plants say goodbye to “drowning” and thrive! If you encounter any issues during the experiment or have more interesting ideas, feel free to share in the comments! 👏👏👏
Location: Cultural Building, 4th Floor, Pukou Sports and Cultural Center
Phone: 18502557198 (same number for WeChat)
 Yuzhixuan Robotics