Step-by-Step Guide to Implementing Accurate Distance Measurement and Obstacle Avoidance with Arduino UNO and Ultrasonic Sensor
Only need 1 ultrasonic sensor + Arduino UNO, learn to measure object distance or achieve intelligent obstacle avoidance in 3 steps! From basic principles to complete code, even beginners can easily master it!
1. Project Highlights
✅ Low Cost: Materials cost less than 15 yuan✅ Easy to Learn: No complex circuit knowledge required✅ Highly Practical: Can be used in scenarios like robot obstacle avoidance, smart distance measuring devices, etc.✅ Strong Expandability: Can be combined with servos and motors for automatic navigation
2. Materials List
| Component | Model/Parameters | Usage |
|---|---|---|
| Arduino UNO | Standard development board | Main control unit |
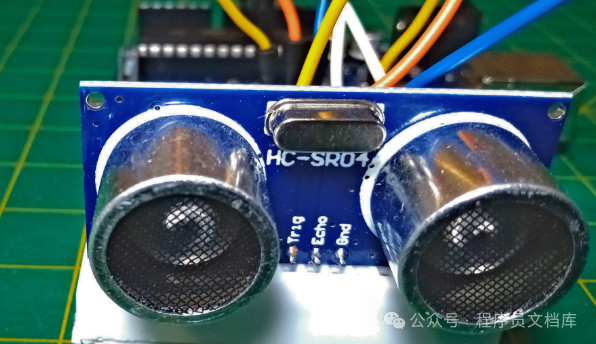
| HC-SR04 Ultrasonic Sensor | 4.0-30cm distance measuring module | Measure distance or detect obstacles |
| Breadboard & Dupont Wires | For building circuits | – |
| LED Light (Optional) | For status indication | – |
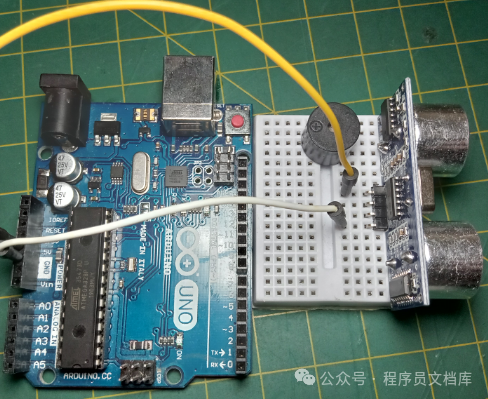
3. Hardware Connection Diagram
HC-SR04 → Arduino UNO:
  VCC → 5V           # Power positive
  GND → GND          # Common ground
  TRIG → D9           # Trigger signal output
  ECHO → D10          # Echo signal input
4. Core Code Implementation
const int trigPin =9;    // Trigger pin
const int echoPin =10;   // Echo pin
const long durationThreshold =20000; // 20cm maximum detection distance threshold

void setup(){
  Serial.begin(9600);
pinMode(trigPin, OUTPUT);
pinMode(echoPin, INPUT);
}

void loop(){
// Send trigger signal
digitalWrite(trigPin, LOW);
delayMicroseconds(2);
digitalWrite(trigPin, HIGH);
delayMicroseconds(10);
digitalWrite(trigPin, LOW);

// Read echo signal
long echoDuration = pulseIn(echoPin, HIGH);

// Calculate distance (cm)
float distance = echoDuration * 0.0343; // Speed of sound conversion factor

// Output result
  Serial.print("Distance: ");
  Serial.print(distance);
  Serial.println(" cm");

// Optional: Add LED status indication
if(distance < 10){
    digitalWrite(LED_BUILTIN, HIGH); // Light up when close to obstacle
}else{
    digitalWrite(LED_BUILTIN, LOW);
}

delay(1000);
}
5. Detailed Working Principle
- Trigger Signal: Send a 10μs high-level signal through the TRIG pin to activate the sensor
- Echo Measurement: The sensor automatically emits ultrasonic waves and receives the reflected waves, the ECHO pin outputs the duration of the echo
- Distance Calculation
distance = (echoDuration * 0.0343) / 2; // Speed of sound 343m/s ÷ 2 (round trip distance)
- Unit Conversion
<span> echoDuration × 0.0343</span> gives the distance in centimeters
- Effective Range Minimum 2cm, maximum about 30cm (exceeding will return error value)
6. Debugging Tips
1. Test Sensor Functionality
- Test with a known distance object (like a book), compare measured value with actual length
- Example: A 20cm object should output about 58-60cm steadily (±5% affected by environmental humidity)
2. Solve Common Issues
| Phenomenon | Solution |
|---|---|
| No measurement data | Check if the TRIG pin is sending the correct pulse |
| Data fluctuates wildly | Add a 100μF capacitor for filtering (between VCC and GND) |
| Measurement value too large | Ensure the object distance does not exceed 30cm |
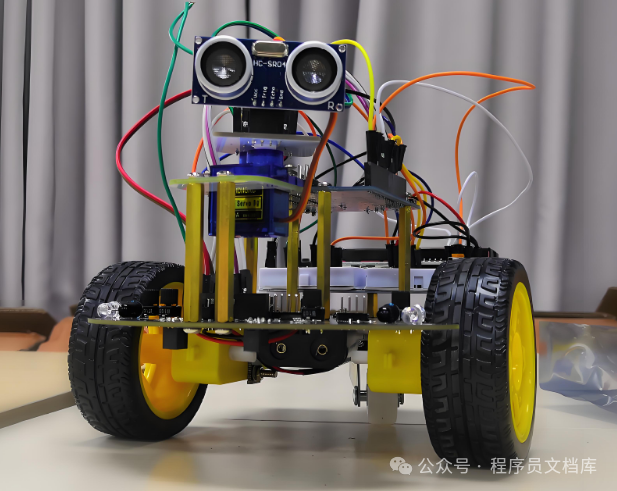
7. Extended Functions (Advanced Applications)
1. Obstacle Avoidance Car Implementation
#include <Servo.h>

Servo myservo; // Servo control
const int obstaclePin = A0;

void avoidObstacle(){
int distance = readUltrasonic();

if(distance < 20){ // Obstacle detected
    myservo.write(90); // Servo turns 90 degrees
    delay(1000);
    moveBackward();       // Move backward to avoid
}else{
    myservo.write(0);   // Move forward
    moveForward();
}
}
2. Automatic Door Control
// Open the door when someone approaches
if (distance < 50) {
  digitalWrite(motorPin, HIGH); // Start motor to open door
  delay(2000);
  digitalWrite(motorPin, LOW); // Stop motor
}
8. Precautions
- Power Supply Requirements It is recommended to use a 5V regulated power supply to avoid voltage fluctuations affecting accuracy
- Environmental Interference
- Avoid using in strong electromagnetic field environments (like near speakers)
- Measurement accuracy will decrease when measuring liquids or black light-absorbing materials
9. Application Scenarios
- Smart Home Automatic curtain sensing open and close
- Industrial Inspection Conveyor belt material size detection
- Educational Experiments Physics class sound speed measurement teaching
Give it a try! If you successfully implement the distance measurement function, feel free to share your creative applications!