
 PanelView Plus 7 Performance B Series Touchscreenuses Windows 10 IoT Core LTSC as its backend, which currently does not support the screen saver (Screen Saver) function. However, we often need to implement this screen saver functionality on many devices. Below, we will introduce a method to achieve this.
01
—
Software Platform
Software Platform:Studio5000 V38 Ftview Studio V16
Hardware Platform: 2711P-T10C22D9P
02
—
Software Program Configuration
1、Create Memory Tags First, we create two analog memory tags under HMI Tags in Factorytalk View ME software: Remote_Display (for screen switching) and Screen_Brightness (for screen brightness control):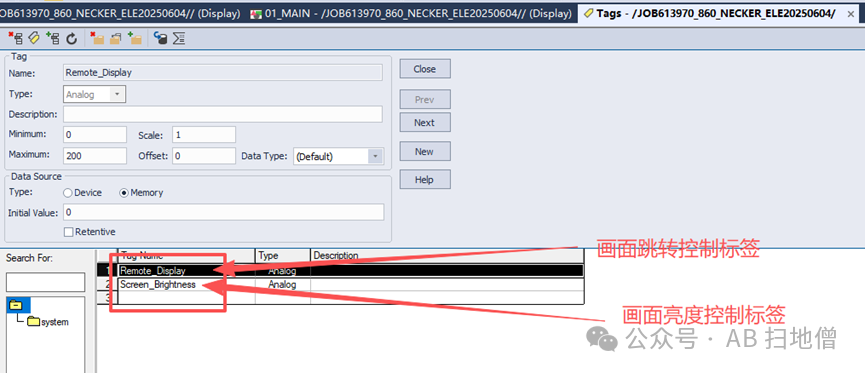 2、Create Macro Application Files We first create a macro file named DimDisplay, and in the expression, assign a value of 1 to the brightness tag:
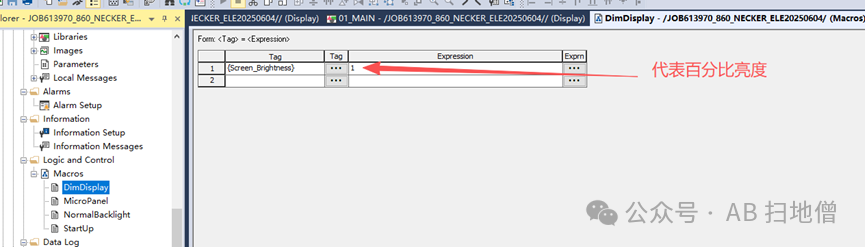 Next, we create a macro file named MicroPanel, and in the expression, assign a value of 100 to the brightness tag and a value of 101 to the remote control switch screen tag: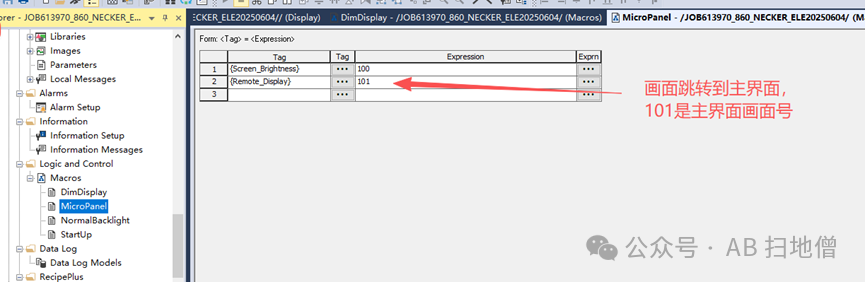
Finally, we create a macro file named StartUp, and in the expression, assign a value of 100 to the brightness tag and a value of 0 to the remote control switch screen tag:
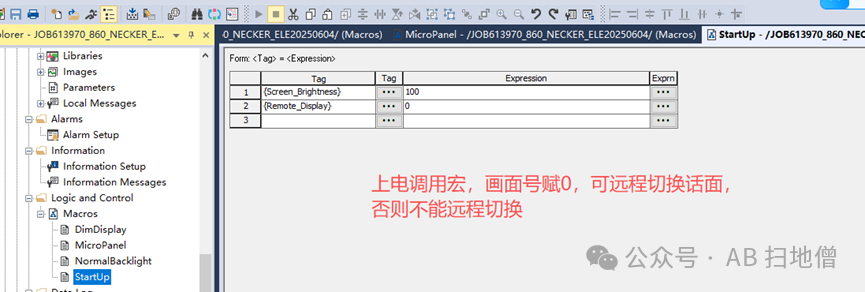
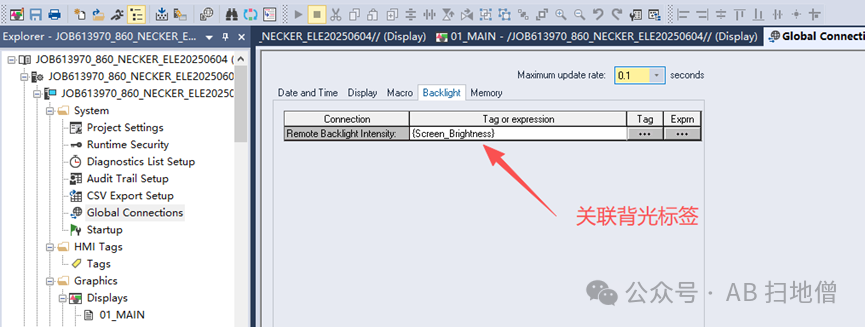
3、Global Link Settings In the global link’s Display, we first set the maximum update time to 0.1S, and associate the Remote_Display tag in the Remote Display Number: In the global link’s Backlight menu, associate the Screen_Brightness tag:
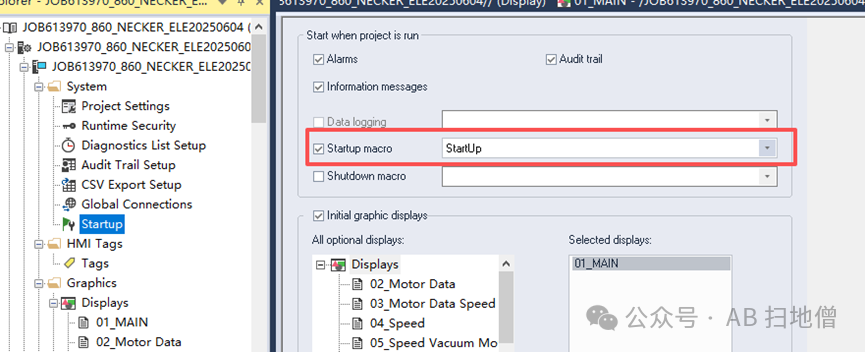
 4、Power-On Run Settings Set the StartUp macro file to be the power-on run macro:
 5、Create and Set Up Screen Saver Screen Create a screen saver screen named Screen_Saver, and define the screen content according to your needs (for example, insert your company’s logo image), set the screen background to black, and associate the DimDisplay macro in the screen Behavior: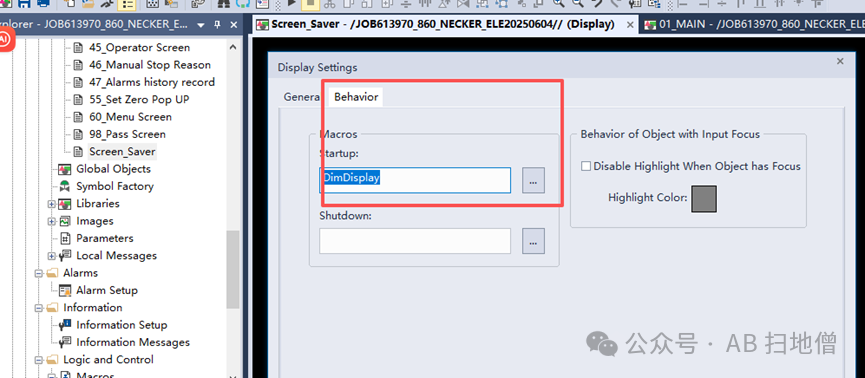
This way, when the screen saver screen runs, the screen brightness will be at its lowest.
Add a macro button to the screen saver screen, which can be made the same size as the screen saver screen and set to hidden, so that clicking anywhere on the screen saver will trigger it. Set the macro button color to black (to blend in with the screen saver screen color), and associate the MicroPanel macro file:
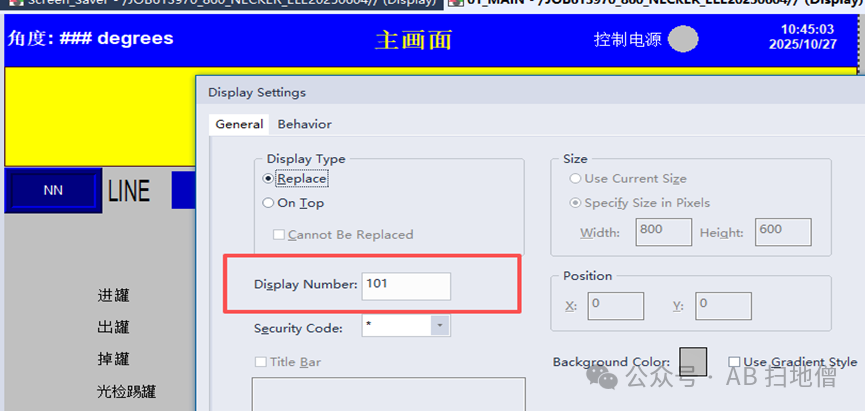
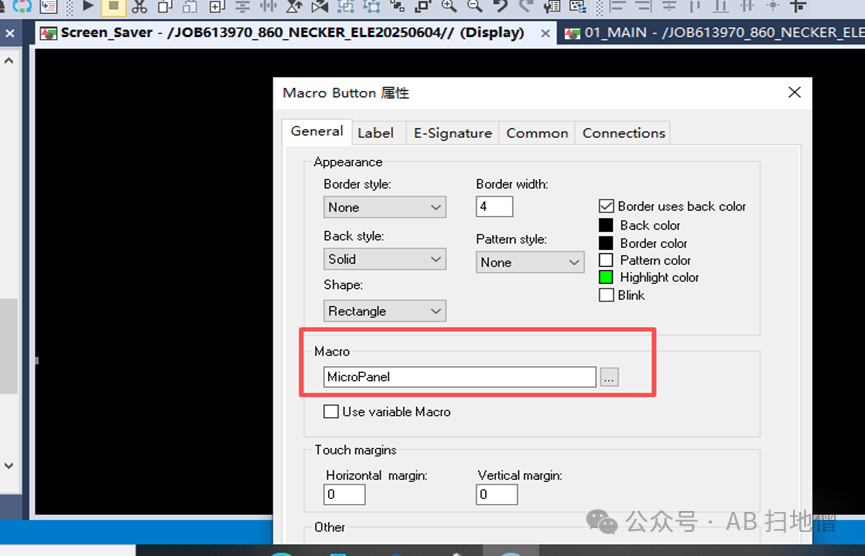 This way, when the user clicks this macro button, the screen will switch to the screen number 101, while adjusting the screen brightness to normal levels.6Main Screen Settings Set the main screen’s screen number to 101:
 and set the macro file executed by the main screen to StartUp:
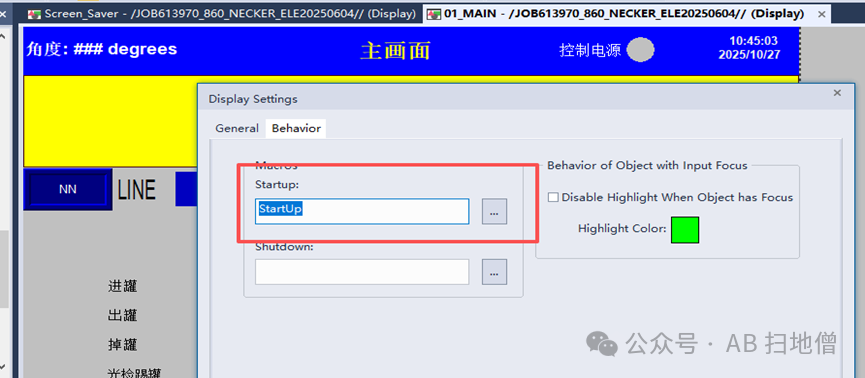 This way, the main screen’s screen number is modified back to 0, allowing the user to switch screens normally on the display.7、Screen Off Settings In the project settings options under the Inactivity menu, set the duration of inactivity before the screen turns off and which screen to switch to when the screen turns off:
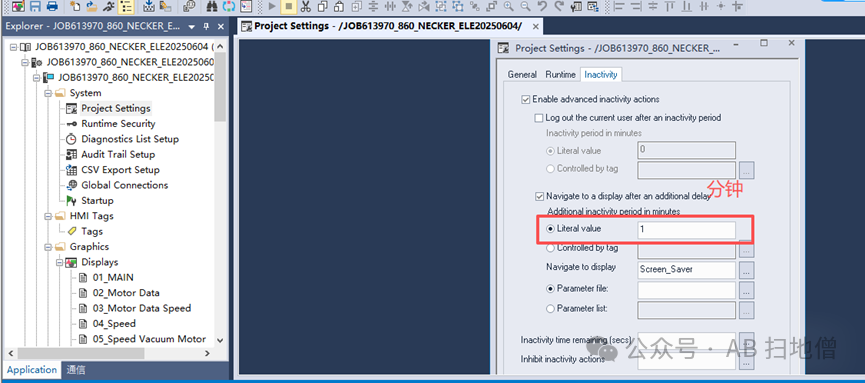 You can set it according to the above method, and then download the program to the screen to see the effect! This is one method for setting up the screen saver for the PanelView Plus 7 Performance B series touchscreen. If you have other setup methods, feel free to leave a comment below the article to discuss and share!!
Previous Reviews:
AB Touchscreen – PV800 Touchscreen Multi-Language Switching FunctionAutomatic Screen Switching via PLC TagsCommon Fault Solutions for PVP Series TouchscreensAB PVP Series Touchscreen Operation Record Implementation MethodTrigger Types and Applications of Alarms in AB Touchscreens