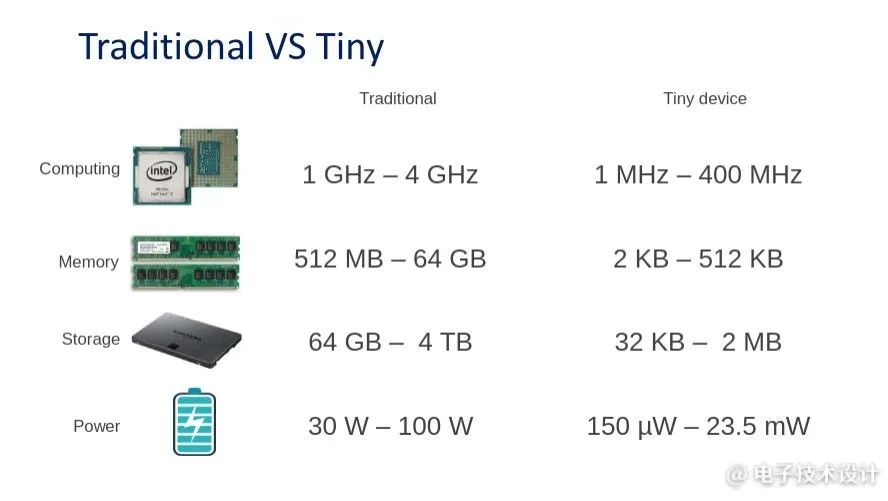
Why Should I Care About TinyML?
-
Cost: The purchase and operating costs of MCUs are low.
-
Environmentally Friendly: Running AI on MCUs consumes very little energy.
-
Integration: MCUs are easy to integrate into existing environments, such as production lines.
-
Privacy and Security: Data can be processed locally on the device. Data does not have to be sent over the internet.
-
Rapid Prototyping: TinyML allows you to develop proof-of-concept solutions in a short time.
-
Autonomous and Reliable: Tiny devices can be used anywhere, even without infrastructure.
-
Real-Time: Data is processed on the MCU with no latency. The only limitation is the processing speed of the MCU.
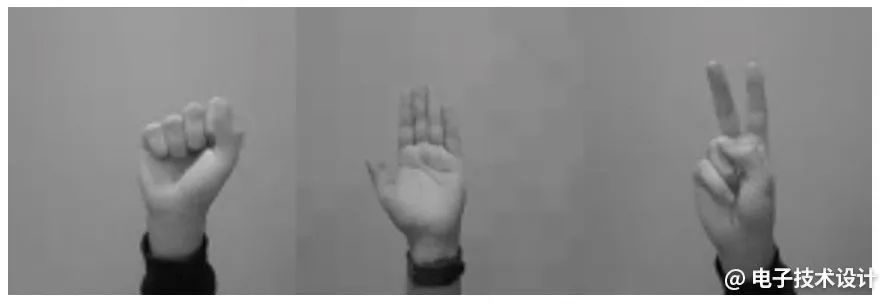
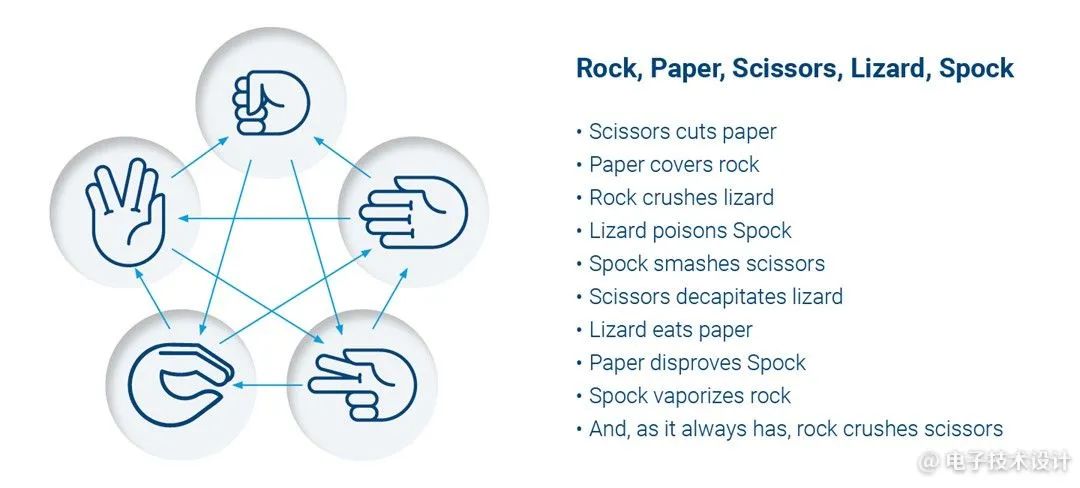
Rock-Paper-Scissors
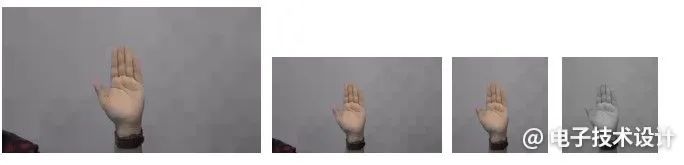
Data Collection
Data Preprocessing
Designing the Model
def make_model_simple_cnn(INPUT_IMG_SHAPE, num_classes=3): inputs = keras.Input(shape=INPUT_IMG_SHAPE) x = inputs x = layers.Rescaling(1.0 / 255)(x) x = layers.Conv2D(16, 3, strides=3, padding=”same”)(x) x = layers.BatchNormalization()(x) x = layers.Activation(“relu”)(x) x = layers.MaxPooling2D()(x) x = layers.Conv2D(32, 3, strides=2, padding=”same”, activation=”relu”)(x) x = layers.MaxPooling2D()(x) x = layers.Conv2D(64, 3, padding=”same”, activation=”relu”)(x) x = layers.MaxPooling2D()(x) x = layers.Flatten()(x) x = layers.Dropout(0.5)(x) outputs = layers.Dense(units=num_classes, activation=”softmax”)(x) return keras.Model(inputs, outputs)
Training the Model
Epoch 1/6 480/480 [==============================] – 17s 34ms/step – loss: 0.4738 – accuracy: 0.6579 – val_loss: 0.3744 – val_accuracy: 0.8718 Epoch 2/6 216/480 [============>……………..] – ETA: 7s – loss: 0.2753 – accuracy: 0.8436
Converting the Model
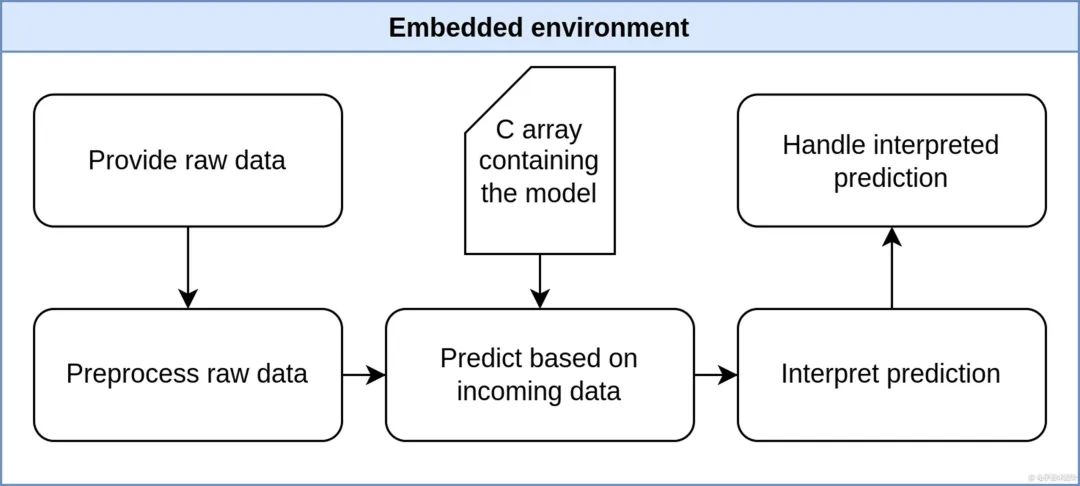
Deploying the Model
Embedded Environment
// initialize interpreter static tflite::MicroInterpreter static_interpreter( model, resolver, tensor_arena, kTensorArenaSize, error_reporter); interpreter = &static_interpreter; model_input = interpreter->input(0); model_output = interpreter->output(0); // assert real input matches expect input if ((model_input->dims->size != 4) || // tensor of shape (1, 96, 96, 1) has dim 4 (model_input->dims->data[0] != 1) || // 1 img per batch (model_input->dims->data[1] != 96) || // 96 x pixels (model_input->dims->data[2] != 96) || // 96 y pixels (model_input->dims->data[3] != 1) || // 1 channel (grayscale) (model_input->type != kTfLiteFloat32)) { // type of a single data point, here a pixel error_reporter->Report(“Bad input tensor parameters in model\n”); return; }
// read image from camera into a 1-dimensional array uint8_t img[dim1*dim2*dim3] if (kTfLiteOk != GetImage(error_reporter, dim1, dim2, dim3, img)) { TF_LITE_REPORT_ERROR(error_reporter, “Image capture failed.”); } // write image to model std::vector<uint8_t> img_vec(img, img + dim1*dim2*dim3); std::vector<float_t> img_float(img_vec.begin(), img_vec.end()); std::copy(img_float.begin(), img_float.end(), model_input->data.f); // apply inference TfLiteStatus invoke_status = interpreter->Invoke(); }
// probability for each class float paper = model_output->data.f[0]; float rock = model_output->data.f[1]; float scissors = model_output->data.f[2];
Expand the Example
Start Your Own Project

Top 10
Technology Trends to Watch in 2023