
1. Download System Image
-
Here we need to install the humble version of ROS2, which requires ubuntu 22.04 version of the system.
-
Download the Orange Pi image: http://www.orangepi.cn/html/hardWare/computerAndMicrocontrollers/service-and-support/Orange-Pi-3-LTS.html
-
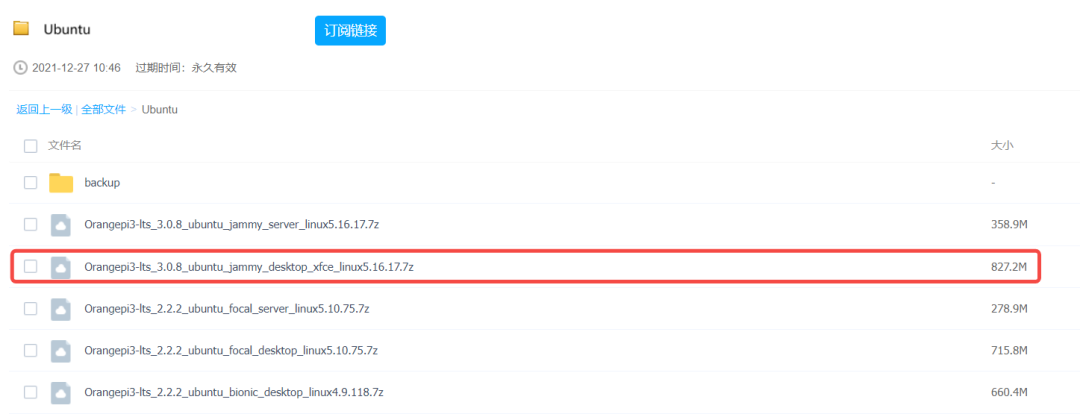
Click on the Ubuntu image, choose either the Jammy desktop version or server version, as shown in the image below
2. Install System Image
-
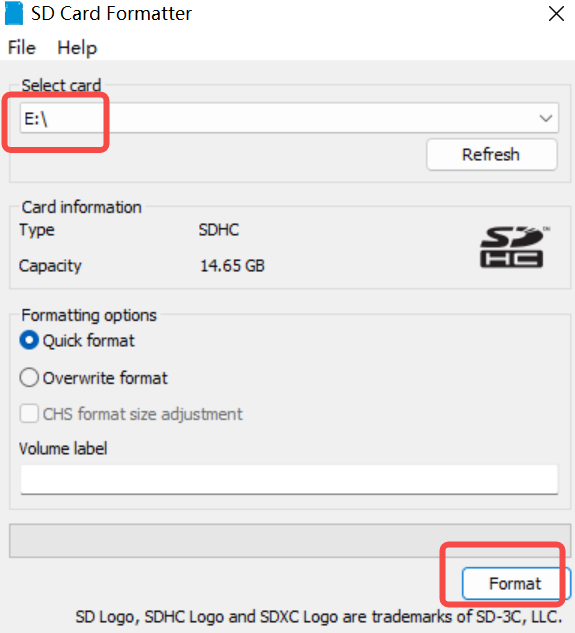
Insert the card reader and use the SD Card Formatter software to format the SD card -
Select the drive letter, click Format, and confirm the pop-up window, as shown in the image below:
-
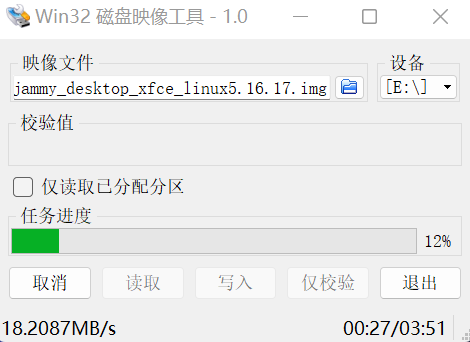
Open the Win32DiskImager software, select the *.img file you need to install, click Write, and wait for the writing to complete, as shown in the image below:
3. Networking and Xshell Connection to Orange Pi
-
Connect the Orange Pi to WiFi and obtain an IP address -
Ensure the client and Orange Pi are on the same local area network -
Open Xshell and create a new connection -
Username: orangepi, Password: orangepi
4. Environment Preparation
# 0. You can choose to disable the desktop version through configuration (not mandatory)
sudo orangepi-config

# 1. Install ROS2
wget http://fishros.com/install -O fishros && . fishros   # 1, 1, 2, 3, 1, 2

# 2. Install keyboard control package
sudo apt-get install ros-humble-teleop-twist-keyboard

# 3. Install relevant packages needed for robot description
sudo apt-get install ros-humble-xacro
sudo apt-get install ros-humble-joint-state-publisher

# 4. Uninstall brltty program to prevent ttyUSB port from being occupied
sudo apt-get purge brltty   # Remove port occupation

# 5. Install boost, which is required for serial communication programs, not installed by default on Orange Pi version
sudo apt-get install libboost-dev

# 6. Reboot, the environment is ready now.
reboot

## -----------------------------------------------------------------------------------
## If package update error occurs
E: Read error - read (5: Input/output error)
E: The package lists or status file could not be parsed or opened.

At first, I thought there was a partition error, so I ran fsck -f /dev/sdX with the Ubuntu startup disk to check the root partition, but the problem persisted.

# The solution is:

sudo rm /var/lib/dpkg/status
sudo cp /var/lib/dpkg/status-old  /var/lib/dpkg/status
sudo rm -rf /var/lib/apt/lists/*

sudo apt-get update

# Problem solved.
## -----------------------------------------------------------------------------------
5. Preparation for Ackermann Vehicle Drive Package
1. Open a terminal and create a ROS2 workspace folder
mkdir -p ~/ros2_ws/src
2. Copy the shared ROS2 corresponding package files to the src directory
## After copying, the file structure is as follows
.
└── src
    ├── mbot_bringup
    ├── mbot_description
    └── sllidar_ros2-humble
3. Open a terminal, navigate to the workspace directory, and compile the package
cd ~/ros2_ws
colcon build # Compile together, if there are compilation errors, you can compile packages one by one

colcon build --packages-select mbot_description
colcon build --packages-select mbot_bringup
colcon build --packages-select sllidar_ros2
After successful compilation, the terminal will print information similar to the following
Starting >>> mbot_bringup
Starting >>> mbot_description
Starting >>> sllidar_ros2

Finished <<< mbot_bringup [2.16s]                                                          Finished <<< sllidar_ros2 [2.46s]
Finished <<< mbot_description [5.35s]

Summary: 3 packages finished [7.67s]
4. Refresh the environment
source ~/ros2_ws/install/setup.bash
5. Set workspace to refresh the environment (one-time setup)
echo "source ~/ros2_ws/install/setup.bash" >> ~/.bashrc
6. Orange Pi Port Configuration
1. Open a terminal, and in the /etc/udev/rules.d/ directory, create a file named 99-robot-usb.rules
cd /etc/udev/rules.d/
sudo vi 99-robot-usb.rules
2. Copy the following content into the file
KERNELS=="1-1", ATTRS{idVendor}=="1a86", ATTRS{idProduct}=="7523", SYMLINK+="mbot",MODE:="0777"
KERNELS=="6-1", ATTRS{idVendor}=="10c4", ATTRS{idProduct}=="ea60", SYMLINK+="lidar",MODE:="0777"
KERNELS=="5-1", ATTRS{idVendor}=="10c4", ATTRS{idProduct}=="ea60", SYMLINK+="camera",MODE:="0777"
Note: Otherwise, when running the program, it will prompt that the port cannot be found
Microcontroller serial port: named mbot
Lidar driver port: named lidar
3. Then change the values of KERNELS, idVendor, and idProduct according to your actual situation.
This mainly refers to my article: Binding Serial Devices and Serial Numbers in Linux Systems
Link: https://blog.csdn.net/zhao_ke_xue/article/details/108700080?spm=1001.2014.3001.5501
Detailed details are as follows:
1. Origin of the Problem
During the development of the ROS vehicle, it is necessary to use the ROS communication serial module, lidar serial module, IMU serial module, etc. In order to prevent the serial numbers of these devices from changing every time the machine is powered on, it is necessary to bind the serial numbers to the serial devices; to better identify the serial ports, we can also set static names for the serial numbers; to better use the serial ports, we can also set permissions for the serial ports.
One-time setup benefits for life.
2. Principle
In Linux systems, although each fixed port may have different ttyUSB* assigned due to the time difference in starting external devices, each fixed port has a fixed KERNELS, idProduct, and idVendor, and each port’s KERNELS are different.
Therefore, as long as we fix the installation location of the serial device, we can still solve this problem from the physical properties of the ports.
3. Method
Step 1: How to query the KERNELS, idProduct, and idVendor of each port?
Here you need to use the following command
udevadm info -a -p $(udevadm info -q path -n /dev/ttyUSB0)
And when each serial device is inserted independently, the serial number is always /dev/ttyUSB0. If you are not sure, you can use the following command to query
ls /dev | grep ttyUSB
Using the first command, the window will print a bunch of device information, we only need KERNELS, idProduct, idVendor, we scroll down to find the information of the corresponding port.
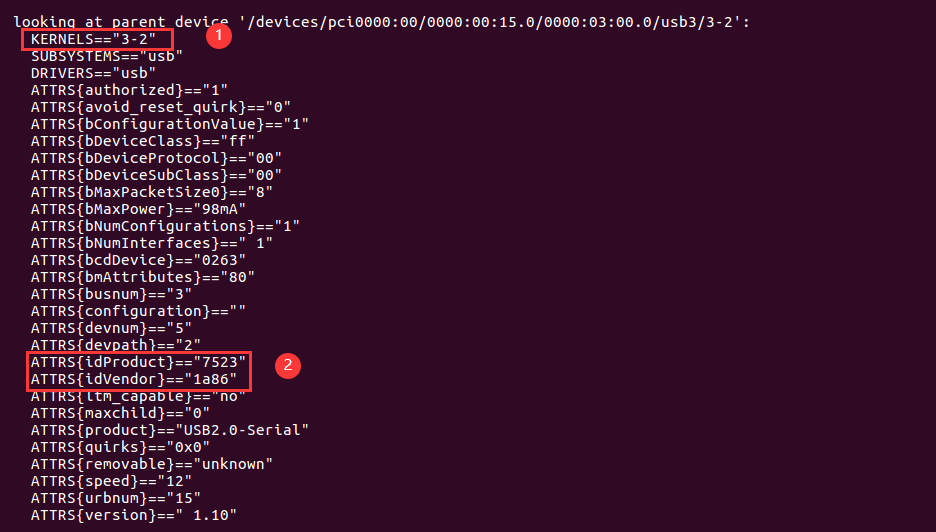
Note: When querying port information, please insert the serial device separately.
Step 2: Create your own 99-*.rules file in the /etc/udev/rules.d/ directory
For example, create a 99-robot-usb.rules file here, use the following command
sudo vim /etc/udev/rules.d/99-robot-usb.rules
Fill in the following content, save
KERNELS=="3-2", ATTRS{idVendor}=="1a86", ATTRS{idProduct}=="7523", SYMLINK+="robot",MODE:="0777"
Explanation of the above
"==": Compare key and value, if equal, the condition is satisfied;
"+=": Assign a value to a key that represents multiple entries.
":=" : Assign a value to a key and reject any subsequent changes to that key. The purpose is to prevent subsequent rule files from assigning values to that key.
Step 3: Restart and check if the configuration has taken effect
Restart
sudo reboot
Wait for the boot, check the port
ll /dev | grep ttyUSB
If the following information is printed, the setup is successful
lrwxrwxrwx   1 root root           7 Sep 20 22:30 robot -> ttyUSB0
crwxrwxrwx   1 root dialout 188,   0 Sep 20 22:30 ttyUSB0
Then when we use the physical location of the port, its serial number will be fixed as /dev/robot, and it will have read, write, and execute permissions.
Precautions:
The above is just the process for setting one port, and most of you have multiple devices. Smart as you, you must know how to apply this knowledge to other situations.
Every time a serial device is inserted independently, obtain its KERNELS, idProduct, idVendor values, record them; create your own 99-*.rules file in the /etc/udev/rules.d/ directory, fill in the information of these devices and the names you want to map; then restart.
7. Start Package Testing
At this point, the necessary conditions are
1. All connections are correct and normal (Microcontroller -> Orange Pi) (Lidar -> Orange Pi)
2. Microcontroller is normal and has the program burned
Here we have prepared two launch files, one with lidar and one without lidar
mbot_with_lidar_launch.py
mbot_launch.py
Taking the launch file with lidar as an example, enter the following command in the terminal:
ros2 launch mbot_bringup mbot_with_lidar_launch.py
If the terminal prints the following, it has started normally
[mbot_bringup-1] [INFO] [1666446425.232926736] [mbot_bringup]: y_:-0.006942
[mbot_bringup-1]
[mbot_bringup-1] [INFO] [1666446425.233090570] [mbot_bringup]: th_:338.204911
[mbot_bringup-1]
[mbot_bringup-1] [INFO] [1666446425.253658500] [mbot_bringup]: dt:0.021006
[mbot_bringup-1]
[mbot_bringup-1] [INFO] [1666446425.253865001] [mbot_bringup]: x_:-0.004255
[mbot_bringup-1]
[mbot_bringup-1] [INFO] [1666446425.253914877] [mbot_bringup]: y_:-0.006942
8. Conclusion
The above content mainly describes the process of quickly deploying software code after obtaining the Ackermann open-source platform.
Open Source! ROS2 Ackermann Development Platform Solution
If you feel that my article is suitable for you, follow me, give a thumbs up, and I’ll give you a different surprise.

– END –