1. Self-Introduction and Board Introduction
Hello everyone, I am “A Big Brother Rong”, and this time I am participating in the first issue of the second season of Funpack. The board used in this episode is the TinyML development board from Syntiant, a provider of deep learning solutions, which uses the NDP101 ultra-low power neural decision processor. Additionally, in terms of appearance, its size is similar to that of a one-yuan coin, making it very mini, but the board is well-equipped, including five digital I/O ports compatible with the Arduino MKR series, customizable RGB, a microSD card slot, a 5V microUSB, and a battery interface, making it easy to compile and download programs or power it independently for practical applications.
Project Share: https://www.eetree.cn/project/detail/1127
2. Environment Setup for This Issue
After receiving the board, I tested it on my computer and found that I didn’t know how to get started. Indeed, the board was left unused for half a month. Later, under the tutorial of the uploader “Simple and Creative”, I learned how to set up the basic environment, while continuously collecting pitfalls encountered by friends in the communication group and their solutions. After repeating the operations several times, I became familiar with this process.
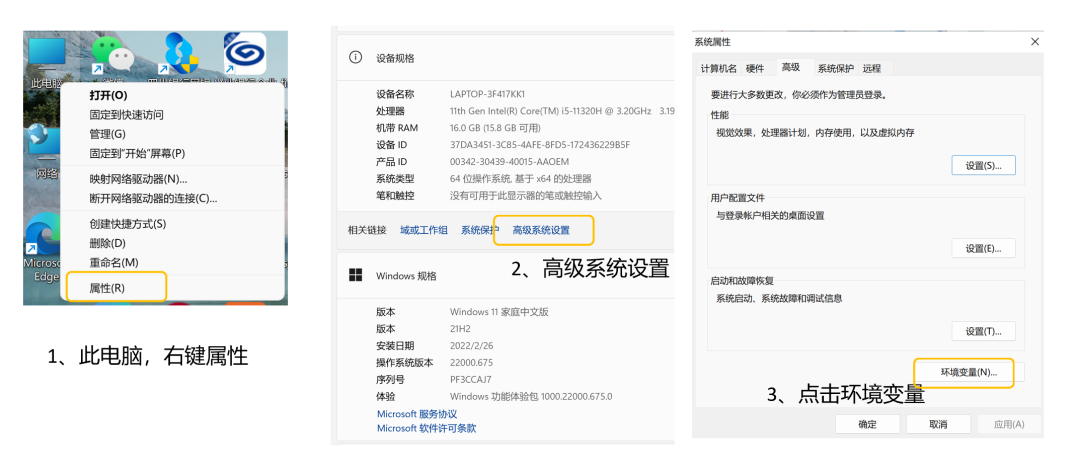
1. First, we need to download the Arduino CLI. Based on the experience of friends in the group, version 0.13 is used. After downloading, we need to configure the CLI path in the environment variables by right-clicking on This PC. As shown in the figure below:
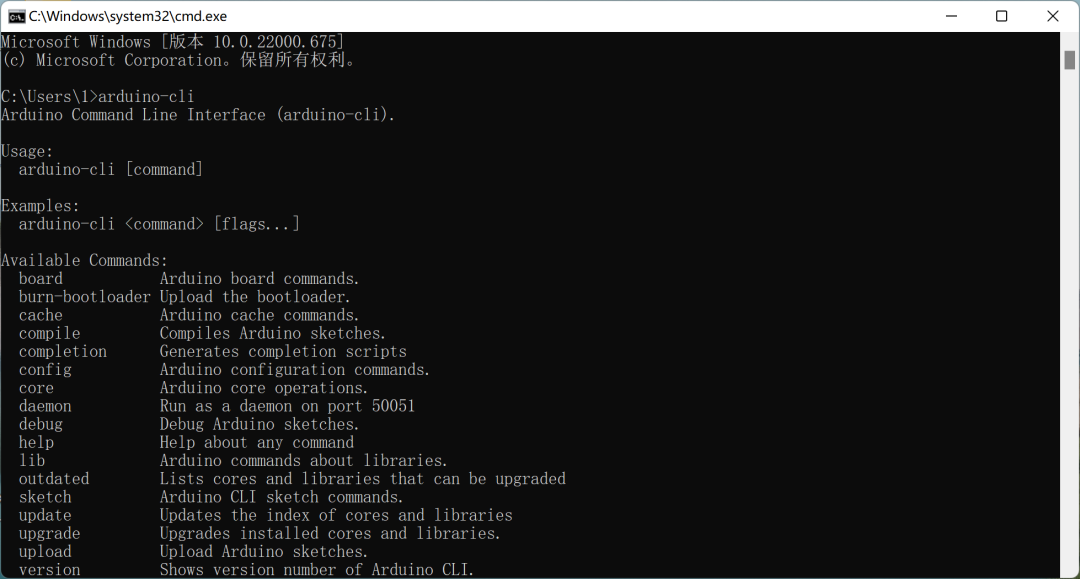
After saving, enter the command arduino-cli run in cmd, and if the following interface appears, the configuration is complete.
2. We need to download and install arduinoIDE and the official Go-stop example program. The IDE version used is 1.8.19, and friends in the group reported that the 2.0 beta version is not very usable. The official example download address: GitHub – edgeimpulse/firmware-syntiant-tinyml: Edge Impulse firmware for Syntiant TinyML board, we can just download the zip package.
3. Open the IDE, connect the board via USB, and the IDE will prompt to install the board files. Here, I encountered many failures in installation, so it must be installed successfully.
Additionally, open the zip file, and run the update_libraries_windows.bat script, which will automatically download the required library files for us. It is also recommended to update several times to avoid failures in downloading some libraries, which would lead to compilation issues.
At this point, the environment is basically set up.
3. Uploading the Official Go Stop Example to the Board
Since I basically modified the official example to create my own program, I first used the official example to learn how to use the EDGE impulse platform and upload the Arduino program.
We enter the public example https://studio.edgeimpulse.com/public/42868/latest, clone it to our account, go directly to Deployment, select the Syntiant Tiny ML board, build the firmware, and once completed, it will automatically download the zip package. After unzipping, run the flash_windows.bat script to flash the firmware.
Then unzip the firmware downloaded from GitHub, rename the folder to firmware-syntiant-tinyml, and open the firmware-syntiant-tinyml.ino file using Arduino IDE to compile and upload. Here, I encountered missing library files or duplicate prompts, so I reran the library update script above or deleted the duplicate libraries, which allowed normal compilation and upload.
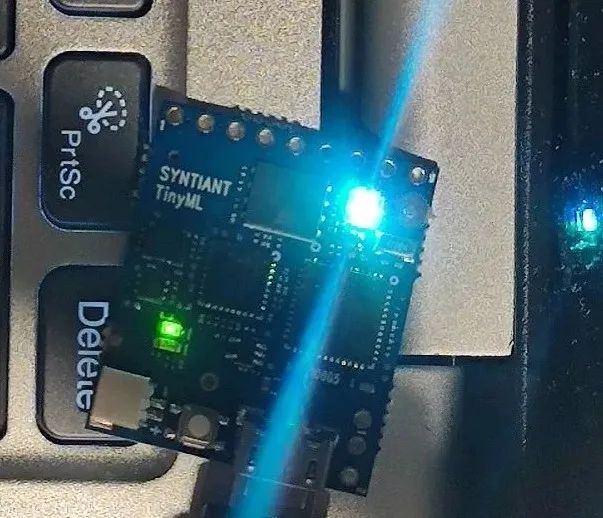
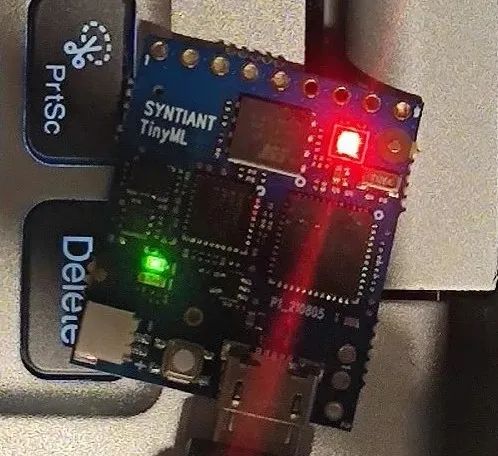
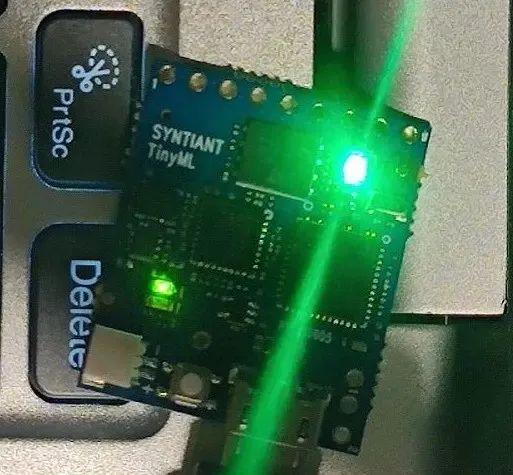
After uploading, wait for the board to restart, then if you say Go and Stop to it, you can see the LED lights responding in green and red.
4. Task Implementation of Model Training
After learning through live courses and practicing the official examples above, I have basically mastered the overall process. First, we go to the EDGE impulse platform to create our custom training model.
Based on friends’ suggestions in the group, I cloned the official project again and deleted all voice data.
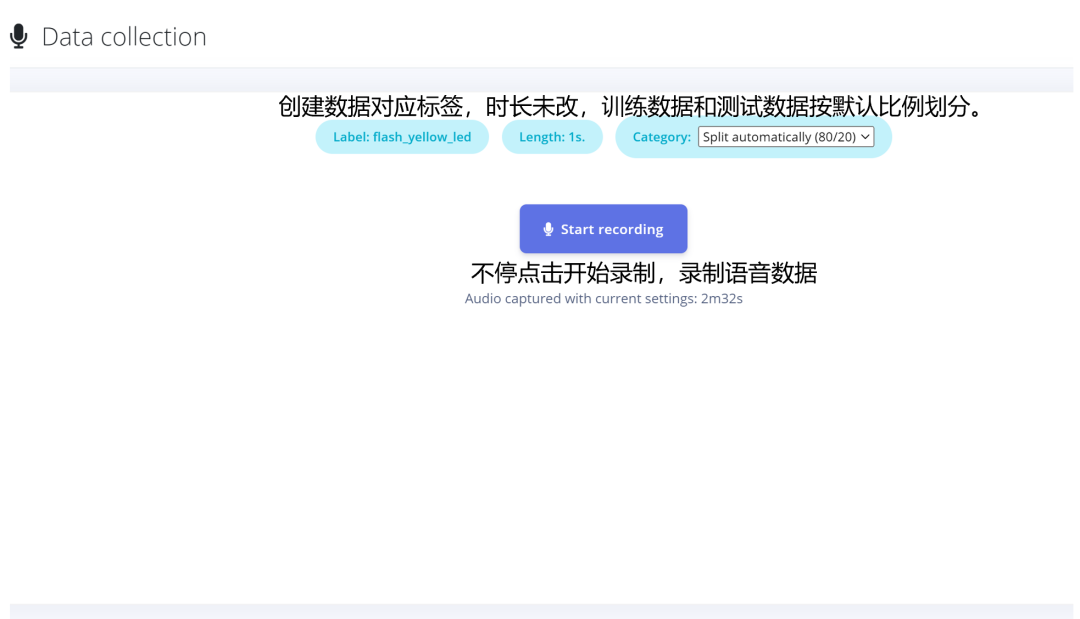
Enter the Data acquisition page, choose to collect data using the computer, which will open a new tab where we create data labels and collect data.
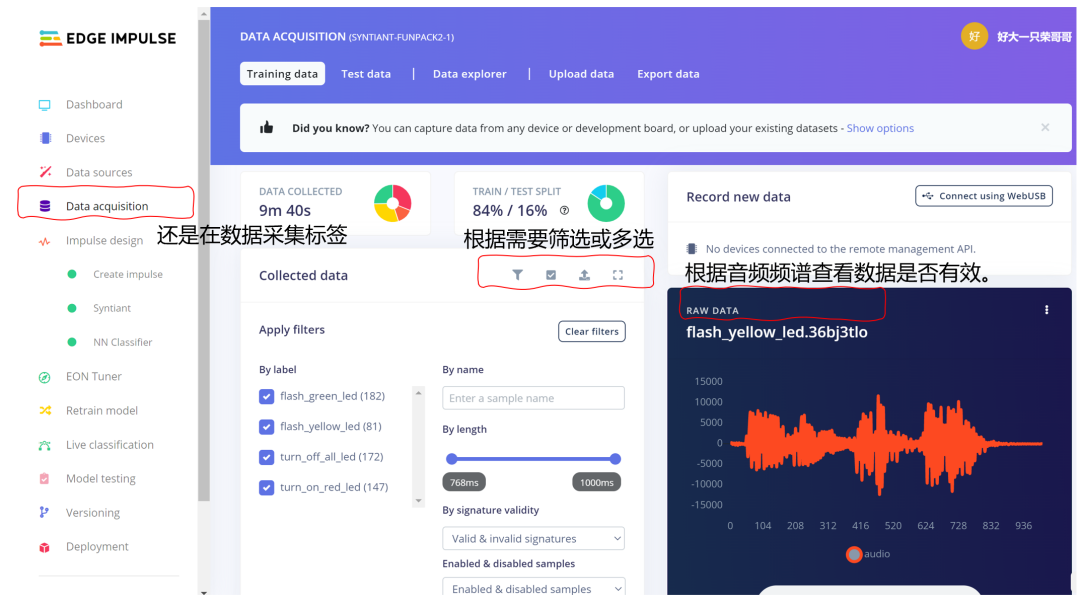
The collected data will be displayed in real-time in the Data acquisition tab, and we need to check the corresponding spectrum to confirm whether the collected data is valid.
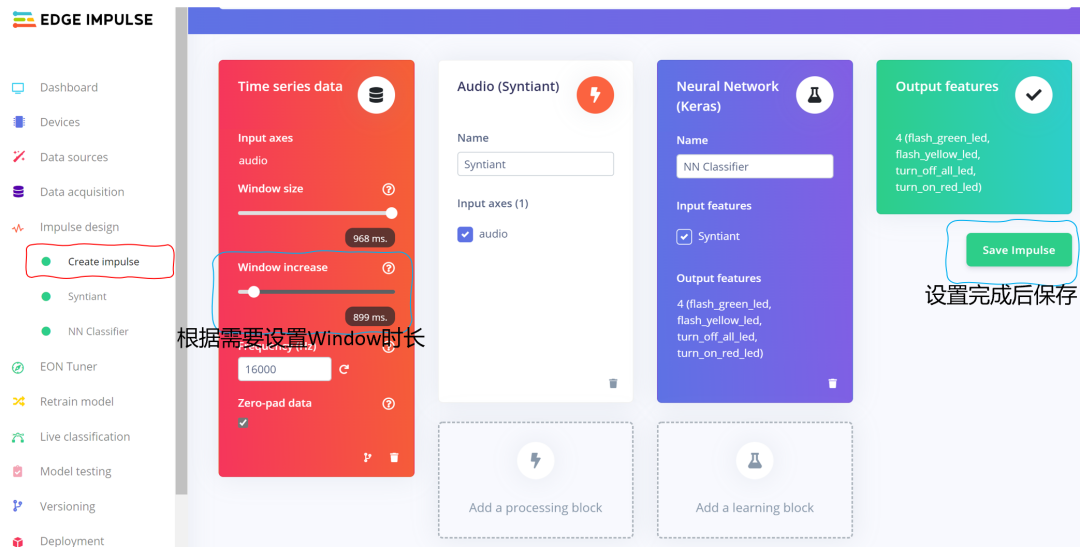
After entering enough data with different data labels, we switch to the Impulse design tab, create an impulse page, and we can set the window increase duration as needed, then save it.
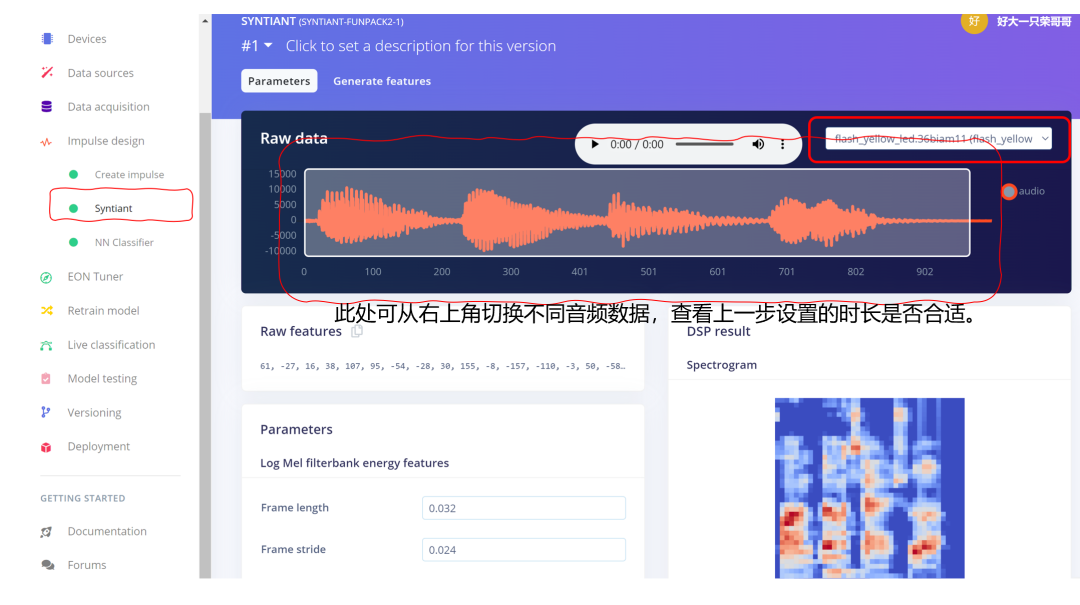
After saving, enter the Syntiant tab, click Save parameters, then click Generate features to generate data label classifications. After running, the right side of the page will display a graphical representation.
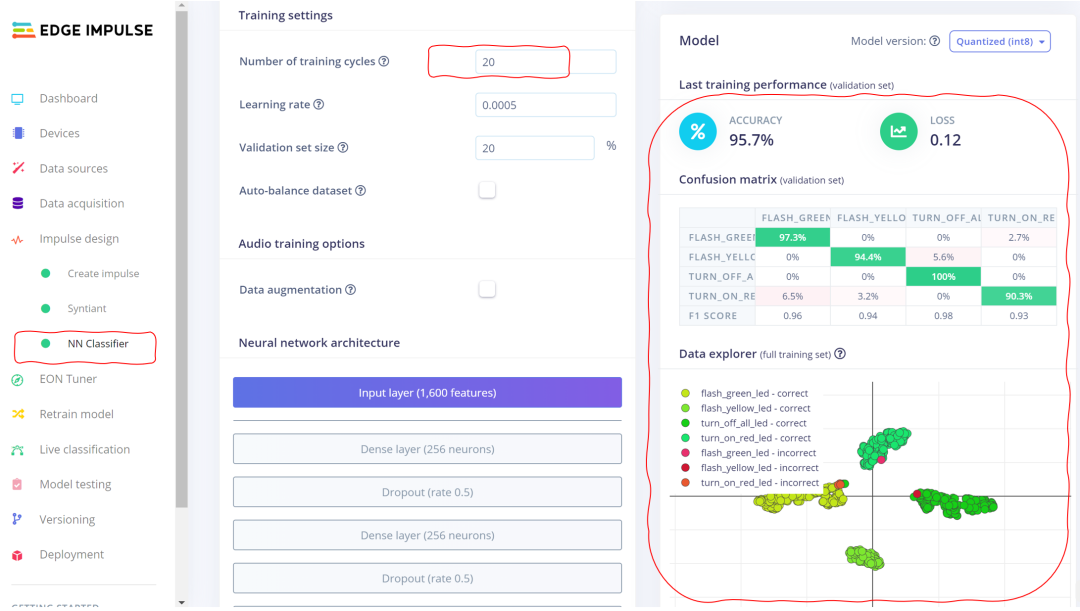
After generating the data labels, we go to the NN Classifier tab to set up the training settings, then click start training to begin training. After training, the right side of the page will display the accuracy and training results in real-time.
Since some data accuracy is not sufficient, the platform provides a model testing feature. We enter the Model testing tab, click the Classify all button to validate the dataset. After validation, we can delete the data with poor accuracy in red and return to the previous step to retrain.
After training is complete, we go to the Deployment tab, select the Syntiant TinyML development board, click the Find posterior parameters button, select the data labels we need, and then click the find parameters button to update the label data. After completion, click the build button to build our training model. Similarly, after building, it will automatically download, and we unzip and run the flash_windows.bat command to update the board firmware.
Finally, still in the Deployment tab, select the Syntiant NDP101 library, then build the model library file. Copy the three files from the model-parameters folder in the zip package to the official firmware-syntiant-tinyml/src/model-parameters folder. This is to replace the model and data label-related data in the official example.
After the update download is complete, we open firmware-syntiant-tinyml.ino to make the necessary code changes.
5. Task Implementation of Corresponding LED Display
After updating the model training to the board, we open the firmware-syntiant-tinyml.ino file.
Opening it, we can see that a function on_classification_changed is defined in the main program, with comments indicating that we can write custom instructions here. Based on the data labels corresponding to the model training, four corresponding instructions were added:
-
flash_green_led: Green LED lights up, turns off after 500ms, voice says “Green light flashing”.
-
flash_yellow_led: Green and red LEDs light up simultaneously, turn off after 500ms, repeated twice, voice says “Yellow light flashing”.
-
turn_off_all_led: Red, green, and blue LEDs light up simultaneously, turn off after 800ms, voice says “Turn off the lights”.
-
turn_on_red_led: Red LED lights up, turns off after 800ms, voice says “Turn on the red light”.
if (strcmp(event, "flash_green_led") == 0) { // Chinese instruction: Green light flashing digitalWrite(LED_GREEN, HIGH); delay(500); digitalWrite(LED_GREEN, LOW); } if (strcmp(event, "flash_yellow_led") == 0) { // Chinese instruction: Yellow light flashing digitalWrite(LED_GREEN, HIGH); digitalWrite(LED_RED,HIGH); delay(500); digitalWrite(LED_GREEN, LOW); digitalWrite(LED_RED, LOW); delay(500); digitalWrite(LED_GREEN, HIGH); digitalWrite(LED_RED,HIGH); delay(500); digitalWrite(LED_GREEN, LOW); digitalWrite(LED_RED, LOW); } if (strcmp(event, "turn_off_all_led") == 0) { // Chinese instruction: Turn off the lights digitalWrite(LED_GREEN, HIGH); digitalWrite(LED_RED, HIGH); digitalWrite(LED_BLUE, HIGH); delay(800); digitalWrite(LED_GREEN, LOW); digitalWrite(LED_RED, LOW); digitalWrite(LED_BLUE, LOW); } if (strcmp(event, "turn_on_red_led") == 0) { // Chinese instruction: Turn on the red light digitalWrite(LED_RED,HIGH); delay(800); digitalWrite(LED_RED, LOW); }
Demonstration effect: Because green and yellow are almost the same when photographed, no photo was taken.
6. Insights and Reflections
From participating in several issues of Funpack’s first season to now, I am very happy to have reached the upgraded second season. This episode’s board is very mini, but the difficulty is still quite high, mainly focused on the model construction and training phase. Due to the lack of data and unfamiliarity with the platform, I encountered many detours. However, after repeatedly watching multiple tutorials, I gradually figured out the path and basically built my first machine learning model, gaining a rough understanding of machine learning. However, the training results of the model are indeed not very satisfactory, with a high false touch rate. I look forward to the next episode to learn together!
7. Latest Funpack Activities
The second issue of Funpack’s second season has been launched, and the board used is the KIT_AURIX_TC275_LITE from Infineon. Its main control TC275TP is designed as the first generation of the Aurix TC27xT series products to meet extremely high safety standards while significantly improving performance. It adopts an innovative multi-core architecture, with three independent 32-bit TriCore CPUs working at 200 MHz.
If you are interested in automotive electronics and intelligent manufacturing, you can deeply experience the charm of Infineon’s high-performance controllers through this activity and lay a foundation for your future R&D work.
You’re welcome to join the communication group to learn more about the event details. If you complete the tasks within the specified time, you can get a full refund.

The Hard He team is dedicated to providing standardized core skills courses for electronic engineers and students in related fields, helping everyone effectively enhance their professional capabilities at various stages of learning and work.
Hard He Academy
We explore and advance together in the field of electronics
Follow Hard He’s official account to access the classroom anytime
Click to read the original text to enter the Funpack homepage