
Recently, I have been working with the Allwinner H5, using the FriendlyARM NanoPi NEO Plus2 development board, which is based on the Allwinner H5 SoC. It features 4 ARM Cortex-A53 cores, ARMV8 64-bit architecture, a built-in six-core Mali450 GPU, and comes with 1GB DDR3 RAM and 8GB eMMC high-speed flash storage.
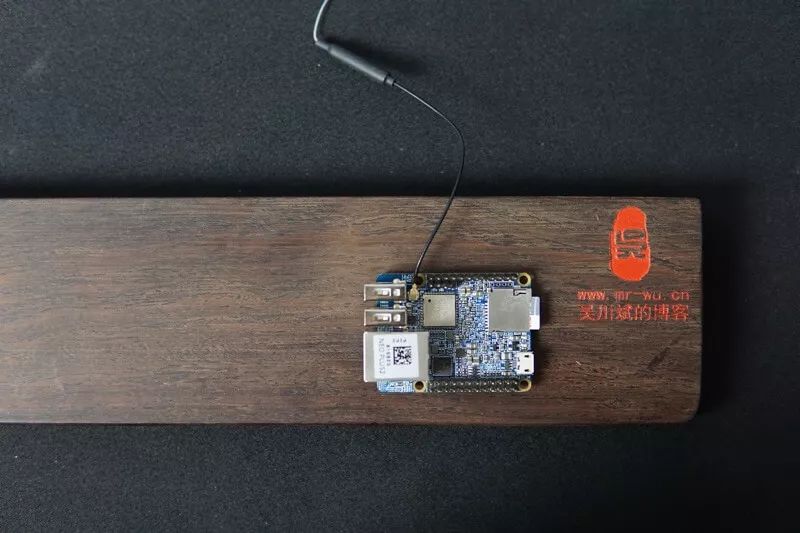
This development board is very compact, measuring only 40x52mm, making it easy to carry around. It has an onboard AP6212 WiFi and Bluetooth module. By powering it with a standard Android cable through a power bank, you can SSH into the system via WiFi, making debugging very convenient.
In the past, when developing embedded Linux, we often used cross-compilation. Cross-compilation refers to the process of compiling code on one host platform (like a PC) to run on another platform (like ARM). Why go through this hassle? Because early ARM processors had poor performance compared to X86, and the supported memory was insufficient, they could only run a trimmed-down Linux operating system and execute specific tasks.
Now, with the performance of the 4-core ARM Cortex-A53 being quite decent, running Linux should reach the level of the first generation P4 single-core processor. The memory is also large enough, typically 512MB, and can even reach 2GB, making it capable of running an Ubuntu Server version without much pressure, and it even has a built-in six-core Mali450 GPU that can run the Lubuntu desktop system.
Thanks to Ubuntu’s comprehensive package management system, we can treat this Allwinner H5 SoC-based development board as a mini-computer, compiling locally in the Ubuntu environment and running programs immediately for debugging, which is very convenient.
However, there is a situation where when compiling some open-source software projects, these projects often depend on many open-source libraries that need to be downloaded via scripts during compilation. The storage paths for these open-source libraries are often on foreign servers. But as you know, the current network environment in China is not great. Downloading these open-source libraries domestically can be very unstable and may even get interrupted. In this case, we need to replace the source with the corresponding domestic mirror or download the source code on a PC and then copy it to the development board, which is quite tedious.
Since the development board runs Ubuntu, it supports VPN just like Ubuntu on a PC. We can directly enable a VPN connection in the Ubuntu system on the development board during compilation, allowing for smooth downloads of foreign open-source libraries.
I personally prefer using Shadowsocks, which is an encrypted transmission protocol based on the Socks5 proxy. Currently, it is developed using programming languages such as Python, C, C++, C#, and Go. Most of the main implementations (except for the iOS platform) are open-source under various licenses like Apache, GPL, and MIT. Shadowsocks consists of a server-side and a client-side. Before using it, you need to deploy the server-side on a server and then connect via the client to create a local proxy.
The main goal here is to install the Shadowsocks Client program on the Ubuntu system of the development board, allowing the client to initiate encrypted connections and exchange data with the Shadowsocks server.
Installing the Shadowsocks Client on Ubuntu is quite simple. The official installation method is to use pip, so you can simply run:
pip install shadowsocks
However, the FriendlyARM Ubuntu system does not come with pip by default in Python, so we need to install pip first.
To install pip, we can easily think of using APT for package management on Ubuntu. Initially, I also tried to install it using:
sudo apt install python-pip
But the version of pip that was installed was quite low. So, I referred to the manual installation method provided on the official website to install pip:
https://pip.pypa.io/en/stable/installing/
First, use the apt package manager to install curl:
sudo apt install curl
Then, install pip to the current user’s permissions using:
curl https://bootstrap.pypa.io/get-pip.py -o get-pip.pypython get-pip.py –user
Since pip is installed in the user directory, we need to include the pip executable in the user’s PATH environment variable by editing:
vim ~/.bashrc to add:
export PATH=$PATH:/home/pi/.local/bin
After saving the edits, run source ~/.bashrc to make the updated environment variable effective. Then we can verify if pip was installed successfully:
pip –version
Next, we can install the Shadowsocks client using:
pip install shadowsocks –user
After successfully installing the Shadowsocks client, we can initiate a VPN connection using the sslocal command.
Before establishing the VPN connection, we need to create a Shadowsocks configuration file that specifies the server address, port, password, and encryption method, etc.
We create a configuration file named shadowsocks.json in the current user directory: vim ~/shadowsocks.json
The content of the shadowsocks.json file is as follows:
{“server”:”hk9.gs.jgjs.me”,”server_port”:52xxx,”local_address”: “127.0.0.1”,”local_port”:1080,”password”:”passwd”,”timeout”:600,”method”:”aes-256-cfb”}
server is the IP address of the server you purchased, mine is hk9.gs.jgjs.me. server_port: The server port, provided by the VPN service provider after purchase. “local_address”: “127.0.0.1”, “local_port”:1080, keep it as default. password: The server password, also provided by the VPN service provider. method: The encryption method, generally aes-256-cfb, according to the information provided by the VPN service provider.
Use the command sslocal -c ~/shadowsocks.json -q & to initiate the VPN connection.
The -q parameter runs in silent mode, so Shadowsocks will not output log information to the console while running, avoiding interference with our normal usage.
Now that Shadowsocks is running in the background, we are not done yet. We still need to resolve the socks to http proxy issue. As the name suggests, Shadowsocks defaults to using a socks5 proxy, but when downloading open-source libraries with curl or wget, we need to use http.
I adopt the method from GitHub to convert the socks proxy to an http proxy using the Polipo tool.
https://github.com/shadowsocks/shadowsocks/wiki/Convert-Shadowsocks-into-an-HTTP-proxy
Install Polipo:
sudo apt-get install polipo
Configuration: Stop the Polipo service sudo service polipo stop and edit the Polipo configuration file /etc/polipo/config, adding the following content:
socksParentProxy = localhost:1080proxyPort = 1081
Start the Polipo service sudo service polipo start
Usage: http_proxy=http://localhost:8123 apt-get update
http_proxy=http://localhost:8123 curl www.google.com
http_proxy=http://localhost:8123 wget www.google.com
Or
Edit ~/.bashrc to add an environment variable
export http_proxy=http://127.0.0.1:1081
If using git, configure it as follows: git config –global http.proxy 127.0.0.1:1081
Done, start enjoying.
You can
curl http://www.google.com
to pull up Google’s homepage for testing, 🙃