Win a Backpack
How Difficult Is It?
Give it a Try!
→_→

Copyright Statement:
This article was published by the blogger“cuter”.Reprinting is welcome, but the content of the blog must not be altered, nor used for any profit purposes. When reprinting, the author’s profile and copyright statement must not be deleted. Any copyright disputes arising from unauthorized use shall be borne by the infringer.
Official Blog Address:
ChinaAET: http://blog.chinaaet.com/cuter521
Recently, I saw new comments on my article from over two years ago“Embedded Development Based on Vivado – PS+PL Practice”, which reminded me of an idea I had shelved for many years.
First, let’s take a look at the comments from netizens. I would especially like to thank several netizens @liyw520, @xiaoniuxxq, and I apologize for not addressing their questions in a timely manner.
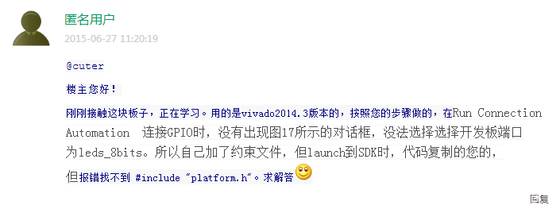

When I first got in touch with Zynq, I had the idea of customizing related files for my board when importing development board information using ISE. This way, during the project creation process, I could finalize relevant configurations and pin assignments in advance, saving time later on. Once the board’s pins and functions are fixed, it will save time so that I don’t have to copy and add the same files every time I create a new project.
People tend to be lazy; although I had this idea a long time ago, I never resolved it until today. I couldn’t suppress the urge to solve this problem, so I just went ahead and did it!
As seen in the image, let me show off the results:
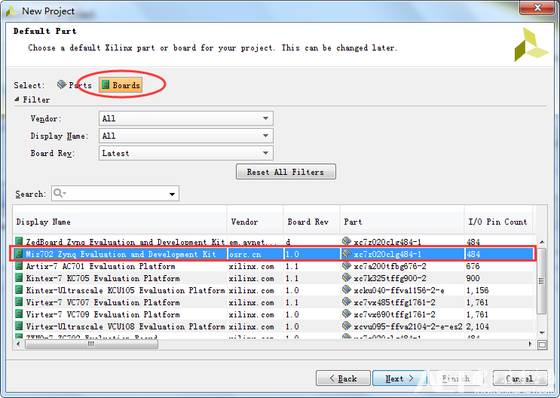
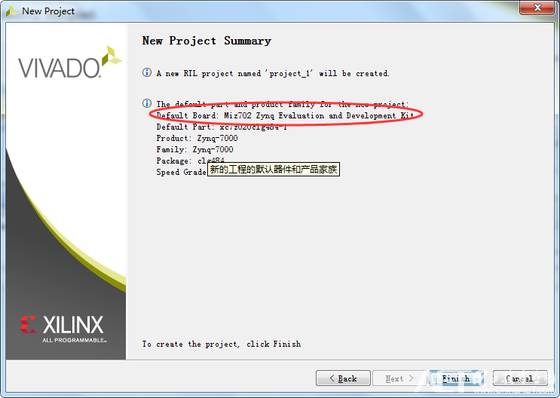
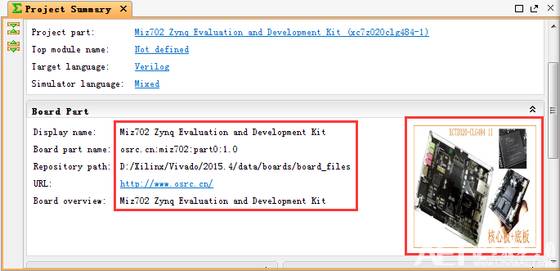
Those who have used Vivado should be familiar with the project creation process, one of the steps is selecting a chip or development board, and I added my own development board, Miz702.
After the project is created, add a GPIO IP.
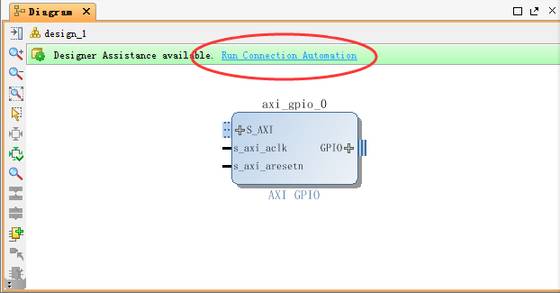
Click on the “Run Connection Automation” inside the red ellipse in the image above, and the dialog box shown below will pop up.
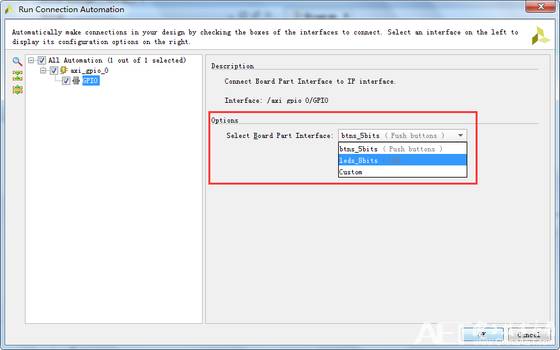
You can choose to connect the IO ports to the 8 LEDs on the development board, or the 5 buttons, or customize it yourself.
Conclusion
I previously wrote a similar themed article about SDK titled “How to Use Vivado SDK to Create Your Own Template Project”. I remember that it didn’t get much attention at the time, so I didn’t complete the second half. This time, it seems to be the same; I won’t discuss the methods, just posting this article for my own amusement ^_^