In this article, you will find a guide on installing Jetpack on your host machine. This section assumes that you have already installed the NVIDIA SDK Manager; for details on the SDK Manager, please refer to the Installing SDK Manager section.The following subsections describe the four steps to install Jetpack 5.0.2 on your host:
STEP 01 Select Hardware Configuration
A. Launch sdkmanager UI by running the following command in the terminal
sdkmanagerAt this point, you should see a login window. After logging in, you should see environment configuration options similar to the image below.
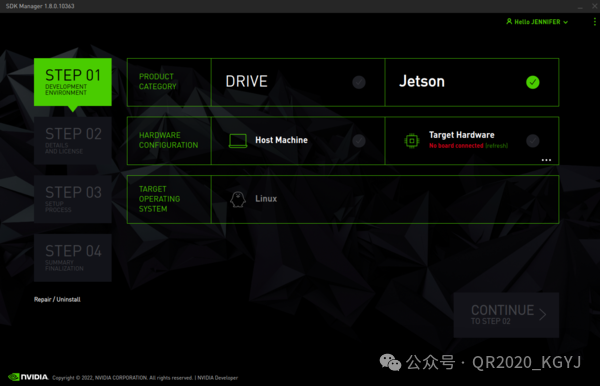
B. Select Product Category
Depending on the version of the SDK Manager installed, there will be one or two options. For SDK Manager version 1.8.0.10363, the options are DRIVE and Jetson. Please ensure to select the Jetson option, as shown in the above image. In older versions of the SDK Manager, the only available option is Jetson, as shown in the image below.
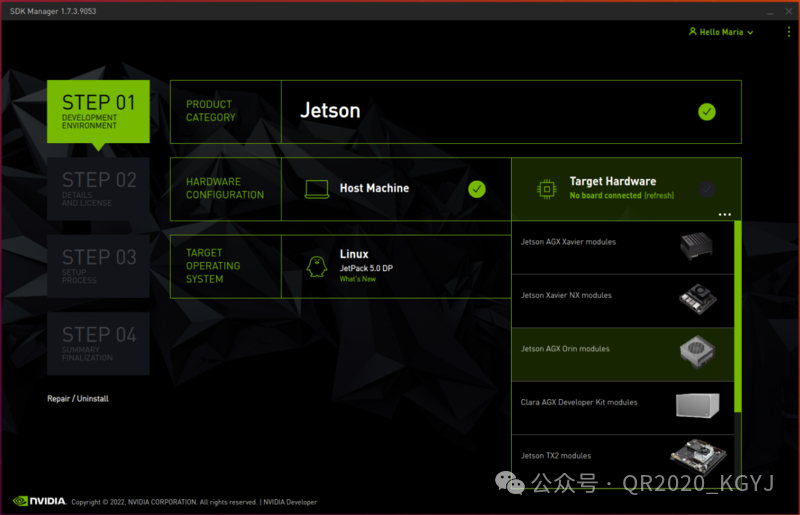
C. Select Jetson AGX Orin Module as Target Hardware
This option should appear in the target hardware dropdown list, as shown in the image above. Alternatively, you can also select the host option to choose to install some developer tools on the host in Step 2. You can select both the host and Jetson AGX Orin options simultaneously.
D. Select JetPack 5.0.2 from the Target Operating System Dropdown List
Similar to the image below.
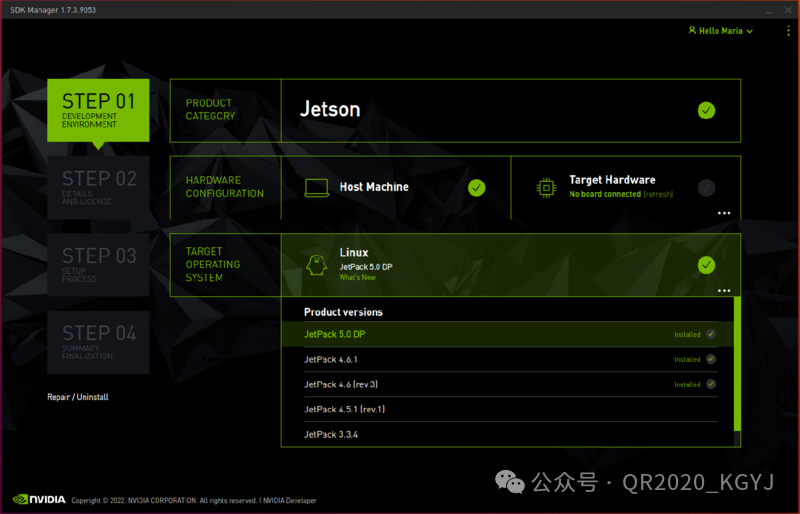
E. You can also choose to install the DeepStream SDK by checking the “Additional SDK” option. After selecting the target hardware and operating system, this option will appear, as shown in the image below.
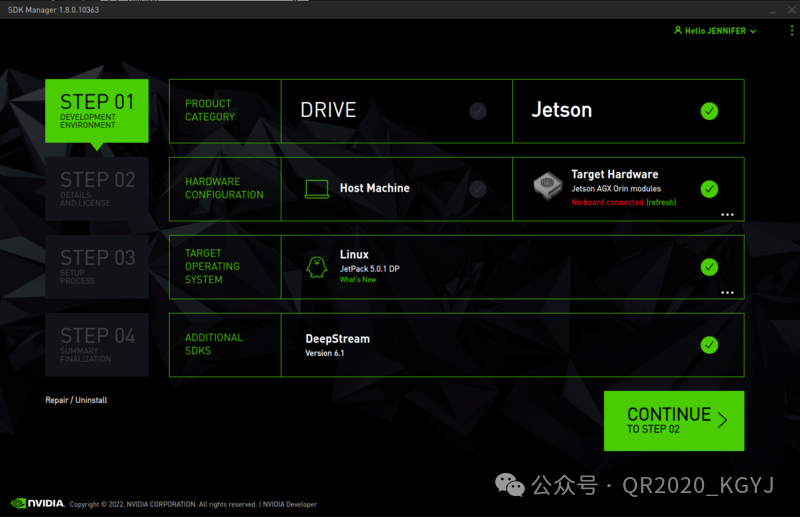
F. Once ready, click the continue to STEP 02 button
STEP 02 Package Selection and Licensing
G. Software Component Installation
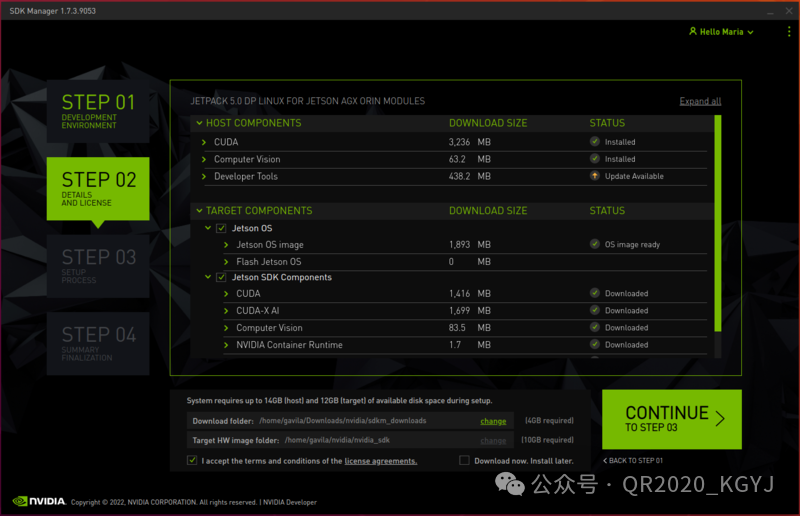
At this stage, the SDK Manager will display the software components that can be installed on your computer (host) and Orin (target or device), as shown in the image below. For the host, you can choose to install CUDA-related tools, VPI libraries, and Nsight. For the target components, make sure to select the Jetson OS option. You can also select Jetson SDK components.
H. Package Selection
You can choose to download the target hardware image folder. By default, the SDK Manager will download all necessary files to /home/目录,并在目录USER/nvidia/nvidia_sdk to set JetPack SDK files, as shown at the bottom of the image above.
I. Install JetPack SDK Components
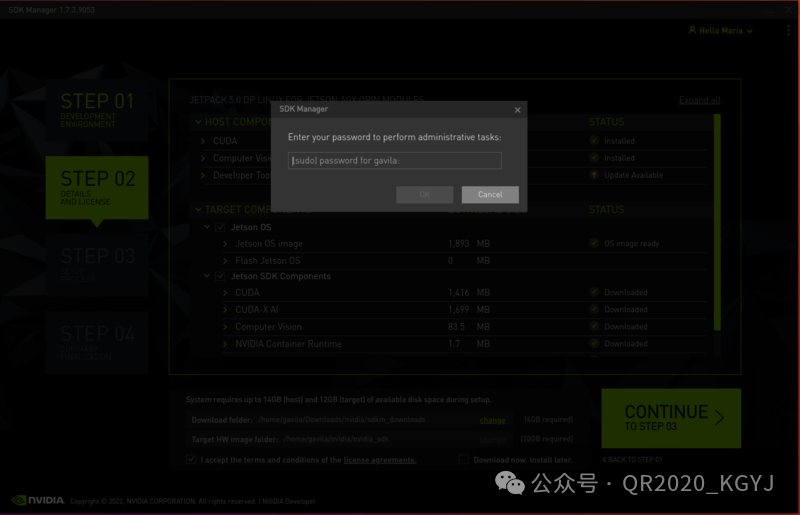
Once ready, check the box with the following option: I accept the terms and conditions of the license agreement, similar to the image above, then press the button to continue to STEP 03.J. At this point, the SDK Manager will prompt you to enter your sudo password to install the JetPack SDK components, as shown in the image below.
STEP 03 Setup Process
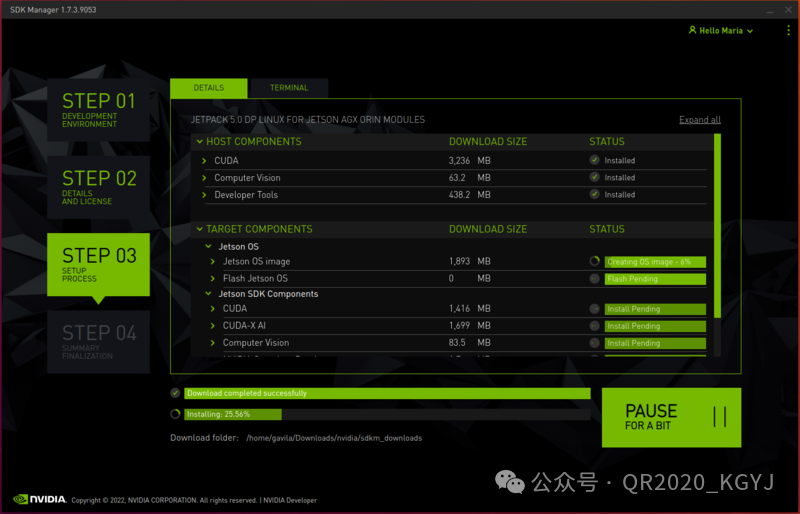
K. The SDK Manager will now begin downloading and setting up the required components. You should see a window similar to the image below.
L. Refresh AGX Orin
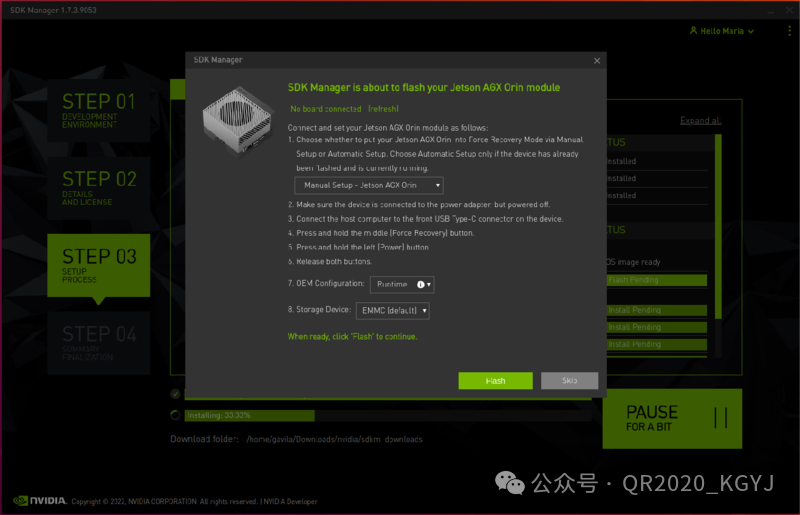
After the SDK Manager completes the host environment setup, a prompt will open allowing the user to refresh the AGX Orin, similar to the image below. At this point, you can choose to refresh Orin using the SDK Manager UI or temporarily skip the refresh. If you want to test the JetPack OS without any modifications, you can proceed to refresh the board immediately. For more details, refer to the section on refreshing the board using the GUI installer. If you wish to customize the kernel or device tree, you may want to temporarily skip the refresh and then look at the section on compiling source code and refreshing the board from the command line.
STEP 04 Completion
M. Verification
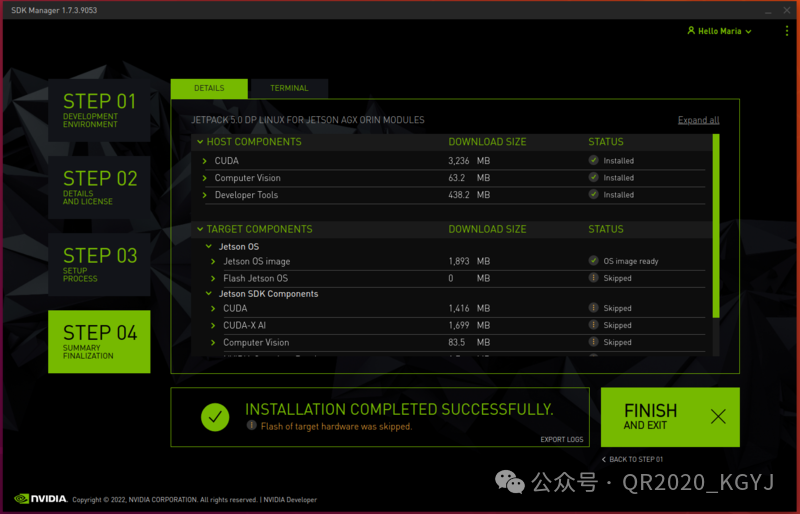
Whether you choose to refresh Orin or skip the refresh, you should see a summary of the software components installed on the host and target along with a success message, as shown below. You can now close the SDK Manager.
Additional Resources
JetPack SDK:https://developer.nvidia.com/embedded/jetpackJetPack 6.1 Release Notes:https://docs.nvidia.com/jetson/jetpack/release-notes/index.htmlHow to Install and Set Up JetPack SDK:https://docs.nvidia.com/jetson/jetpack/install-setup/index.html