In the public account list, long press my public account, pin the public account so you can see me anytime.
Reader “*Wuzhi*” commented:
After finishing this (MDK-ARM) series of tutorials, I still haven’t learned how to create multiple targets under one project?
My answer:
1. First, you need to understand the difference between 【multiple Projects under one Workspace】 and 【multiple Targets under one Project】?
2. The steps to create multiple targets are generally as follows:
a. Create (add) Target;
b. Select the target and modify the group/file configuration in the project window;
c. Modify the Options for Target configuration;
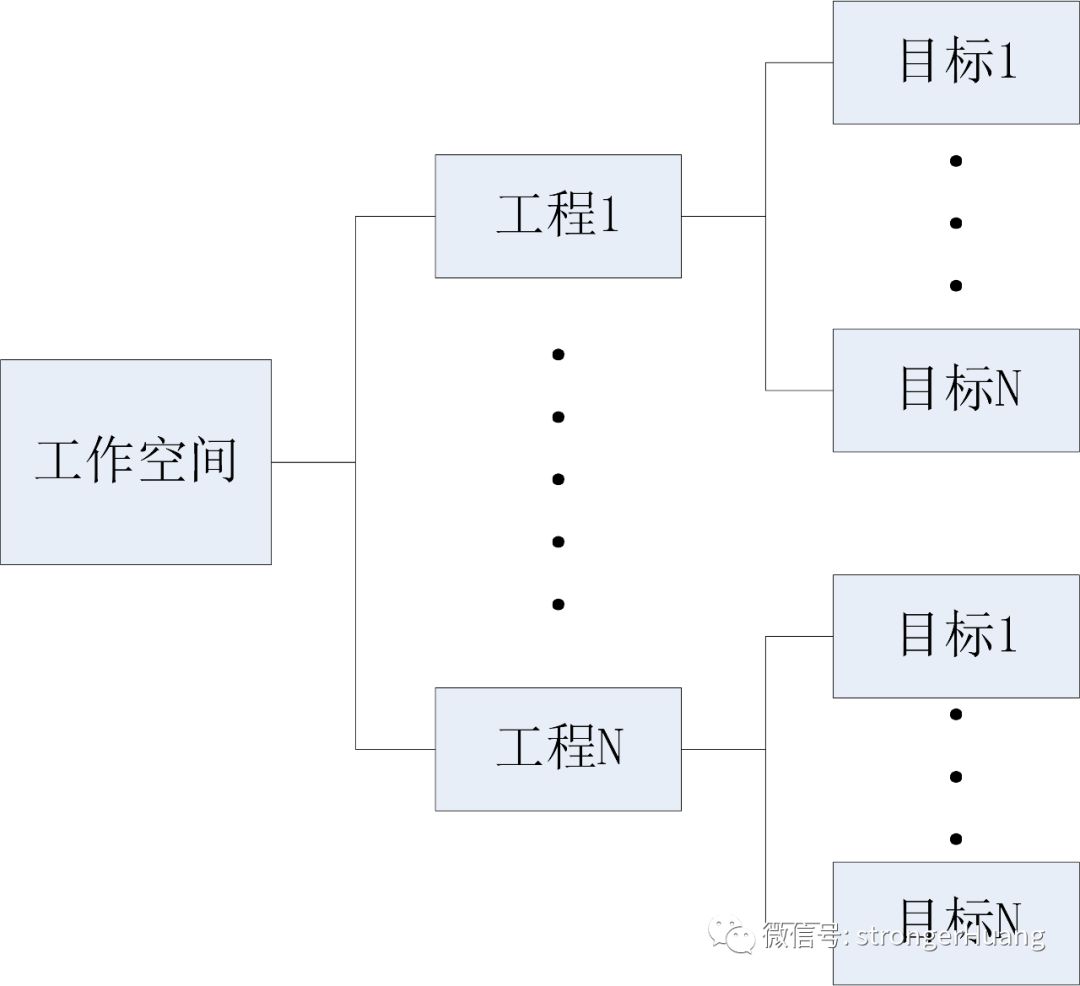
First, let’s look at the relationship between Workspace, Project, and Target, as shown in the figure below:
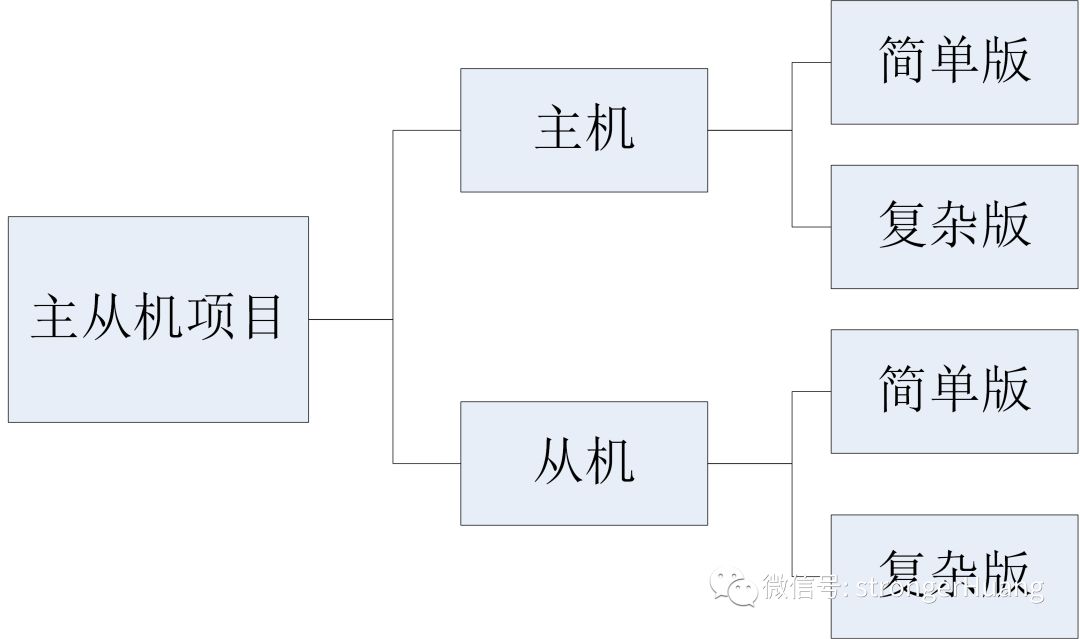
For example: A project consists of a host and a slave, but to distinguish between high-end and low-end products, the project is made into two versions: simple and complex (the simple version retains only part of the complex version’s functionality). An illustrative example is shown in the figure below:
Open the official Virtual_COM_Port example, as shown below:
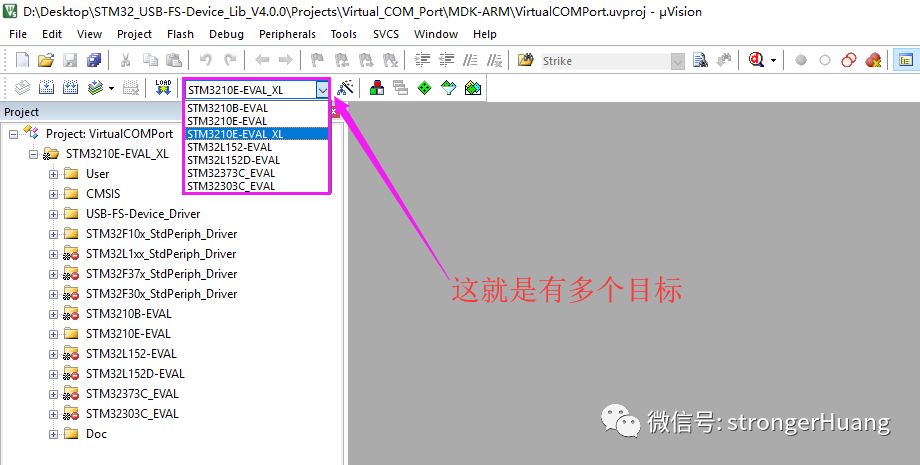
The part boxed in the image above represents multiple targets. To differentiate between targets, we create multiple targets, with the final goal of integrating them into one project.
Whether it’s multiple Projects under one Workspace or multiple Targets under one Project, one important purpose is 【to facilitate unified project management】.
A reader previously asked a similar question: I have hundreds of clients, and each client’s needs are slightly different; how should I manage the projects?
If unified management is needed, then this friend can create multiple targets: for example: Target 1: Zhang San; Target 2: Li Si; Target 3: Wang Wu······ etc.
In summary: Among our multiple projects with slight differences, we can (combine into one project) and create multiple targets.
The specific steps also answer the above reader’s three steps, just with more detailed graphical descriptions.
1. Create (Add) Target
Project -> Manage -> Project Items (or directly click the “red, green, and white three-color square”), and create (add) Target under Project Targets.
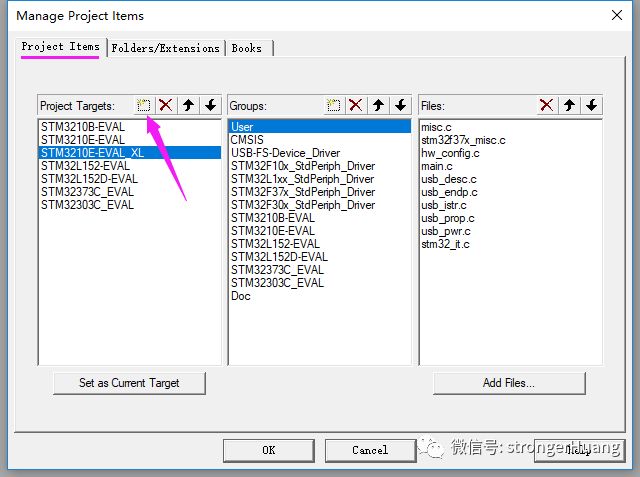
For example: Create a target for Zhang San.
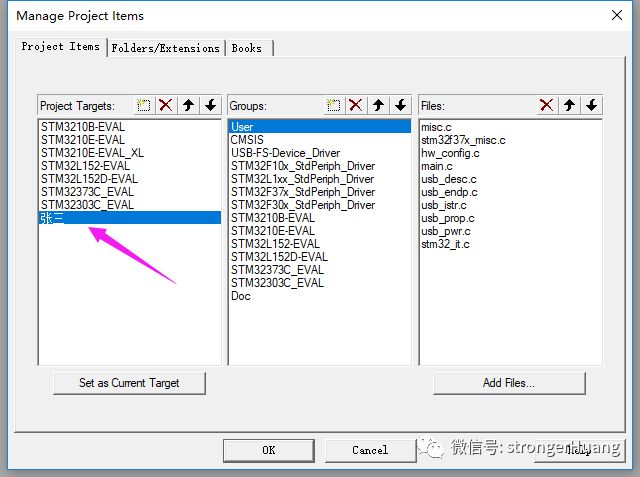
Note:
a. The newly added target is based on the currently selected target and is copied over. Therefore, when you add a target, you need to first select a target that is more similar. (The next point explains this)
b. The groups and files under each target are the same, so we need to differentiate them through the configurations in the following two steps.
2. Select Target and Modify Group/File Configuration in Project Window
Select the target “Zhang San“, as shown in the figure below:
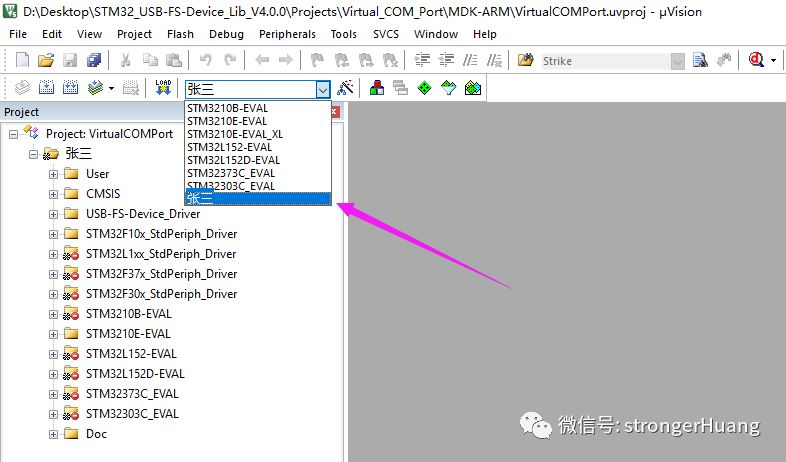
You can see that the target “Zhang San” is the same as the target “STM3210E-EVAL”. Now you know why they are the same, right? It’s because “Zhang San” was created based on the STM3210E-EVAL target.
Modifying the group/file configuration in the project window generally means: whether to include that group or file, the memory allocation for that group/file, and compilation-related configurations (such as priority, C99, etc.).
To modify a group or a single file, select the group or file -> right-click, as shown in the figure (group):
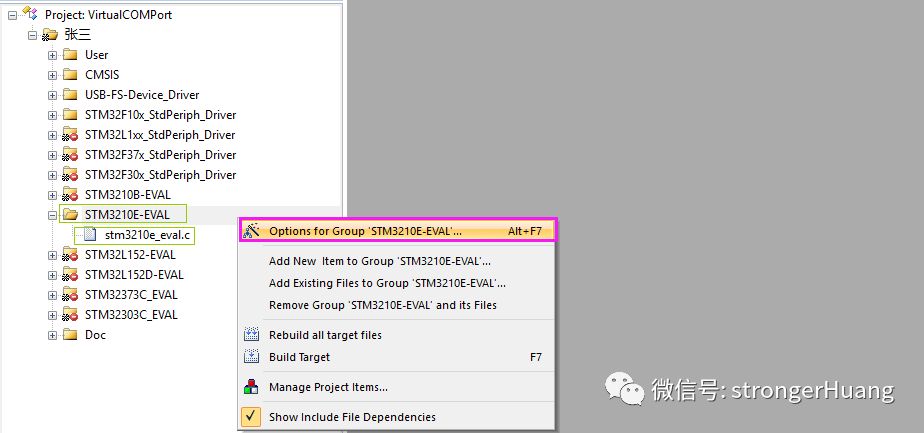
After modification, you can see icons with “*” and “prohibited” in the Project window. For specific icon descriptions, please refer to 【Project Window Icon Descriptions】 article.
3. Modify Options for Target Configuration
Select “Zhang San” then go to Project -> Options for Target (or directly click the Target configuration icon, as shown in the figure):
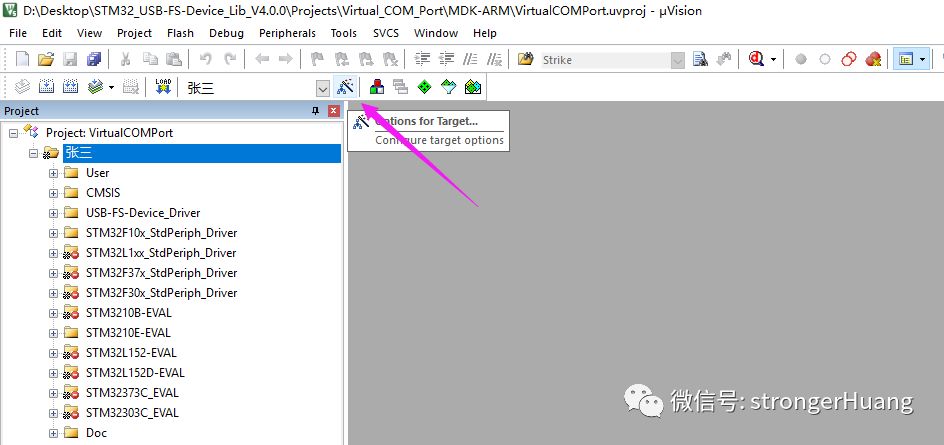
After clicking in, the configurations inside are straightforward (similar to basic operations). If you don’t understand, you can refer to the following two articles.
MDK-ARM Series Tutorial (III) – Project Target Options Configuration (I)
MDK-ARM Series Tutorial (IV) – Project Target Options Configuration (II)
Recommended Reading for the First Two Articles:
1. Difference Between Relative Delay and Absolute Delay in FreeRTOS
2. PWM Frequency Range and Duty Cycle Precision of Timer Output
1. Pinning makes it easy to find me;
2. Liking increases my reputation;
3. The QR code for the public account is below; consider following!

Long press to recognize the QR code to follow

Appreciation is recognition and support for the author!