Currently, many beginners learning STM32 are still using the “STM32xxx_StdPeriph_Lib” standard peripheral library. However, many friends do not understand the various Targets and their configurations in the projects after opening the library-provided projects.
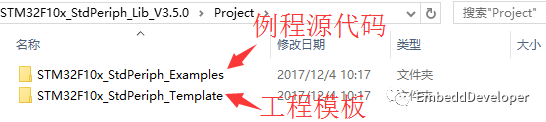
The official ST-provided “standard peripheral library” contains example source code and project templates under the project folder, as shown in the figure below:
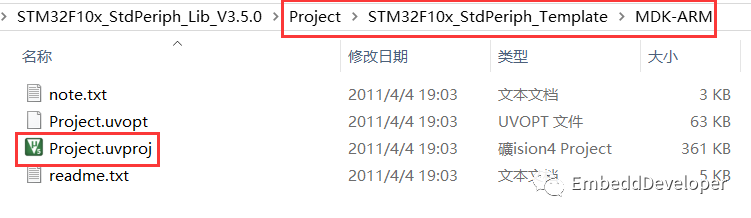
In fact, many friends know that there are pre-built projects in the Template folder, as shown in the figure below:
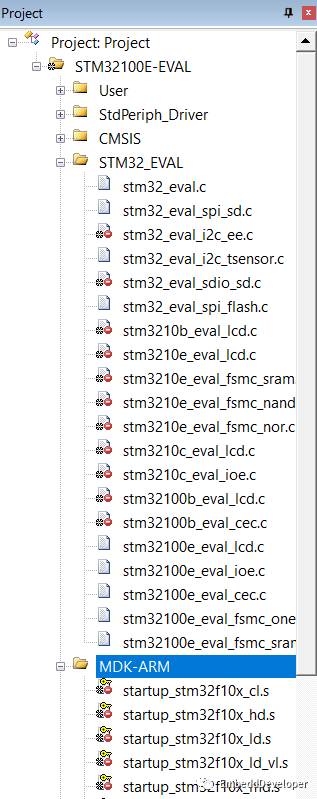
However, many friends directly double-click to open the project and see that the project files are sometimes marked with *, and there are red “messy” indicators, leaving them confused.
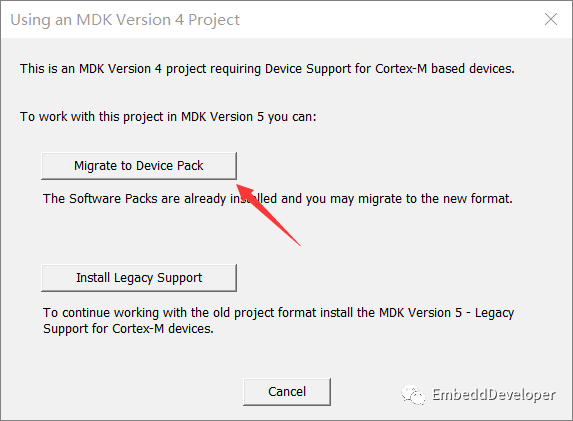
Tip: If you open certain libraries (such as STM32F) with MDK-ARM V5, you may see a message like the one in the figure below. Click “Migrate to…” and then “OK” to continue.
You only need to copy the source code from the Examples folder and replace the source code files in the Template folder, select the corresponding chip, compile, and download.
Generally, there are several source files:
main.c
stm32fxxx_conf.h
stm32fxxx_it.c
stm32fxxx_it.h
system_stm32fxxx.c
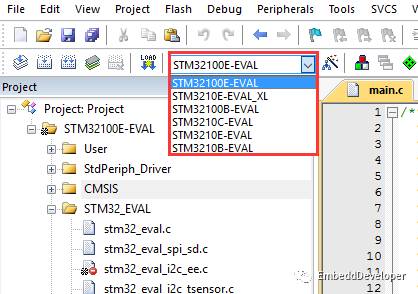
Select the corresponding project Target:
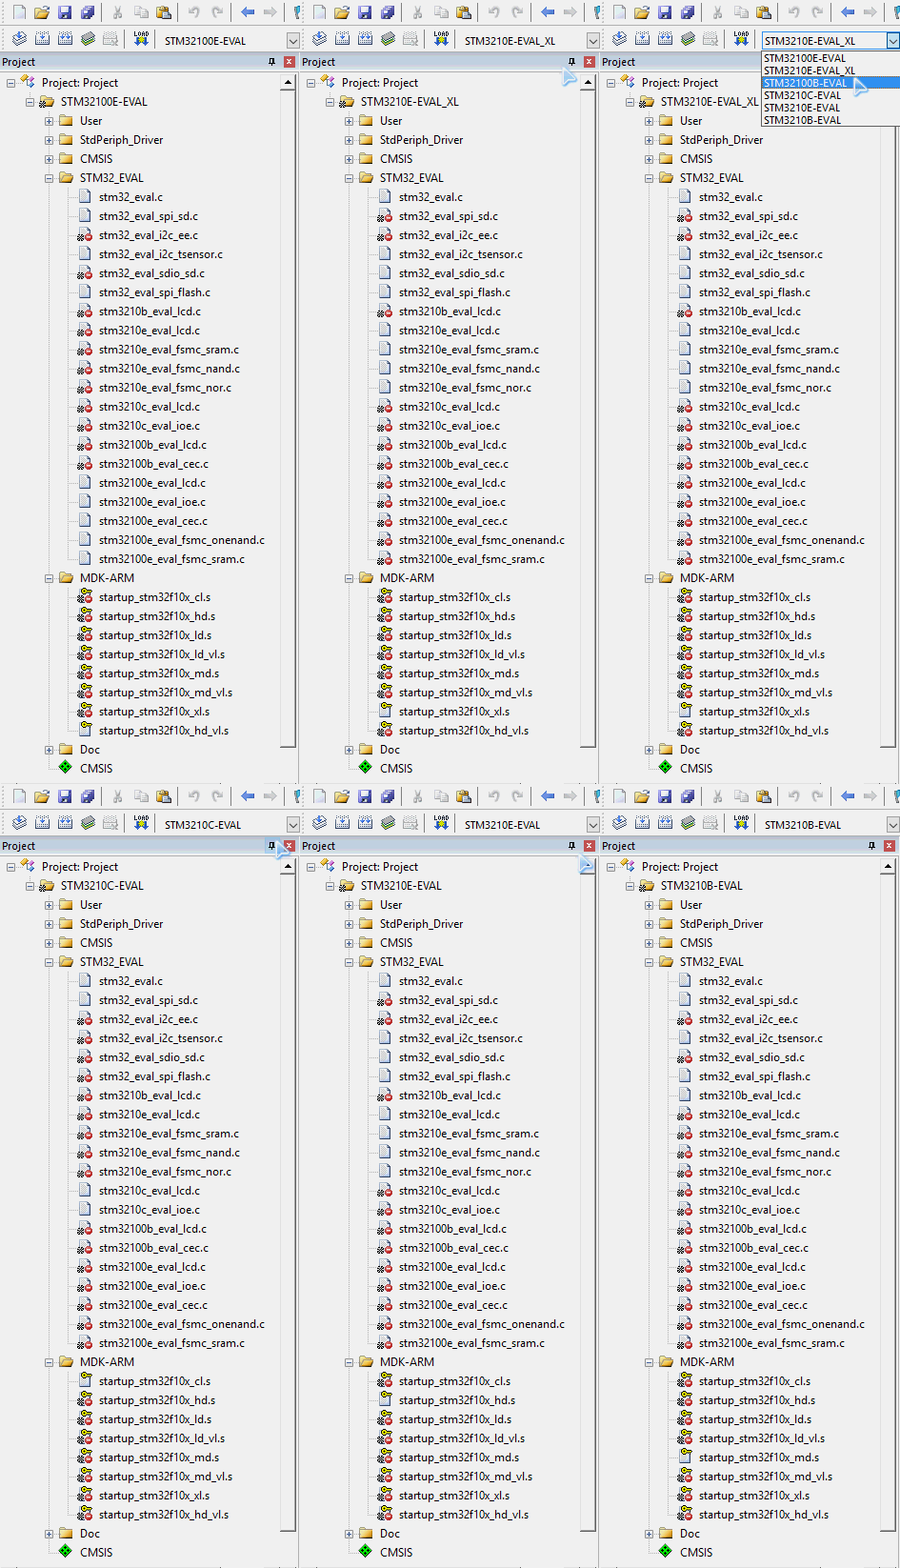
As for those project files marked with “*” or the “key” and various icons, they all have their meanings. You can refer to the Keil help documentation or check my other article Keil Overview (02) – Description of Project Window Icons for the meanings of each icon.
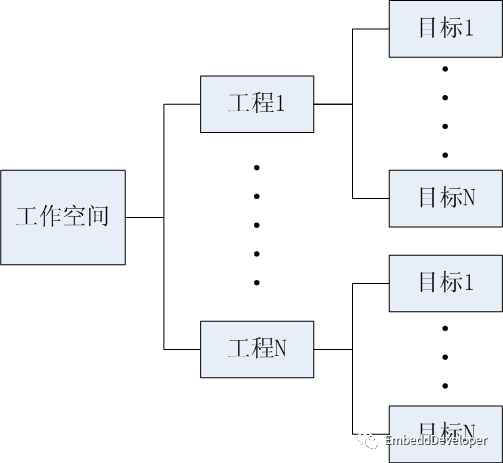
This question has actually been mentioned in my Keil series tutorials, but many people still do not understand it. In my Keil (MDK-ARM) Series Tutorial (3) – Project Target Option Configuration (I), I discussed the relationships between workspace, project, and target, as shown in the figure below:
Project -> Manage -> Project Items: will appear as shown below:
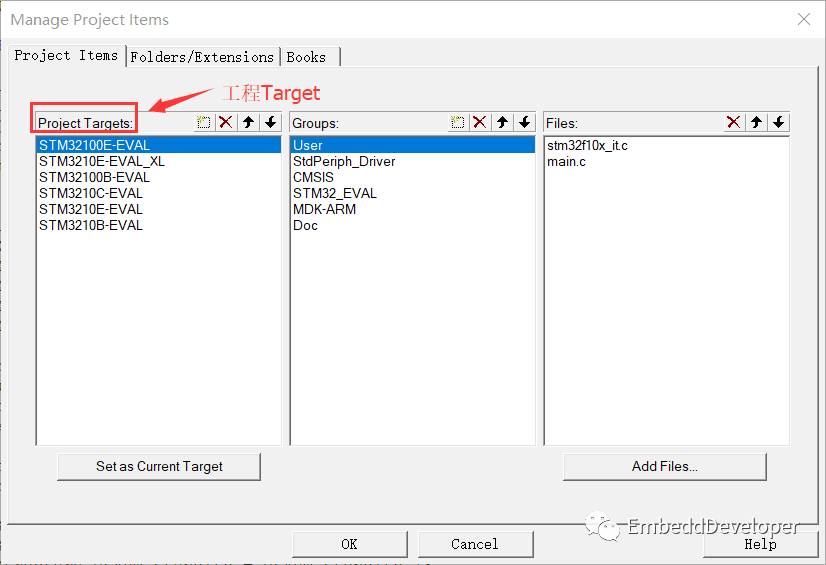
For example, STM32100E-EVAL, STM3210E-EVAL_XL, STM32100B-EVAL, etc., are individual targets.
Project -> Options for Target ··· as shown in the figure below:
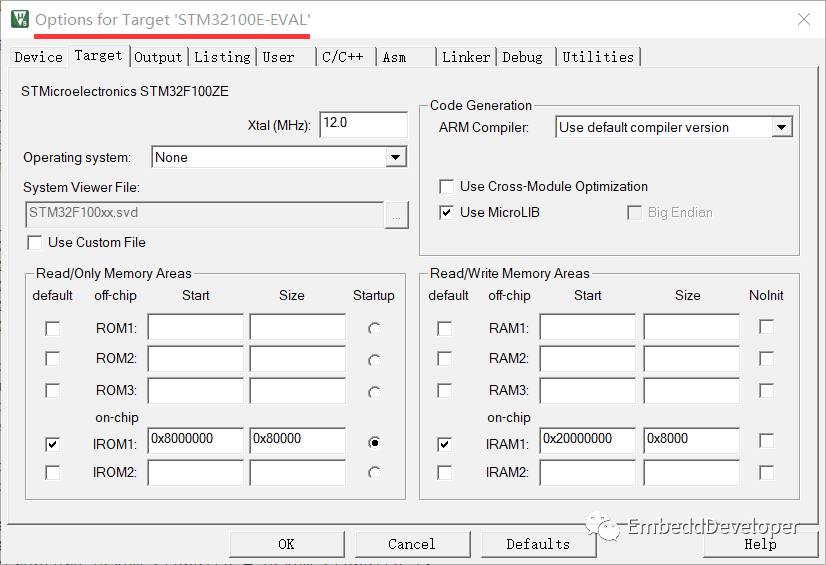
The above figure shows the configuration options for the target “STM32100E-EVAL“. Generally, the important configurations in our project are concentrated here.
Having said so much, returning to the main topic, when we select different targets and open the corresponding target options, we will find that some configurations are indeed different.
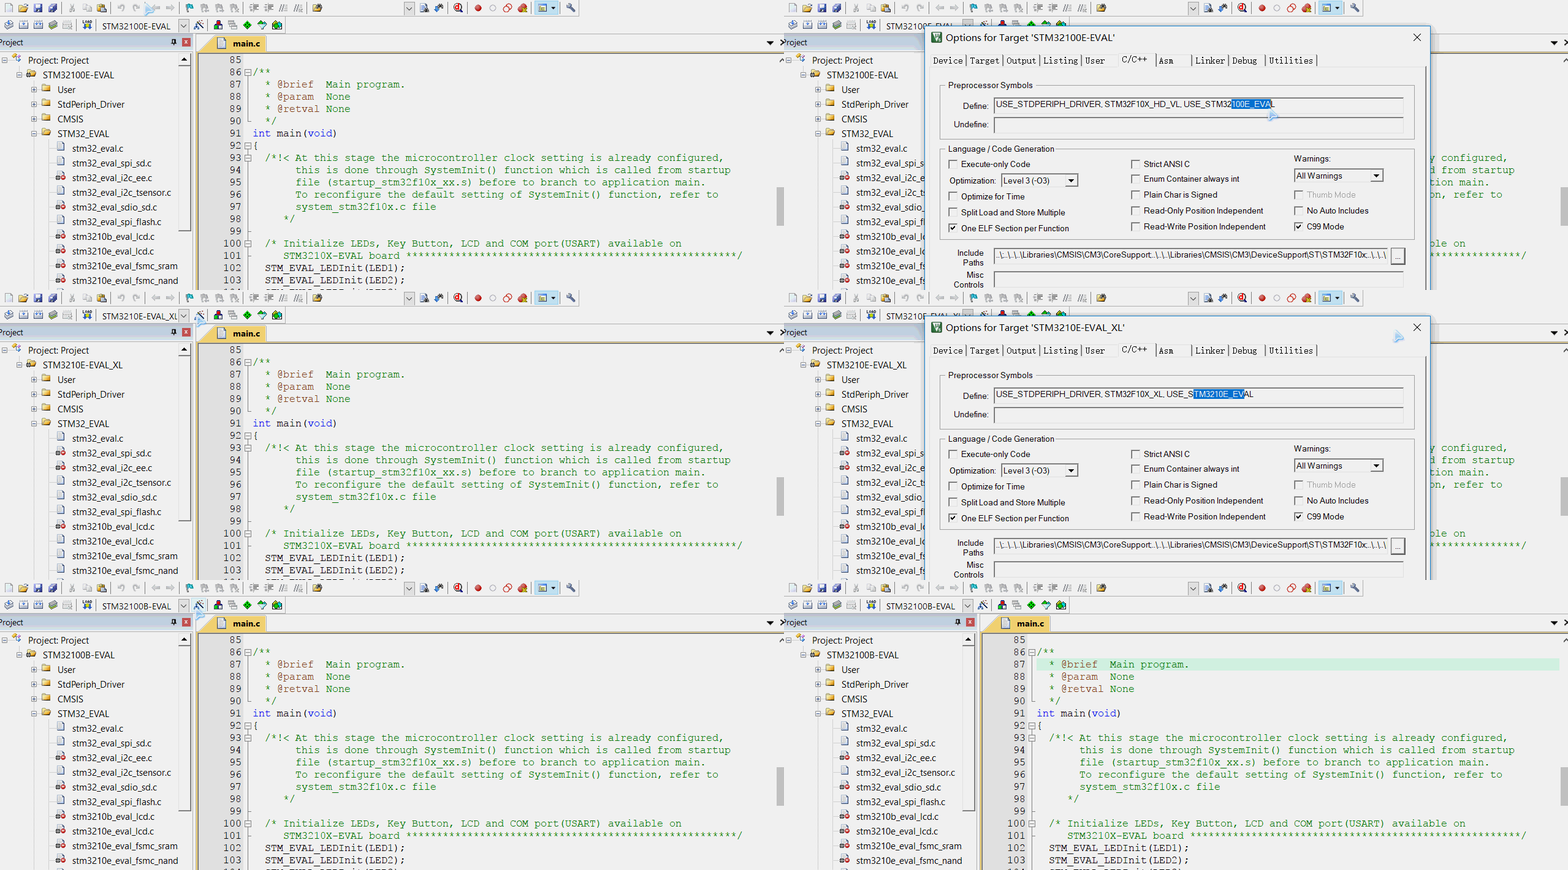
In addition to the differences in target option configurations, there are also the icons mentioned earlier, indicating that some files are not compiled in the project target or are not included in the project target. For specifics, see my article Keil Overview (02) – Description of Project Window Icons, where the meanings of each icon are described.
At this point, friends who have carefully read should understand what the target and options are, right?
There is still much content about MDK-ARM, such as how to create multiple project targets, how to create multiple projects (workspaces), etc. I may mention these in the future if there are friends who want to know, feel free to leave a message.
Search for “EmbeddDeveloper” on WeChat or scan the QR code below to follow and see more exciting content.

Long press to recognize the QR code to follow

Original content is not easy, if the content helps you, a like is also a support and encouragement for me!