👨🎓Author Introduction
🏅 High-quality creator in the cloud computing field 🏅 Expert blogger in Huawei Cloud Developer Community 🏅 Expert blogger in Alibaba Cloud Developer Community💊Communication Community: Operations and Maintenance Communication Community, everyone is welcome to join!🐋 Hope everyone supports us, and we can progress together!😄🎉 If this article helps you, feel free to like 👍🏻, comment 💬, bookmark ⭐️, and follow +💗
Environment Description
| Environment | Version | Purpose |
|---|---|---|
| Operating System | CentOS 7.8 | Base environment for running Jenkins |
| Jenkins Version | 2.419 | Used for building projects and other automation |
| Maven Version | 3.8.6 | Used for building JAR packages |
| JDK Version | 18, 1.8 | 18 (for running Jenkins), 1.8 (for running JAR packages) |
1. Create a Maven Project
1.1 Install Necessary Plugins [Required]
- Maven
- Git
- SSH
- SVN
Generally, after deployment, selecting the default installation plugins will install Git.
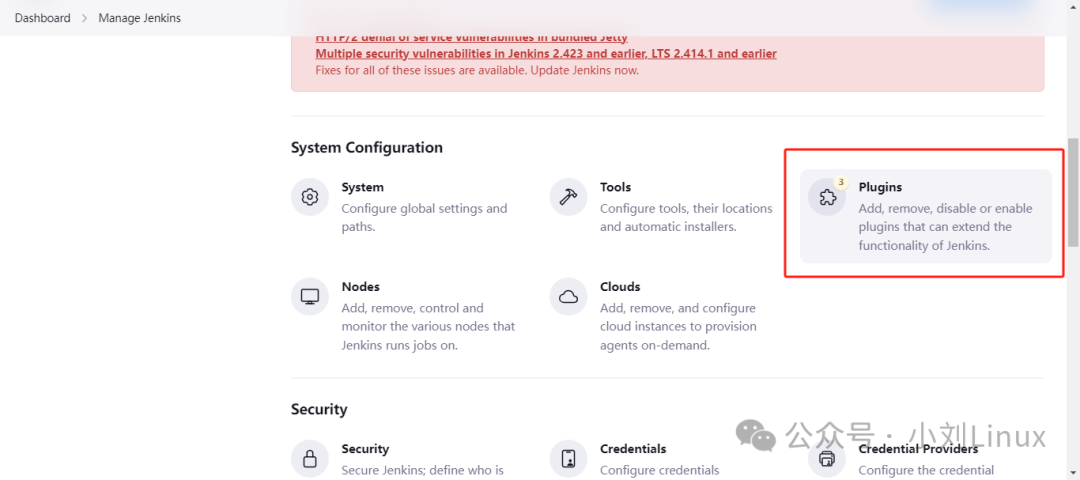
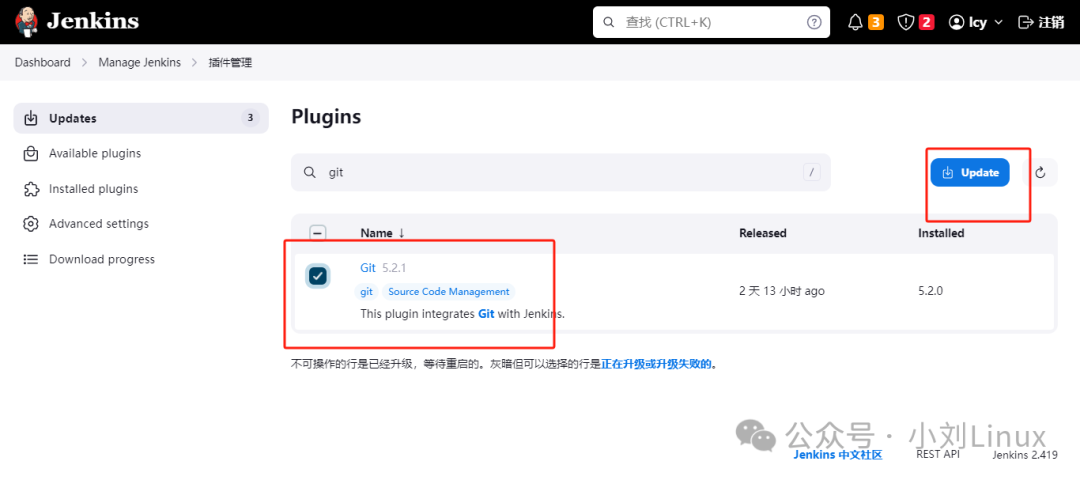
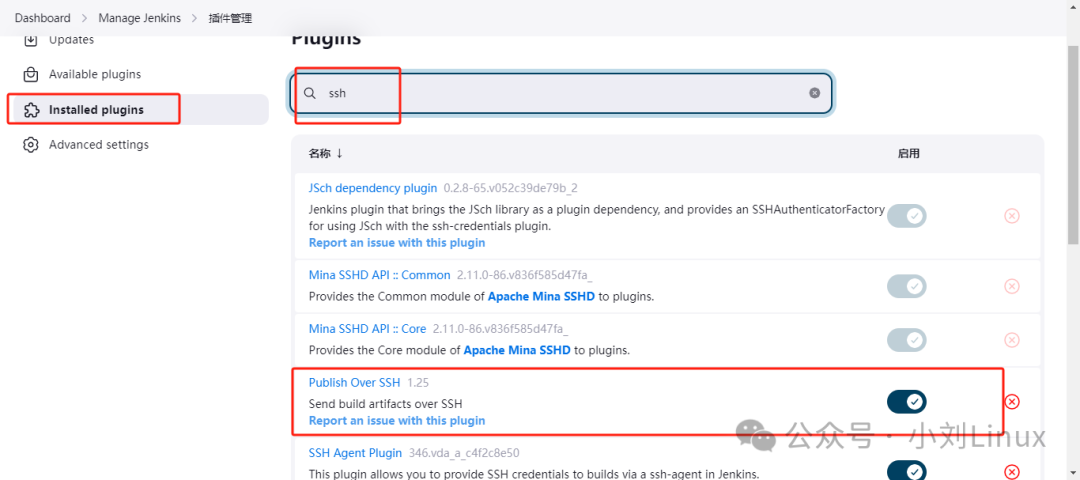
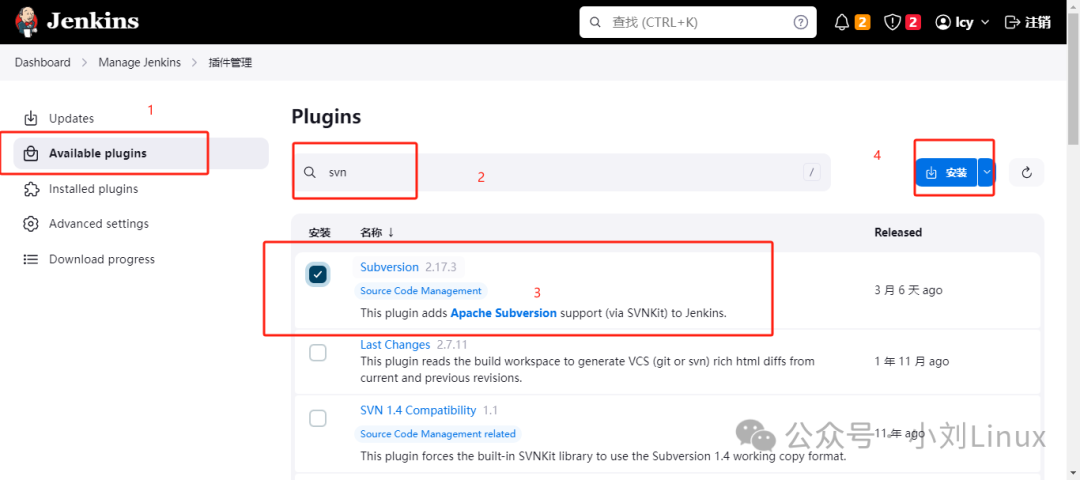
Click <span>Manage Jenkins </span>–> <span>Plugins</span> –> <span>Available Plugins</span>
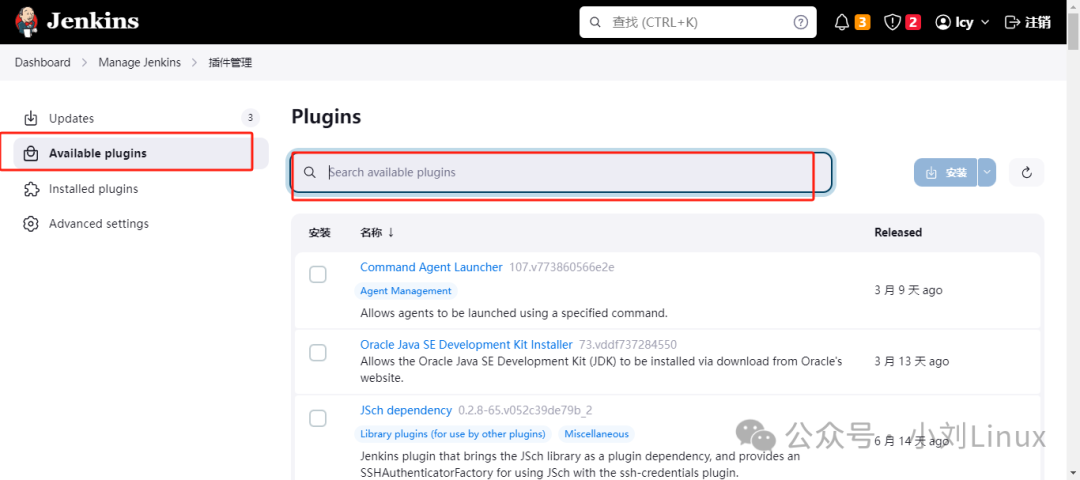
- Search for
<span>git</span>,<span>maven</span>,<span>ssh</span>, and<span>svn</span>to install;
Git and SSH are already available here, just update if necessary;
Maven and SVN are not available here, so let’s install them;
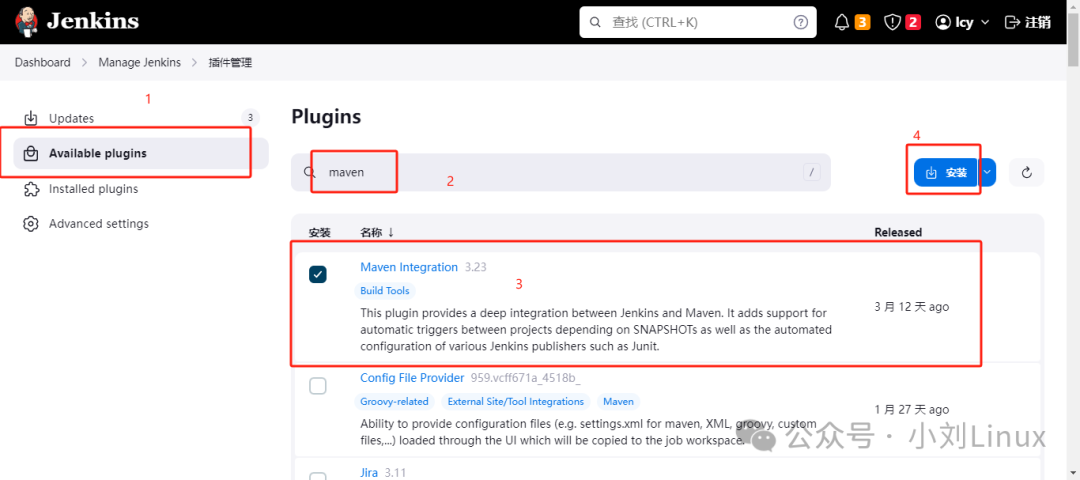
After installation, you can see Maven in the new <span>Item</span> section. As shown below ↓

SVN
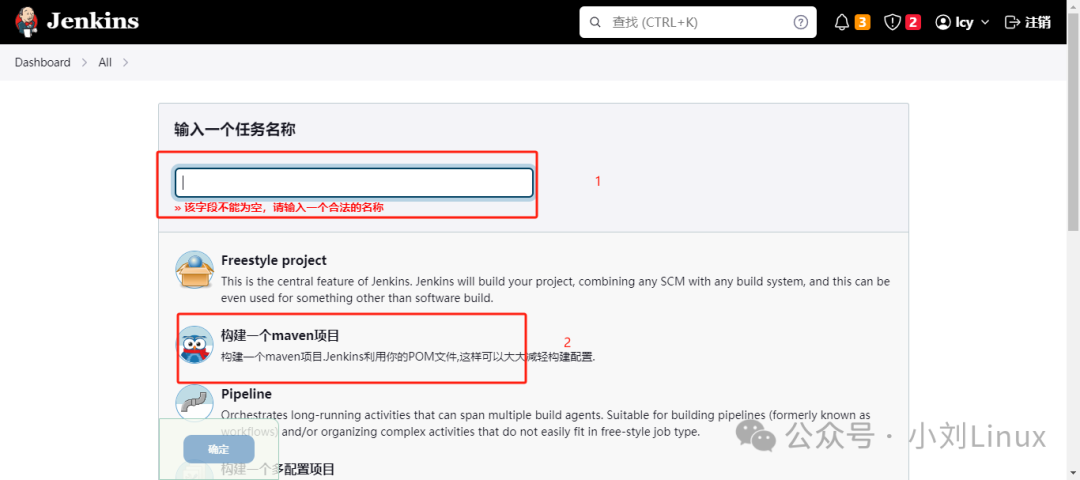
1.2 Create a Maven Job
- Create a new
<span>Item</span>–> Select Maven project, and give it a job name.
After creation, you will arrive at this page
2. Configure the Maven Project
Next, let’s explain the configuration items in the Maven project.
2.1 Detailed Explanation of Configuration Items in the Maven Project
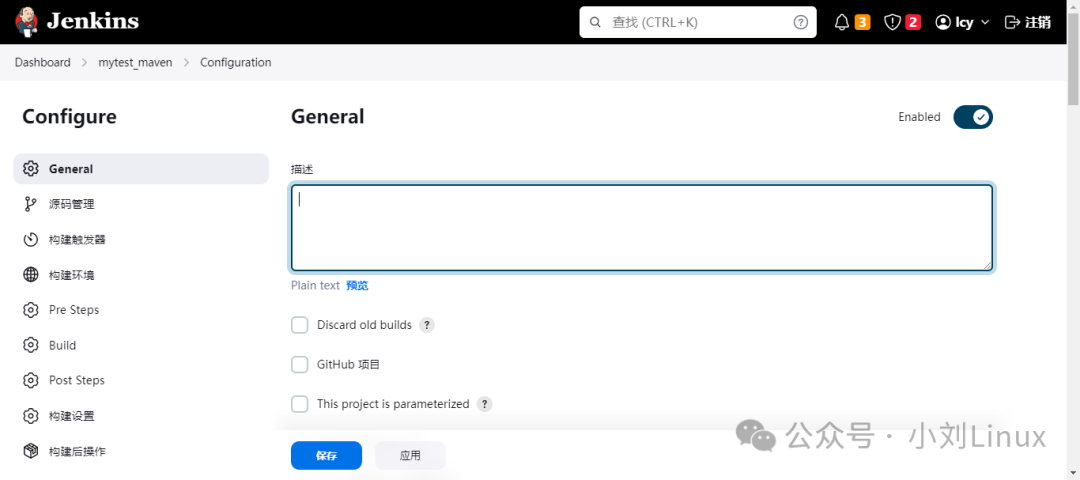
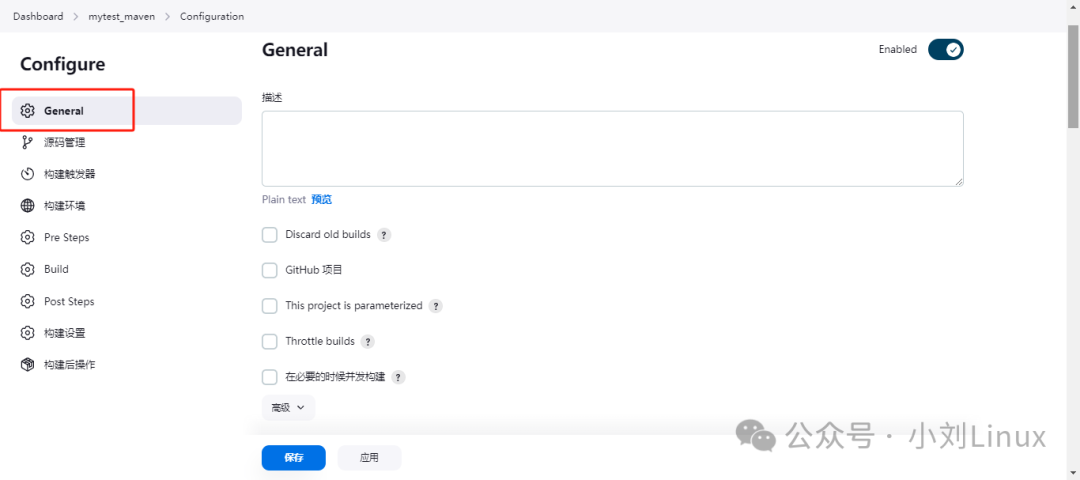
2.1.1 General
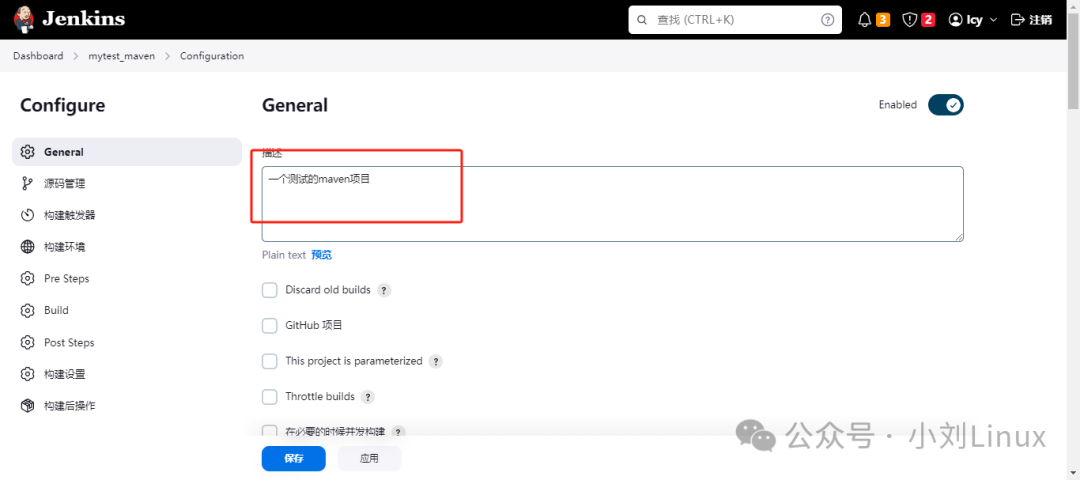
Project description, you can write some descriptions of the project here.
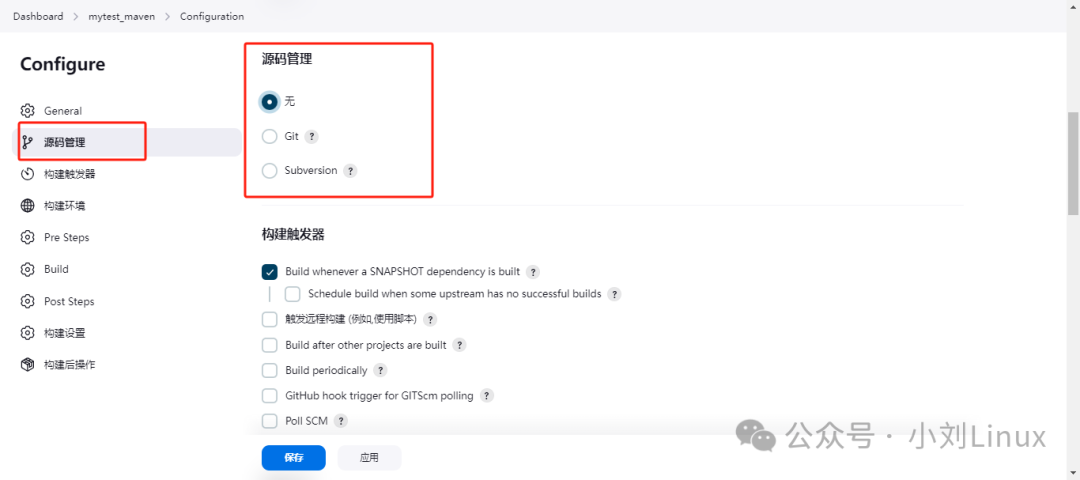
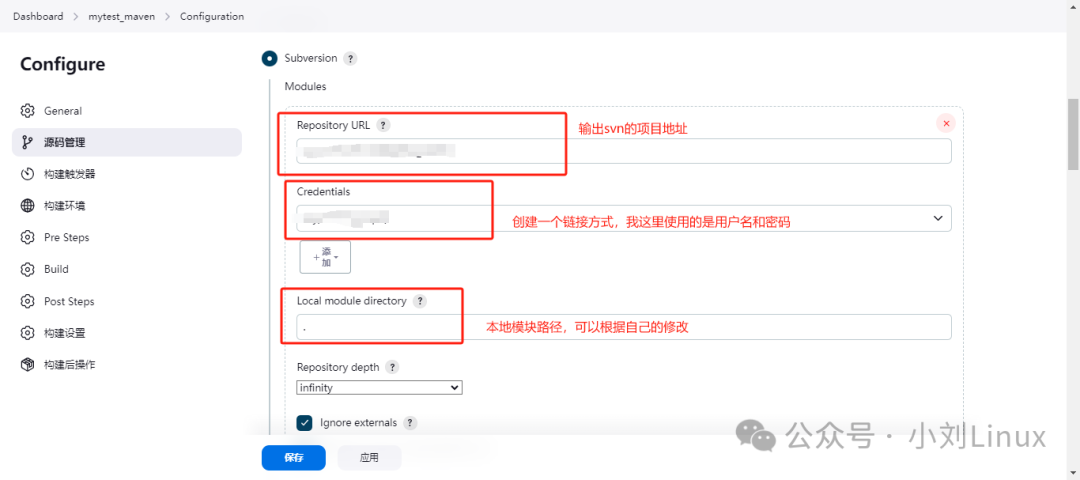
2.1.2 Source Code Management
This is mainly used for pulling source code, there are two methods:
<span>git</span>and<span>svn</span>. We will use the SVN method to create the project.
Not only does the Jenkins project need to install the Git plugin, but Git also needs to be installed on the server.
yum -y install git
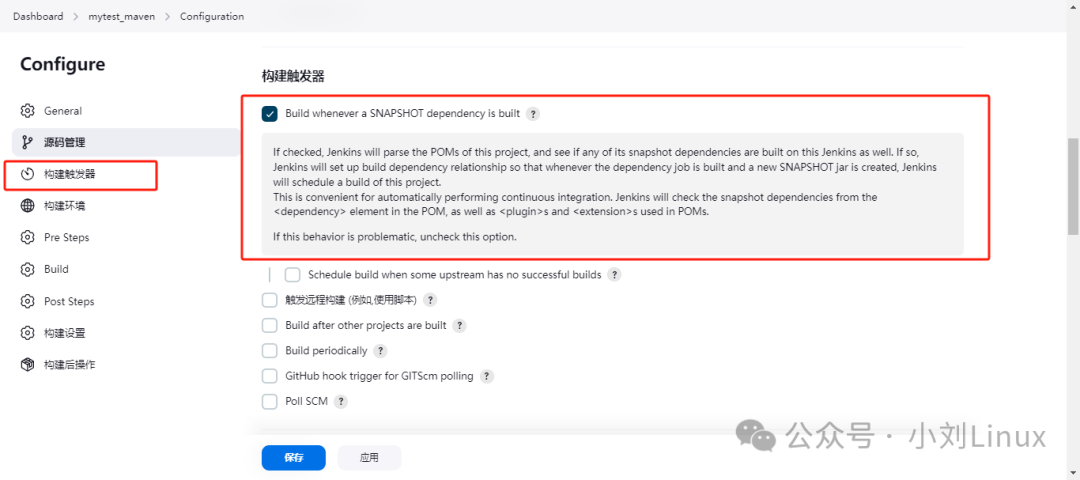
2.1.3 Build Triggers
The default option checked is: Jenkins will look for previously built POM dependencies (if there are previously built identical POM files), and directly use the previous image, thus avoiding re-parsing.
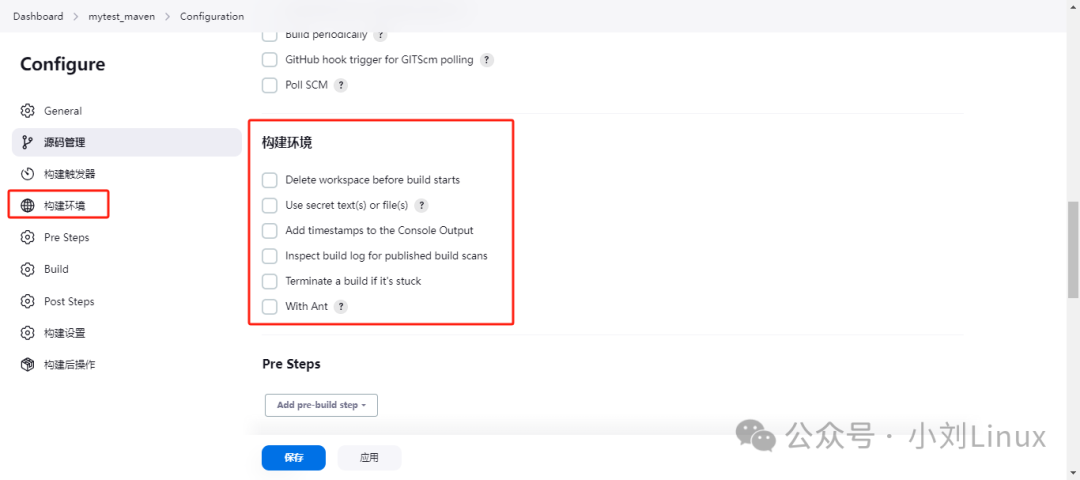
2.1.4 Build Environment
In this section, check the corresponding content to perform some additional processing, but keep the default and do not check anything here.
This is the translated version, which can be used according to actual conditions.
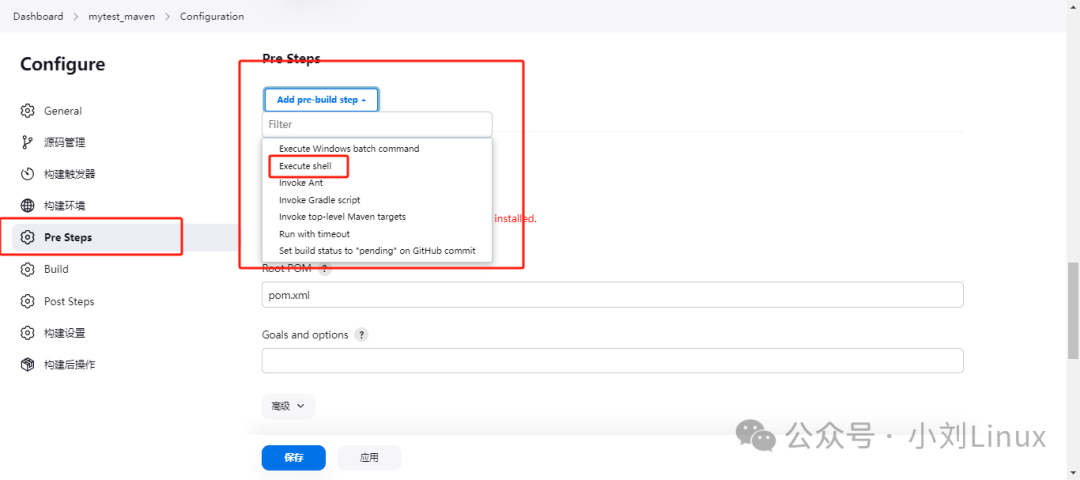
2.1.5 Pre Steps
For pre-steps, generally choose <span>Execute shell</span> and <span>Invoke Gradle script</span>.
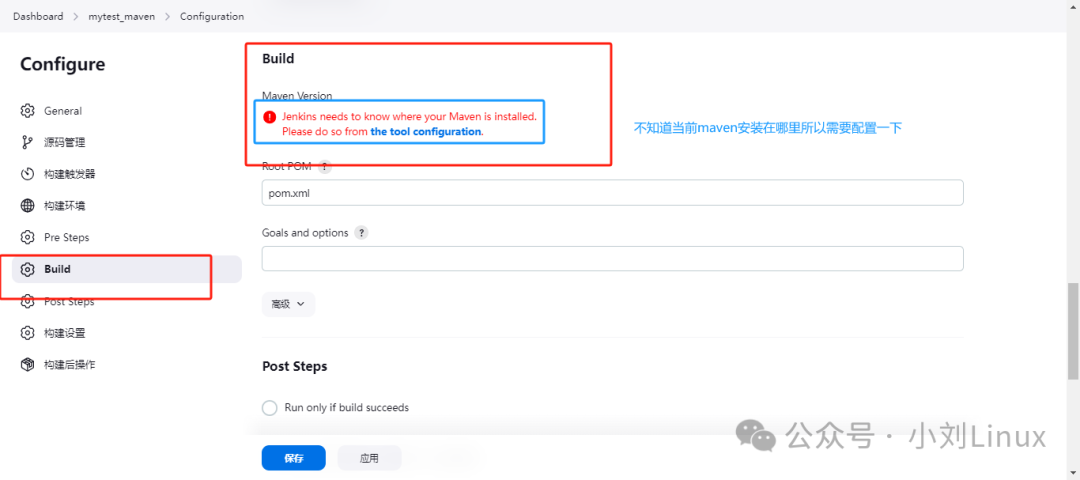
2.1.6 Build
2.1.7 Post Steps
This configuration indicates what needs to be done after the project is built.
Here, we need to transfer the built project package to our test server, and this is where the configuration is done.
2.1.8 Build Settings
You can configure <span>Email Notifications</span>. For example, notifications can be sent for failures or successes.
2.2 Configure the Maven Project
2.2.1 The server needs to be installed in advance:
If using Git for deployment, Git also needs to be installed on the server;
-
JDK 1.8
-
Maven
-
[x] JDK: Choose the required JDK version based on your project. My project requires
<span>JDK 11 or above, using JDK 18</span>; if JDK 1.8 is needed and Jenkins is deployed according to my deployment document, then JDK 1.8 will be available by default. You can use<span>find / -name java</span>to find the installation path of Java and configure the absolute path in the global tool configuration; if not installed, you need to install it; refer to: Installing JDK 1.8 and Configuring Environment Variables in Linux -
[x] Maven: Choose the required Maven version based on your project. My project requires
<span>Maven 3.8</span>; the Maven environment is not available by default, and needs to be installed on the server; refer to: Installing Maven Command in CentOS (Linux), recommended to use Maven 3.8, download link: https://pan.baidu.com/s/1drjw-sQ5JKFukamVSsLqtw?pwd=b1a0
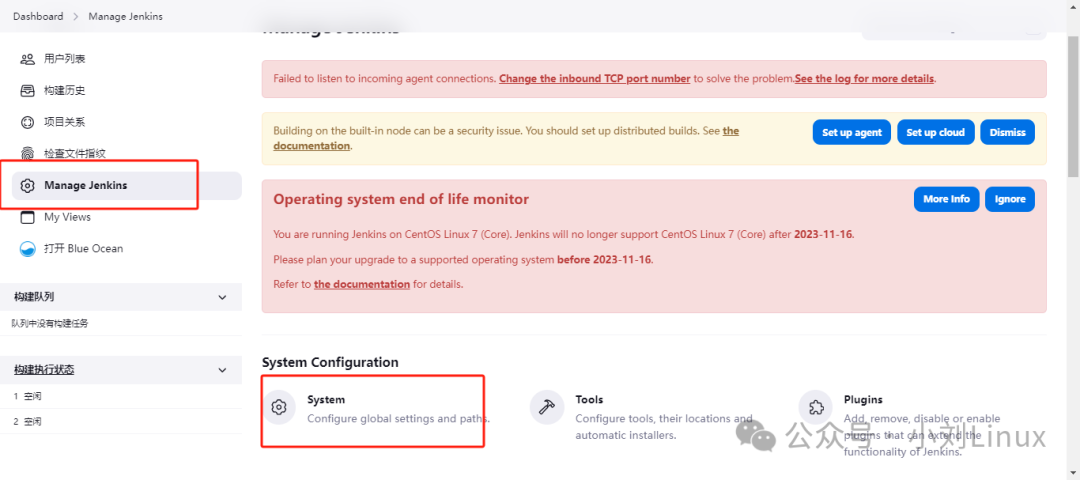
2.2.2 Configure Global System Configuration
Manage Jenkins –> System
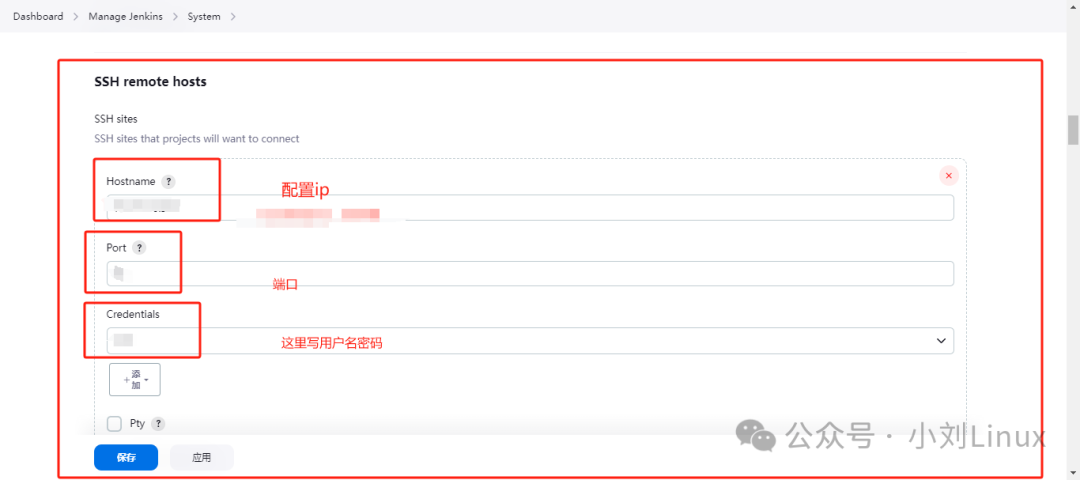
- Configure SSH Environment
Tip: If you can’t find where SSH is, you can use
<span>ctrl+f</span>to search;
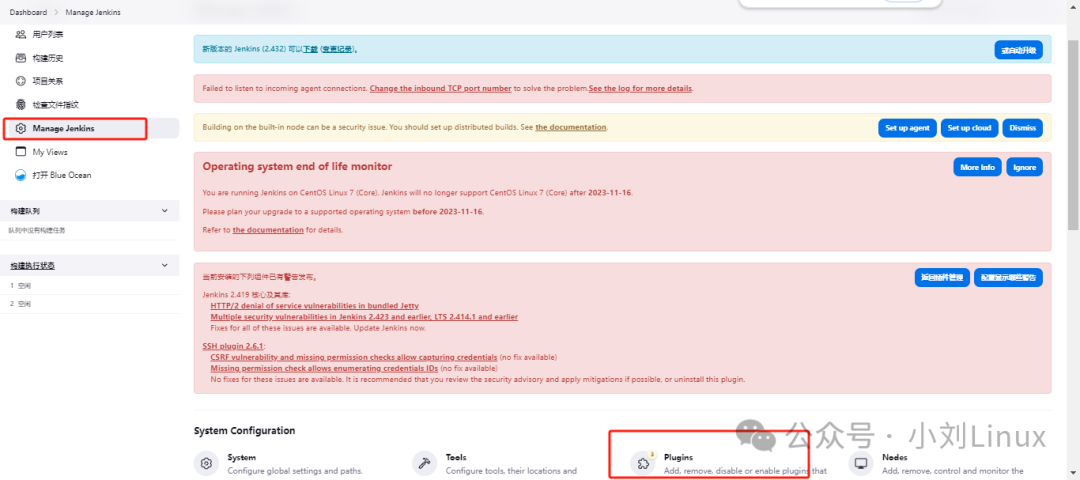
2.2.3 Configure Global Tool Configuration
Manage Jenkins –> Tools
- Maven Configuration
Before starting the project, we installed Maven, so the default configuration for Maven is fine, and this section does not need to be changed. If the server has multiple Mavens, you will need to reconfigure it at this time, configuring the Maven path in the <span>setting.xml</span> file, for example, <span>/usr/local/maven/apache-maven-3.8.6/conf/setting.xml</span>.
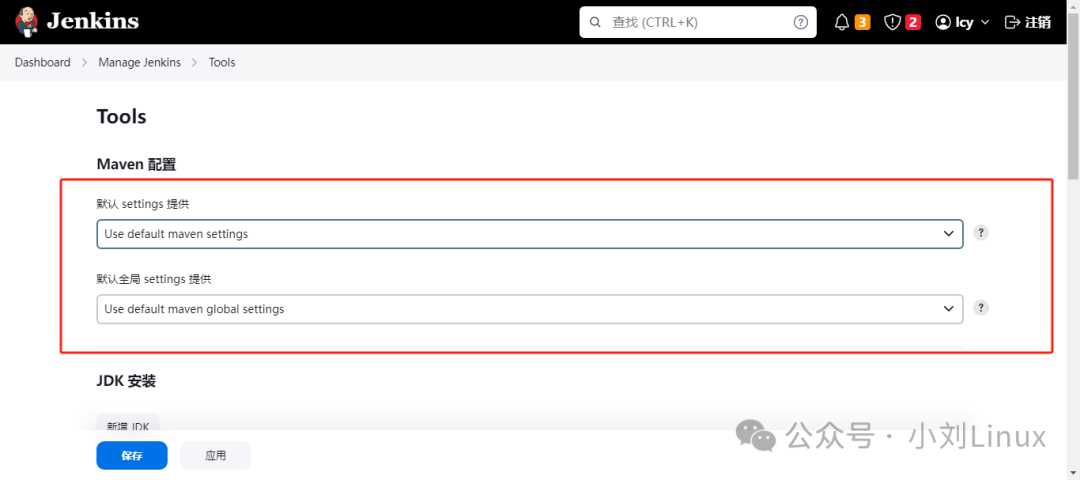
Then we scroll down to see another Maven, which needs to be configured;
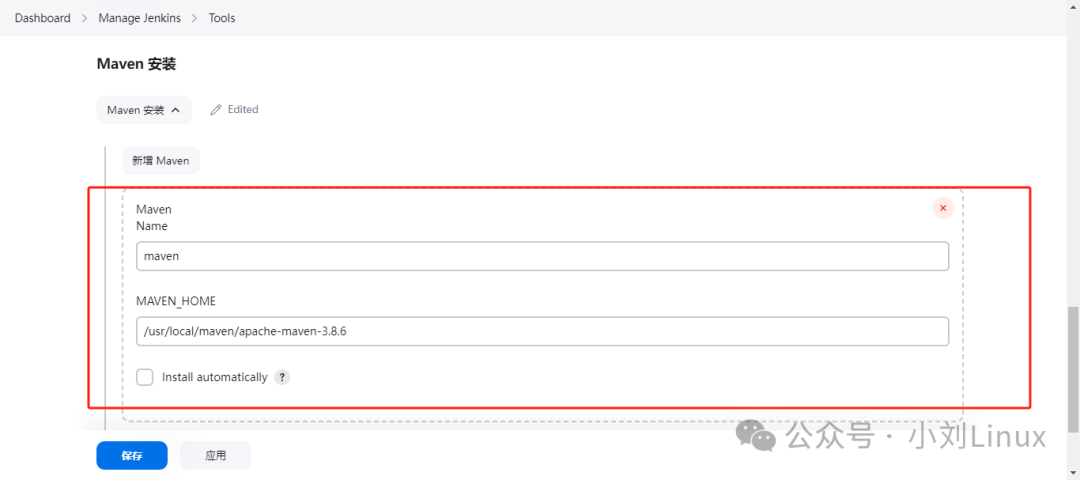
Find Maven Installation –> Click Add Maven –> Configure the Maven path.
- JDK Configuration
Find JDK Installation –> Click Add JDK –> Configure the JDK path.
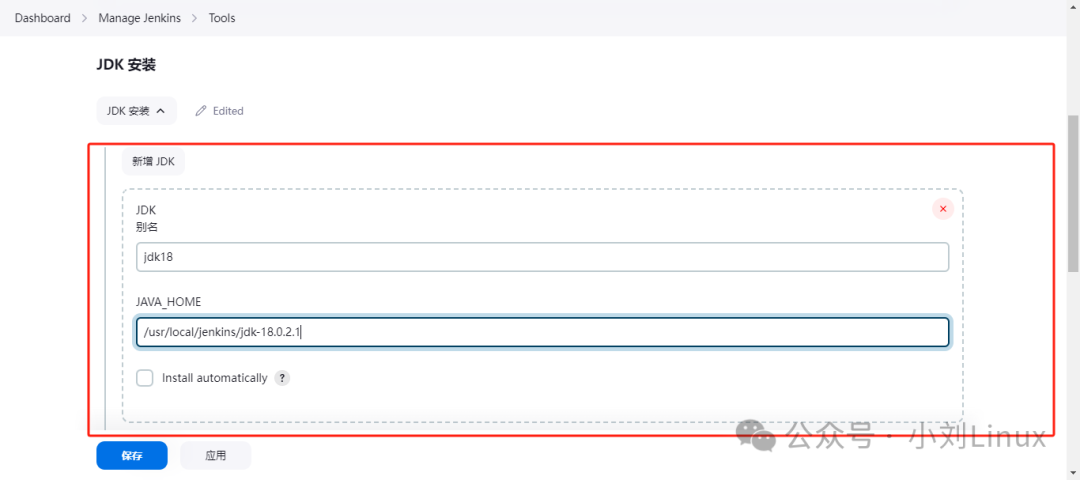
After configuration, save it.
2.2.4 Write a Description (Optional)
Enter the Maven project just created, select <span>Configure</span>, and jump to this page;
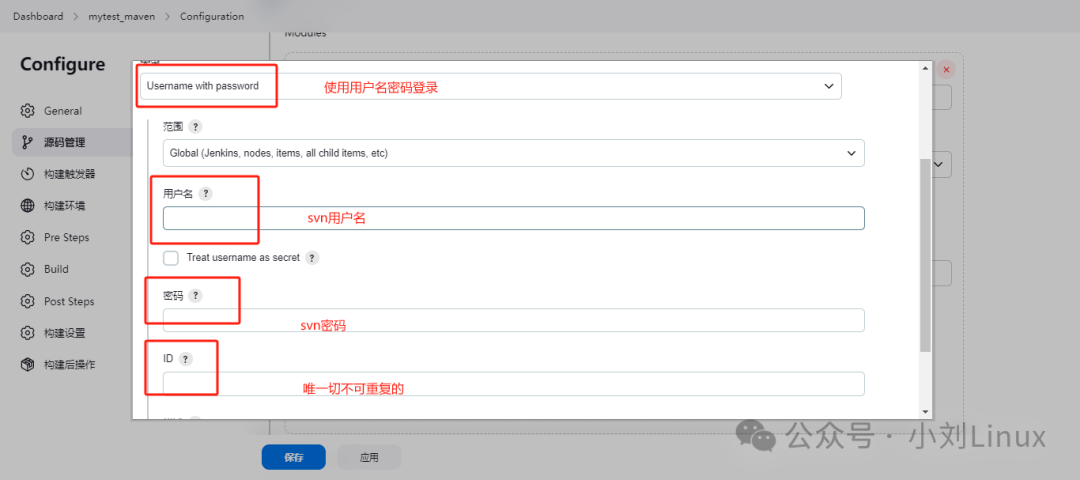
2.2.5 Create Source Code Management (SVN Method)
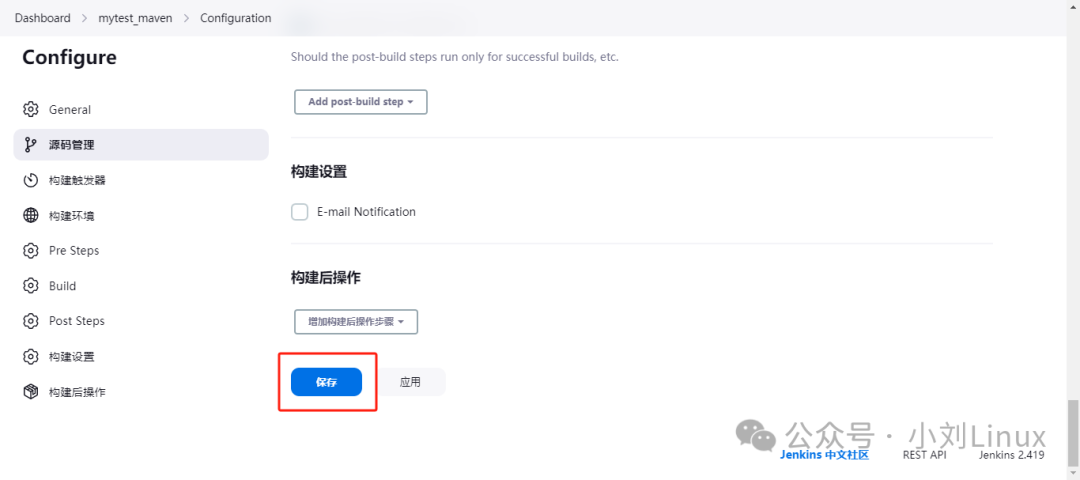
2.2.6 Save Configuration
After configuration, click Save
3. Build the Maven Project
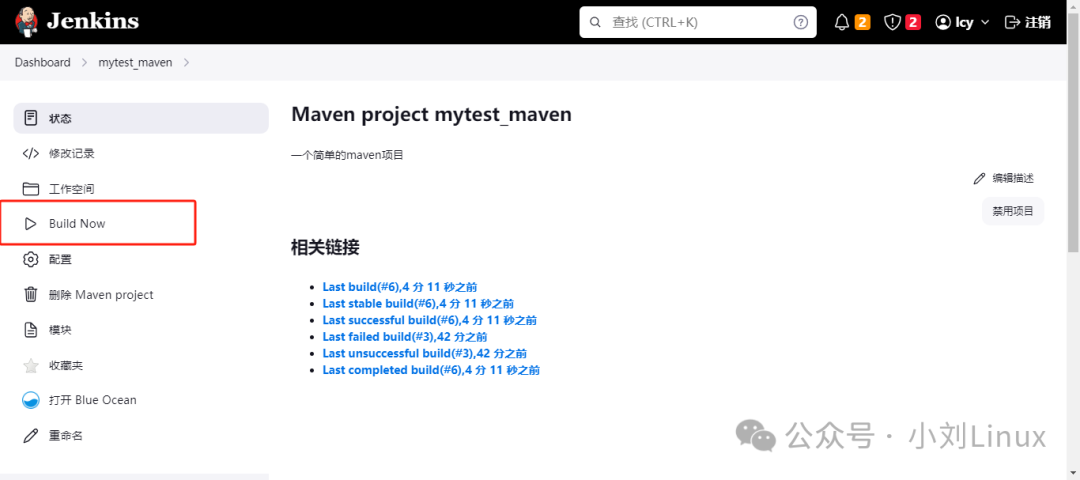
3.1 Build the Project
After saving, you will see a <span>Build Now</span> option on the left, then click Build to start;
During the build, you can view the build process,<span>F5</span> to refresh the page
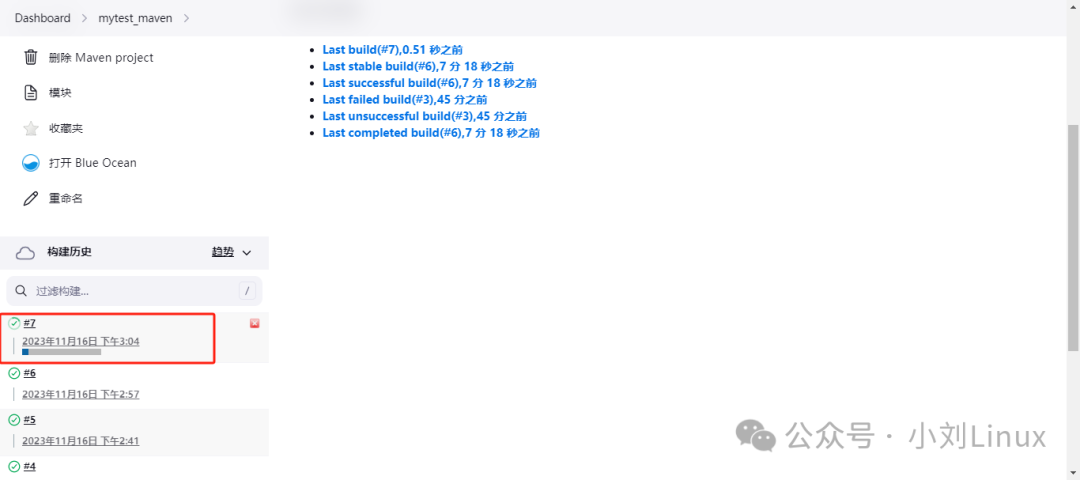
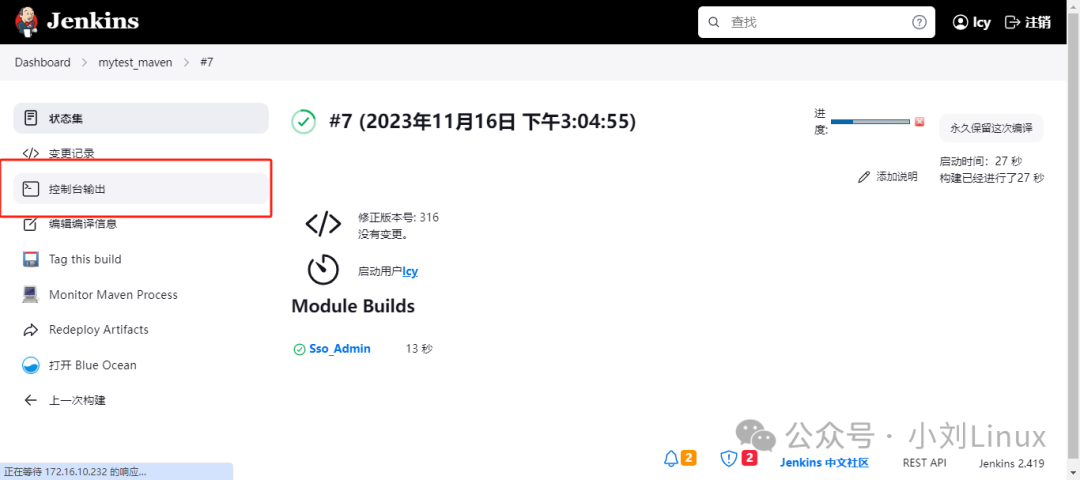
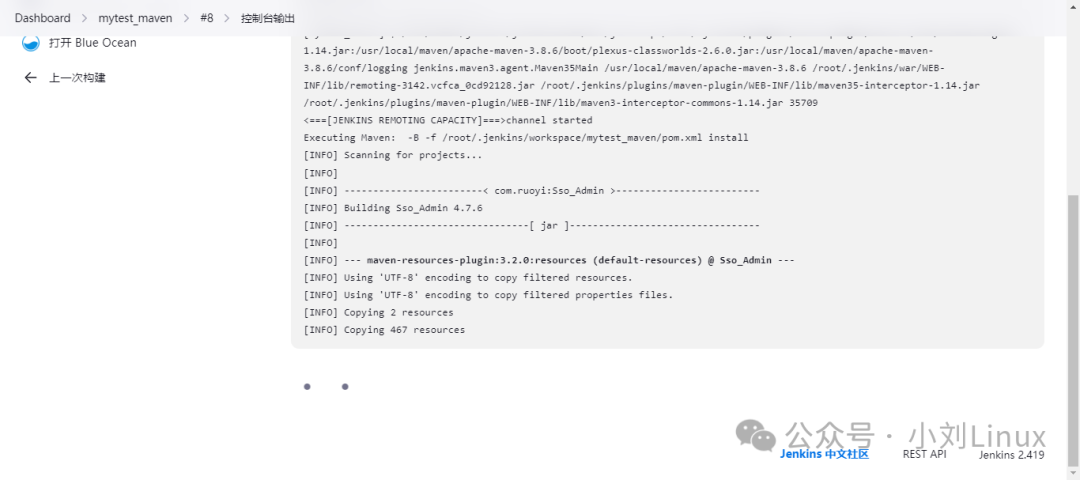
Scroll down, click on it, and then click Console Output to see the build process.
3.2 Build Completion
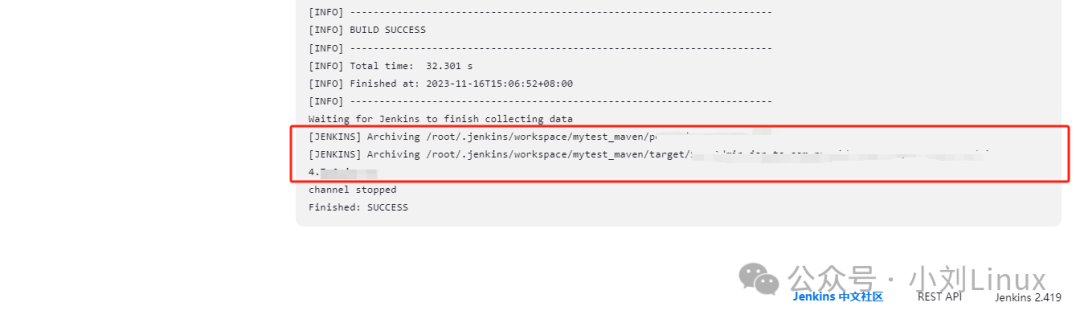
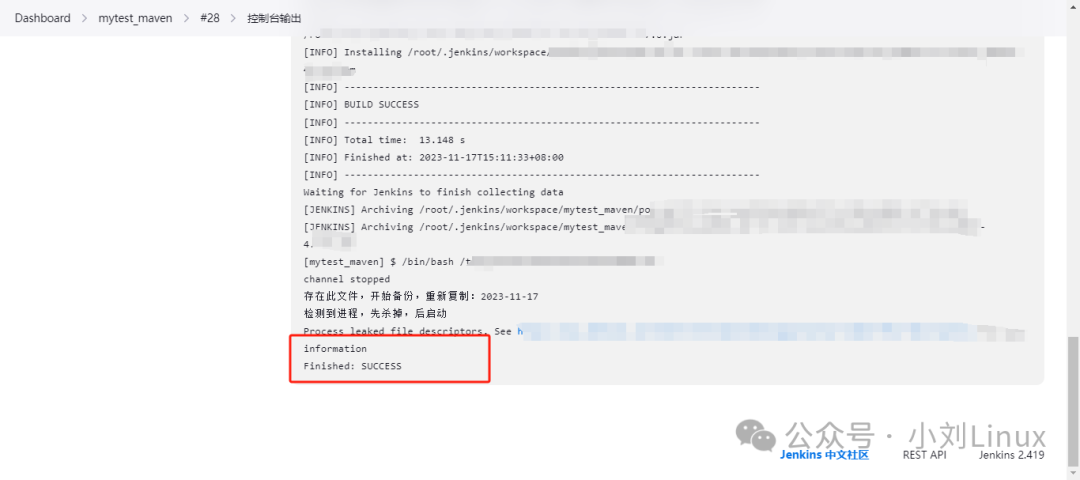
If you see <span>Finished: SUCCESS</span>, the build is complete.
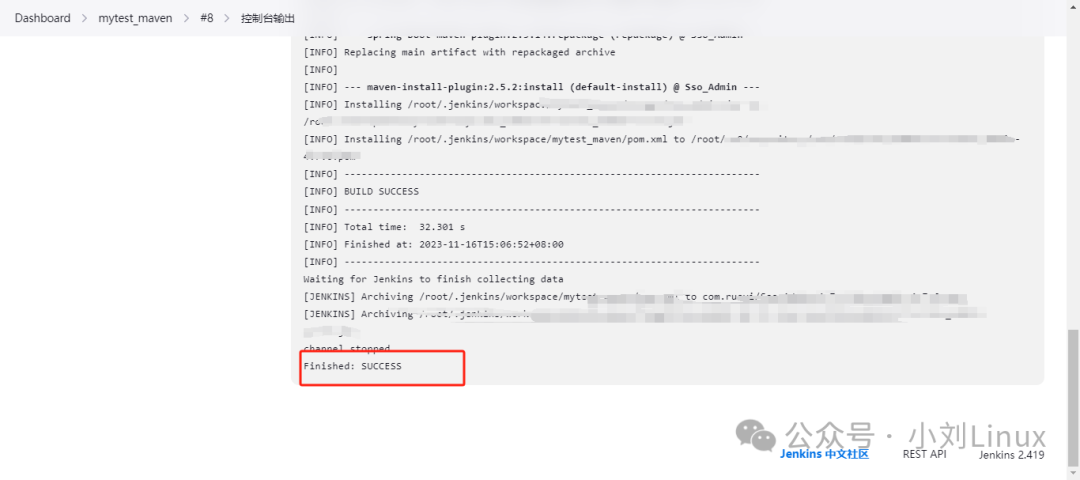
At the same time, the top will also change to a green checkmark;

After the build, you can check on the server, here is the path where it is stored on the server.
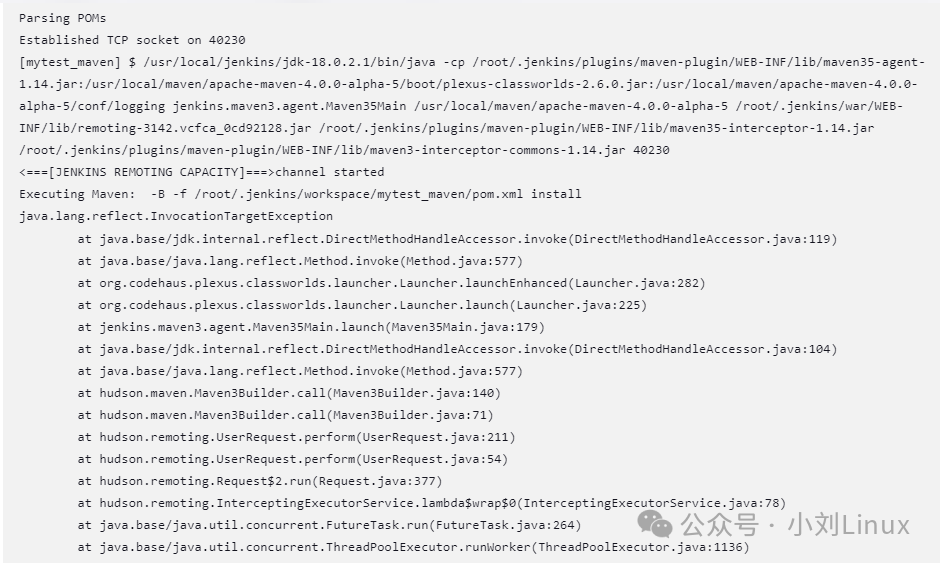
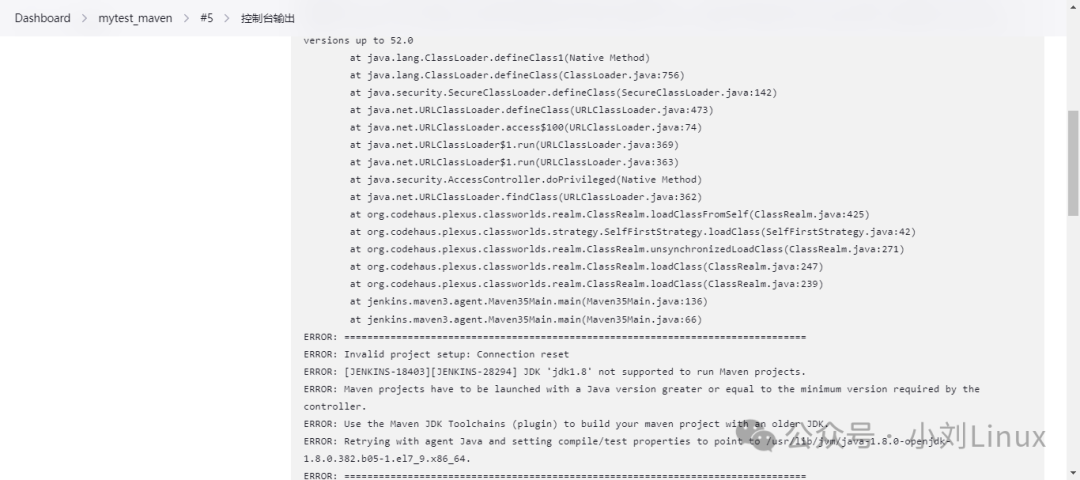
3.3 Build Error Summary:
3.3.1 About Maven Version Error
If you encounter this error during the build, it is due to the Maven version issue;
3.3.2 About JDK Version Configuration Issue
If you encounter this error during the build, it is due to the JDK version configuration issue;
4. Automatically Run on the Server After Build Completion
4.1 Configure Post Steps in the Project
This indicates what operations need to be performed after the build is complete, written here. You can use
<span>ssh</span>or<span>shell</span>methods;<span>ssh</span>and<span>shell</span>are essentially the same, both involve writing commands; SSH also requires configuring global variables, although it has been configured above, I generally use the<span>shell</span>method often, so choose as you see fit. Here, I will take the<span>shell</span>method as an example.
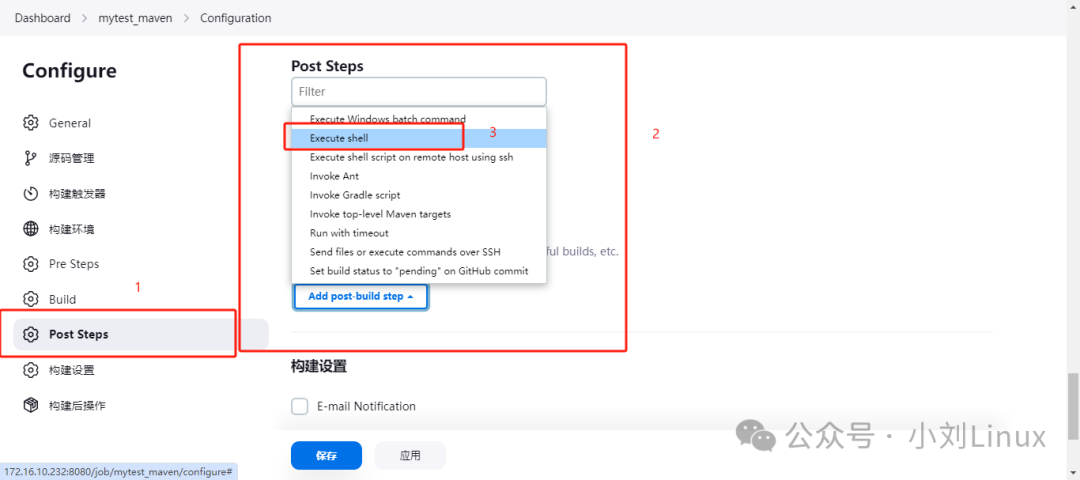
First, return to the project to configure;

- Find
<span>Post Steps</span>
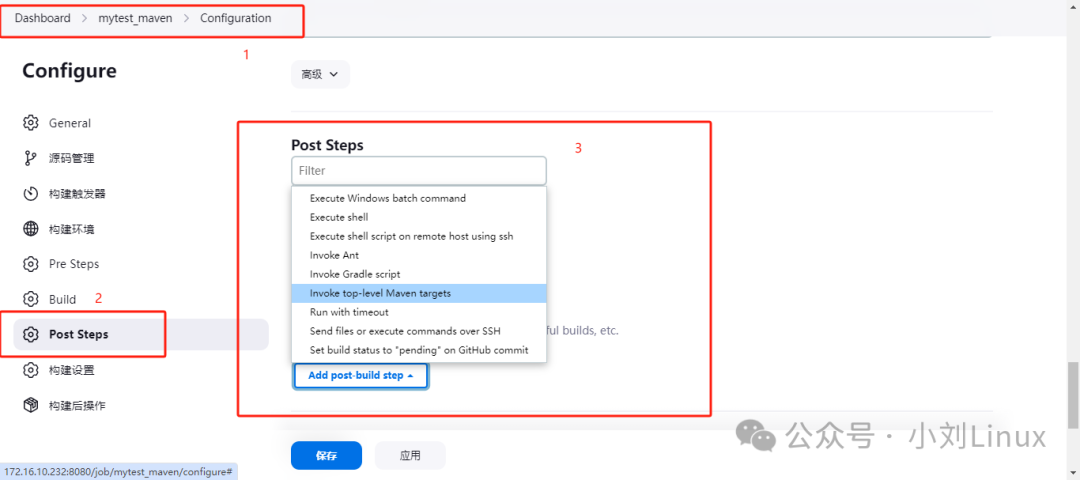
- Select Execute Shell, write a shell script (you can also use SSH method, define it yourself)
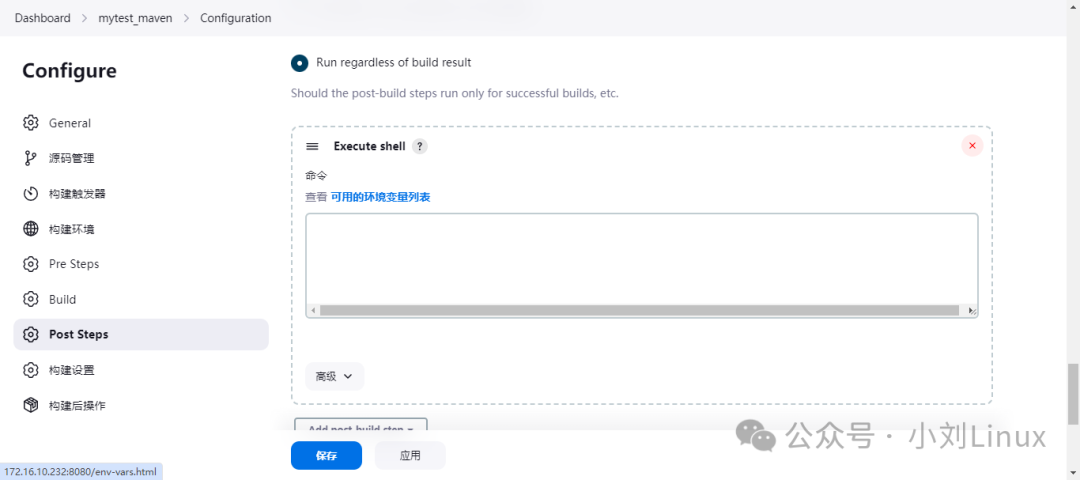
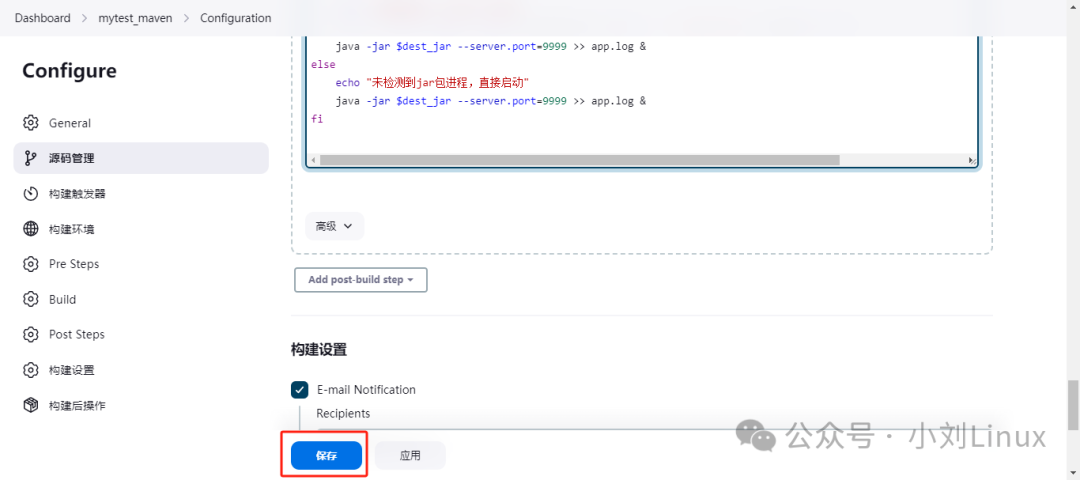
- Shell script content
Tip: If you want to run the JAR package, you must add the environment variable <span>BUILD_ID=DONTKILLME</span> in the script to prevent the automated build JAR package program from stopping automatically after execution.
#!/bin/bash

# (Required) Configure an environment variable to prevent the automated build JAR package program from stopping automatically after execution
BUILD_ID=DONTKILLME

# Source JAR package and path
src_jar="/root/.jenkins/workspace/mytest_maven/target/cs.jar"
# Target JAR and package path
dest_jar="/application/cs.jar"
# Target JAR package path
dest_path="/application/"

# Create target path
mkdir -p /application/

# Copy the built JAR package
## First check if the JAR package exists, if it exists, back it up, if not, directly copy it to run.
if [ -e $dest_jar ];then
echo "This file exists, starting backup, re-copying: $(date +"%Y-%m-%d")"
 mv $dest_jar $dest_jar-$(date +"%Y-%m-%d")
 cp -ar $src_jar $dest_jar
else
echo "The target path does not have this file, directly copying"
 cp -ar $src_jar $dest_jar
fi

cd $dest_path
# Check the JAR package process, here directly write the JAR package name, because if referencing the above environment variable, it is the path plus the JAR package name, if starting on the server, it may not be found, so need to write the JAR package name directly.
jar_jin=$(ps -ef | grep -v grep | grep -ic cs.jar)

if [ "$jar_jin" -ge "1" ];then
echo "Process detected, killing first, then starting"
 ps -ef | grep -v grep | grep cs.jar | awk -F " " '{print $2}' | xargs kill -9
 java -jar $dest_jar --server.port=9999 >> app.log &
else
echo "No JAR package process detected, starting directly"
 java -jar $dest_jar --server.port=9999 >> app.log &
fi
After configuration, click Save;
4.2 Automatically Build the JAR Package and Run
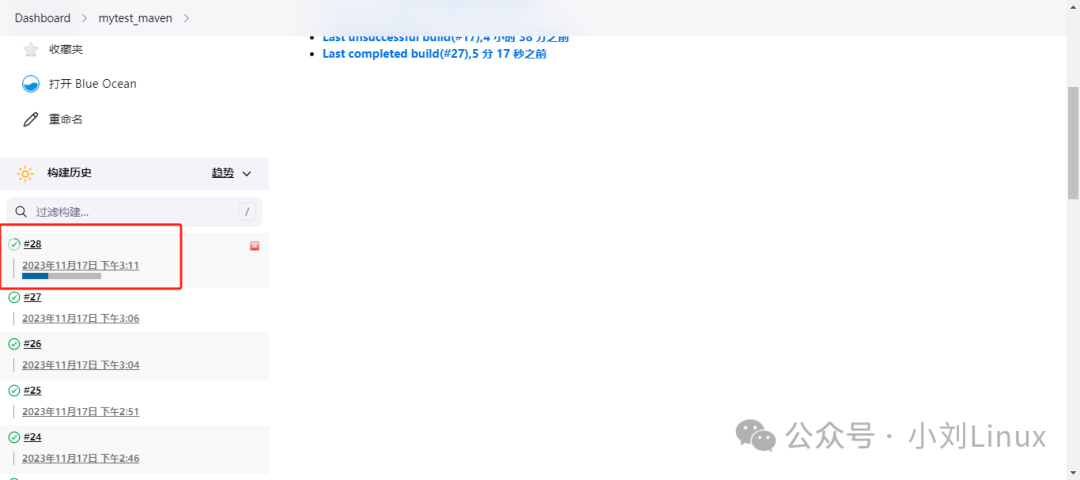
- Click Build Now
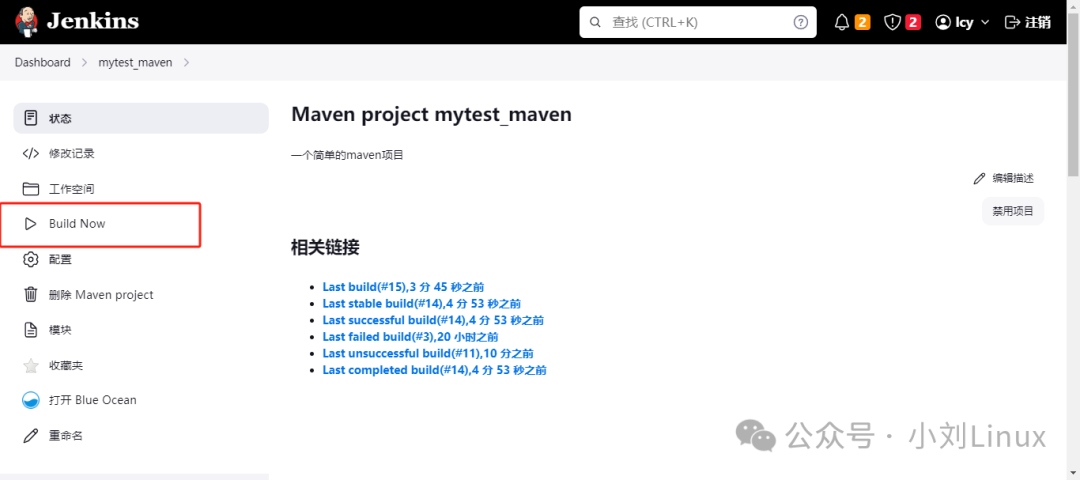
<span>F5</span>to refresh, you can see the latest build running
- Click to enter and check the console output.
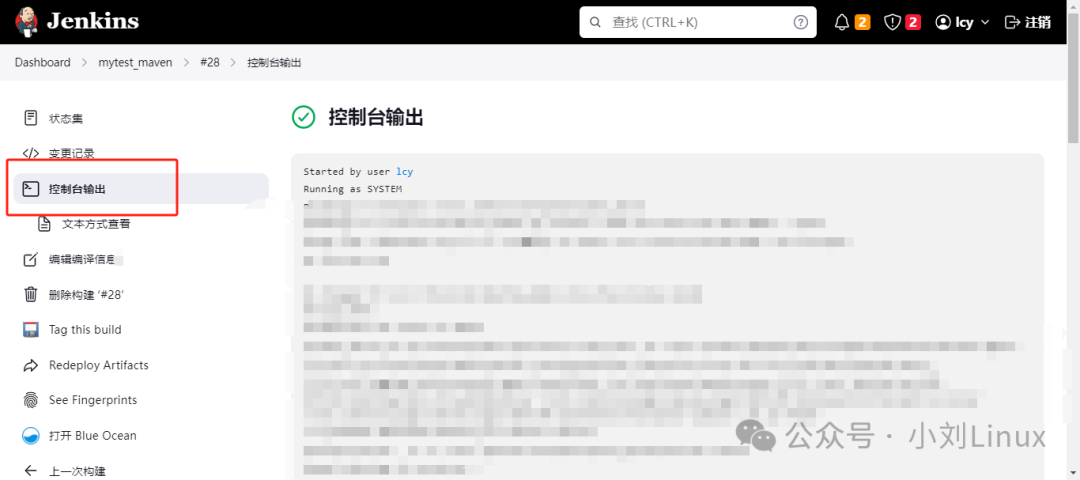
If the output shows <span>Finished: SUCCESS</span>, it indicates successful execution.
After successful execution, we enter the server to check whether the service has started, we can check whether the port is open or whether the JAR package process is running.
ps -ef | grep cs.jar

netstat -anput | grep 9999
If both the port and the JAR package process exist, you can proceed to access the page or similar operations.
If you cannot access, you need to confirm whether the service has started normally or whether the firewall port is open.
This completes the automatic build, packaging, and running of the JAR package.