Unlocking the Ultimate Potential of Mac Mini: Setting Up a Home Remote Download Server
Many friends who purchase a Mac Mini are attracted by its exquisite and compact body, outstanding industrial design, and affordable pricing. I also have a fondness for this device, but due to its desktop nature, it cannot be used as conveniently and portably as a MacBook. I always feel it is a pity to let it sit idle at home, wasting its performance value. Therefore, I have been pondering how to fully explore its potential and transform this idle device into a practical dedicated server for my home.
The Core Advantages of Mac Mini as a Home Server
- Ultra-Low Power Consumption: Operating at only about 15W under low load, you need not worry about electricity costs even when it runs continuously.
- Stable and Reliable: The macOS system is known for its stability, supporting 24/7 operation.
Preparation Checklist
- A Mac Mini (any model will do, even older models are sufficient)
- A portable hard drive (for storing downloaded files, recommended capacity of 500GB or more)
- A network penetration tool (this article uses DDNSTO as an example, which is stable and easy to use)
- Docker Desktop (a container deployment tool that simplifies the configuration process)
Next, follow me step by step to unlock the remote download server potential of the Mac Mini!
1. Core Principle Analysis
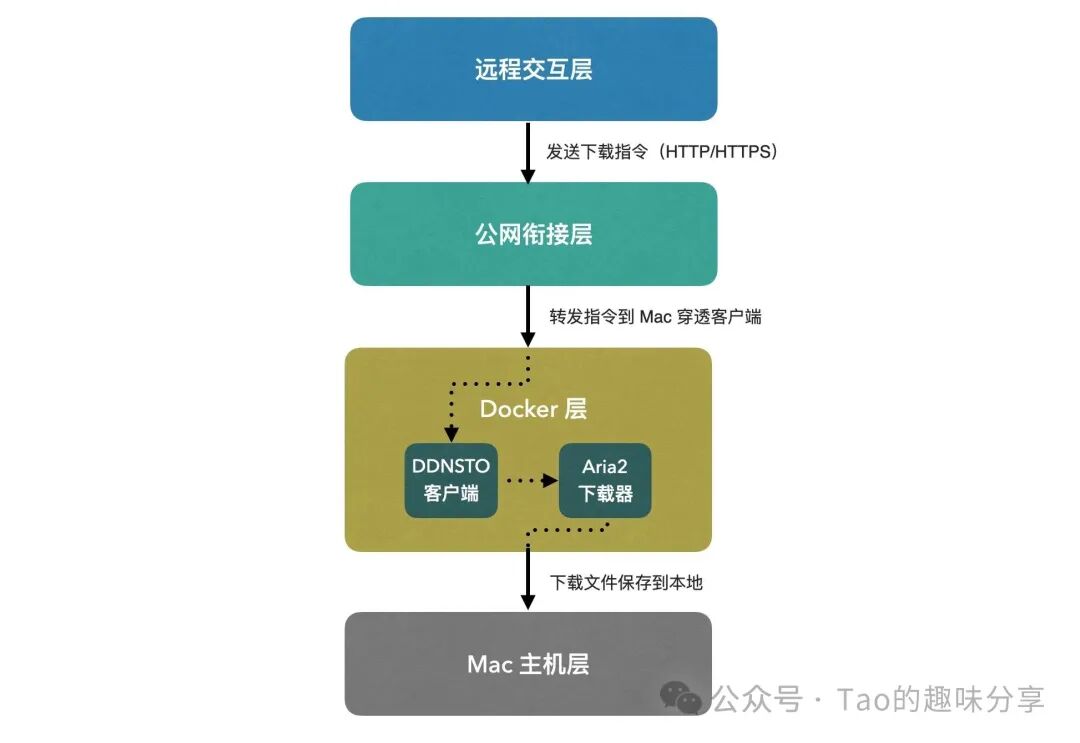
| Layer | Core Component | Function Description |
|---|---|---|
| Remote Interaction Layer | Remote Device (Mobile/Computer) | Send download commands to Aria2 via browser/Aria2 client |
| Public Network Connection Layer | Public Network Server (Network Penetration Server) | The “transit station” for network penetration: remote requests first reach the public server, then are forwarded to the penetration container on the Mac. |
| Docker Layer | Network Penetration Container (e.g., frp/nps), Aria2 Container | Both containers run independently, but the penetration container must “map the Aria2 port” to allow external access to Aria2. |
| Mac Host Layer | Mac OS System, Docker Desktop | Provides the basic operating environment; Docker Desktop is the “carrier” for all containers. |
2. Register and Configure the Network Penetration Server
💡 DDNSTO is a stable, fast, and easy-to-use network penetration tool that allows access to home network devices (such as NAS, servers, etc.) from external networks (e.g., company, travel) via a browser without needing a public IP.
- Open the DDNSTO official website: https://web.ddnsto.com
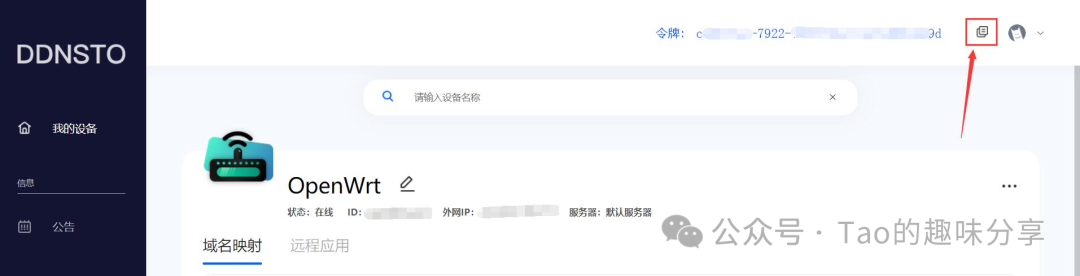
- Log in using WeChat QR code, and after logging in, obtain your exclusive “Token” as shown in the image below:
3. Install Docker Desktop and Deploy Containers
📌 Docker Desktop for Mac is the officially recommended Docker desktop client for the Mac platform, integrating core components such as Docker Engine, Docker CLI, Docker Compose, and Kubernetes, providing a graphical interface and convenient management tools, allowing developers to quickly use Docker container technology on Mac without complex configurations.
Step 1: Install Docker Desktop
-
Download link: https://www.docker.com/products/docker-desktop/
-
After downloading, double-click the installation package and follow the prompts to complete the installation without additional configuration.
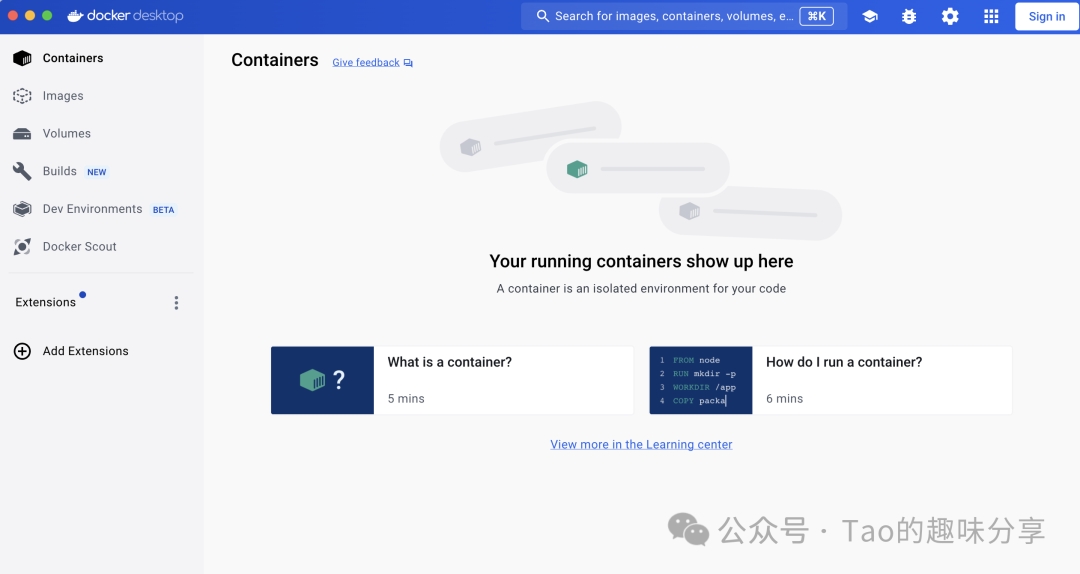
The software interface after successful installation of Docker Desktop is as follows:
Step 2: Deploy the DDNSTO Penetration Container
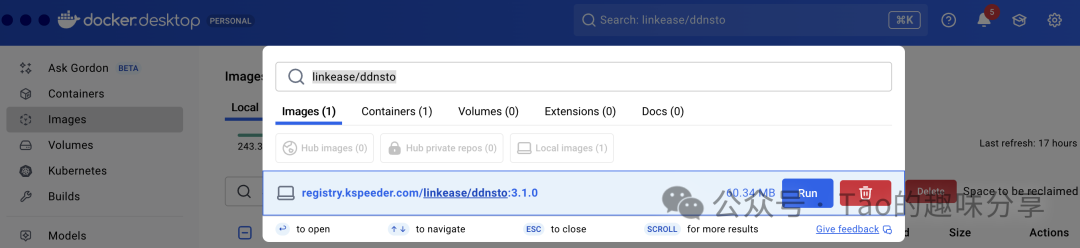
- Open Docker Desktop, enter linkease/ddnsto in the top search box, and click the button on the right to pull the image:
- Open the Mac terminal, and enter the following command to start the DDNSTO container (replace <fill in your token> with the token obtained in the first step):
➜ docker run -d
    --name=ddnsto
    --restart always
    --network host
    -e TOKEN=<填入你的token> \ # The token here is the token from the DDNSTO server
    -e DEVICE_NAME=MyDdnsto
    -v /etc/localtime:/etc/localtime:ro
    registry.kspeeder.com/linkease/ddnsto:3.1.0
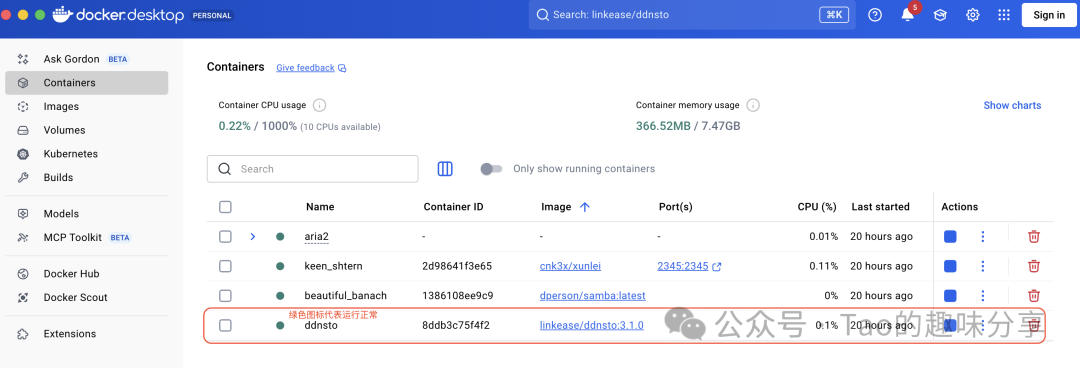
- Return to the Docker Desktop interface, and you can check the running status of the DDNSTO container in “Containers”; if it shows “Running”, it has started successfully:
Step 3: Deploy the Aria2 Download Container (with Web Management Interface)
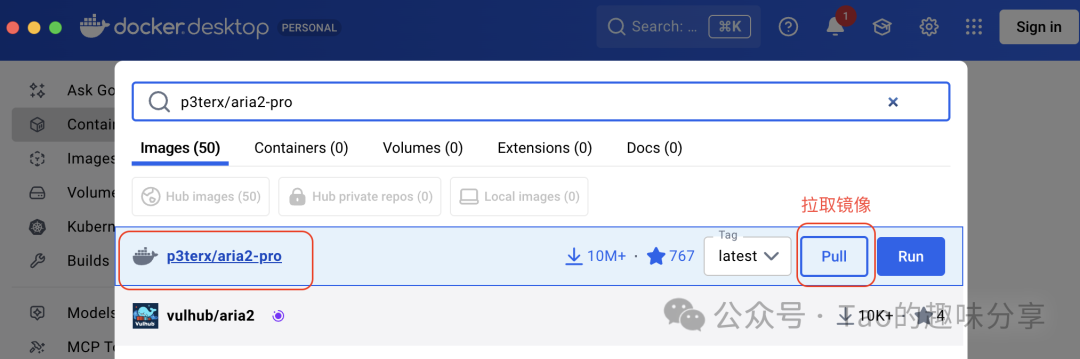
- In the Docker Desktop search box, enter
<span>p3terx/aria2-pro</span>, and click to pull the Aria2 image; simultaneously search for<span>p3terx/ariang</span>to pull the Web management interface image:
- Create a configuration file: Open the terminal and enter the following command to create a
<span>docker-compose.yml</span>file (this file integrates the configurations of both Aria2 and AriaNg containers):
➜ touch docker-compose.yml
- Edit the configuration file: Open
<span>docker-compose.yml</span>with a text editor and paste the following content (you can modify the<span>RPC_SECRET</span>key and port as needed):
version: "3.8"

services:
aria2-pro:
    container_name:aria2-pro
    image:p3terx/aria2-pro
    environment:
      -PUID=501
      -PGID=20
      -UMASK_SET=022
      -RPC_SECRET=P3TERX# Ensure the key has no special characters and is consistent with the subsequent AriaNg configuration
      -RPC_PORT=6800
      -LISTEN_PORT=6888
      -DISK_CACHE=64M
      -RPC_ALLOW_ORIGIN_ALL=true# Allow cross-origin access to avoid AriaNg connection being blocked
      -IPV6_MODE=false
      -UPDATE_TRACKERS=true
      -CUSTOM_TRACKER_URL=
      -TZ=Asia/Shanghai
    volumes:
      -${PWD}/config:/config
      -${PWD}/downloads:/downloads
    network_mode:bridge
    ports:
      -6800:6800# RPC port mapping
      -6888:6888# BT listening port mapping
      -6888:6888/udp
    restart:unless-stopped
    logging:
      driver:json-file
      options:
        max-size:1m

ariang:
    container_name:ariang
    image:p3terx/ariang
    command:--port6880# Parameter, use the default 80 port of the image to avoid port conflicts
    network_mode:bridge
    ports:
      -6880:6880# Host 8080 port mapped to container 80 port (AriaNg default Web port)
    depends_on:
      -aria2-pro# Ensure Aria2 starts first
    restart:unless-stopped
    logging:
      driver:json-file
      options:
        max-size:1m
- Start the containers: Execute the following command in the terminal (ensure the current directory is where
<span>docker-compose.yml</span>is located):
➜ docker compose -d
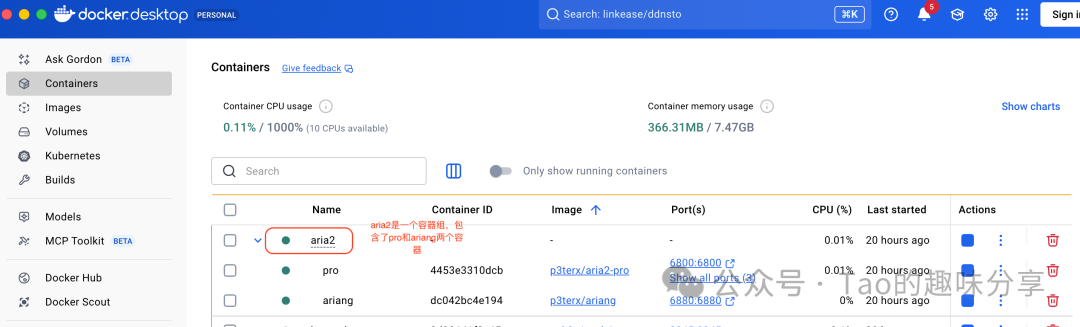
- Verify the startup: In the “Containers” section of Docker Desktop, check the status of
<span>aria2-pro</span>and<span>ariang</span>; if both show “Running”, it is successful:
Step 4: Configure the AriaNg Management Interface
- Access
<span>Mac Mini Internal IP:6880</span>in your browser (for example,<span>192.168.1.100:6880</span>), to open the AriaNg interface:
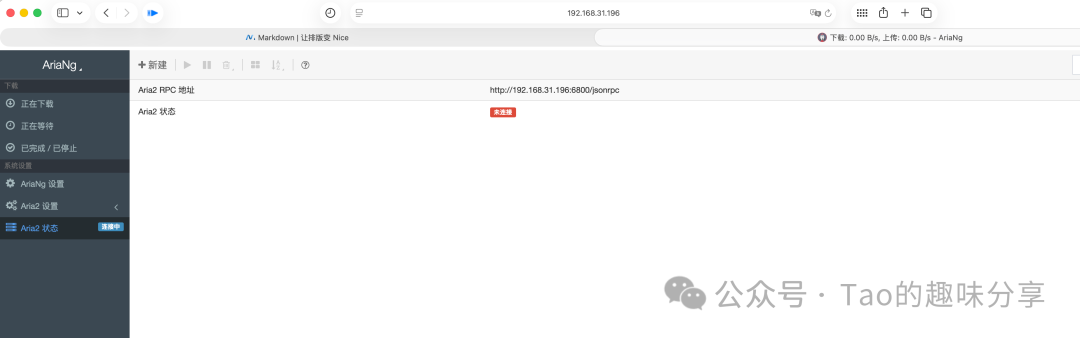
- Click the “Settings” icon in the upper right corner, and switch to the “RPC” tab:
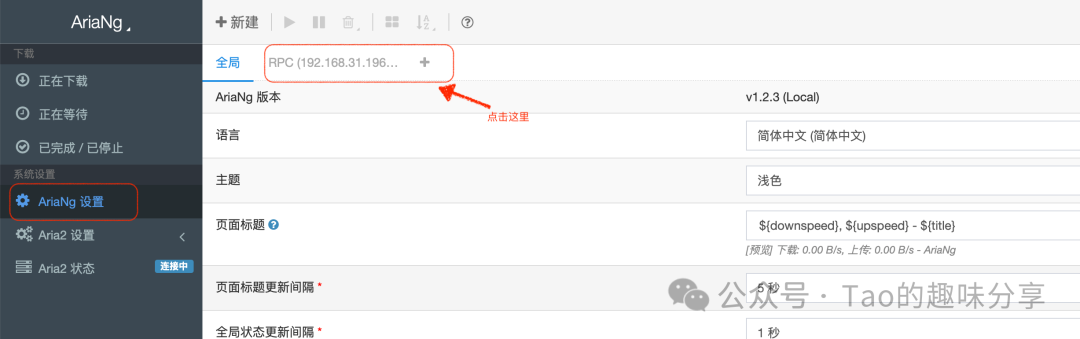
-
In the “RPC Key” field, enter the
<span>RPC_SECRET</span>value set in<span>docker-compose.yml</span>, and click “Save”: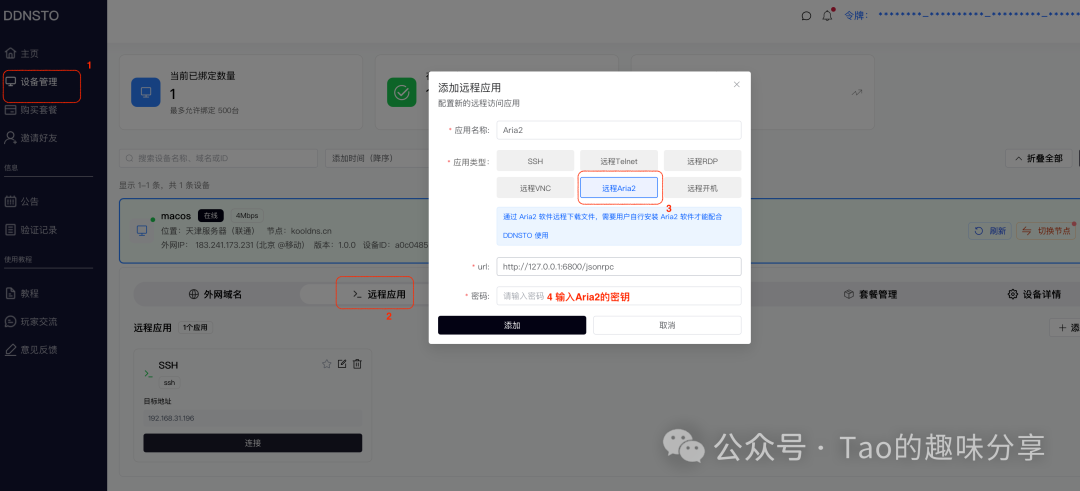
At this point, the Aria2 download service has completed local configuration.
4. Achieving Remote Access via Network Penetration
The final step is to configure the public network access link through DDNSTO:
-
Open the DDNSTO console, go to “Device Management” → “Remote Applications” → “Add Application”;
-
Select “Aria2”, enter the previously set
<span>RPC_SECRET</span>key, and click “Add”: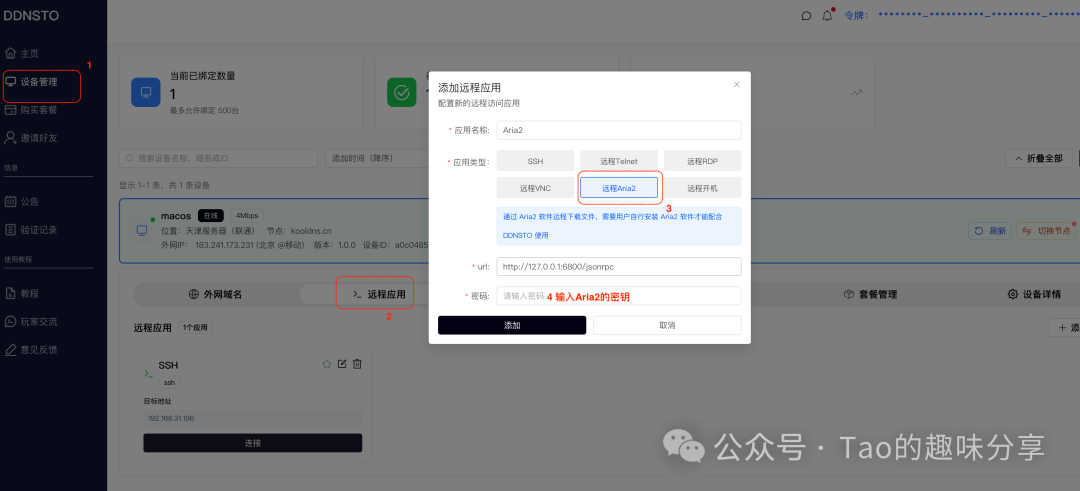
-
After adding, click “Connect” to access the Aria2 service on the Mac Mini via the public network, allowing you to initiate download tasks anytime, anywhere.
Thus, your Mac Mini has successfully transformed into a home remote download server! You need not worry about the device being idle; its low power consumption and stable performance make it a practical tool for your home. More potential uses for the Mac Mini will be shared in the future, so stay tuned!