Background Knowledge
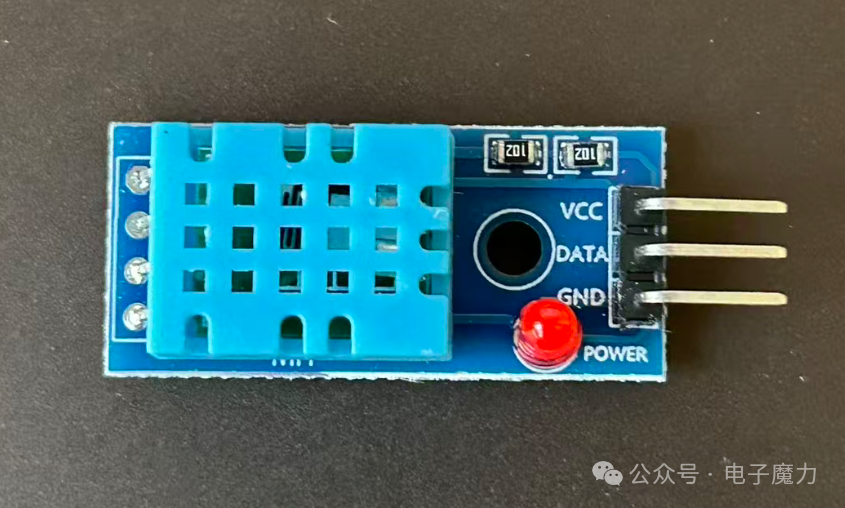
The DHT11 temperature and humidity sensor includes a resistive humidity sensing element and an NTC temperature sensing element. It features strong response and anti-interference capabilities, as well as a high cost-performance ratio. Each DHT11 sensor is calibrated in a highly precise humidity calibration chamber. The calibration coefficients are stored in OTP memory in the form of a program, which the sensor’s internal processing must reference during signal detection. The one-wire serial interface simplifies system integration. It has an ultra-small size and very low power consumption.
【Core Parameters】
-
Temperature measurement range: 0℃~50℃, error ±2℃.
-
Humidity measurement range: 20% RH~90% RH, error ±5% RH.
-
Output signal: One-wire digital signal, no additional ADC conversion required.
-
Response time: ≤2 seconds, update cycle ≥1 second.
【Key Features】
-
Simple hardware structure, requiring only three wires: VCC, GND, and DATA to operate.
-
Built-in calibration algorithm, directly outputs digital temperature and humidity data without complex processing.
-
Low cost and small size, compatible with mainstream controllers like Arduino and 51 microcontrollers.
-
The downside is lower accuracy, making it unsuitable for scenarios requiring high measurement precision.
【Application Scenarios】
-
Smart home environment monitoring (e.g., indoor temperature and humidity display).
-
Entry-level projects like simple weather stations and greenhouse environment monitoring.
-
Electronic production, student experiments, and basic IoT prototype development.
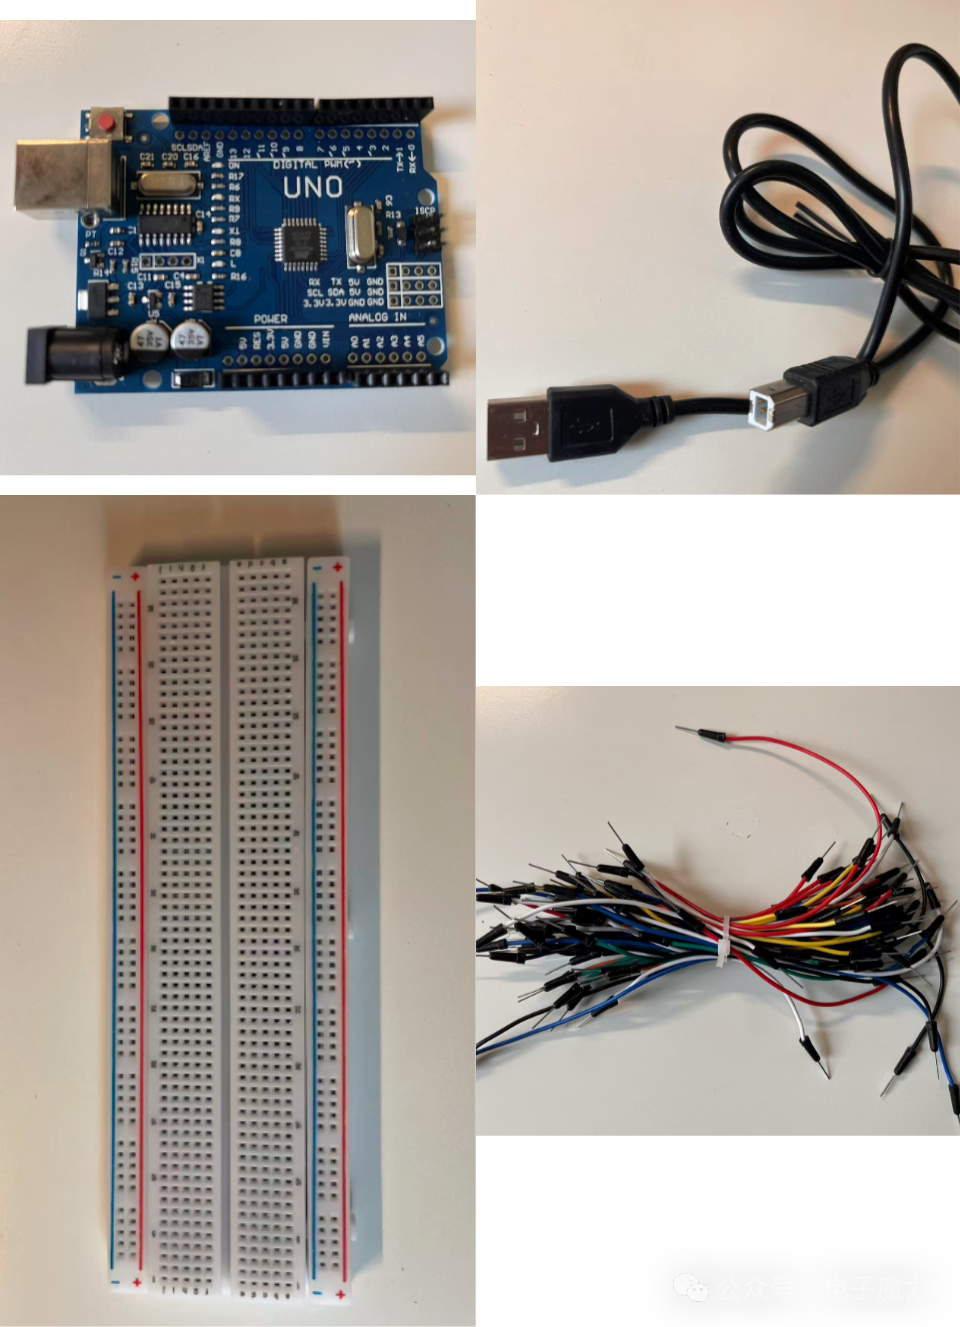
1. Electronic Components Used in the Experiment
1 Arduino board, 1 USB data download cable, 1 breadboard, several Dupont wires
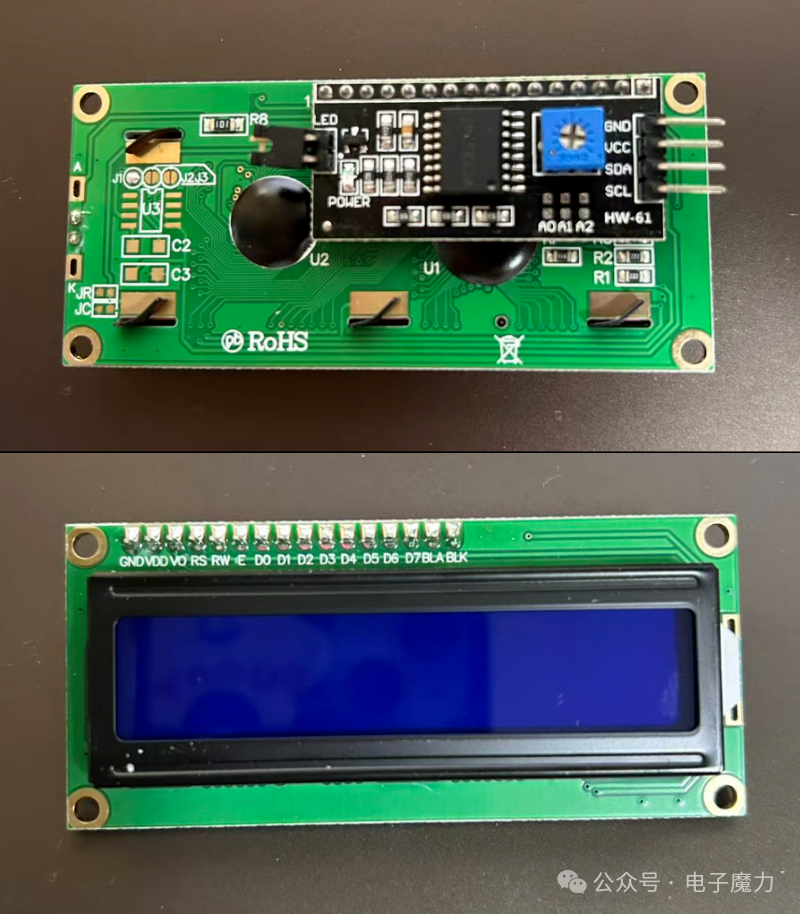
1 LCD1602 IIC LCD display (integrated driver circuit)
1 DHT11 temperature and humidity sensor
2. Experiment Steps
We will connect the wires as follows
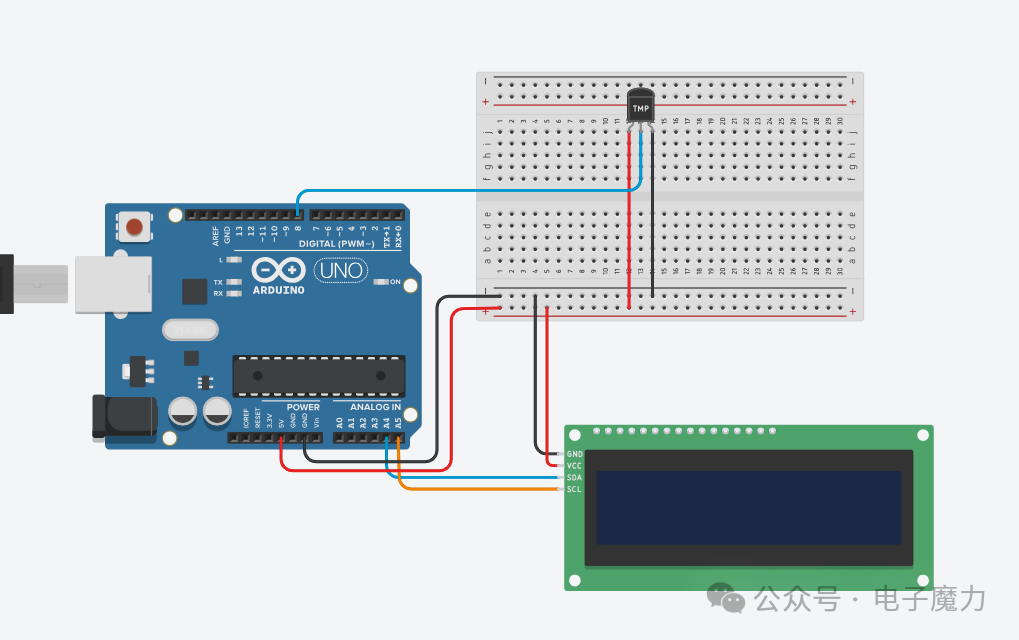
The SDA and SCL pins of the LCD display are connected to the A4 and A5 ports of the Arduino mainboard, while the other two pins VCC and GND are connected to the shared positive and negative rails of the breadboard;
The VCC and GND pins of the DHT11 sensor are connected to the shared positive and negative rails of the breadboard; the DATA pin is connected to digital pin 8 of the Arduino mainboard;
The positive and negative rails of the breadboard are connected to the 5V and GND of the Arduino board.
3. Program Code
This experiment’s code requires the inclusion of the LiquidCrystal_I2C.h library to drive the LCD1602 display; the DHT.h library is included to drive the temperature and humidity sensor. Search for and install these two libraries in the IDE.
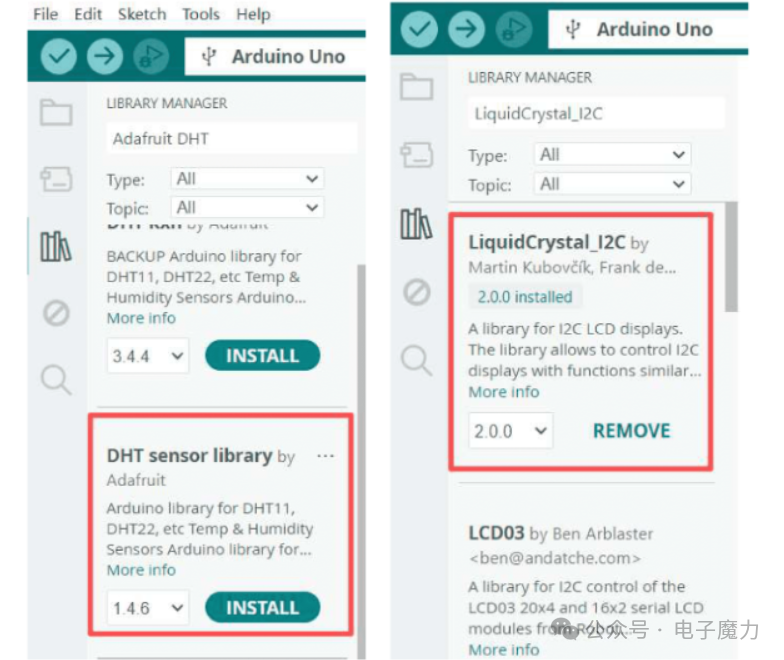
The implementation code is as follows:
#include <LiquidCrystal_I2C.h> // LCD1602 screen driver library#include <DHT.h> // DHT11 temperature and humidity sensor libraryLiquidCrystal_I2C lcd(0x27, 16, 2); // Set LCD1602 device address 0x27, 16 columns and 2 rows#define DHTPIN 8 // Set DHT pin to Pin 8#define DHTTYPE DHT11DHT dht(DHTPIN, DHTTYPE);void setup() { lcd.init(); // Initialize lcd lcd.backlight(); // Turn on lcd backlight dht.begin(); // Initialize sensor}void loop() { delay(2000); // Important: Add a 2-second delay to avoid DHT11 response delays causing data errors float hum = dht.readHumidity(); // Read humidity float temp = dht.readTemperature(); // Read temperature if (isnan(hum) || isnan(temp)) { lcd.setCursor(0, 1); lcd.print("Read Error! "); return; } lcd.setCursor(0, 0); lcd.print("Temp: "); lcd.print(temp, 1); lcd.print("C "); lcd.setCursor(0, 1); lcd.print("Hum: "); lcd.print(hum, 1); lcd.print("%RH");}4. Experiment Results
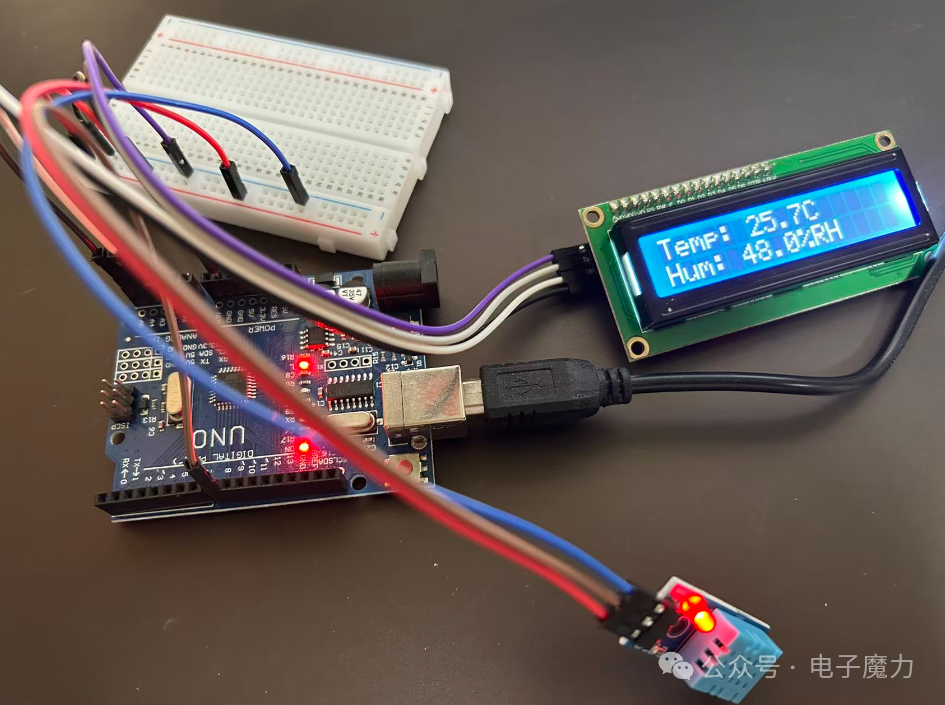
After uploading the program, we will see the LCD screen light up and display two lines of information, with the first line showing the temperature and the second line showing the humidity. The DHT11 sensor collects temperature and humidity signals, converting the analog signals into digital values for display.
Wiring physical diagram:
Experiment video:
The code in this article has been uploaded to Gitee, see the link: https://gitee.com/webxiaohua/arduino-learn/tree/master/25_wen_shi_du_xian_shi