[3D Printing Daily] Issue 898
<span>For those without a printer, don't worry! You can click on the public account menu 'Local Printing' to contact local friends for printing assistance.</span>
1. Solder Extractor
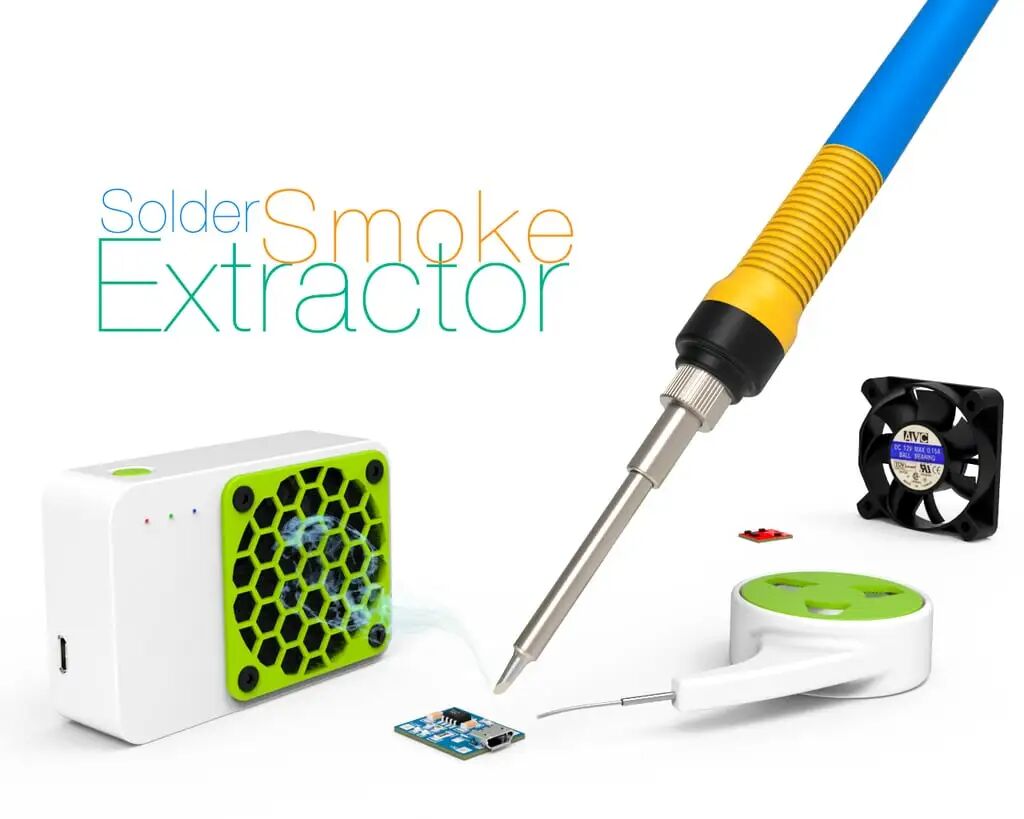
<span>[ID:4249597]</span> This DIY solder smoke purifier is designed to provide a compact and portable solution to harmful fumes generated during soldering. While there are ready-made products available on the market, this project aims to create a more personalized and customizable device.
The purifier uses a 5010 cooling fan as its core power source, effectively absorbing and filtering soldering smoke through an activated carbon filter. The circuit section employs an MT3608 DC-DC boost converter to provide stable voltage to the fan, while a TP4056 charging board manages the charging process of a 3.7V lithium battery, ensuring the device can be used wirelessly. A TTP223 capacitive touch switch button is used to control the device’s power, and an N-Channel MOSFET IRFR120N (or a similar N-channel MOSFET) serves as a key component in the switching circuit.
During assembly, various tools may be required, including a belt sander, mini cordless grinder, polisher, reamer, micro HSS twist drill, engraving tools, mini hand tools, deburring tools, and various adhesives (AB glue, 502 glue, E8000 strong liquid glue, UV glue, etc.). Additionally, M3 screws and embedded nuts will be used for fastening, and transparent fishing line will serve as the light guide material for the LED. By selecting quality parts and tools, users can build an efficient and user-friendly solder smoke purifier, improving their work environment and protecting their health.
2. HEPA Filter for 3D Printers
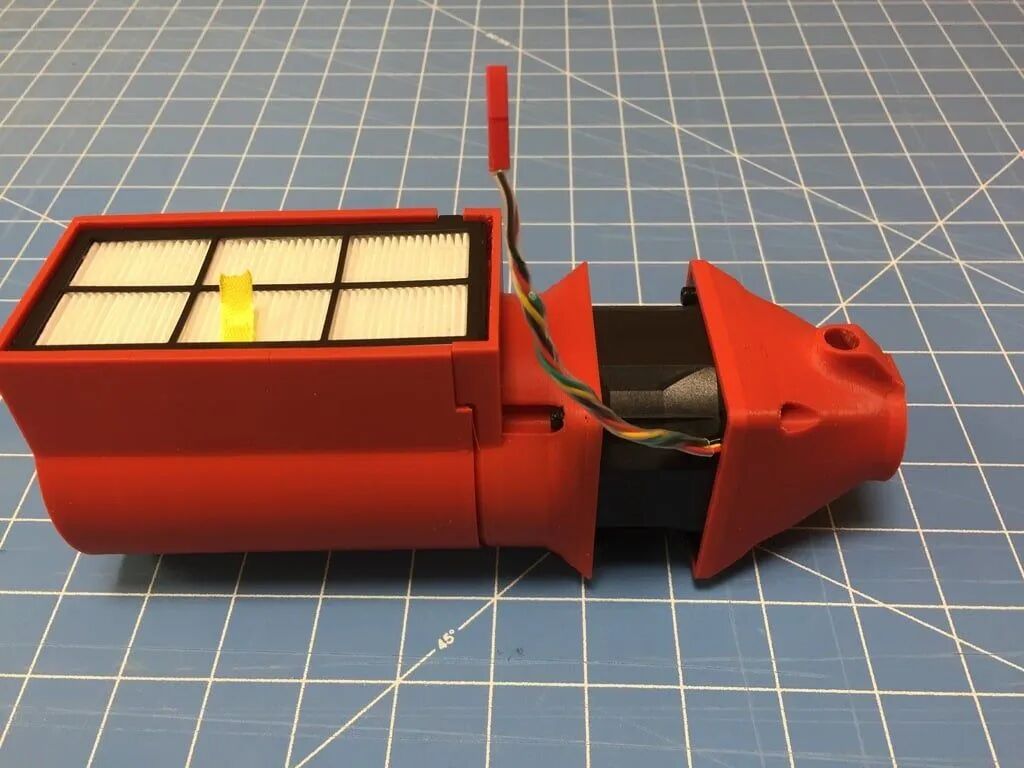
<span>[ID:2394452]</span> This air purifier is designed specifically for desktop 3D printers like the Prusa i3 MK2S, aiming to effectively remove harmful volatile organic compounds (VOCs) and ultrafine particles generated during printing. 3D printing, especially when using fused deposition modeling to print plastics, inevitably produces these byproducts, affecting indoor air quality.
The device is based on the design by RJ_Make, integrating a HEPA filter used in iRobot vacuum cleaners and employing activated carbon particles as the adsorbent material for efficient filtration. Compared to the original design, this product has undergone several improvements: screws replace rubber bands to secure components, reducing the number of parts, and optimizing the fan outlet nozzle to provide dual output—one for exhaust and one for circulating filtered air within the printer enclosure. Additionally, exhaust pipes from the nozzle to the enclosure seal and enclosure seals, as well as optional flow limiters, have been added.
The unique nozzle design allows approximately 40% of the filtered air to be expelled from the enclosure, while the remaining portion is recirculated, maintaining negative pressure inside the enclosure to prevent unfiltered air from leaking out, ensuring safe air quality during the printing process. If using materials like ABS that require higher stable temperatures, a flow limiter can be installed to adjust the mixing ratio to 50/50.
The design also includes an extended grid for partitioning the filter chamber, with one half for placing desiccants and the other half for activated carbon particles. Practical experience has shown that activated carbon particles possess sufficient drying properties, often eliminating the need for additional desiccants. Users can position the extended grid appropriately in the filter chamber, filling one side near the fan with activated carbon particles and the other side with desiccants to ensure all air passes through VOC filtration.
Product update records: On January 7, 2018, the chamber baffle was restored, the chamber design was modified to secure the baffle, and space was created between the filter and baffle. The designs for “filter to motor” and “extended grid” were modified, reducing the number of holes in the top few rows to force more air through the activated carbon pile, and support for other fan models was added. On March 5, 2019, a reinforced bracket provided by beikeland was added.
3. Solder Wire Holder
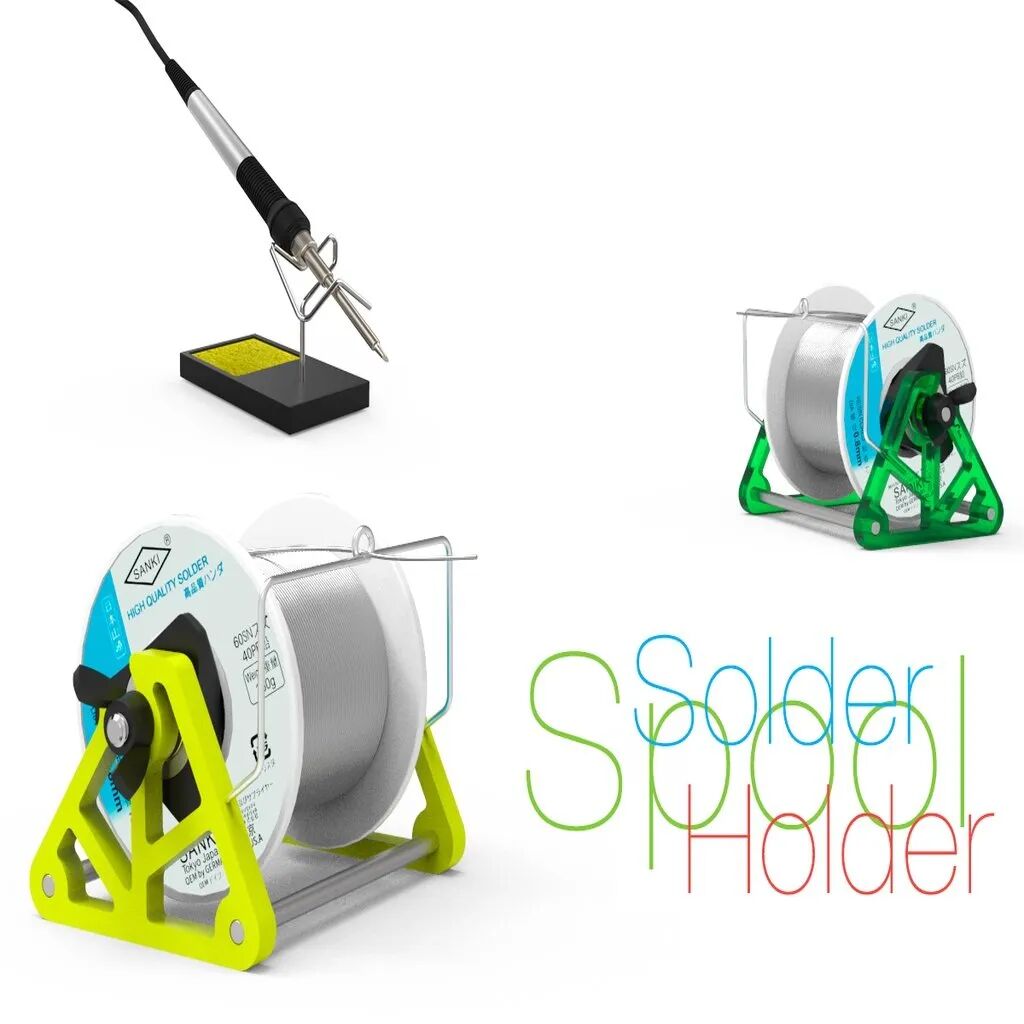
<span>[ID:2874671]</span> This DIY solder wire holder is suitable for solder wire spools with a maximum diameter of 50mm. Its main structure is made from the metal rods of discarded DVD drives, making it environmentally friendly and economical. The wire guide cleverly utilizes a paperclip, making it simple and practical.
To make this holder, the following components may be needed for user reference: threaded shaft (available in standard and brass types), UV glue pen (for securing parts), butterfly nuts (for adjusting tightness), and flanged ball bearing FZ604ZZ (to ensure smooth rotation of the spool).
This design is simple in structure, easy to assemble, and makes full use of existing resources, reducing production costs. At the same time, it provides an economical and practical soldering tool solution for electronics enthusiasts. Additionally, a series of links to 3D printer-related accessories are provided, including lamps, spool holders, pulleys, ducts, wire clips, etc., to facilitate users in expanding and optimizing their 3D printing equipment.
4. Grinding Machine AC Motor
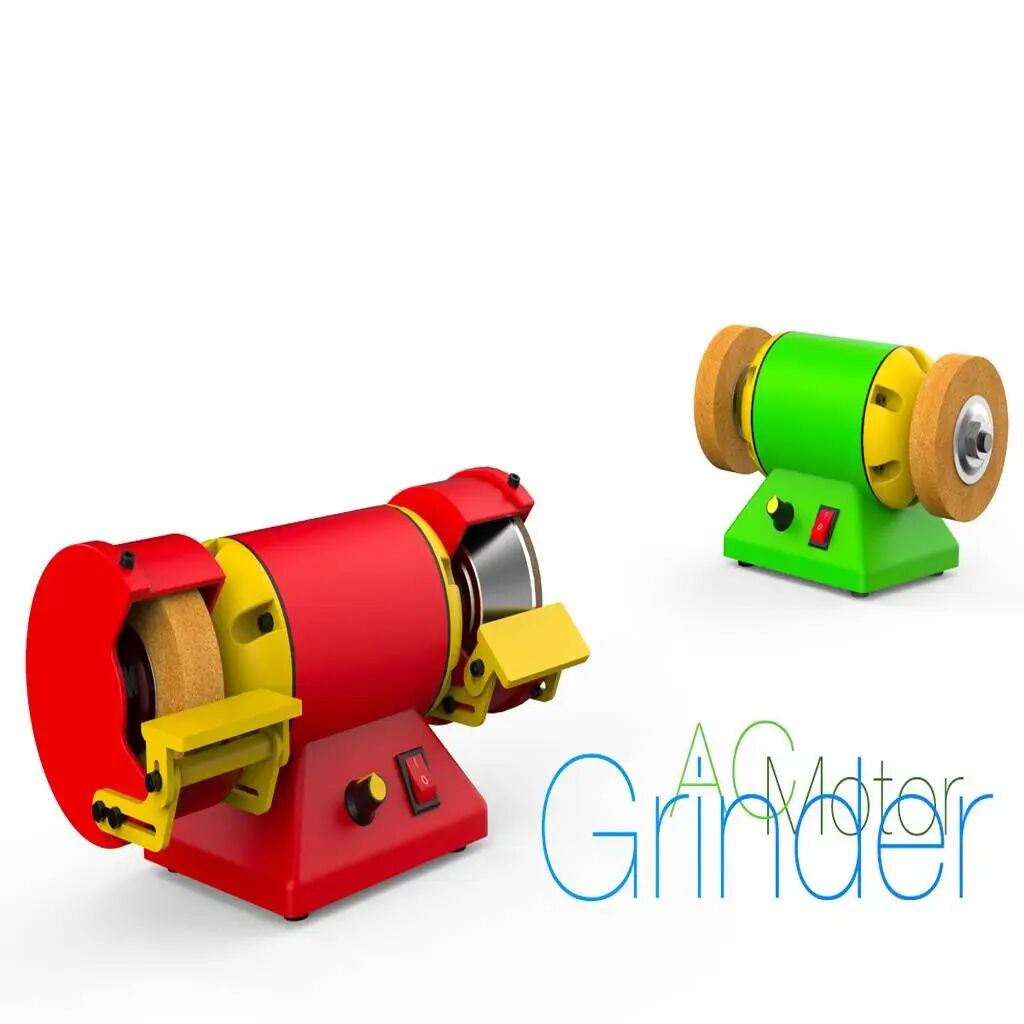
<span>[ID:3837220]</span> This product is a grinding machine solution based on an AC motor, but the currently used motor speed is too high and not entirely suitable for the grinding needs of this model. To optimize the grinding effect, it is planned to replace it with a 755 DC motor and make corresponding adjustments to the model.
This solution involves various components and tools. Required components include: polishing connecting rod, saw blade adapter, 10mm spindle adapter M10, grinding stone wheel, diamond grinding cup, cotton wheel, cutting wheel, SCR dimmer, crimp terminal, power switch and cap, nylon screws and nuts, steel screws and nuts, Velcro, Pasteur pipette, and HSS 4mm x 4mm x 200mm material.
Required tools include: mini metal lathe, Hilda 400W tool, drill press stand, X-Y axis workbench. These tools and components provide the hardware foundation for the implementation of the project, laying the groundwork for the subsequent production of the DC motor grinding machine.
5. Poor Man’s Fourth Axis CNC
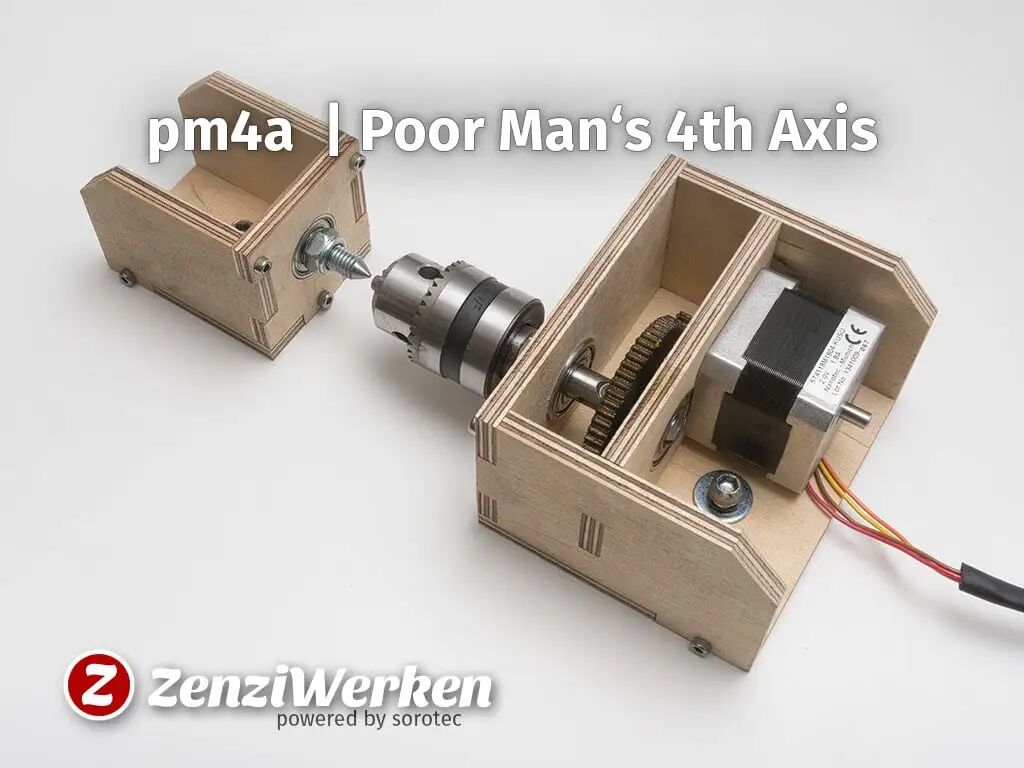
<span>[ID:2344975]</span> To give model car tires the final touch, an attempt was made to use a fourth axis for rotary engraving. Due to the initial idea being vague, the investment cost was high, and the software requirements were strict, a professional fourth axis kit was not adopted. Fortunately, a stepper motor (replaced from the Y-axis) and a small chuck were available, leading to the birth of pm4a.
The main body of this device is made from 6.5mm birch plywood, and the gears are made from 5mm bakelite, processed using a 1.2mm spiral end mill on a Stepcraft desktop CNC machine. Additionally, the following components were used:
•2 x 6000ZZ ball bearings (10 x 26 x 8 mm)•1 x 608ZZ ball bearing (8 x 22 x 7 mm)•Small chuck with SDS-Plus adapter (10 mm 3/8” x 24 UNF)•NEMA17 stepper motor•A sharpened M8 machine screw and a self-locking nut (for the tailstock)•Some M3 machine screws
The two gears use unconventional cycloidal (circular) teeth, which help create smaller teeth as they have no edges. Otherwise, the size of the teeth would be limited by the diameter of the end mill.
The motor is driven by inserting it into the X-axis stepper driver. This way, the machine does not move laterally, but the workpiece rotates. The distance moved during a single rotation is calculated based on the diameter of the workpiece divided by a 6:1 gear reduction ratio. For example, if the tire diameter is 40mm, then the circumference is 40mm x π (3.1415) = 125.66mm / 6 = 20.94mm. This value is input into the controller settings.
When using pm4a, it is best to use some cover to prevent dust from entering the gear mechanism.
6. High-Capacity Paste Extruder
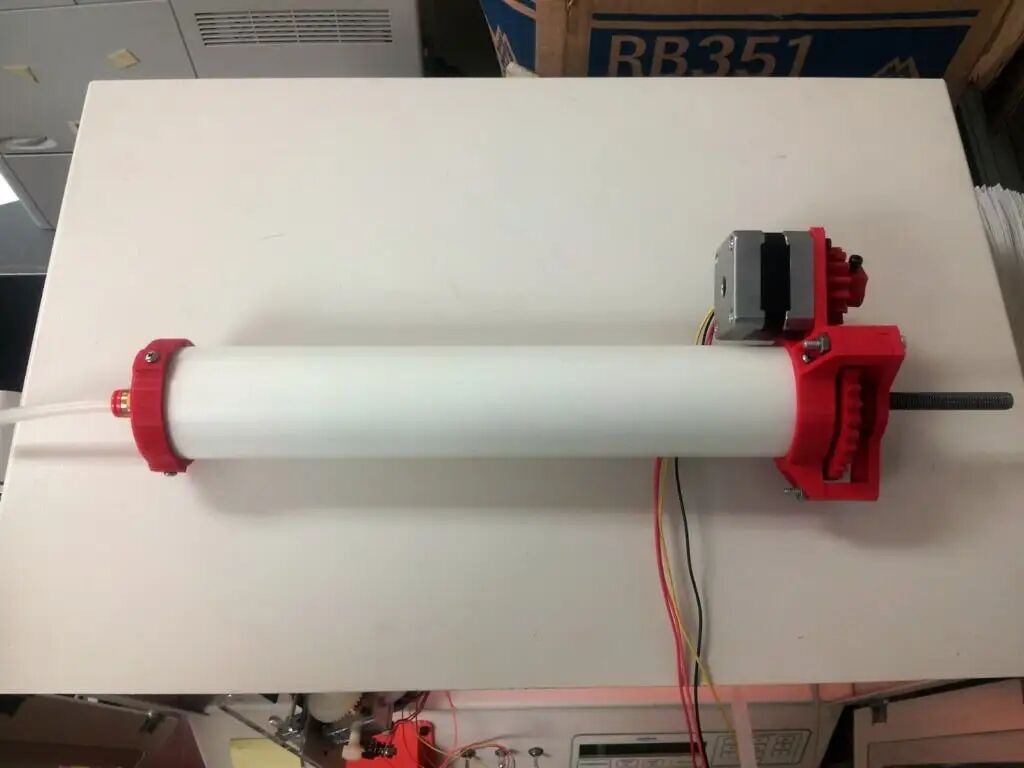
<span>[ID:468539]</span> This extruder is designed to push large volumes of paste-like materials through a Bowden tube to the user’s chosen nozzle. It is driven by a stepper motor that advances the paste, allowing for precise control using existing stepper motor controllers (such as RAMPS, RAMBO, etc.). The nozzle is designed to be mounted on the cap of an ink refill bottle.
In addition to printable parts, the following materials are required: 3 x 8mm nuts, 2 x 8mm washers, 1 x approximately 400mm 8mm threaded rod, 1 x 350mm 1.5-inch Schedule 40 PVC pipe, 1 x 1/8-inch NPT hose clamp, 1 x 1/4-inch air hose (length as needed), 1 x 10mm M3 screw and nut, 2 x 608 skate bearings, 3 x 3-inch 6-32 screws, 3 x #6 washers and nuts, 6 x 1/2-inch 6-32 screws, 2 x 1.5-inch x 1/8-inch O-rings, 1 x NEMA 14/17 stepper motor (with mounting screws), and a drill and drill bit set.
This extruder is compact in structure, utilizing a stepper motor to drive the piston, achieving precise control over the paste advancement process, and can be used with various common stepper motor controllers, offering good compatibility. Users can easily extrude various pastes, such as ceramic slurries, silicone, food sauces, etc., into the desired shapes, applicable in 3D printing, food processing, and other fields. The clever combination of the nozzle with the ink refill bottle cap simplifies the connection method. Users are also required to have certain hands-on skills and tools for self-assembly and adjustment.
7. Solder Tip Cleaner
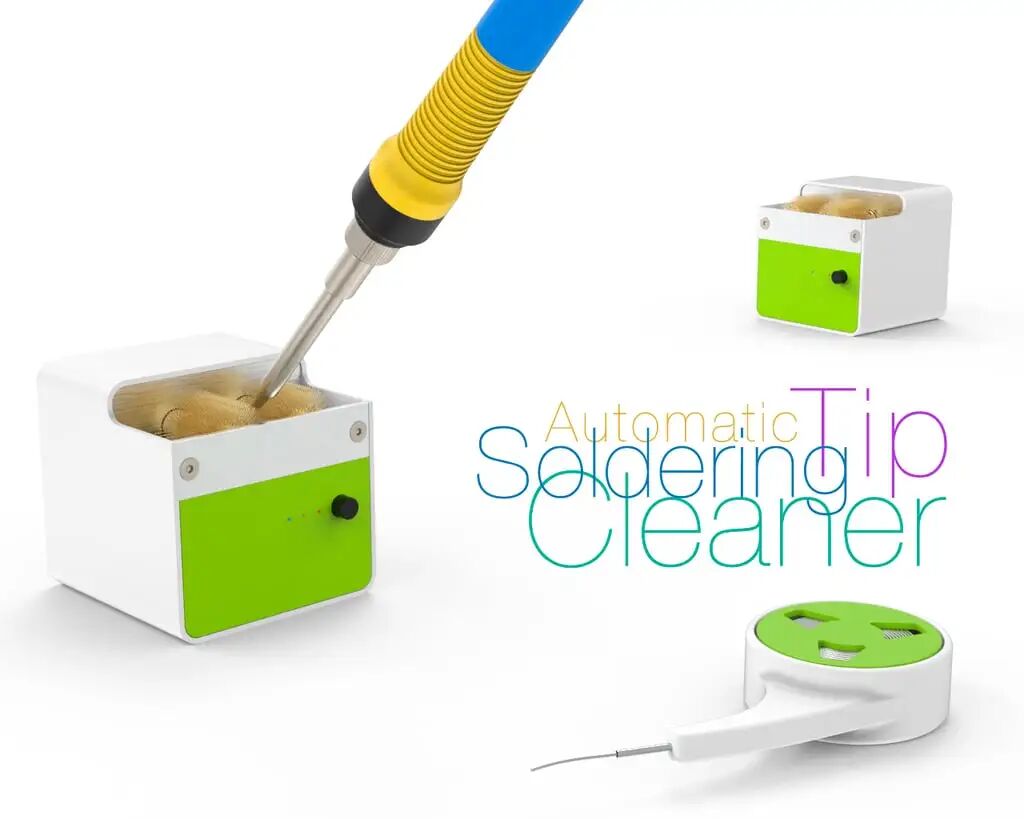
<span>[ID:4240833]</span> This solder tip cleaner is designed to provide convenience for soldering operators, especially suitable for users with high maintenance requirements for soldering tools. Although there are ready-made alternatives on the market, they are relatively expensive, and this product offers an economical solution.
The cleaner features a modular design, including a motor (series 380), an MT3608 DC-DC boost converter, a TP4056 charging board, a TTP223 capacitive touch switch button, an N-channel MOSFET IRFR120N (or a similar N-channel MOSFET), a LiPo 3.7V 1400mAh battery, and other necessary electronic components and mechanical parts. Among the mechanical parts are 7×7 button switches, button switch caps, 2->3mm shaft couplers, 3mm stainless steel shafts, and various brushes for cleaning solder tips, such as fiberglass cleaning brushes, brass wire brushes, and spiral-wound brass wire tube brushes (the latter can also be made by users themselves).
During assembly, some tools may be required, such as a mini metal lathe, belt sander, mini cordless grinder, polisher, reamer, micro HSS twist drill bits, Dremel tools, NOGA deburring tools and blades, as well as adhesives like AB glue, 502 glue, E8000 strong liquid glue, and UV glue. Additionally, some auxiliary materials are needed, such as M3 screws, M3 embedded nuts, high-temperature tape, and crystal fishing line (used as LED light guide material). The casing can be made from 15x2mm aluminum profiles, which can be purchased at hardware stores.
In summary, this solder tip cleaner provides an efficient and economical solution for cleaning solder tips through carefully selected electronic components and mechanical parts, combined with DIY assembly, meeting the needs of both professionals and hobbyists.
8. Micromill
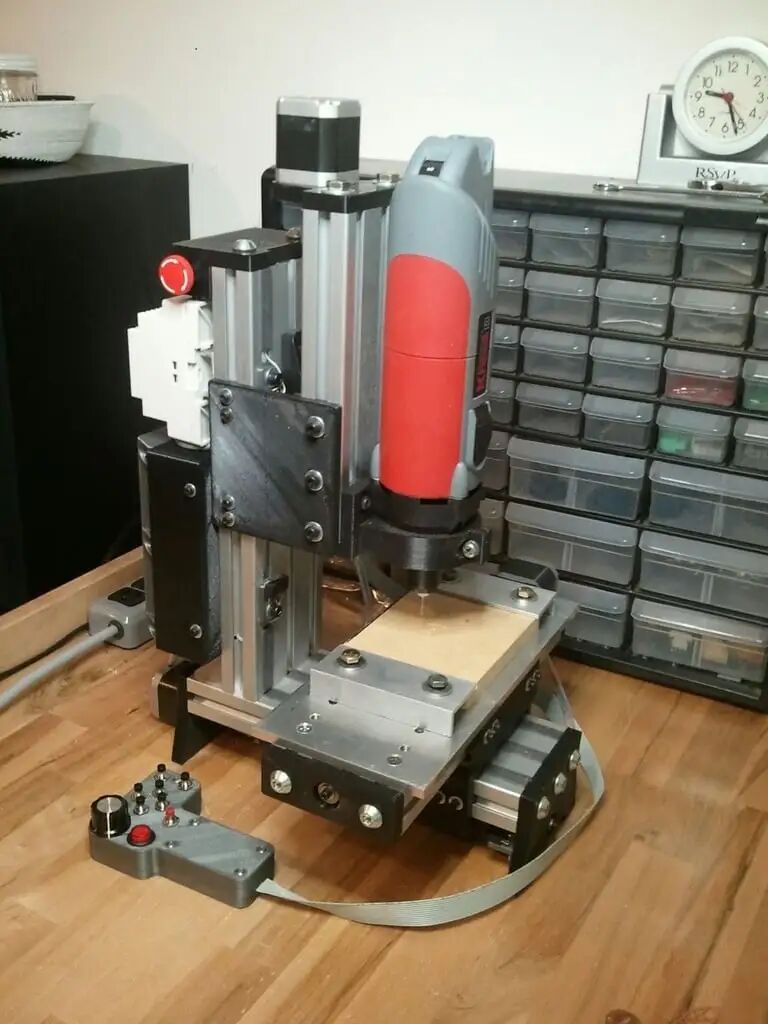
<span>[ID:44854]</span> This is a three-axis CNC milling machine capable of milling circuit boards and aluminum or other soft metals. The accompanying planet-cnc controller software can generate G-code from DXF or Gerber files. The handheld control panel allows for manual milling, while the PC interface displays digital readings of the positions of each axis.
This three-axis CNC milling machine is an ideal choice for manufacturing small precision parts, especially adept at processing circuit boards and soft metals. It combines ease of use with powerful functionality, providing users with an efficient and flexible solution. The core of the machine is the planet-cnc controller, which supports direct G-code generation from DXF and Gerber files without complex programming processes. This means users can quickly turn designs into actual products, significantly shortening development cycles.
In addition to automated milling capabilities, this milling machine is equipped with a handheld control panel, allowing users to perform precise manual control. Through the control panel, users can adjust milling parameters in real-time and accurately control the position of each axis using the digital readings on the PC interface. This manual control capability provides users with greater flexibility, enabling them to make adjustments and repairs as needed.
The milling machine is compact in structure and occupies a small footprint, making it suitable for use in laboratories, workshops, or small manufacturing facilities. It is not only suitable for electronic engineers and hobbyists but can also meet the needs of professional manufacturing. Whether for rapid prototyping, small batch production, or precision part processing, this three-axis CNC milling machine can handle it all. With its high precision, ease of operation, and versatility, it becomes a valuable assistant in the manufacturing field.
9. VISE Coordinate XY Table
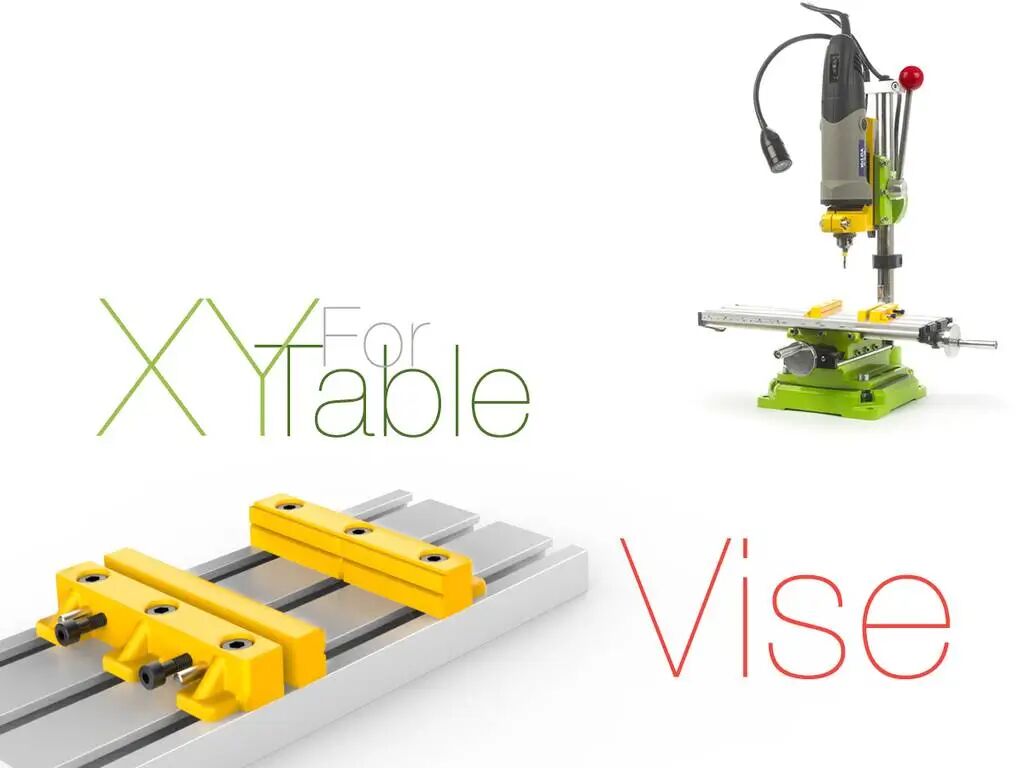
<span>[ID:5868583]</span> This vise designed for coordinate XY tables aims to enhance your comfort when using fasteners, bidding farewell to bulky, space-consuming traditional vises. It saves space and height on XY tables while providing excellent stability and precision even when handling hard materials.
This vise has previously been tested on a Proxxon machine, proving its reliability in holding workpieces.
Parts required to make this vise include: M5x16 and M4x25(20) screws, P30-M5 T-nuts, M4x8 embedded nuts, D4x30 cylindrical pins, and Tree Frog 502 50g strong glue and AB epoxy glue. It is recommended to use TopZeal Filament ABS material for manufacturing.
Recommended tools include: HILDA electric drill, drill press stand, coordinate X-Y axis workbench, NOGA deburring tools and blades, and a reamer set.
The project files include the required designs, available for download.
10. DIY Wire Bending Machine
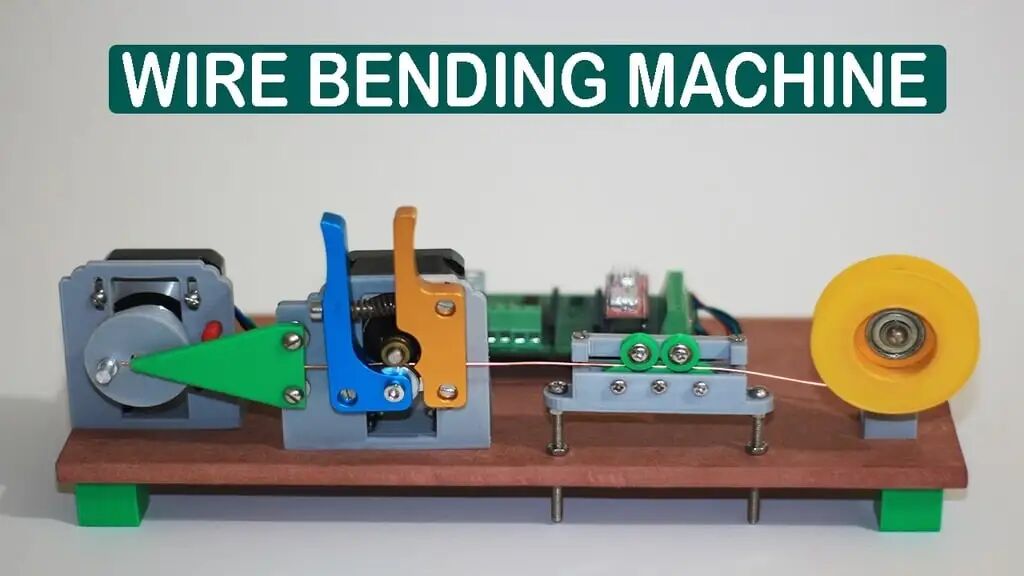
<span>[ID:3789571]</span> This 2D wire bending machine based on an Arduino microcontroller can be used to bend 1mm² brass wire. The main components of this machine are made using 3D printing technology, produced by a Tevo Tarantula printer.
The workflow is as follows: the wire first passes through a wire straightening mechanism, then is pulled by a stepper motor-driven 3D printing filament feeder mechanism. Subsequently, the wire guide further directs the wire, while a bending arm mounted on another stepper motor shaft is responsible for bending the wire.
The current version of the code presets five basic shapes, which can be selected via the serial monitor, and the dimensions can be customized by the user.
Required components include: Arduino Nano, Nema 17 stepper motor, A4988 driver, filament feeder, 1mm² brass wire, and 3mm 693ZZ bearings (5 pieces). By combining these components with clever mechanical design, users can build an economical and versatile wire bending solution suitable for prototyping, DIY projects, and small-scale production.
11. Cutter / Segment Knife Blade
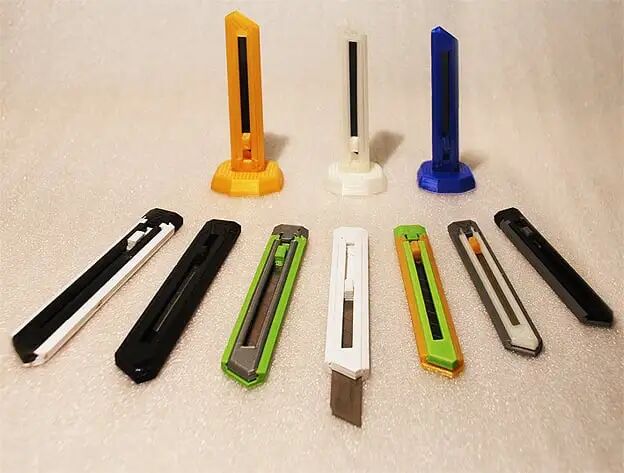
<span>[ID:447793]</span> This 3D printed cutting knife aims to provide a practical and convenient tool solution. The original design concept stems from optimizing commonly used cutting tools in workshops, and it is also suitable for various scenarios such as offices and handicrafts. Equipped with a knife holder, it can also serve as an aesthetically pleasing display piece on a desk or shelf.
The current version (0.9) has redesigned the slider, significantly improving the spring retention performance compared to the previous 0.8 version. Although it may still loosen after prolonged use, the addition of a small spring in the button, which pushes outward against two flanges, effectively addresses this issue. Additionally, the slider has been integrated from two parts into one, and adjustments have been made to the upper and lower bodies, making the parts of version 0.9 incompatible with version 0.8. The initial sliding may be slightly tight, but it will gradually become smoother. The old version (0.8) remains available online for users to obtain replacement parts. The knife holder is compatible with all versions.
Version 0.8.1 has adjusted the knife holder. Version 0.8 removed the tail end component, simplifying the connection method between the upper and lower bodies. Although the blade breaking function has been removed, it will be integrated into the knife holder base in the subsequent version 0.8.1.
<spanearly (0.5)="" 0.2mm="" 18mm="" a="" adapt="" after="" almost="" and="" are="" as="" at="" be="" blade.
12. Laboratory Pipette
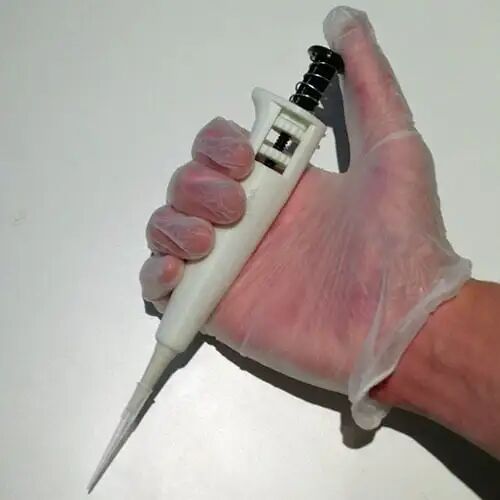
<span>[ID:159052]</span> This redesigned pipette aims to replace the balloon membrane suction method with a more reliable plunger and tubing system, thus solving the problem of maintaining siphon pressure. Its core improvement is compatibility with commercially available 200µL pipette tips, making it convenient for users. Although it has not yet been precisely calibrated, the accuracy ultimately depends on the settings and fit of the lower gear. Preliminary use indicates good consistency in liquid dispensing.
The assembly of this pipette requires the following materials in addition to 3D printed parts: three 3x7mm EPDM, nitrile rubber, or other suitable O-rings, a PEZ candy box spring (or a similar spring), lubricant, and commercially available pipette tips from brands like Eppendorf.
When printing, the plunger, gears, and pipette tube should be set to the highest possible precision. It is recommended to use 100% infill and 2 outer shells for the plunger, gears, and pipette tube, while the main body can use 15% infill.
Before assembly, it is advisable to prepare sandpaper and first try inserting the plunger with the O-ring into the pipette tube to ensure a good fit. Prepare some water to test the fit and suction like using a syringe. It is recommended to lubricate the O-ring to improve performance. Once a good fit is ensured, with minimal friction and the ability to maintain siphon effect, disassemble and proceed with final assembly.
The assembly steps are as follows: insert the pipette tube into the main body, pushing it fully until it slightly protrudes at the top opening. Slide the spring onto the plunger. The next part is trickier. Insert the gear into the top cavity, passing the plunger tip through the top opening and through the center of the gear. After the plunger tip protrudes below the gear, use fingers or tweezers to slide the three O-rings onto the plunger tip. Pre-lubricate the O-rings and the opening of the pipette tube for easier operation. The plunger tip has two grooves, and the installation of the O-rings should ensure that the middle O-ring is secured in the groove by the upper and lower O-rings. Once installed, insert the plunger tip into the pipette tube, and start turning the gear to further insert the plunger into the pipette tube until the upper gear can no longer turn. Test the spring function and siphon effect, and calibrate as needed.
The author has further improved this pipette by using a stronger spring (as the PEZ candy box spring is slightly weak) and may redesign the plunger to accommodate a round spring. It is hoped that this pipette will assist DIY biologists or molecular gastronomists.
13. Painting Rotating Table
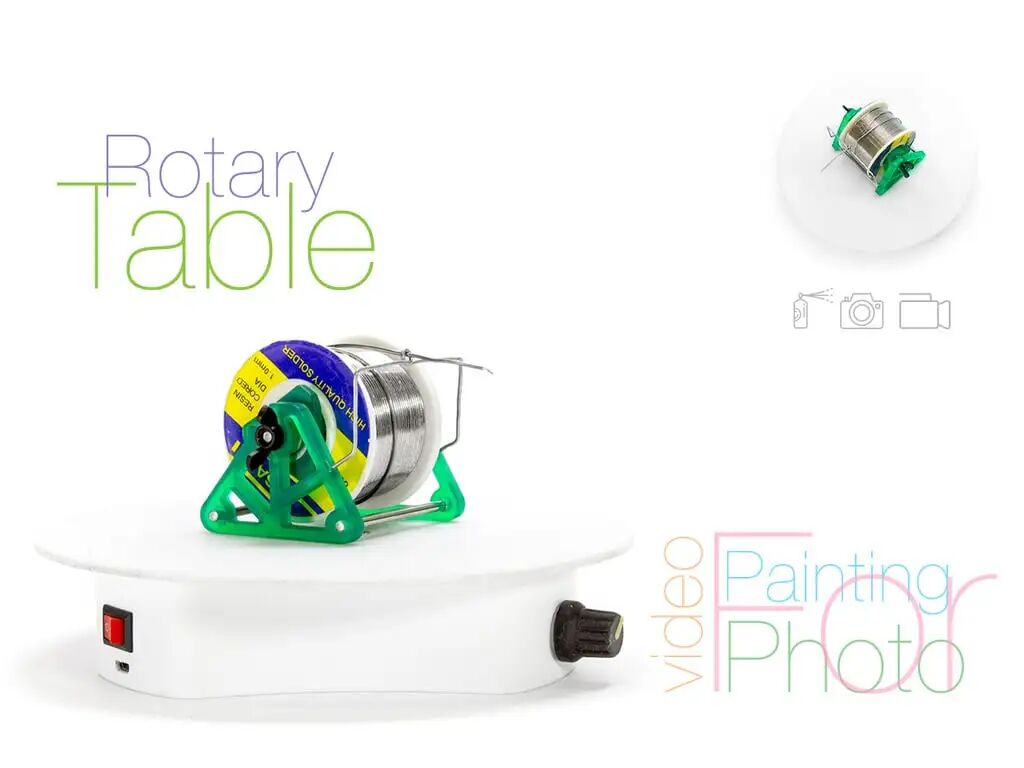
<span>[ID:3079231]</span> This rotating table can be used for spraying small 3D models, as well as for demonstration photography or video shooting.
The construction of this rotating table uses the following components: Arduino Pro mini, MINI ULN2003, DC-DC 2V-5V to 5V power module, 17500 battery, lithium battery charging module, 50K potentiometer, switch, 28BYJ-48 stepper motor, NL8H spherical transmission unit, and buttons. The Arduino code will be included in the downloaded compressed package.
14. Electric Slider

<span>[ID:4722397]</span> This electric slider is a personal project born out of the need to modify existing equipment. Although there are many ready-made slider products on the market, the pursuit of personalized customization led to the decision to design and implement it independently.
This project is still in the development stage, and the video only showcases the prototype. The design of the electronic components is being refined, and the final circuit board and bill of materials (BOM) will be published after testing is completed. Currently, it has been confirmed to include a potentiometer and a battery.
Although the electronic components are still being improved, the basic mechanical structure of the slider has been completed. The initial plan uses a simple PWM speed controller, along with forward, reverse, and stop buttons. If the project is well-received, future consideration may be given to adding wireless remote control functionality.
The main components used in this project include: planetary gear motor zwpd008008-XXX, bearings F604ZZ and MR128, O-rings 3.5x20mm, and various specifications of screws (M3x16mm, M4x16mm, M3x10mm). Additionally, M3 and M4 rivet nuts (length 5mm), keyboard O-rings 9x4x2.5mm, camera mounting screws, self-locking push button switches 7×7, button caps, 3.7V Lipo battery 601235 200mah, and dual potentiometer 50K are required.
15. DIY CNC Machine – OpenScad/Parametric
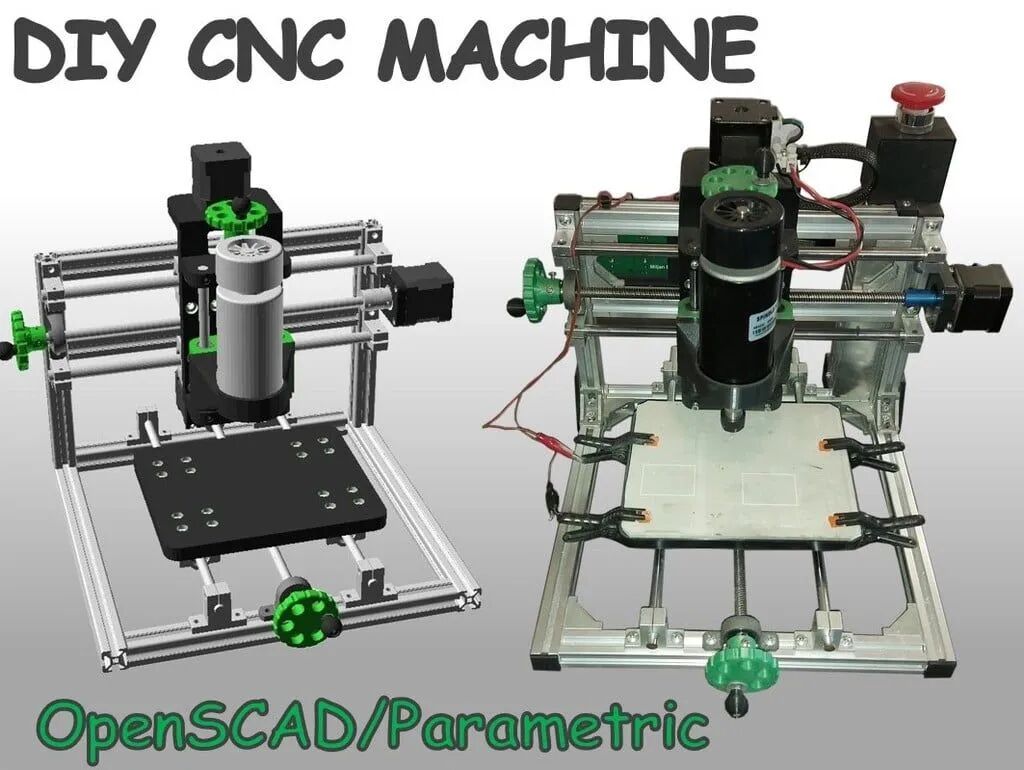
<span>[ID:6570319]</span> This is a parametric model of a DIY CNC machine designed based on OpenSCAD. All model files are located in the CNC.zip compressed package. This model aims to provide users with a customizable CNC machine design solution, allowing users to adjust and optimize according to their needs. Utilizing OpenSCAD’s parametric modeling capabilities, users can easily modify the machine’s dimensions, structure, and other key parameters to meet different processing needs, such as PCB milling, etc. This model provides a powerful tool for DIY CNC machine enthusiasts and makers, reducing design difficulty and improving the flexibility and efficiency of the DIY process. By adjusting parameters, users can explore different design solutions, optimize machine performance, and ultimately create a CNC processing platform that meets their needs. It provides users with a starting point to delve into the design principles and practices of CNC machines and, through continuous iteration and improvement, ultimately realize their CNC manufacturing dreams.
16. DIYBIO Centrifuge v2.0
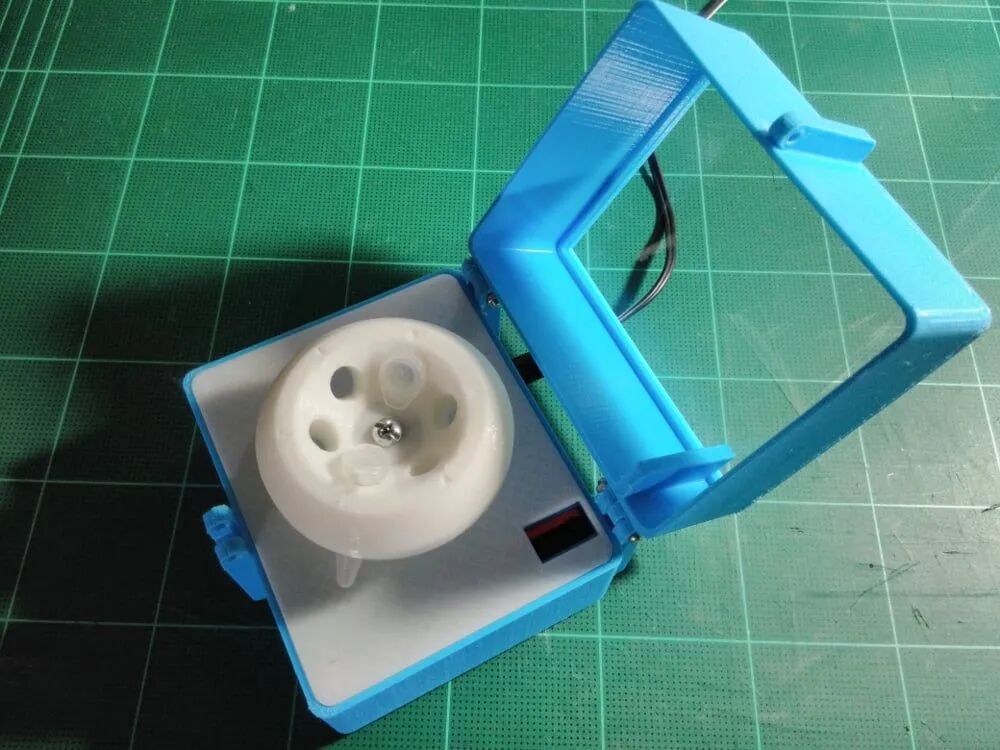
<span>[ID:2598206]</span> A homemade centrifuge powered by a 12V DC motor, equipped with a simple toggle switch. The design includes a reserved installation position for a micro switch, which can achieve automatic power-off when the top cover is opened, ensuring safe use. The internal space is ample, facilitating the integration of a microcontroller (such as Arduino Nano) to implement timing and cycling functions.
The top cover offers two options: one is an integrated 3D printed top cover, and the other consists of two parts that can be combined with acrylic sheets through friction welding or adhesive to form a top cover with a viewing window (as shown in the picture).
The rotor design is based on the OpenSCAD model published by Thomas Kircher, fine-tuned for high resolution (400 faces) to achieve more uniform dimensions. The improved rotor significantly enhances performance compared to the original low-polygon version. The original SketchUp file (.skp) and OpenSCAD code (.scad) are included.
The rotor spindle connector is currently a temporary solution, using a cut-off 5mm diameter bolt and a nut glued into the spindle connector. The development team is working on a better solution to ensure perfect rotor balance.
17. Easy Circuit Tester
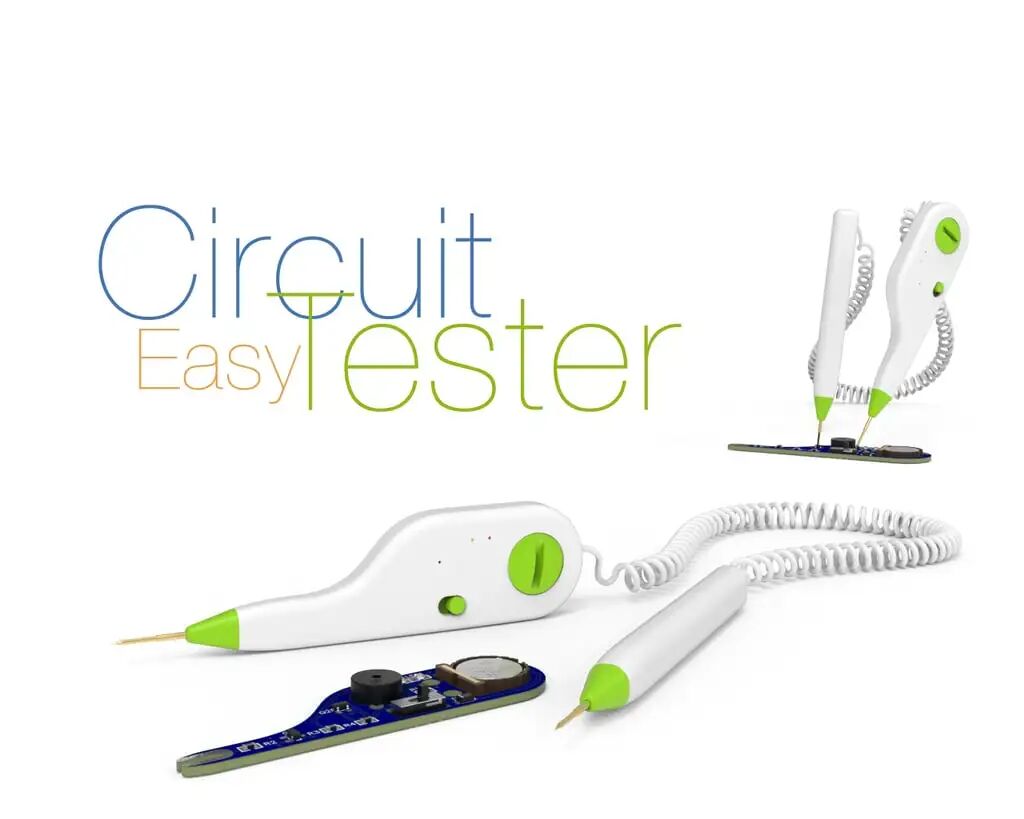
<span>[ID:4206888]</span> This simple circuit tester is designed to enhance daily work efficiency, integrating multiple testing functions to eliminate the hassle of frequently changing multimeter ranges. In addition to basic circuit contact detection, this tester can also check batteries, diodes, transistors, resistors, and capacitors (within a certain range). Furthermore, it has the capability to detect the presence of mains voltage.
The PCB size for this project is 74.52 x 21.2mm, and the circuit diagram and Gerber files are included in the project compressed package.
Key components required to build this tester include: BC847B SOT-23 transistors (Q1, Q2), red and green LEDs in 0805 package, 1N4007 SOD-123FL diodes, 39kΩ, 120kΩ, 115Ω, and 2kΩ resistors in 0805 package, 0942 active buzzer, CR1220 battery and battery holder, MSS22D18 power switch, Pogo Pin p75 probes, and 3×3 mm magnets.
The emergence of this multifunctional circuit tester can help electronics enthusiasts and professionals simplify the circuit debugging process and quickly locate issues.
Previous Issues:
“Material Detection II” DIY machine essential components that can save you a lot of materials and avoid empty runs, and you can install a buzzer on any machine to detect material exhaustion.
“DIY Tools” Essential tools for DIY enthusiasts, including soldering, surface mounting, cutting, drilling, polishing, painting, etc., with complete 3D printing plans to build your own workshop.
“Shredder” Releases the productivity of 3D printers, gathering various practical shredder designs, allowing you to create functional mechanical devices and experience the process of creating from digital models to physical tools.
“Turntable – Manual” 3D printed manual rotating turntable for photography and painting use, with stable gear drive speed and no displacement, fully 3D printed, an essential tool for creators.
“Turntable – Electric” 3D printed programmable motor rotating platform, stable and uniform rotation, with various parameters set for shooting, product display, and 3D scanning, complete production material tutorial.
“Hand Drill II” 3D printed small hand drill, compact and convenient, making it easy to drill holes in printed models, a handy tool to have.
“Hand Drill” 3D printed small manual drill fixture, an essential tool for handmade projects, useful when a power drill is too large or difficult to control, compact and practical.
“Dremel – Drill Stand” Initially, I didn’t know about Dremel, but after organizing these tool expansions for 3D printing, I want to buy one; the accessories are too rich.
“CNC Machine” The twin brother of the 3D printer; if you have built a 3D printer, you can likely use leftover materials + a spindle to make a CNC machine.
“Table Saw” Several solutions to achieve a table saw at a very low cost; there is no best, only the most suitable.
“Lathe” 3D printed construction of a real usable lathe, using common materials and 3D printed structural parts, easy to make, low cost, and essential for DIY players.
“Laser Engraver” Complete construction plan for a 3D printed laser engraver, featuring 30 excellent designs, each upgraded through long-term design and practice, a true productivity tool.
“Electric Sander” 3D printed electric sander, low cost, compact, easy to make and improve, an essential tool for polishing models and DIY projects.
“Drill Assist” Drilling must be professional; 3D printed drill hole assist tool for drilling at various tricky angles, ensuring each hole is consistently precise, vertical, and smooth.
“Hex Screwdriver Bit Organizer” 3D printed bit organizer for hex drill bits, portable, preventing loss, and convenient.
“Tool Dust Collection” Dust collection during drilling and grinding processes with electric drills and angle grinders, collecting debris.
“Drill Press” Men love to drill; low-cost drill press for making every hole well.
<span>If you cannot download the models due to network issues, you can join the group, and friends in the group have shared the source files for each issue.</span>
A “3D Printing Technology Exchange Group” has been established; if interested, you can join the group by clicking the ‘Join Group’ menu below the public account or replying “Join Group” to get the joining method.
If anyone has specific types they need, please leave a message, and I will select the most requested types to produce a few more issues.
All model copyrights belong to the original authors; this is only for introduction and explanation, for learning purposes, without any profit motive. For specific model original copyrights and information, please check the original address.
Note: For more information on specific models, directly use the <span>T station ID</span> to check on <span>thingiverse</span>.