Introduction
This is a deep troubleshooting guide for Linux users, especially those using distributions like Pop!_OS and Ubuntu. It is based on a real experience of a system ’emergency’ that lasted several days, triggered by an interruption during the installation of NVIDIA drivers. We will start from the initial ‘unable to boot’ situation and peel back the layers to explore every detail of UEFI boot, LUKS full disk encryption, LVM logical volume management, <span>initramfs</span> boot mechanism, and the <span>systemd-boot</span> bootloader.
The goal of this article is not only to provide solutions but also to help you establish a systematic way of thinking to handle complex Linux boot issues by reviewing the error messages, diagnostics, and thought processes at each step.
Act One: The Beginning of the Storm – System Crash and Initial Diagnosis
The story begins with a routine CUDA installation. During the process of adding the <span>apt</span> repository and installing CUDA following the NVIDIA official tutorial, the system unexpectedly interrupted. Upon reboot, the familiar graphical interface disappeared, and we were thrown into the cold ’emergency mode’ (<span>emergency mode</span>).
Symptom 1: Endless Emergency Mode Loop
The system prompts <span>You are in emergency mode</span> and suggests running log commands. However, any repair attempts, such as <span>apt upgrade</span>, would lead the system back into this mode after failing.
Symptom 2: Clear Boot Error
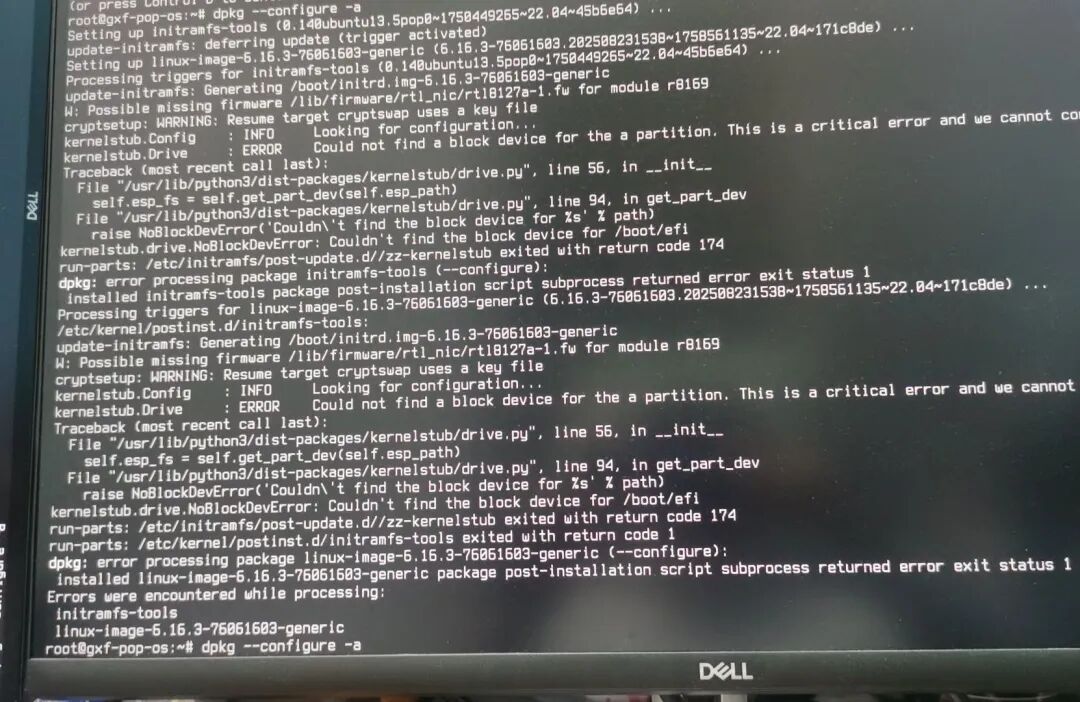
The core error in the logs pointed to the boot partition:
kernelstub: ERROR: Could not find a block device for the partition
NoBlockDevError: Couldn't find the block device for /boot/efi
- Interpretation:
<span>kernelstub</span>(the boot management tool for Pop!_OS) could not find the EFI System Partition (ESP). This is the first ‘break’ in the boot process.
How to Identify My Partitions?
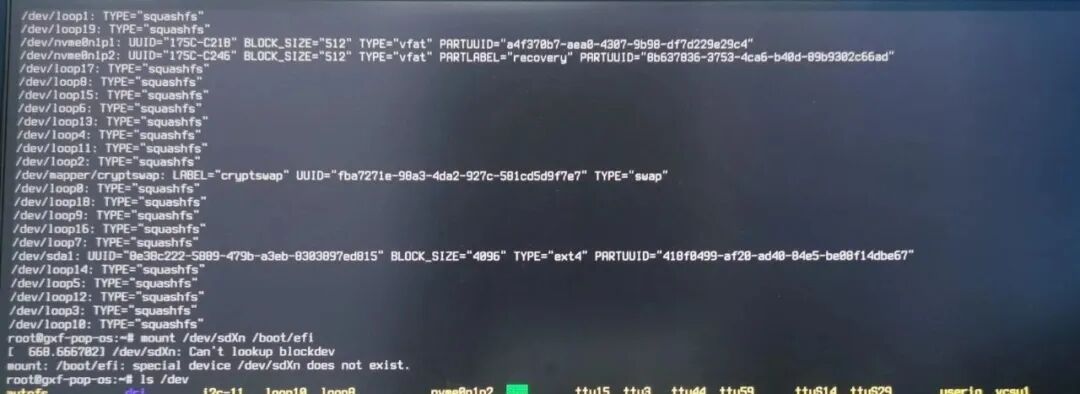
Before attempting any repairs, the first step is to ‘know yourself and your enemy’ by understanding your hard drive’s partition structure. In emergency mode or the terminal of a Live USB, you can use <span>lsblk -f</span> or <span>sudo parted -ls</span> commands.
- EFI Partition (
<span>/boot/efi</span>): Look for a partition size between<span>500MB</span>and<span>1GB</span>, with a filesystem type of<span>vfat</span>(FAT32). In the output of<span>parted</span>, it is usually marked with<span>boot, esp</span>. In our case, it is<span>/dev/nvme0n1p1</span>. - Encrypted Root Partition: This is usually the largest partition on the hard drive. In the output of
<span>lsblk -f</span>, its filesystem type will show as<span>crypto_LUKS</span>. In our case, it is<span>/dev/nvme0n1p3</span>. - Recovery Partition: A partition specific to Pop!_OS, usually around 4GB in size, with a filesystem also as
<span>vfat</span>, and the label in<span>parted</span>output is<span>recovery</span>. In our case, it is<span>/dev/nvme0n1p2</span>.
Act Two: Emergency Scene – The ‘Paralysis’ of <span>initramfs</span>
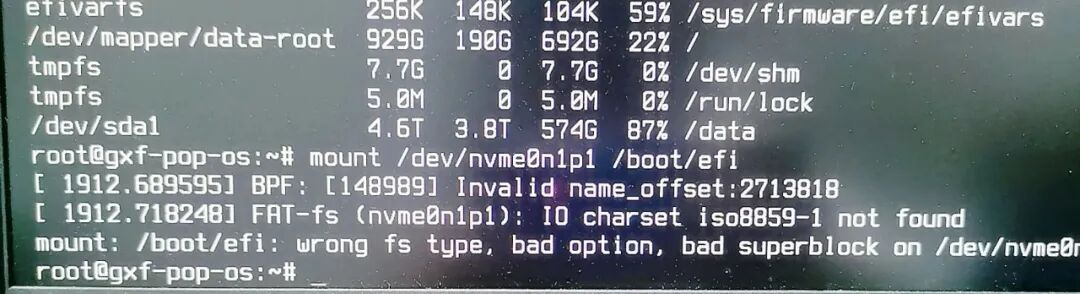
After identifying the partitions, we attempted to manually mount the EFI partition in emergency mode but encountered deeper failures.
FAT-fs (nvme0n1p1): IO charset iso8859-1 not found
This error indicates that the emergency mode micro-system itself is damaged, lacking the essential kernel modules required to read and write the EFI partition. This means that repairs cannot be completed within emergency mode.
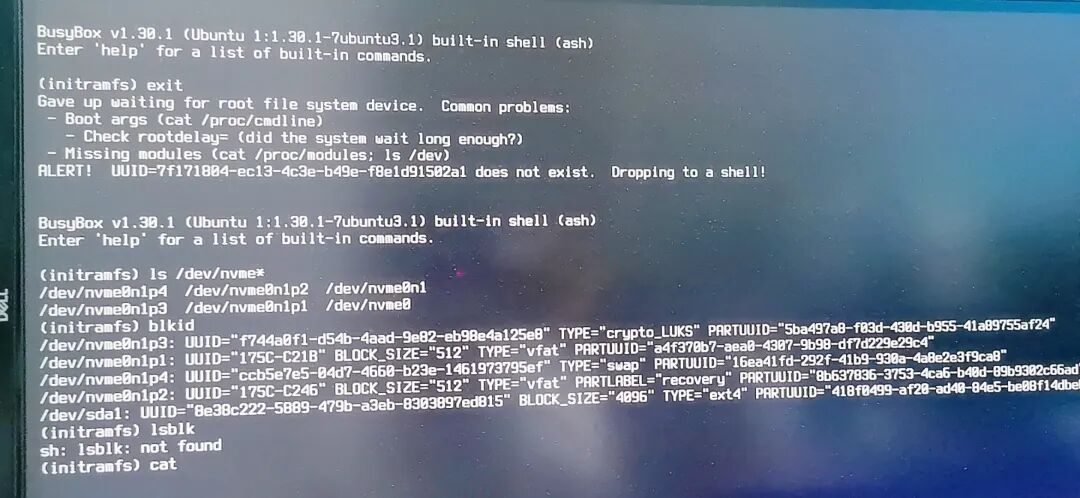
Sometimes, the system directly enters a more limited <span>(initramfs)</span><code> command line and throws a fatal error:
ALERT! UUID=... does not exist. Dropping to a shell!
This also confirms that the <span>initramfs</span> image is damaged, as the boot script inside cannot find the correct root partition address, leading to a complete interruption of the boot process.
Core Cause: All these symptoms point to the same culprit – an incomplete NVIDIA driver/CUDA installation that generated a corrupted <span>initramfs</span> boot image.
Act Three: Detective Work – Debugging Complex Encrypted Partitions
Before entering the final repair process, a key step is to successfully mount the main system partition in the Live USB environment. This process itself is a brilliant ‘detective work’ where we deciphered the error messages and peeled back the ‘encrypted-LVM’ composite structure of the hard drive.

First Attempt: Direct Mounting We first tried the most straightforward <span>mount</span> command:
sudo mount /dev/nvme0n1p3 /mnt
Immediately, we encountered the first clue:
mount: /mnt: unknown filesystem type 'crypto_LUKS'.
- Clue Interpretation: The system clearly tells us that
<span>/dev/nvme0n1p3</span>is not a directly mountable filesystem, but a<span>crypto_LUKS</span>encrypted volume. Like a locked safe, we cannot open it directly; we must first unlock it with a key.
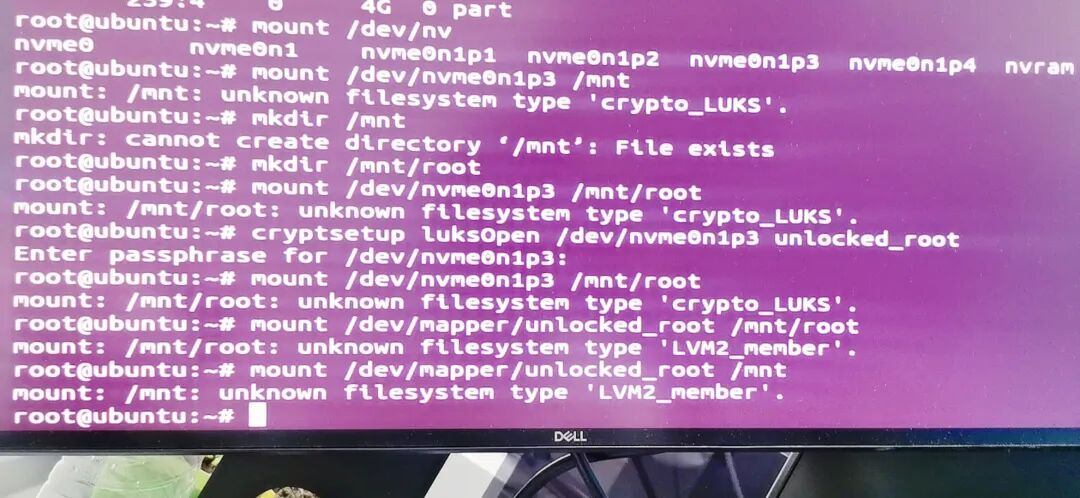
Second Attempt: Unlocking the Encryption Layer Based on the clue, we used the correct ‘key’ – the <span>cryptsetup</span> tool to unlock:
sudo cryptsetup luksOpen /dev/nvme0n1p3 unlocked_root
After entering the password, we confidently tried to mount the newly appeared virtual device <span>/dev/mapper/unlocked_root</span>, but received the second clue:
mount: /mnt: unknown filesystem type 'LVM2_member'.
- Clue Interpretation: This error reveals a deeper structure. The unlocked device is still not the final filesystem, but an
<span>LVM2_member</span>(LVM physical volume). This indicates that what is inside the ‘safe’ is not directly usable files, but another ‘filing cabinet system’ (LVM).
Final Solution: Activate LVM and Mount With this clue, we know we must first get the system to recognize and activate this ‘filing cabinet’ to access the final files.
# Activate LVM logical volumes
sudo vgchange -ay
# Mount the root partition logical volume in LVM
sudo mount /dev/mapper/data-root /mnt
This time, the mount finally succeeded. By following the clues like a detective, we successfully completed the entire process of ‘unlocking the safe -> activating the filing cabinet -> retrieving the files.’
Act Four: Ultimate Rescue – Live USB ‘Aseptic Surgery’
Since the system itself cannot self-rescue, we must rely on an external, healthy ‘operating room’ – the Live USB environment (for Pop!_OS users, when the system can still enter <span>recovery</span> mode, it can also play the same role).
3.1 Preparing the Surgical Environment
- Create and Boot Live USB: Download the system ISO, use tools like BalenaEtcher to create a bootable drive, and boot the computer from the USB drive.
- Connect to the Network: After entering the Live USB desktop, connect to Wi-Fi or a wired network, which is necessary for downloading software packages later.
3.2 Entering the ‘Aseptic Operating Zone’ (Chroot Environment)
Open the terminal, and we will ‘enter’ the ‘sick’ system on the hard drive through a series of commands.
- Unlock the LUKS Encrypted Volume:
sudo cryptsetup luksOpen /dev/nvme0n1p3 cryptdata - Activate the LVM Logical Volumes:
sudo vgchange -ay - Mount the System Partition:
sudo mount /dev/mapper/data-root /mnt sudo mount /dev/nvme0n1p1 /mnt/boot/efi - Bind System Directories and Enter Chroot:
for i in dev dev/pts proc sys run; do sudo mount -B /$i /mnt/$i; done
sudo chroot /mnt
Upon success, the terminal prompt will change to
<span>root@...:/#</span>, and now all operations will directly affect your main system.
3.3 ‘Debridement’ and ‘Transplant’: Fixing Core Issues
In the chroot environment, we will perform a thorough ‘surgery.’
-
Completely Remove the Source of Infection (Remove All NVIDIA and CUDA Packages): This is the only reliable way to resolve version conflicts and residual configurations.
apt-get purge --auto-remove -y '*nvidia*' '*cuda*' 'libcuda1*' 'libxnvctrl*' -
Transplant ‘Healthy Organs’ (Install CUDA and Drivers from NVIDIA Official Source): Choose to add NVIDIA’s official
<span>apt</span>repository to install the latest CUDA and drivers, ensuring a single source and version compatibility. The command<span>ubuntu-drivers install nvidia-drivers-580</span>is actually useless; I seem to still be using the open-source driver. If it doesn’t work, fix the graphical interface first and then tinker.# (These commands are executed in chroot) # First, install necessary tools apt install software-properties-common # Download and add NVIDIA's keyring wget https://developer.download.nvidia.com/compute/cuda/repos/ubuntu2204/x86_64/cuda-keyring_1.1-1_all.deb dpkg -i cuda-keyring_1.1-1_all.deb # Update apt cache apt-get update # Install the required version of CUDA, which will automatically include the compatible proprietary driver apt-get -y install cuda-toolkit-13-0 -
Generate a Brand New ‘Immune System’ (Rebuild initramfs): This is the most critical step, which will package the freshly installed drivers and all correct configurations into a new boot environment.
update-initramfs -u -k all
3.4 ‘Wake the Patient’: Wrap Up and Reboot
- Exit the chroot Environment:
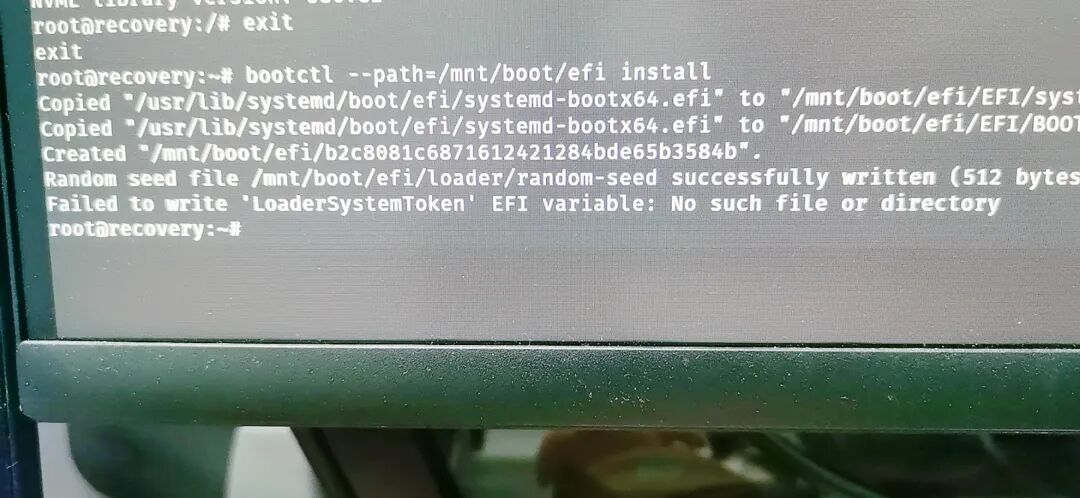
<span>exit</span> - Reinstall the Bootloader:
<span>sudo bootctl --path=/mnt/boot/efi install</span> - Reboot the Computer:
<span>sudo reboot</span>(at this point, remove the USB drive)
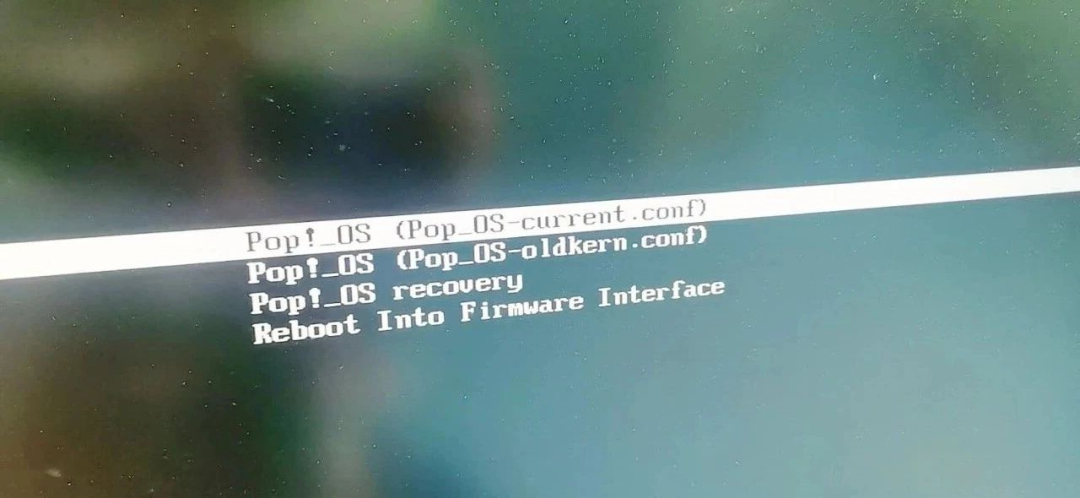
Act Five: Post-Operative Recovery – The ‘Last Mile’ of the Boot Menu
Sometimes, after completing the above repairs, the system reboot may default to entering Recovery Mode. This indicates that the boot entry for the main system has been repaired, but the default boot order still points to the recovery partition.
When to No Longer Rely on Live USB? When you can successfully enter the <span>recovery@recovery:~#</span> command line, you no longer need the Live USB. You can directly execute the final boot fixes in the Recovery environment.
Fixing the Boot Menu
- Mount the EFI Partition:
<span>sudo mount /dev/nvme0n1p1 /boot/efi</span> - Manually Edit
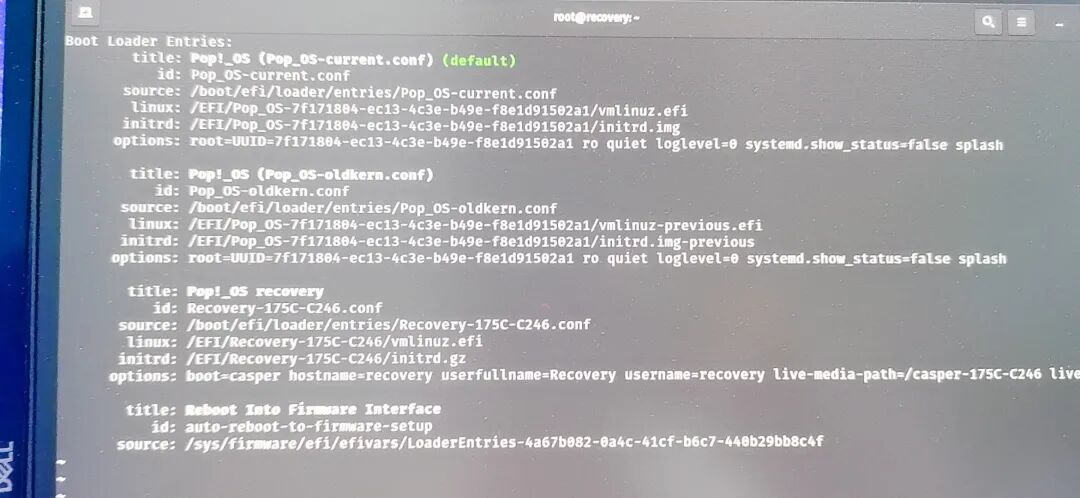
<span>loader.conf</span>:<span>sudo nano /boot/efi/loader/loader.conf</span> - Force Specify the Default Entry: Ensure the file content is as follows, where the
<span>default</span>line’s filename must exactly match the main system configuration filename (including the<span>.conf</span>suffix) in the<span>/boot/efi/loader/entries/</span>directory.default Pop_OS-current.conf timeout 3 - Reboot to complete.
 Note that Pop! OS does not use grub, which is different from Ubuntu.
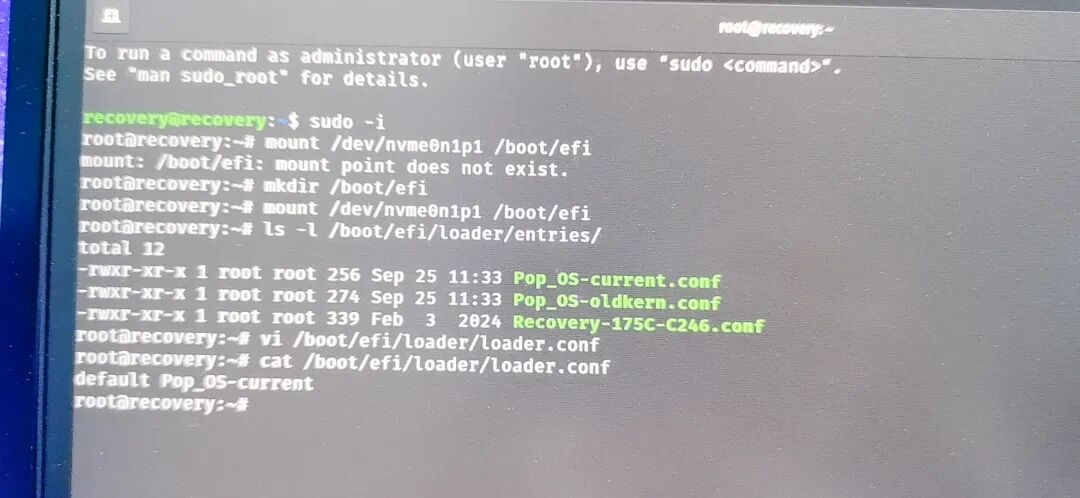
Act Five: Troubleshooting (Q&A)
-
Q: Error when mounting
<span>unknown filesystem type 'crypto_LUKS'</span>or<span>LVM2_member</span>? A: This is because you did not execute<span>cryptsetup luksOpen</span>and<span>vgchange -ay</span>in order to unlock and activate the encrypted volume and LVM. -
Q: Error in chroot when running
<span>update-initramfs</span><span>Failed to retrieve NVRAM data</span>? A: This is normal; the chroot environment cannot access the motherboard firmware. You can temporarily move the<span>/etc/initramfs/post-update.d/zz-kernelstub</span>script, run the command, and then move it back. -
Q: Error in chroot when running
<span>nvidia-smi</span><span>Driver/library version mismatch</span>? A: This is normal. The chroot shares the kernel of the Live USB, and it is inevitable that the driver version does not match your main system. To determine if the driver is successfully installed, check for errors with the<span>apt</span>and<span>update-initramfs</span>commands.
-
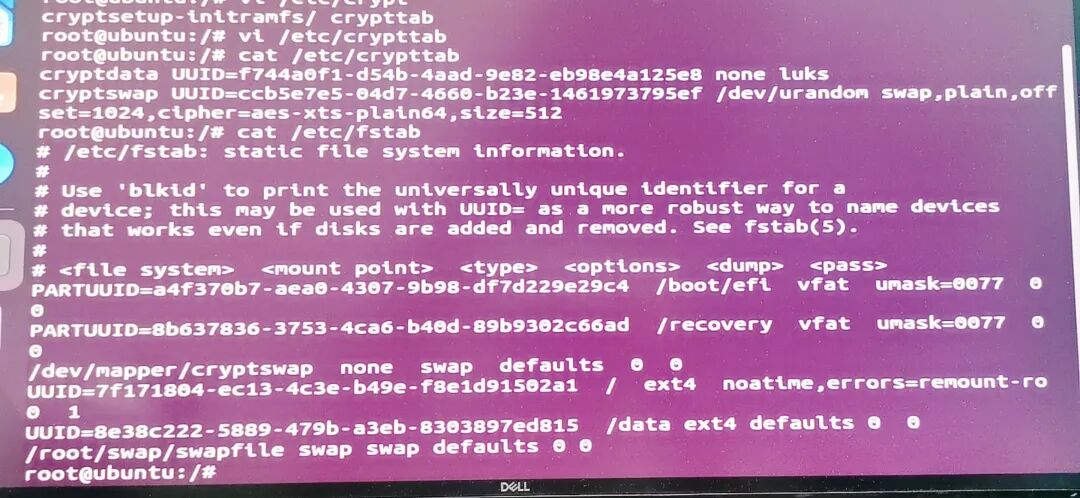
<span>/etc/crypttab</span>and<span>/etc/fstab</span>should not have issues due to driver installation, so no modifications are made; see the official website for format details.
Conclusion
The Linux boot process is intricate and complex, and a single accident can trigger a chain reaction of ‘system avalanches.’ Fortunately, through Live USB and Chroot, we can always gain the highest control over the system. I hope this detailed review can provide you with a reliable ‘first aid manual’ for your future explorations in Linux.
References
- System76 Official Bootloader Repair Guide: https://support.system76.com/articles/bootloader/
Finally, here is a collection of commands to check various versions when installing drivers:
#!/bin/bash
# Comprehensive Diagnostic Command Set for NVIDIA & CUDA Environment (Concise Version)

echo "=============== HARDWARE ==============="
# Check GPU hardware, driver, and kernel module usage
lspci -k | grep -A 3 -i "VGA|3D|Display"

echo "
=============== KERNEL & OS ==============="
# View current running kernel, installed kernels, and system version
uname -r
ls /boot/vmlinuz-*
lsb_release -a

echo "
=============== DRIVER MODULES ==============="
# Check NVIDIA kernel module loading status
lsmod | grep nvidia
# Check DKMS compilation status (very critical)
dkms status
# View loaded driver version (if the module is loaded)
cat /proc/driver/nvidia/version

echo "
=============== PACKAGES (APT) ==============="
# View all installed NVIDIA and CUDA related packages
dpkg -l | grep -i nvidia
echo "---"
dpkg -l | grep -i cuda
# View the source policy of key packages
echo "---"
apt-cache policy nvidia-dkms-$(dpkg -l | grep -o 'nvidia-dkms-[0-9]\+' | head -n 1 | cut -d- -f3)
apt-cache policy cuda-toolkit

echo "
=============== NVIDIA & CUDA STATUS ==============="
# Check NVIDIA driver communication status
nvidia-smi
# Check CUDA compiler version
nvcc --version
# Check OpenGL renderer
glxinfo | grep "OpenGL renderer"

echo "
=============== SYSTEM LOGS (LAST 20) ==============="
# Filter the latest NVIDIA related errors from kernel logs and system logs
dmesg | grep -i -E "nvidia|nvrm" | tail -n 20
echo "---"
journalctl -b | grep -i -E "nvidia|nvrm" | tail -n 20

echo -e "
Diagnosis complete."