In the first article of this series, we introduced the interfaces of the Jetson Nano and the peripherals needed. In this article, we will guide you on how to start the Jetson Nano Developer Kit.
Before starting the Jetson Nano Developer Kit, we need to install the system package on this TF card.
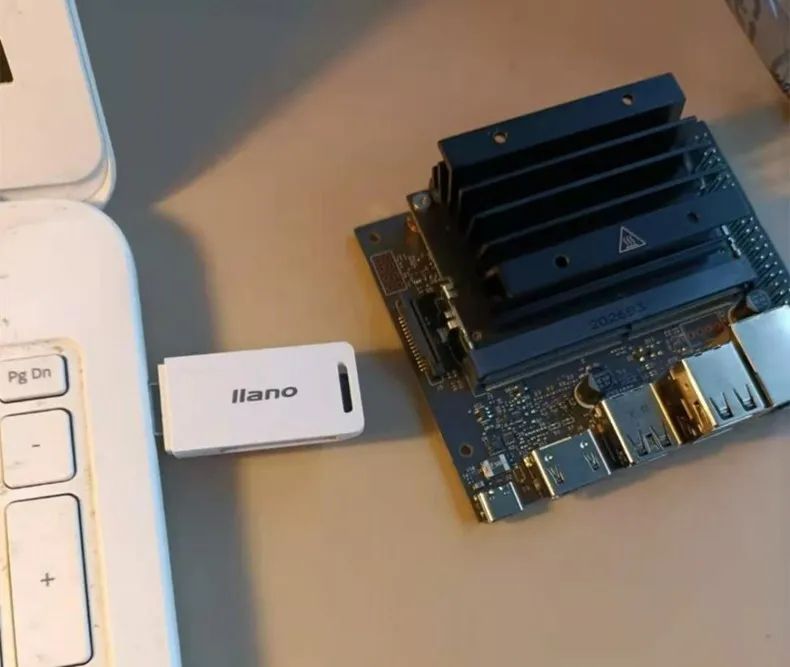
First, prepare a USB card reader, insert the TF card into the USB card reader, and connect it to a computer.
Next, please follow the steps below:
1. Download the latest image file from the NVIDIA official website. Here is an important reminder: although the Jetson Nano 4GB and Jetson Nano 2GB use the exact same architecture, the image files for both are not compatible, so you must choose the correct download link. In other words, if you mistakenly download the Jetson Nano 4GB image package, errors will occur on the Jetson Nano 2GB.
Remember the location as follows:
Jetson Nano 2GB:
https://developer.nvidia.com/jetson-nano-2gb-sd-card-image
The download may take a considerable amount of time, so some patience is needed.
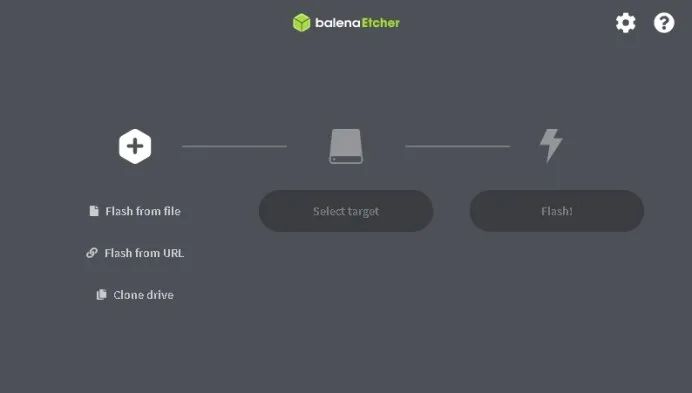
2. Download the Etcher flashing software: the download location is https://www.balena.io/etcher/. This software supports Windows (x86|x64), macOS, Linux x64 (64-bit), and Linux x86 (32-bit), so please choose the appropriate version to download. The provided files are all executable, and you can run them directly after downloading without any installation steps, which is very simple.
Run Etcher:
① Windows version: run balenaEtcher-Portable-x.x.xxx.exe
② Linux version: right-click on balenaEtcher-x.x.xxx-x64.AppImage and select “Open” to execute
③ MacOS version: standard startup method is sufficient
The interface after startup is shown in the screenshot below:
3. After clicking “Flash from files” in the image above, select the image file to install, here we choose the Jetson Nano 2GB image file “jetson-nano-jp441-2gb-sd-card-image.zip”, then the icon of the option will change (as shown below).
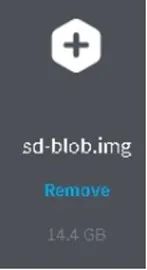
Among them, “sd-blod.img” is the file extracted from jetson-nano-jp441-2gb-sd-card-image.zip. The “14.4GB” below indicates the storage capacity used before compression. From this, it can be seen that if only a 16GB TF card is used for installation, there will be very little available space after the system is installed.
4. Insert the TF card into the card reader, and then connect it to your x86 or Mac machine. Etcher will automatically detect the appropriate installation device and select it. However, for safety, it is best to click the “change” option (as shown in the screenshot) to confirm whether the selected device is correct; otherwise, once the final step “Flash” is executed, all data on the selected target storage will be lost.
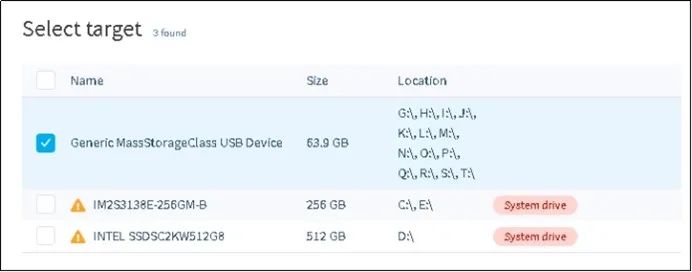
In the image above, Etcher automatically selects the first option (check Generic Mass Storage Classes USB Device) and shows that the capacity of this device is 63.9GB, which indeed meets our set standard device.
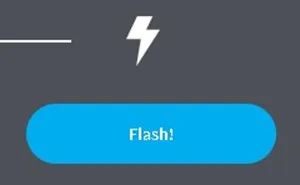
After the first two options are selected, the far-right “Flash!” button will change to the blue background with white text as shown in the image below, indicating that it can be clicked.
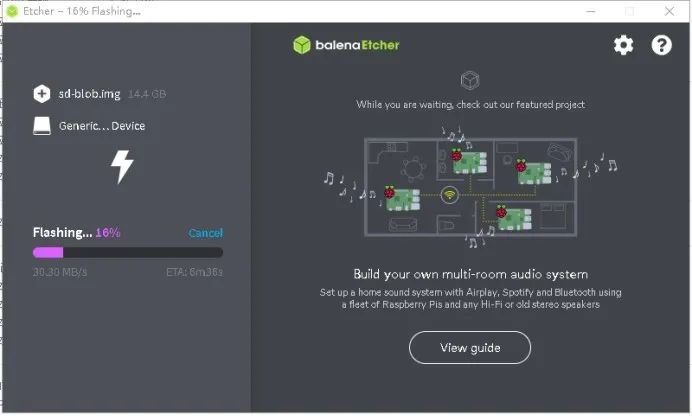
After clicking this button, the flashing process will begin (as shown in the image below). If everything goes smoothly, the next step is to wait for the task to complete. The time required will depend on the size of the image and the read/write performance of the TF card itself.
5. The data written to the TF card is stored in Linux’s ext4 format, which means it cannot be recognized under Windows. Windows users need not panic (many users have encountered issues where they cannot see data under Windows and thought they had not installed successfully).
This TF card’s content can be recognized normally under Linux or Mac. NVIDIA has utilized special techniques to create 14 partitions on this TF card (as shown in the image below), but don’t worry, as long as the Jetson Nano can recognize it, that is sufficient.
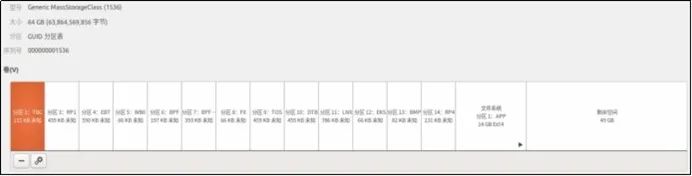
After flashing the image onto the TF card,
the partition map displayed in the Ubuntu disks tool
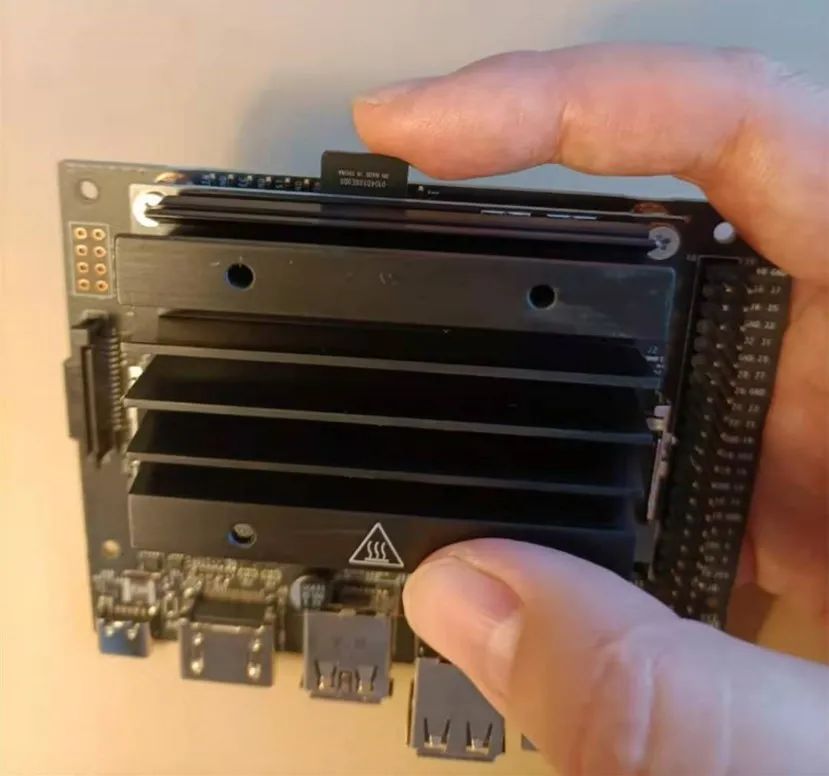
6. Then remove the TF card with the installed system from the card reader and insert it into the card slot at the back of the Jetson Nano 2GB.
7. The final step is to connect the power supply to the Jetson Nano 2GB.
First Start of Jetson Nano
After starting the Jetson Nano, remember to connect the mouse/keyboard/monitor. The initial debugging process is now similar to Windows, but Nano is simpler; just follow the standard steps below.
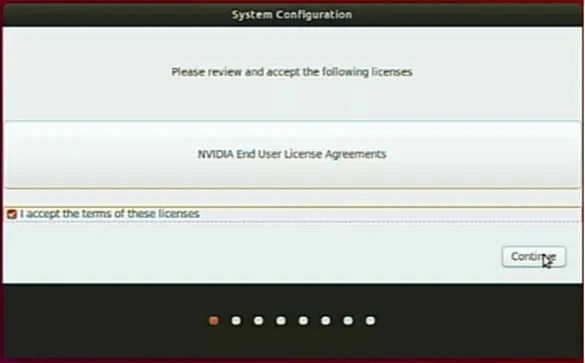
After the first startup, you will enter the following screen, which has eight steps to execute. After checking each step, click “Continue” at the bottom right corner.
Step 1: After checking “I accept the terms of these licenses”, you can click “Continue”.
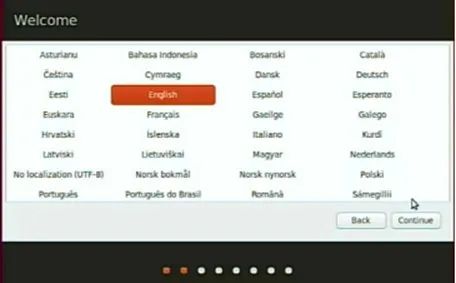
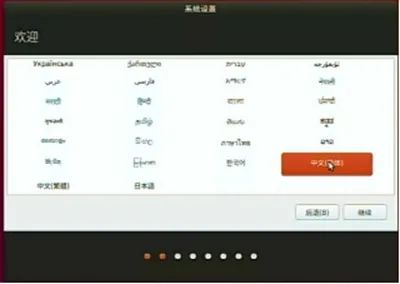
Step 2: Choose the language, pre-select “English” or find the option for “Chinese (Simplified)” below, then continue.
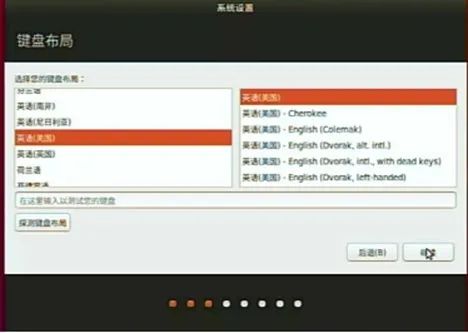
Step 3: Keyboard layout, just select the pre-selected one and continue.
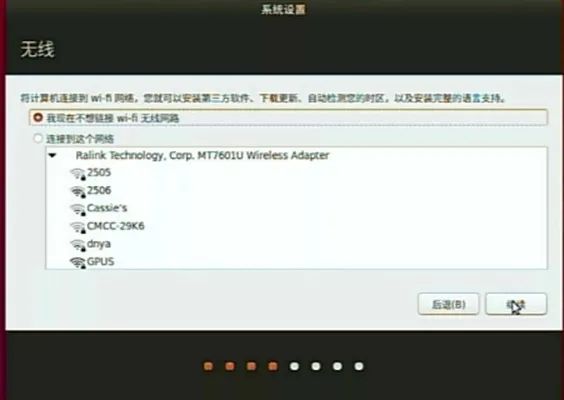
Step 4: If you have a USB wireless network card connected, this option will appear, but it is recommended to first select “Do not connect” at this step, and set up Wi-Fi connection after entering Ubuntu.
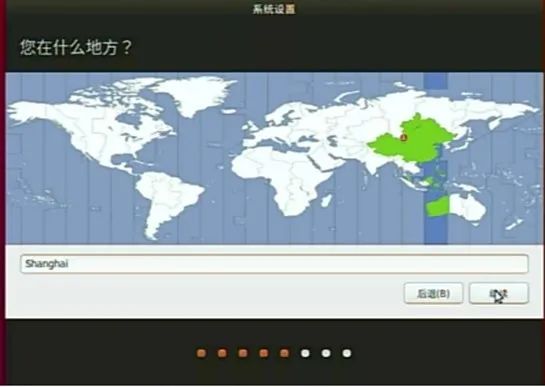
Step 5: Select the region, you can directly click on the location on the map.
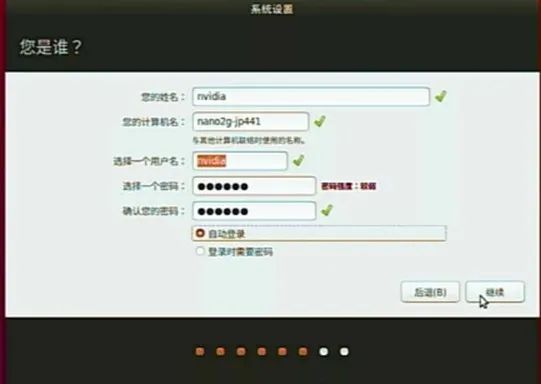
Step 6: This step is the most important part of the entire setup, where you can set the account, device name, and password for your Jetson Nano 2GB.
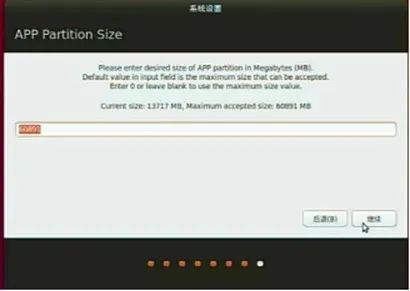
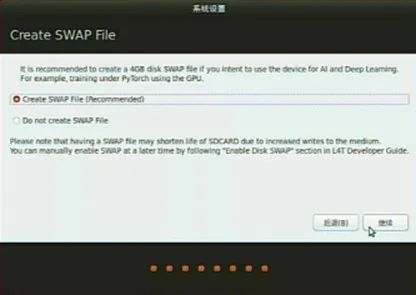
Step 7 and Step 8: Configure TF card usage space and SWAP virtual memory settings. It is recommended not to change these two options and accept the default values.
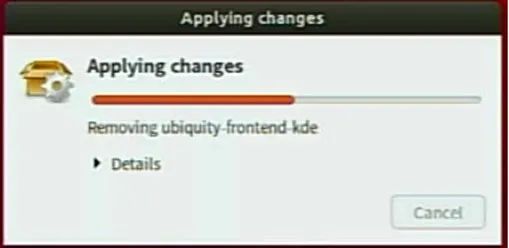
After completing the above 8 steps, the system will start to configure and display the progress status below, which will take about 1 minute to complete.

After executing the above steps, the system will automatically restart, and the initial setup of the Jetson Nano will be officially completed. After restarting, it will enter the Ubuntu 18.04 L4T desktop.
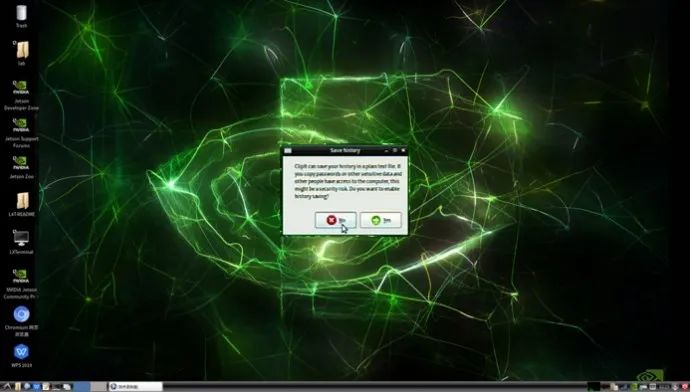
It is important to note that if your device is the Jetson Nano 2GB version, to reduce system resource usage, the desktop will be set to the lightweight LXDE desktop of Ubuntu. During the first startup, a dialog box will appear in the middle of the desktop; please read the content yourself, and it is recommended to choose “No”.
The layout and usage habits of this desktop are somewhat similar to the Windows 95 operating system, such as the position of the task panel (menu bar) at the bottom and the start button at the lower left corner, etc. You will feel very familiar once you start using it.
Does it look very similar to a Windows operating environment? As for the Chinese localization settings, Chinese input methods, WPS Office, and QQ installation, we will guide you step by step in the next article.
The JetPack development environment provided here is completely consistent with the Jetson Nano 4GB version, so all applications that can be executed on the 4GB version can also be implemented on the 2GB version, including AI deep learning, OpenCV computer vision, ROS/IOT machine control, etc. You need not worry about any loss of functionality.
Recommended Reading
NVIDIA Jetson Nano 2GB Series Article (1): Unboxing Introduction

Registration for the GTC China Online Conference is in full swing, and NVIDIA invites you to participate online in this annual AI and graphics technology conference. Scan the QR code on the poster below or click “Read the original text” to register immediately!
