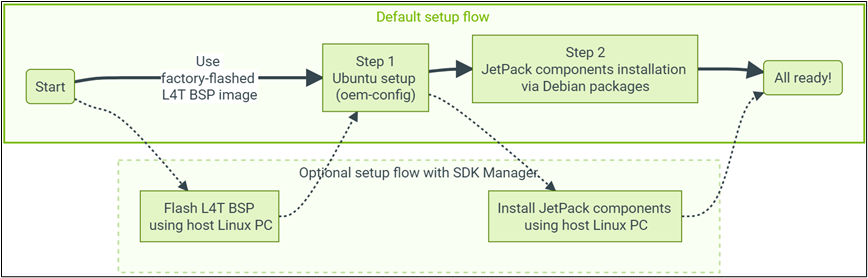
NVIDIA provides an easier way to install the system for the Orin development kit. The following image presents two operational processes:
-
Upper path: Directly use the L4T BSP Image image pre-installed when factory shipped;
-
Lower path: Use the SDK Manager on a PC to flash the operating system.
Now, just connect a mouse, keyboard, and DP (Display Port) monitor to the Orin, and you can use it. If you do not have a direct DP monitor at hand, some brands of DP to VGA adapters will also work.
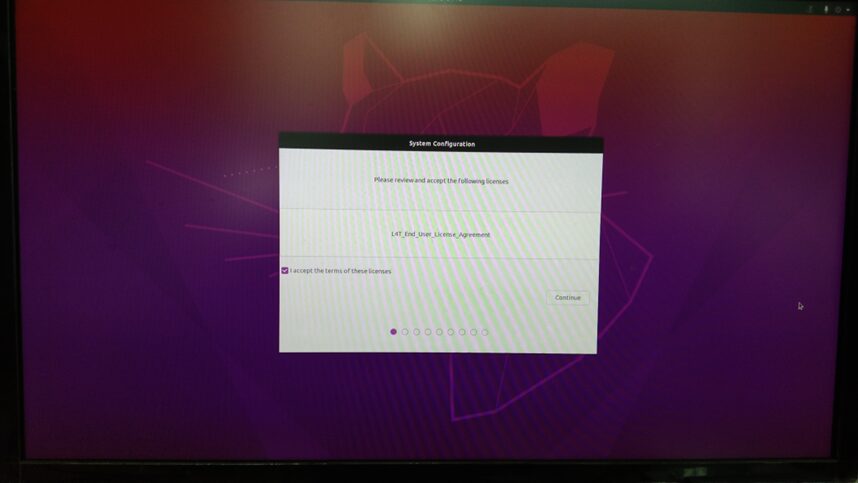
After powering on, you will enter the “Step 1. Ubuntu setup (oem-config)” phase, where you will perform the following 9 steps of system configuration:
1. Accept the license: Click the box to the left of “I accept the terms of these licenses” in the lower left corner, then click the “Continue” button in the lower right corner to proceed;
2. Select the “Language” type: It is recommended not to choose Chinese at this stage, just click the “Continue” button in the lower right corner to proceed;

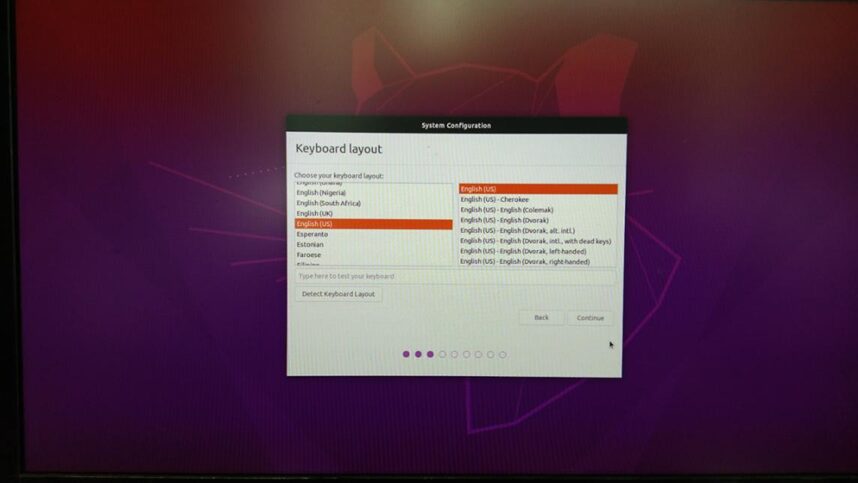
3. Choose “Keyboard Layout”: Just click the “Continue” button in the lower right corner to proceed;
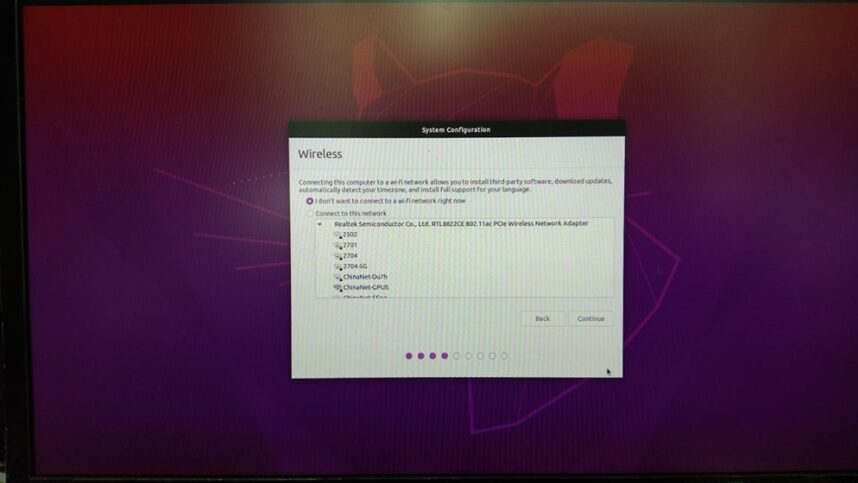
4. Connect to a WIFI hotspot: You can choose a hotspot based on your actual situation, or skip connecting now and connect later after entering the system, then click “Continue” in the lower right to proceed;
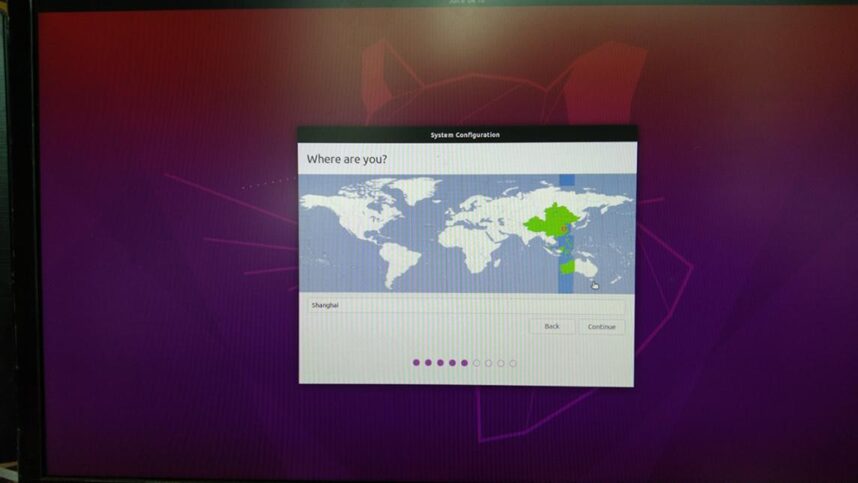
5. Select “Region”: Click “China” in the image, and the below area will update to “Shanghai”, then click “Continue” in the lower right to proceed;
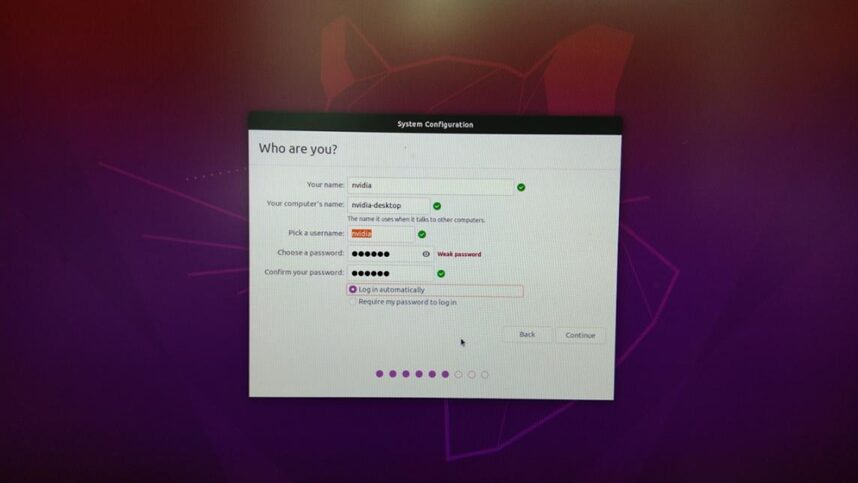
6. Configure username and password: This step is crucial because there are no preset values, so you need to enter the username (Your Name), device name (Your computer’s name), and password (Choose a password), then click “Continue” in the lower right to proceed;
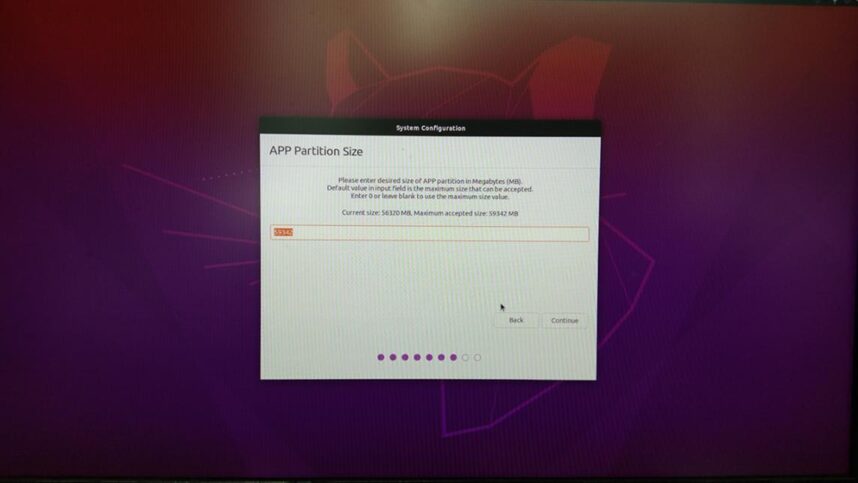
7. Configure disk space: The default is the maximum available space, it is recommended not to change it, then click “Continue” in the lower right to proceed;
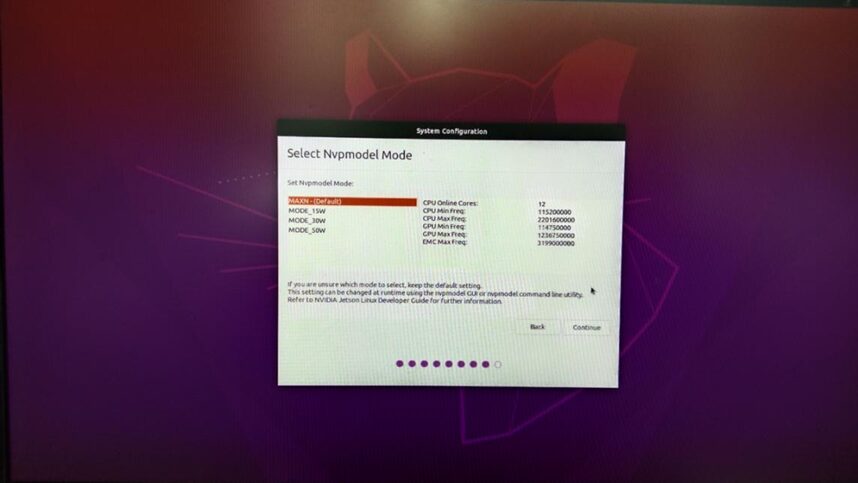
8. Select the working (power) mode: This part is easy to switch later, so it is fine to accept the default value (MAXN-Default), then click “Continue” in the lower right to proceed;
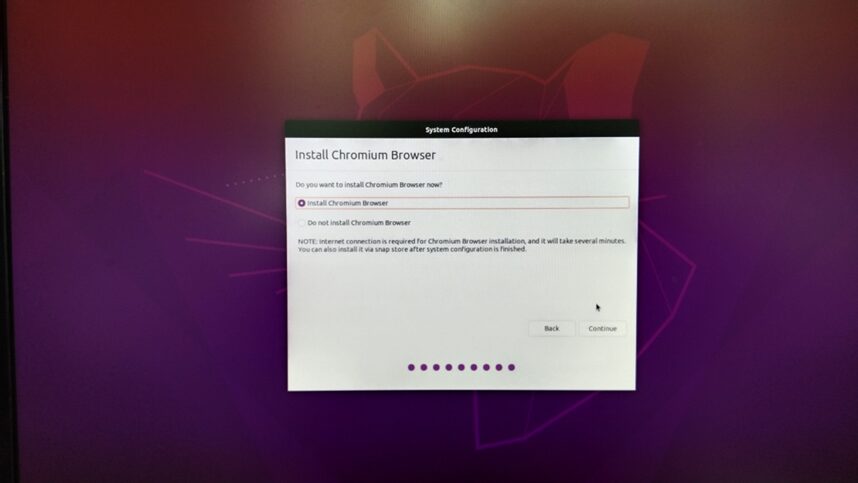
9. Whether to install the Chromium browser: Accept the default value (install), then click “Continue” in the lower right to proceed;
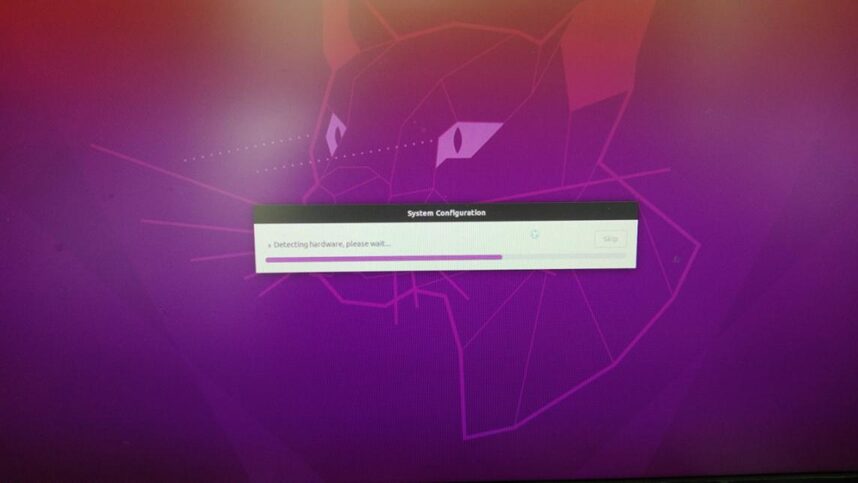
Next, the system will execute “System Configuration” based on the previous selections, as shown in the following two images.

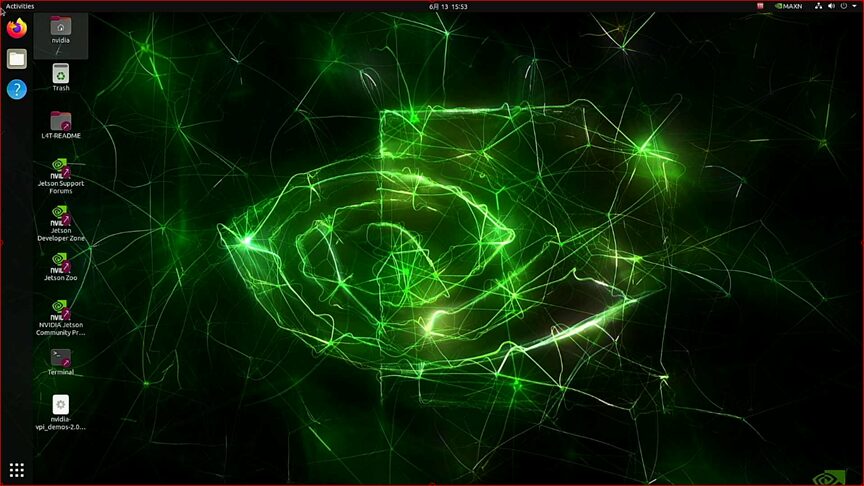
After completing the system configuration, it will automatically restart, then enter the Ubuntu 20.04 L4T (Linux for Tegra) desktop operating system. As with all Ubuntu operating systems, the steps required for the first login are to select “Next” and you will see the familiar standard Ubuntu desktop.
This completes the operating system configuration, but so far, the related development environment, including the CUDA toolkit, cuDNN/TensorRT library, OpenCV vision library, etc., has not been installed yet. Therefore, the next step is to install a complete development environment for the Orin development kit.
Recommended Reading
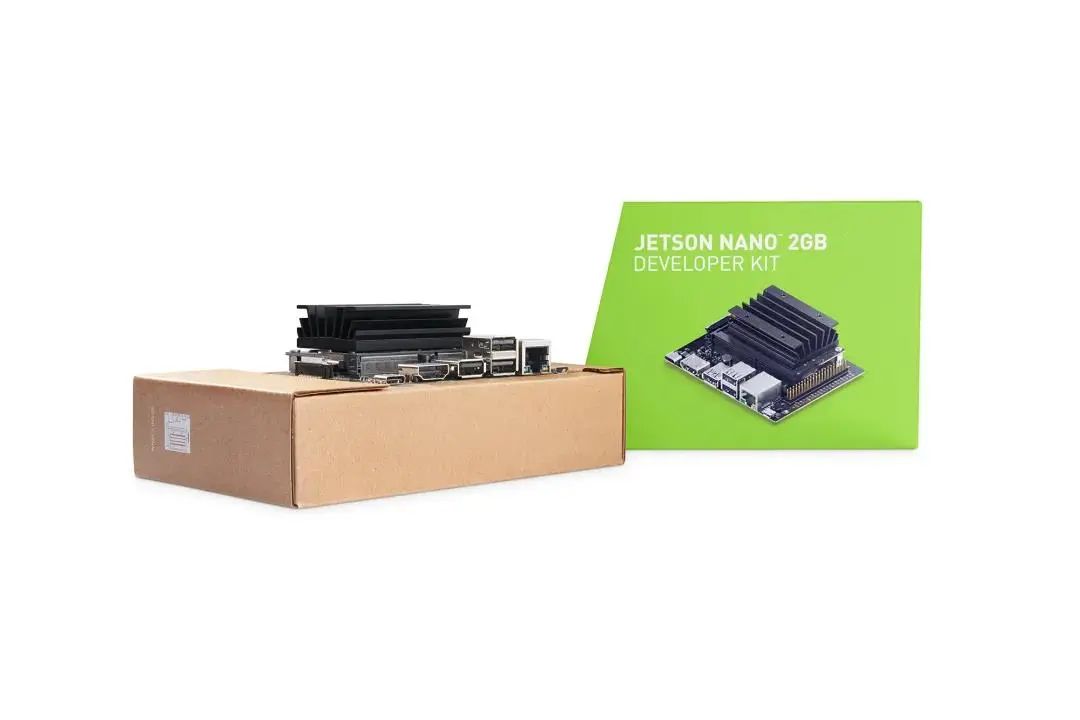
NVIDIA Jetson Nano 2GB Series Article (1): Unboxing Introduction

NVIDIA Jetson Nano 2GB Series Article (2): Installing the System

NVIDIA Jetson Nano 2GB Series Article (3): Network Settings and Adding SWAPFile Virtual Memory

NVIDIA Jetson Nano 2GB Series Article (4): Experiencing Parallel Computing Performance

NVIDIA Jetson Nano 2GB Series Article (5): Experiencing Vision Function Libraries

NVIDIA Jetson Nano 2GB Series Article (6): Installing and Invoking Cameras

NVIDIA Jetson Nano 2GB Series Article (7): Invoking CSI/USB Cameras through OpenCV

NVIDIA Jetson Nano 2GB Series Article (8): Executing Common Machine Vision Applications

NVIDIA Jetson Nano 2GB Series Article (9): Adjusting CSI Image Quality

NVIDIA Jetson Nano 2GB Series Article (10): Dynamic Adjustment Techniques for Color Space

NVIDIA Jetson Nano 2GB Series Article (11): Key Points You Should Know about OpenCV

NVIDIA Jetson Nano 2GB Series Article (12): Face Localization

NVIDIA Jetson Nano 2GB Series Article (13): Identity Recognition

NVIDIA Jetson Nano 2GB Series Article (14): Hello AI World

NVIDIA Jetson Nano 2GB Series Article (15): Hello AI World Environment Installation

NVIDIA Jetson Nano 2GB Series Article (16): The Power of 10 Lines of Code

NVIDIA Jetson Nano 2GB Series Article (17): Changing Models for Different Effects

NVIDIA Jetson Nano 2GB Series Article (18): Utils’s videoSource Tool

NVIDIA Jetson Nano 2GB Series Article (19): Utils’s videoOutput Tool

NVIDIA Jetson Nano 2GB Series Article (20): “Hello AI World” Expansion Parameter Analysis Function

NVIDIA Jetson Nano 2GB Series Article (21): Identity Recognition

NVIDIA Jetson Nano 2GB Series Article (22): “Hello AI World” Image Classification Code

NVIDIA Jetson Nano 2GB Series Article (23): “Hello AI World” Object Recognition Application

NVIDIA Jetson Nano 2GB Series Article (24): “Hello AI World” Object Recognition Application

NVIDIA Jetson Nano 2GB Series Article (25): “Hello AI World” Image Classification Model Training

NVIDIA Jetson Nano 2GB Series Article (26): “Hello AI World” Object Detection Model Training

NVIDIA Jetson Nano 2GB Series Article (27): Introduction to DeepStream and Activation

NVIDIA Jetson Nano 2GB Series Article (28): First Experience with DeepStream

NVIDIA Jetson Nano 2GB Series Article (29): DeepStream Object Tracking Function

NVIDIA Jetson Nano 2GB Series Article (30): DeepStream Camera “Real-time Performance”

NVIDIA Jetson Nano 2GB Series Article (31): DeepStream Multi-model Combination Detection-1

NVIDIA Jetson Nano 2GB Series Article (32): Architecture Description and deepstream-test Example

NVIDIA Jetson Nano 2GB Series Article (33): DeepStream License Plate Recognition and Privacy Information Masking

NVIDIA Jetson Nano 2GB Series Article (34): DeepStream Installation of Python Development Environment

NVIDIA Jetson Nano 2GB Series Article (35): Practical Explanation of Python Version test1

NVIDIA Jetson Nano 2GB Series Article (36): Adding USB Input and RTSP Output

NVIDIA Jetson Nano 2GB Series Article (37): Multi-network Model Combination Function

NVIDIA Jetson Nano 2GB Series Article (38): nvdsanalytics Video Analysis Plugin

NVIDIA Jetson Nano 2GB Series Article (39): Integrating IoT Information Transmission

NVIDIA Jetson Nano 2GB Series Article (40): Introduction to Jetbot System

NVIDIA Jetson Nano 2GB Series Article (41): Software Environment Installation

NVIDIA Jetson Nano 2GB Series Article (42): Installation and Debugging of Wireless WIFI

NVIDIA Jetson Nano 2GB Series Article (43): Installation and Testing of CSI Cameras

NVIDIA Jetson Nano 2GB Series Article (44): Jetson’s 40-pin Header

NVIDIA Jetson Nano 2GB Series Article (45): I2C Bus and PiOLED

NVIDIA Jetson Nano 2GB Series Article (46): Installation of Electromechanical Control Devices

NVIDIA Jetson Nano 2GB Series Article (47): Attention to Detail in the Assembly Process

NVIDIA Jetson Nano 2GB Series Article (48): Control Actions with Keyboard and Joystick

NVIDIA Jetson Nano 2GB Series Article (49): Live Demonstration of Intelligent Collision Avoidance

NVIDIA Jetson Nano 2GB Series Article (50): Intelligent Obstacle Avoidance Model Training
NVIDIA Jetson Nano 2GB Series Article (51): Implementing Pathfinding Function with Image Classification Method

NVIDIA Jetson Nano 2GB Series Article (52): Implementing Pathfinding Function with Image Classification Method

NVIDIA Jetson Nano 2GB Series Article (53): TAO Toolkit for Simplifying Model Training Process

NVIDIA Jetson Nano 2GB Series Article (54): Overview of NGC Content and Registration Key

NVIDIA Jetson Nano 2GB Series Article (55): Installing TAO Model Training Tool

NVIDIA Jetson Nano 2GB Series Article (56): CLI Instruction Set and Configuration File of the Launcher

NVIDIA Jetson Nano 2GB Series Article (57): Environment Configuration and Mapping for Vision Scripts

NVIDIA Jetson Nano 2GB Series Article (58): Data Format for Vision

NVIDIA Jetson Nano 2GB Series Article (59): Data Augmentation for Vision

NVIDIA Jetson Nano 2GB Series Article (60): Model Training and Pruning for Image Classification

NVIDIA Jetson Nano 2GB Series Article (61): Model Training and Optimization for Object Detection

NVIDIA Jetson Nano 2GB Series Article (62): Model Training and Optimization for Object Detection – 2

NVIDIA Jetson Nano 2GB Series Article (63): Model Training and Optimization for Object Detection – 3

NVIDIA Jetson Nano 2GB Series Article (64): Deploying Models to Jetson Devices

NVIDIA Jetson Nano 2GB Series Article (65): Executing the TensorRT Acceleration Engine for Deployment

NVIDIA Jetson Series Article (1): Hardware Unboxing