
★
In the information age, most electronic products require system support to operate perfectly. However, there are times when these systems may malfunction, such as failing to boot. If you don’t know how to flash the firmware, it can be quite frustrating. This tutorial will teach you how to flash the firmware to resolve such issues.
★
This course is applicable to the following models:
M1 (4K), M2 (4K), M3 (4K), F1 (4K Enhanced Version), H6 Enhanced Version, etc.
Preparation: You will need the device to be flashed (This article uses M2-4K as an example), a dual-headed USB data cable (must be a dual-headed USB interface), and a toothpick.
You need to download the following two links: tools and firmware.
1. Firmware flashing tool download link: http://pan.baidu.com/s/1kTuwunP Password: rdz9 (Since the flashing tools for Allwinner H3 and H8 are the same, the cloud drive shows the octa-core flashing tool)
2. Firmware download link: http://pan.baidu.com/s/1qWMQJyG Password: rzbh
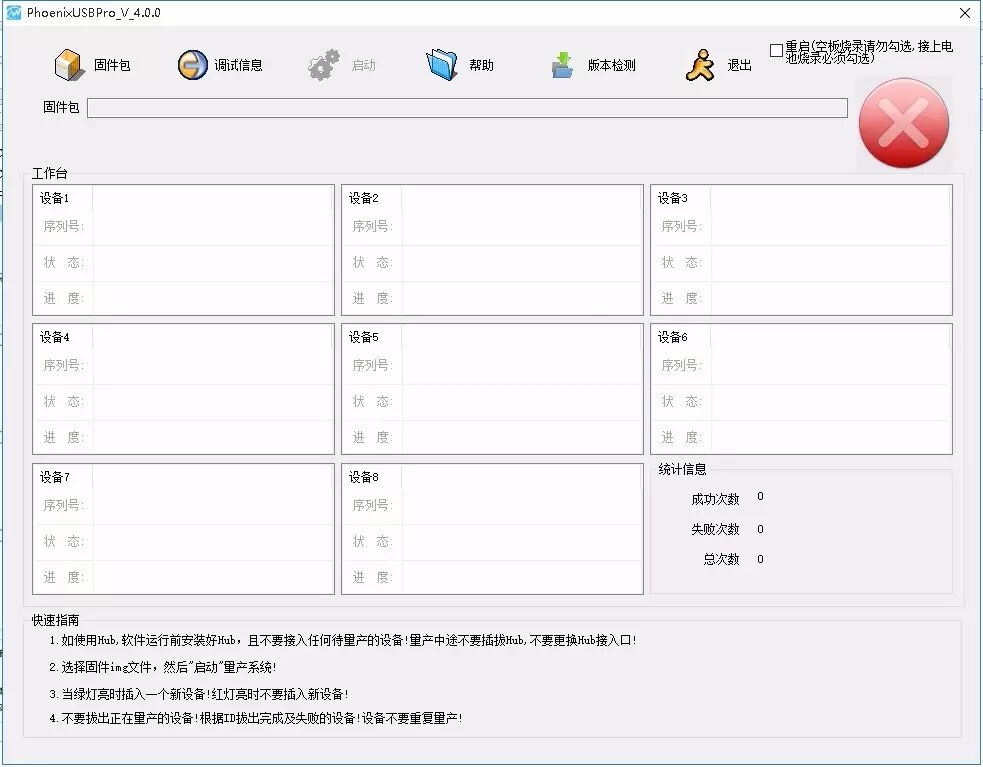
First, download the flashing tool and firmware, save them to your desktop. The flashing tool needs to be extracted, while the firmware does not. After extraction, open the flashing tool program (as shown below).

The following is the extracted package after downloading; the one above is the installation package extracted. Double-click the installation package to install the flashing program.

(The red box contains the installed flashing program ↑↑↑)
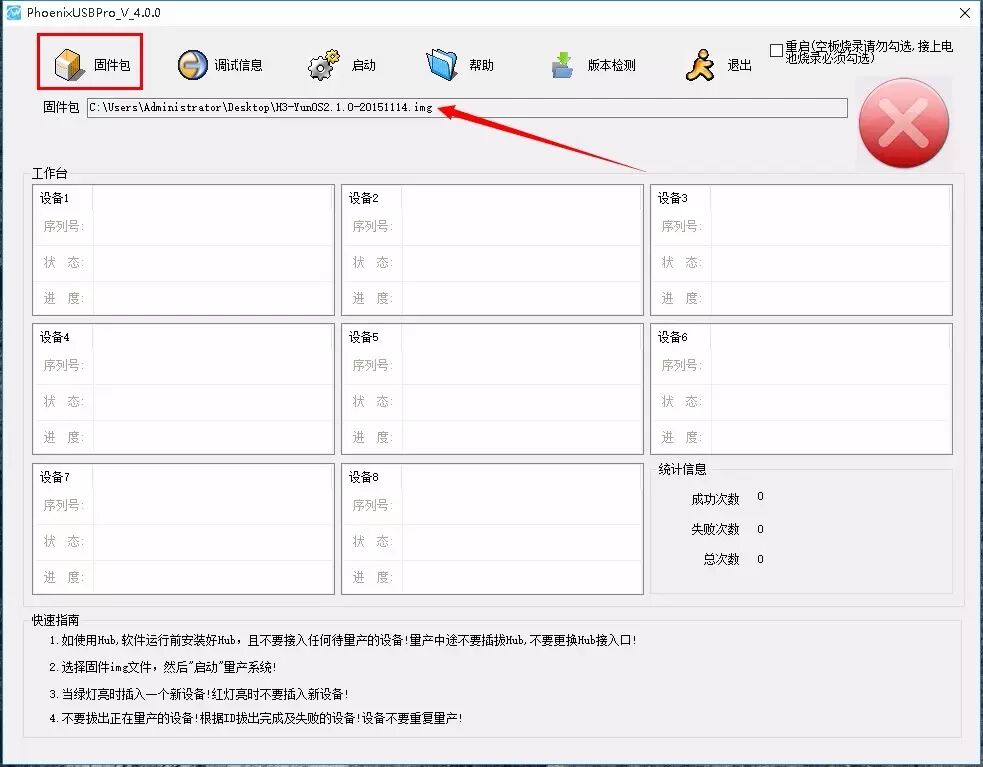
After opening the flashing tool, click on the “Firmware Package” option to import the firmware.
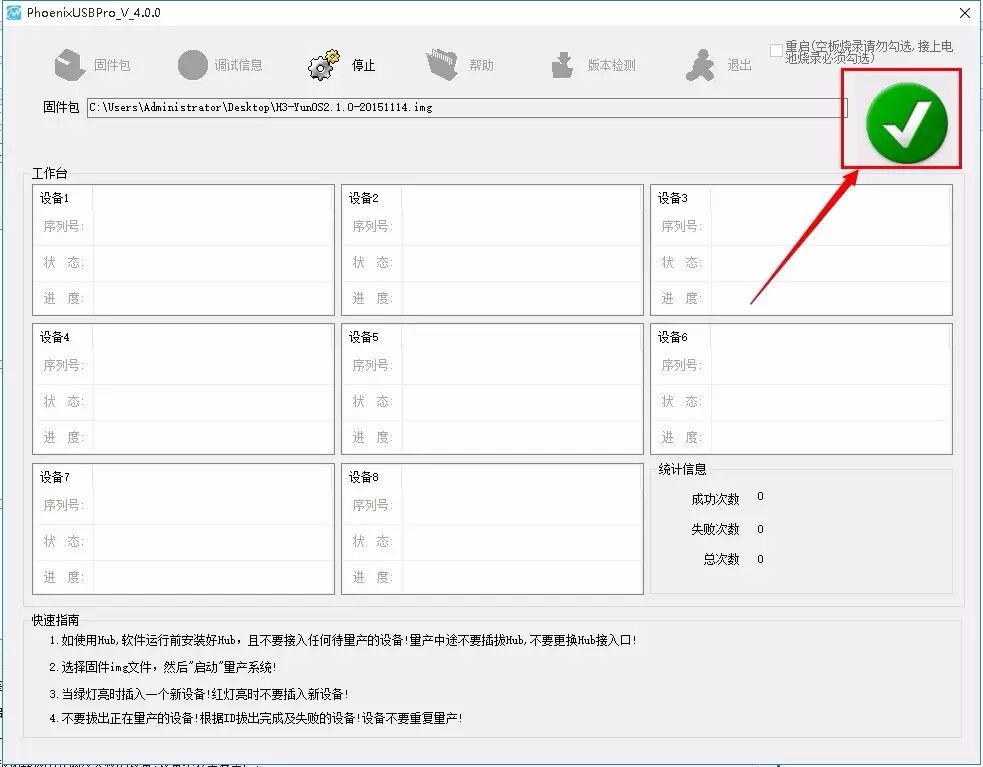
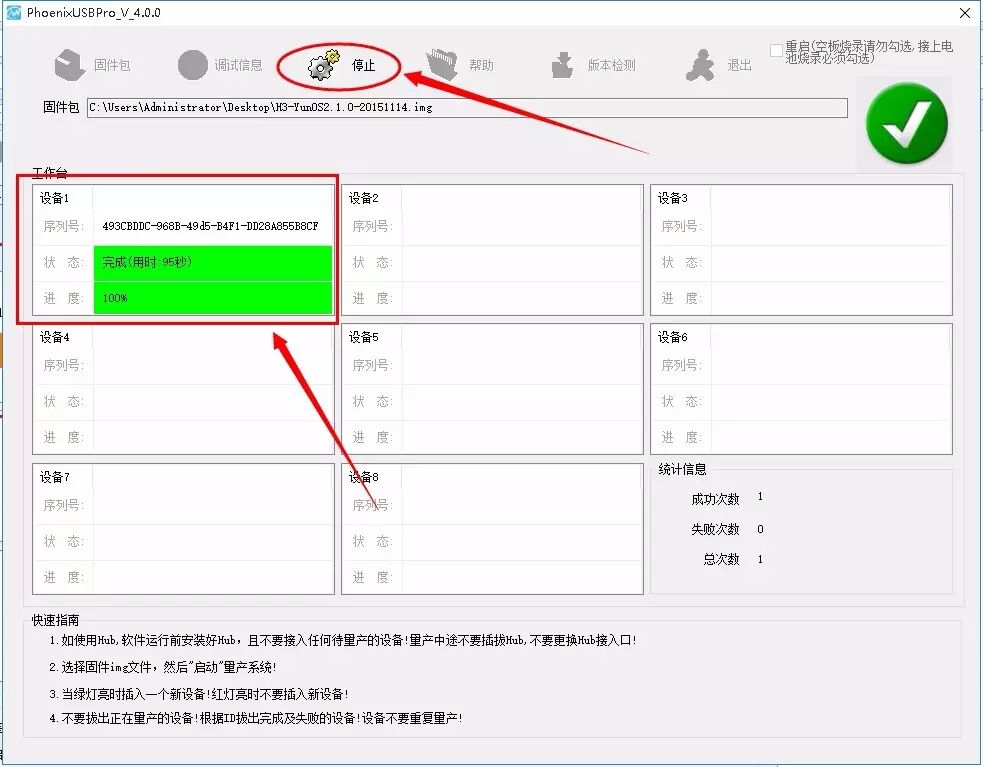
Click “Start” to change the red cross in the upper right corner to a green check mark.
Use a toothpick to press the button inside the gap at the bottom of the device (the flashing button for Allwinner H3 and H8 chips is on the motherboard; remember, the button in the middle of the USB interface on the set-top box is the forced reset button, not the flashing button), as shown in the figure below.

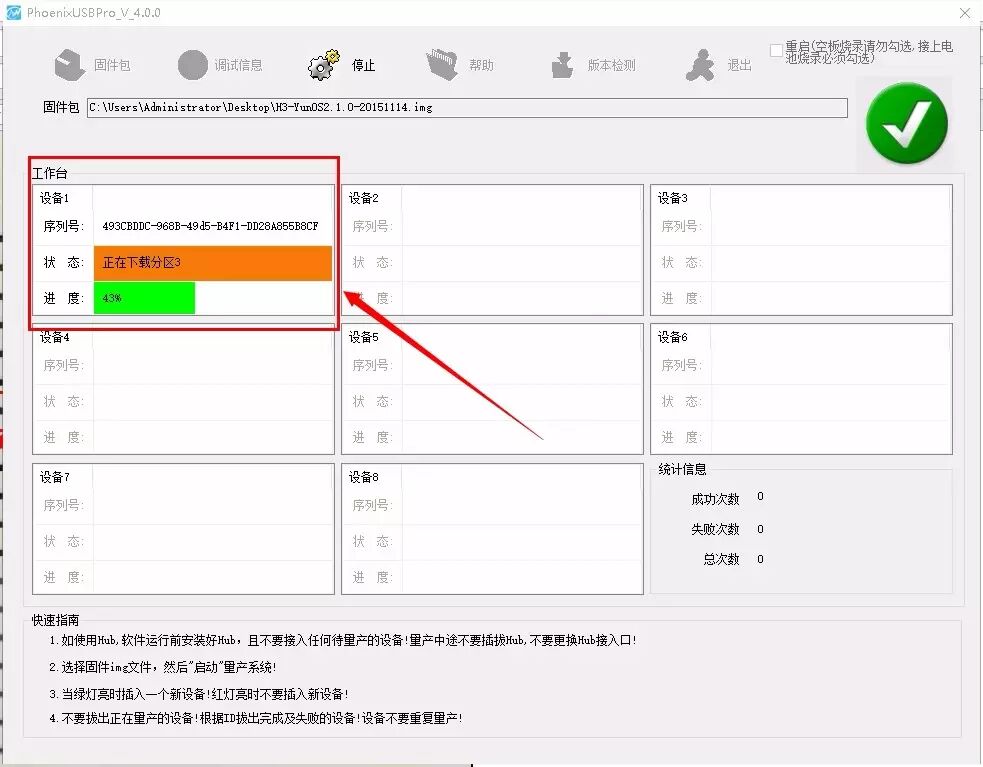
After pressing the flashing button, connect the USB cable to the set-top box until the flashing tool shows that it is writing the firmware, then release the button, as shown in the figure below.
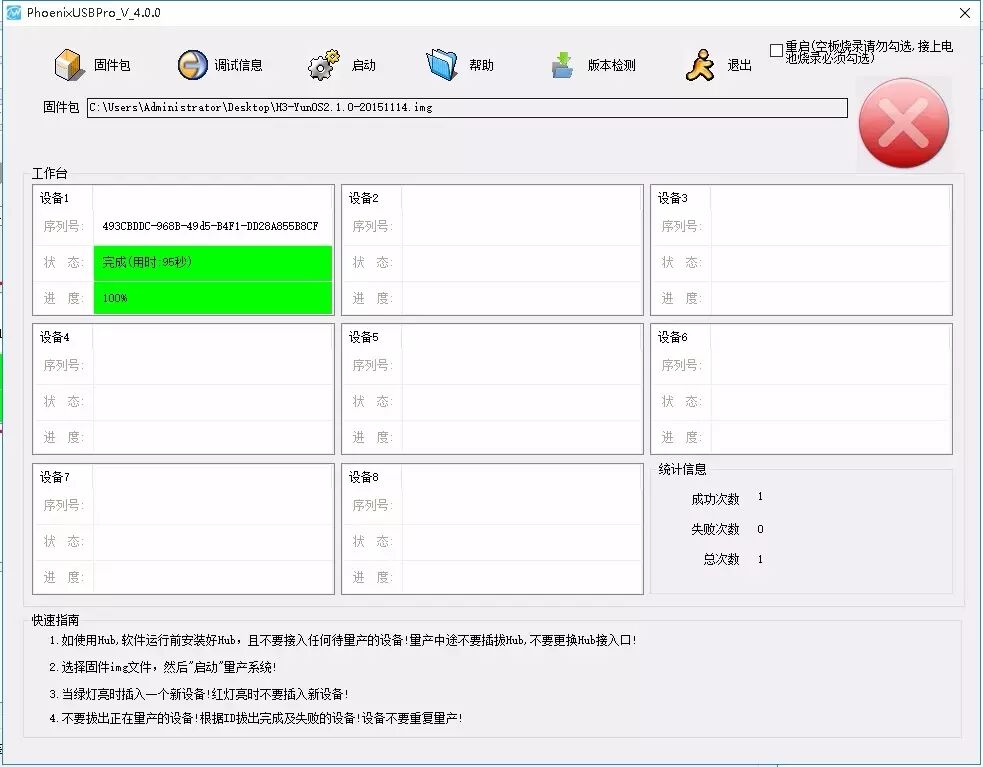
Once the firmware writing is complete, click “Stop”, unplug the USB cable, and the flashing is complete. Connect it to the TV for testing.
The image below shows what it looks like after clicking “Stop”.
最后
This firmware flashing tutorial is now complete. I believe most users have learned how to do it. If you encounter system issues in the future, you can use this tutorial to resolve them yourself, saving the hassle of returning the device for repairs.

High Definition Life
Bringing high definition into every household

After-sales WeChat ID: hezila008