
Click the blue text above to follow us

Preface
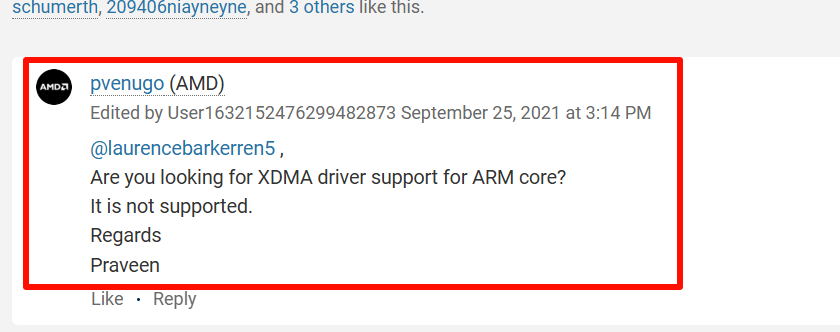
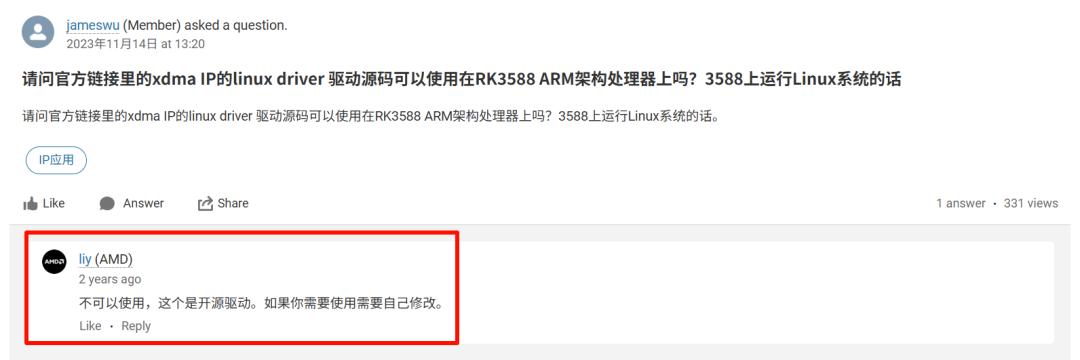
On AMD’s official Q&A platform, the official staff directly responded that they do not support users compiling and testing XDMA drivers on ARM.
https://adaptivesupport.amd.com/s/question/0D52E00006hpPyySAE/xdma-device-driver-ar65444-fix-for-arm?language=en_US
 This case uses the latest version of the XDMA driver. Additionally, during the actual operation, I used several earlier versions of the driver, which resulted in various bugs on the ARM platform that could not be resolved without thoroughly understanding the XDMA Linux driver source code.
To ensure logical and procedural coherence, I made slight adjustments to the initially planned chapters. To maintain continuity, the chapter numbering continues from the previous tutorial: Debugging XDMA on ARM Devices (RK3588).
<4> ARM End Testing
It should be noted that since the driver in this case is cross-compiled, there will be two Linux environments: one is the X86 virtual machine environment, and the other is the RK3588 Linux environment. Since the X86 Linux environment in this case is only used for cross-compiling the driver file xdma.ko, all subsequent references that need to be explicitly stated will refer to X86 Linux, while other references will pertain to operations in the RK3588 Linux environment. Due to concerns about ambiguity in my writing, the driver output will be placed in the next chapter. Below, we continue with the ARM end testing from the previous tutorial: Debugging XDMA on ARM Devices (RK3588), assuming that the driver has been successfully compiled and the corresponding xdma.ko has been generated.
lspci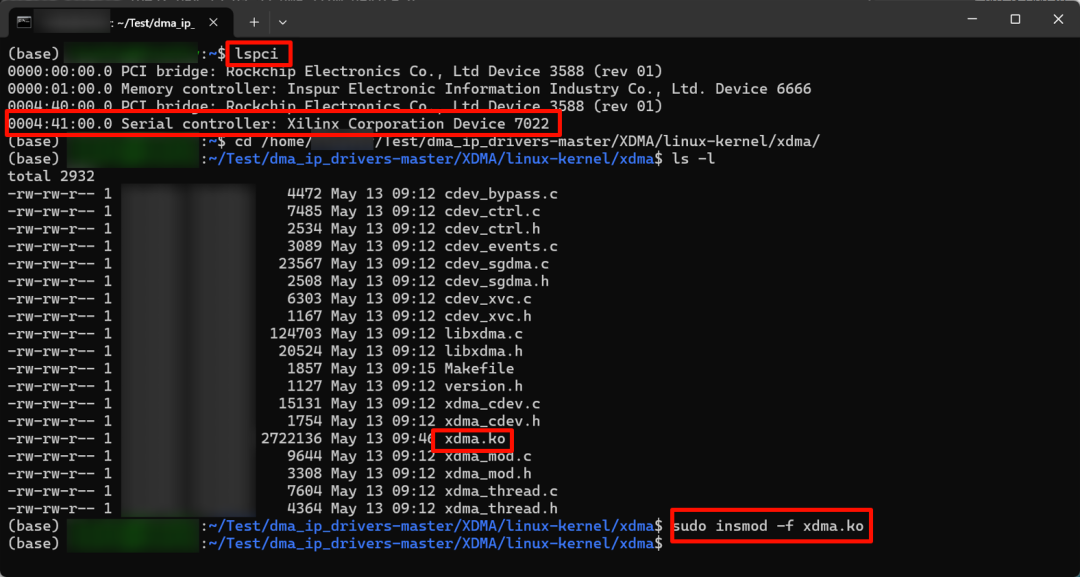 If the hardware connection is successful, the terminal will output the corresponding Xilinx Corporation Device 7022.Find the cross-compiled xdma.ko file (the cross-compilation process will be detailed in the next chapter, here it is assumed to be available), and then execute the command to load the driver into the kernel.
sudo insmod -f xdma.koIf the FPGA logic configuration is normal, the hardware connection is normal, and the compiled xdma.ko driver is functioning correctly, there will be multiple devices starting with xdma in the /dev/ directory.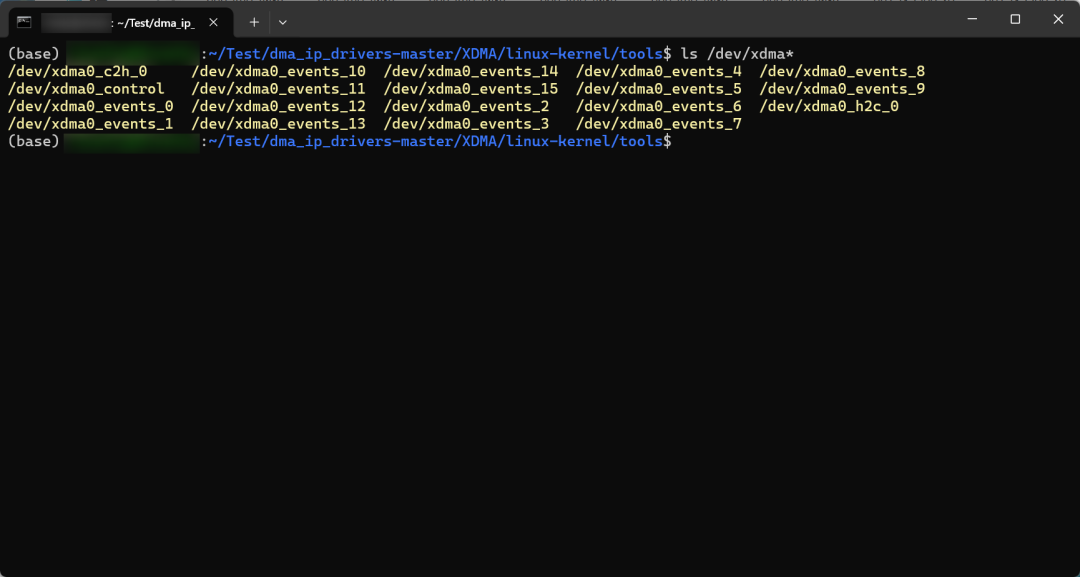 At this point, it at least proves that the driver is functioning correctly. To further test, navigate to the tools directory under the XDMA open-source package and compile and execute the official test code.
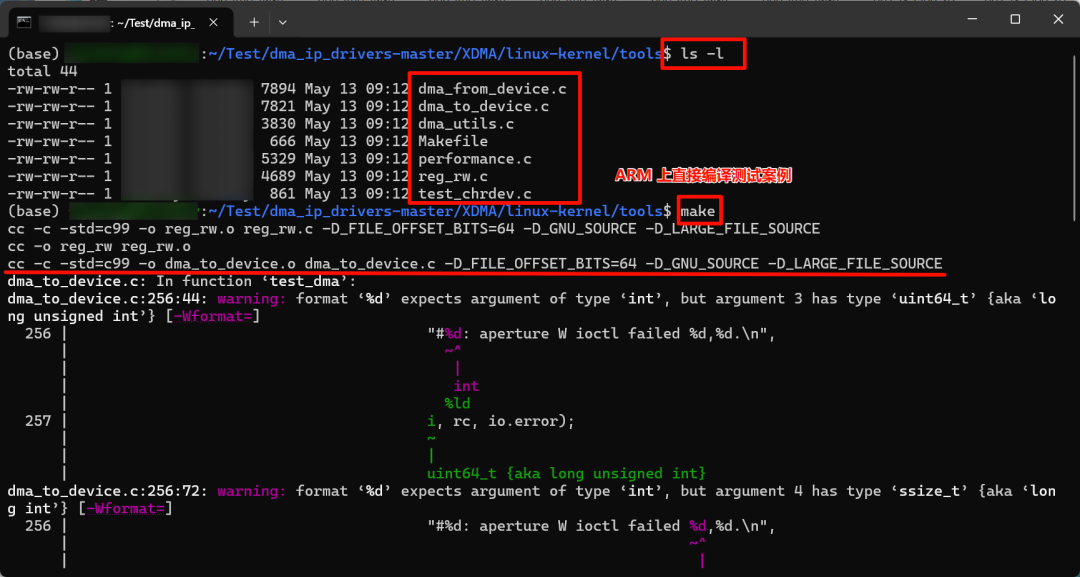 The entire Xilinx project is named dma_ip_drivers, and the required files are located in the XDMA/linux-kernel directory. The include folder is used to store header files, the xdma folder contains the driver source code, the tools folder contains the test source code, and the tests folder contains the test scripts. In the previous step of loading the driver into the kernel, you can also directly use the scripts in the tests folder, which will perform a preliminary evaluation of the xdma device.
sudo ./load_driver.shNext, continue to compile the test source code in the tools folder.During the compilation process, there will be some warnings, mainly due to the gradual deprecation of certain functions; as long as there are no errors, they can be ignored.Then, testing can proceed, testing both read and write channels for normal operation.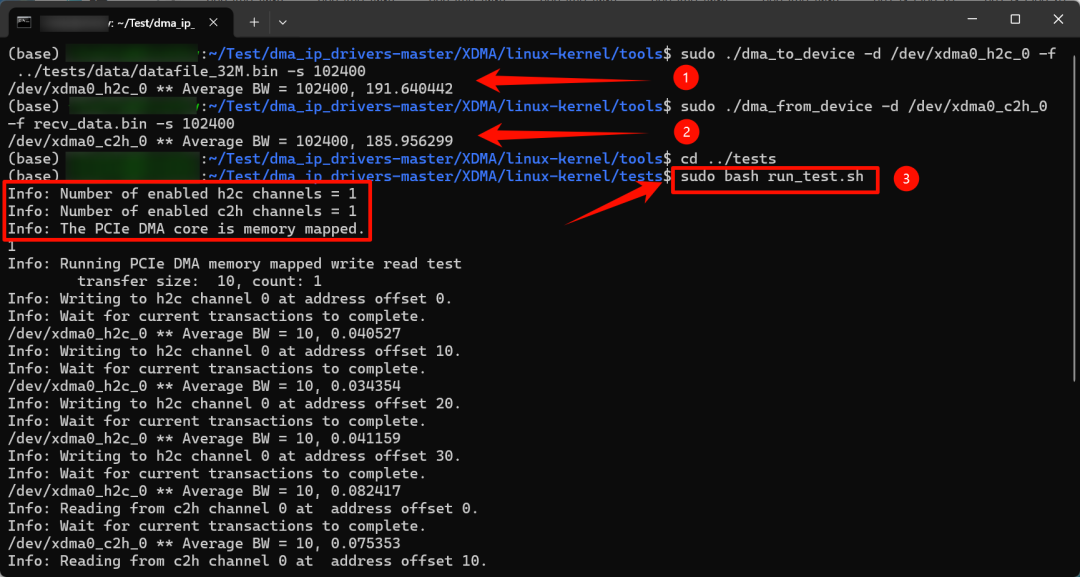 Using the official script in the tests folder for testing, the official script also calls the program compiled in the tools folder.
sudo ../tests/run_test.sh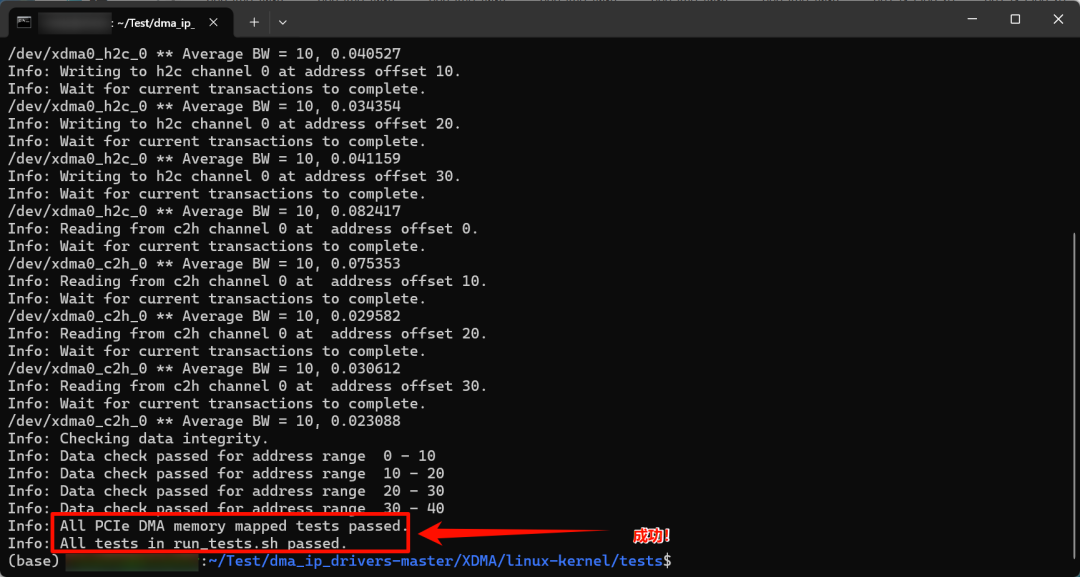 The terminal output shows All tests in run_test.sh passed, indicating successful testing. During the debugging process, I operated remotely via SSH in WIN CMD, and used lscpu to check that I was in the ARM environment.
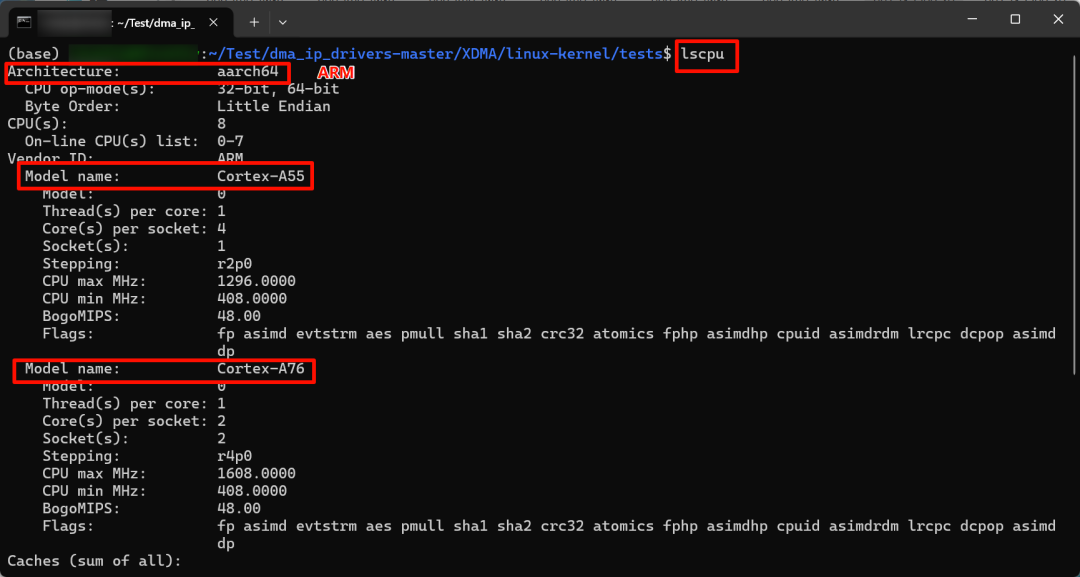
<5> Driver Compilation
Prepare the XDMA source package and the virtual machine; this chapter’s content will be compiled in the X86 Linux environment of the virtual machine. Here, it is assumed that the user has compiled the SDK and has a compatible and compiled Kernel for the development board. For brevity, I will not describe the installation of the virtual machine and the details of SDK compilation. Detailed tutorials can be found on the development board and various forums.Open the virtual machine, and in the dma_ip_drivers/XDMA/linux-kernel/xdma directory, open a terminal. Modify the Makefile, paying attention to two main points: one is to change gcc to the aarch architecture so that the compiled program can be loaded correctly. The other is to modify the compilation directory in the Makefile to the aforementioned Kernel folder.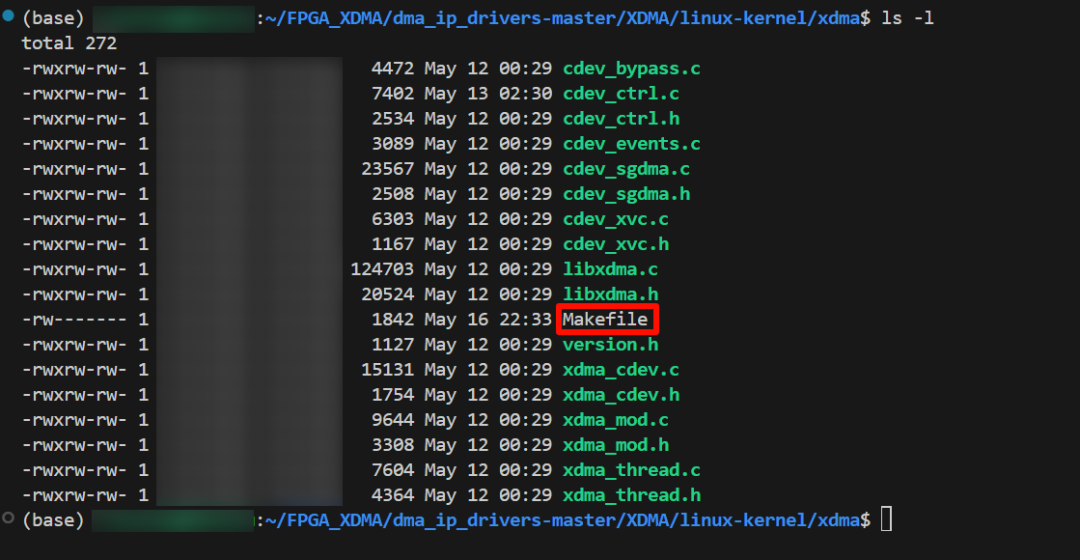
ifneq ($(KERNELRELEASE),) $(TARGET_MODULE)-objs := libxdma.o xdma_cdev.o cdev_ctrl.o cdev_events.o cdev_sgdma.o cdev_xvc.o cdev_bypass.o xdma_mod.o xdma_thread.o obj-m := $(TARGET_MODULE).oelse BUILDSYSTEM_DIR:=/home/zzk/FPGA_XDMA/Kernel/ PWD:=$(shell pwd)Modify the compilation directory in the fifth line of the above code to the directory where the Kernel is located. Then execute the cross-compilation to output xdma.ko in the current directory. Transfer this file to the RK3588 development board and load it normally according to the method in chapter <4>.
source /home/zzk/RK3588/rk3588-buildroot-2021.11-sdk-v1.1/buildroot/output/rockchip_rk3588/host/environment-setup
make CC=aarch64-buildroot-linux-gnu-gcc
I generally do not prefer cross-compilation unless I really do not want to spend time and effort solving problems. Compiling the xdma driver can certainly be done directly on the RK3588, and I will supplement this based on actual conditions later. For me, the RK3588 is essentially a server, and switching environments back and forth reduces work efficiency.
<6> Summary and Outlook
First of all, do not be superstitious about anything before doing it, even if it is from official personnel. If you want to do something, even if you fail after trying, you will accept it gladly.Secondly, make sure to download the latest version of the XDMA source package. Otherwise, some issues may arise, such as the c2h channel not opening.Finally, I hope this tutorial can help those in need. I cannot be your captain for life, but I hope to accompany you on your voyage.
Related Articles
Tutorial: Debugging XDMA on ARM Devices (RK3588)
Local Deployment of DeepSeek-R1 Large Model on RK3588 Platform – NPU Section
Local Deployment of DeepSeek-R1 Large Model on RK3588 Platform – CPU Section