This article is compiled by FreeBuf, Dear Little Rabbit, a tutorial on DIY drones using Raspberry Pi by Greg Nichols, originally published on ZDNet. FreeBuf is an excellent security media and technology exchange platform, and we are here to recommend a geek story they shared. After reading it, you will definitely want to try building a drone like this.
If you want to DIY your own drone, then you can read this article next; it might inspire you after you finish reading.
This project mainly uses parts from Erle Robotics (an open-source quadcopter project using Linux). The author of this article does not work for this company, but if you are interested in this scenario, you can also follow basic projects related to Raspberry Pi, such as Dexter Industries and PiBOT. Additionally, there are more tutorials available on some related websites.
This year, Robotics has provided enthusiasts with a relatively inexpensive and easy-to-use opportunity to burn programs onto chips while continuously adding new hardware, which can be attributed to Raspberry Pi and other microcontrollers. Of course, the information and resources available online have also played a significant role.
Erle Robotics is an open-source quadcopter project using Linux. Their slogan is: “Building the next generation of educational drones.” The author also mentioned this issue in a previous article, and this project provides relatively inexpensive components that assist in DIY Raspberry Pi projects.
Parts
Erle Robotics PXFmini
Raspberry Pi Zero
HobbyKing Spec FPV250
Erle Robotics PXFmini Power Module
Tools
Soldering Iron
Tape
Screwdriver
Application/Online
APM flight stack
Debian-based Linux system
Demonstration Tutorial
Next, we will demonstrate how to assemble a Linux-based drone on Raspberry Pi Zero. Note that the cost is less than $200. The drone system uses a real-time performance Linux kernel based on the Debian system. The PXFmini flight control system circuit board of the drone uses the APM flight control program, which comes from the Erle Robotics project.
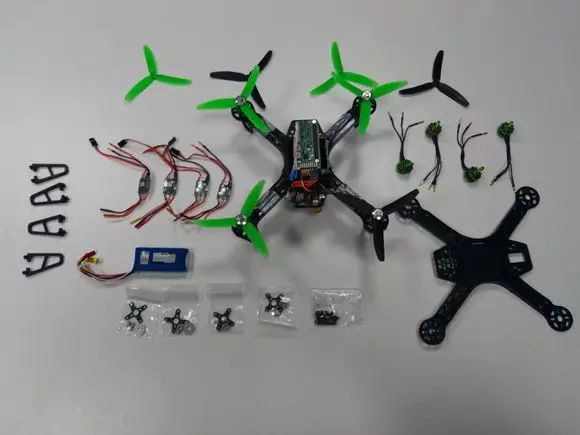
Step 1: Assemble the Drone Kit
Time: 30 minutes
Once you have all the parts ready, start assembling them. You can refer to the above image to prepare the parts.
First, assemble the black drone frame and motors together, then use tape to bind the speed controller and motors together.
Next, connect the power components and the ground control console components to the speed controller, and finally connect them to the power components, securing these components to the black drone frame.
If you want to connect the power components to the power supply, here are a few points to note. If you want to quickly connect the connector and power components together, be careful of short circuits. You can also remove the other end of the power module and solder the battery and connector; this way, we can easily disconnect the drone battery from the power components.
Finally, use nylon straps to install the battery and power components under the drone.
Step 2: Prepare the Drone Control System
Time: 30 minutes
The PXFmini flight control system circuit board connects to the Raspberry Pi Zero, as shown in the reference image below.
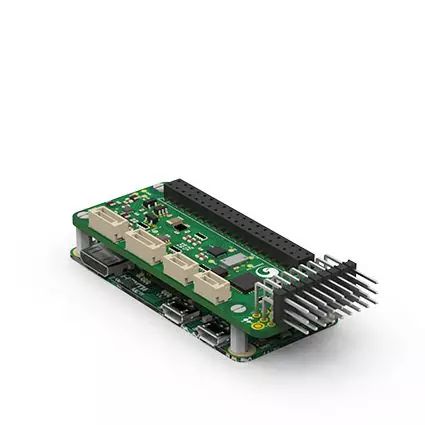
Raspberry Pi Zero and PXFmini need to select the corresponding software for control. This program needs to provide some necessary functional services for the drone, such as starting services.
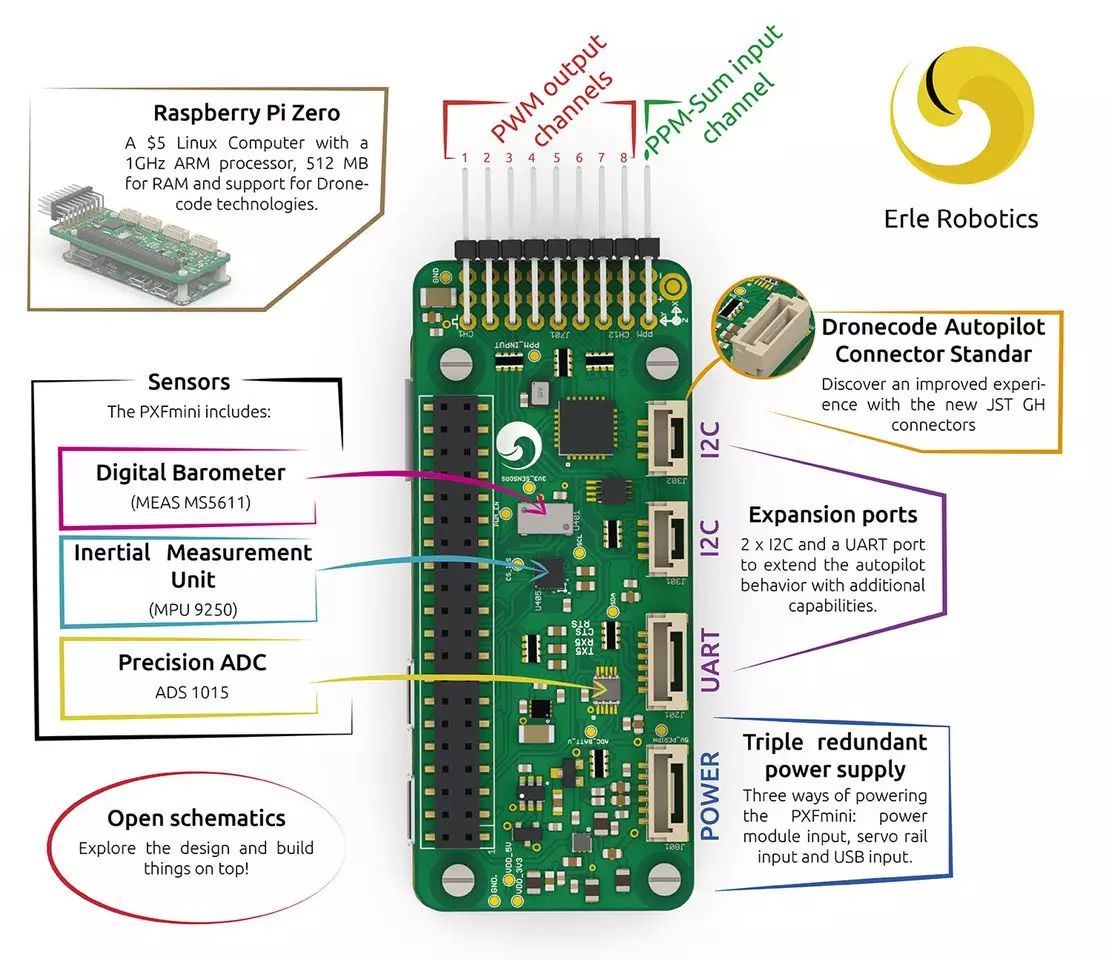
If you purchased the PXFmini board from Erle Robotics, you can access the Debian-based image file system, and you can use PXFmini to transfer the image and then extract the files with an SD card.
Step 3: Install the Flight Control System
Time: 5 minutes
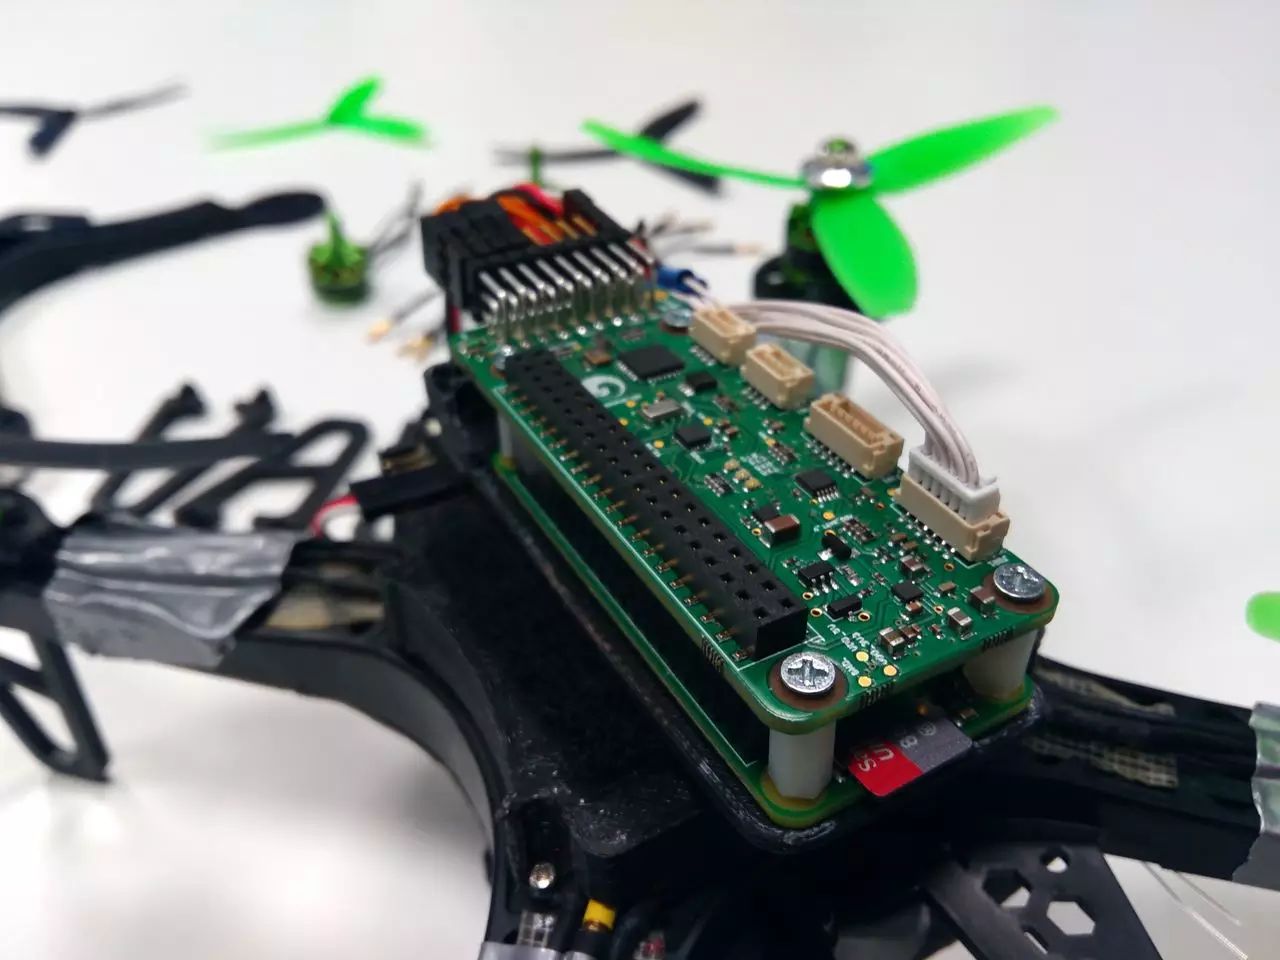
Install the flight control system (Raspberry Pi Zero + PXFmini) on the drone. You need to connect the JST GH wire to the power module and PXFmini. This will supply power to the flight control system.
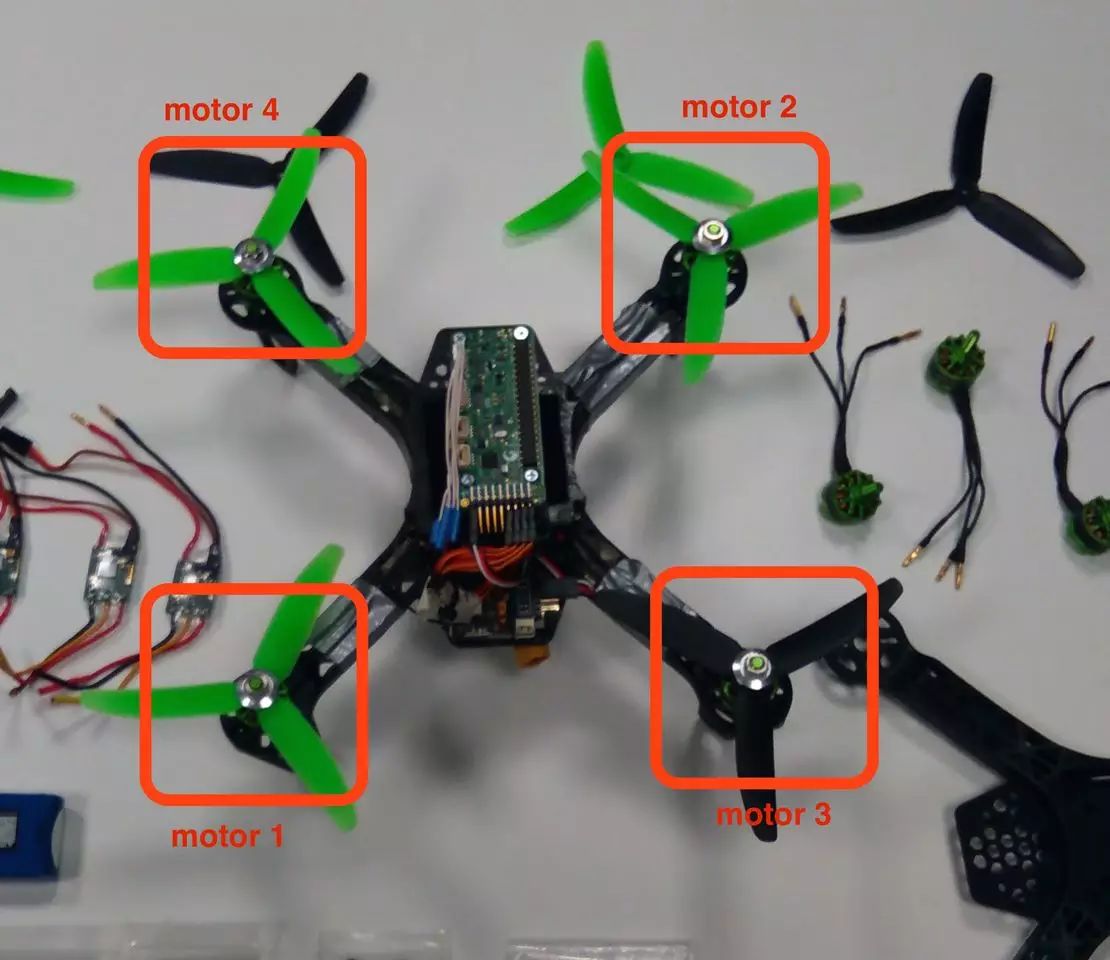
Next, you need to install the PWM modulator in the flight control system, connecting your ESC wire to ESC 1 (also connected to motor 1), and then connect it to PWM channel 1. Then, using the same method, connect ESC 2 to PWM 2.
Step 4: Install the Propellers and Make It Fly!
Time: 15 minutes
Two of the propellers rotate clockwise (marked with “R”), and the other two rotate counterclockwise. Connect the clockwise propellers to motors 3 and 4, and the counterclockwise propellers to motors 1 and 2. This is a very important step, as it ensures that the subsequent installations are correct.
Now you need to decide how to control your drone. This is very important.
WiFi + Controller: Create your own WiFi network with a USB adapter (the Erle Robotics image supports this by default) to control the drone through the ground control station.
WiFi + ROS: The ROS system is a good choice. You can use this system to establish visual flight modes and control the drone.
RC: You need to purchase a PPM-Sum receiver with an RC interface and connect it to the flight control module (PPM-SUM input channel). The final effect video is as follows:
via: zdnet, FreeBuf
Editor: Orphan’s Complaint

Recently, the new version of WeChat has updated the public account pinning feature
If you want to be the first to see the latest information from Geek View
Don’t miss the latest way to use the public account!
Image Tutorial👇👇👇
First, update your WeChat to the latest version
Then:



www.geekview.cn Geek View
For reprints or cooperation, please reply Request for Appointment