
Hello everyone, I am Tech Sister
Recently, my friends have been playing an AR game
That is Let’s Catch Monsters Together
I didn’t expect the highly competitive Mr. MB
Actually made a drone for catching monsters
From the Sky Mother Ship, Millennium Falcon, Flying Sword
We have made many drones
This time Mr. MB will teach everyone how to make a simple drone
Materials Needed
3-inch propeller, 30A ESC, 2208-7 2600KV motor, distribution board, remote receiver, flight controller, remote control
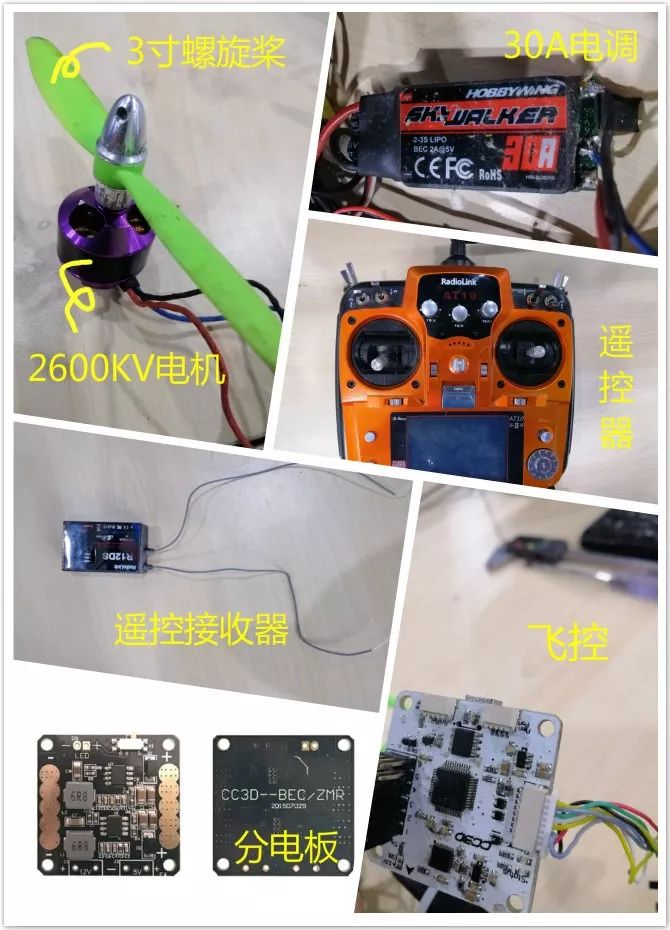
Propeller Selection
The specifications of the propeller are generally represented by four digits The first two digits represent the diameter, and the last two digits represent the pitch, for example, a 1060 propeller means 10 inches in diameter and a pitch of 60 (6.0 inches, or 152.4mm).
The choice of propeller is related to the motor and the whole machine, the same motor with different KV values will use different propellers, each motor has a recommended propeller, relatively speaking, if the propeller is too small, it will not exert maximum thrust, and if the propeller is too large, it can cause the motor to overheat, demagnetize, and permanently degrade motor performance. Larger propellers require low KV motors, while smaller propellers require high KV motors.
ESC Selection
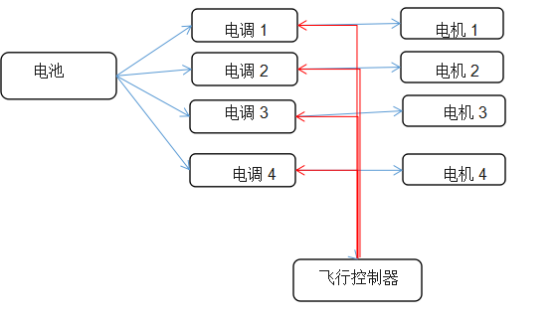
The function of the ESC is to convert the control signal from the flight controller into the amount of current to control the speed of the motor. Since the motor’s current is very high, without the ESC, the flight controller cannot withstand such a high current and cannot drive the brushless motor. The current rating of the ESC needs to be larger than the maximum current of the motor.
Motor Selection
For brushless motors used in model aircraft, we mainly look at two parameters, one is the model, such as: A2208, where 22 indicates the rotor diameter is 22mm, and the height is 8mm (note that this is not the outer casing size), which reflects the power of the motor to some extent; the larger the size, the greater the power. The KV value indicates the motor’s speed, for example, KV2600 means that for every 1V increase in input voltage, the motor’s speed increases by 2600 RPM (under no load). For the same model of motor, there are usually different KV values to choose from; the higher the KV value, the higher the speed under the same voltage, but the torque will be lower. The motor selection is based on the desired maximum takeoff thrust, which is the maximum thrust of each motor averaged from the maximum takeoff thrust of the propeller. Choose the motor according to this value.
Motor selection principles: The first principle is that it must match the frame we choose; generally, there are many combinations, but I will directly introduce the most commonly used and efficient combinations. The second principle is the brand; of course, the more expensive the brand, the better the motor quality.
Component Relationship Diagram
Production Process
Step 1: Assemble the frame kit; generally, sellers have detailed installation tutorials;
Step 2: Connect and install the distribution board, ESC, and flight controller on the frame, and properly connect the control signals, remote signals, etc.;
Step 3: Solder the motor wires to the three pads of the ESC in order; soldering one group in a cross pattern will reverse the direction;
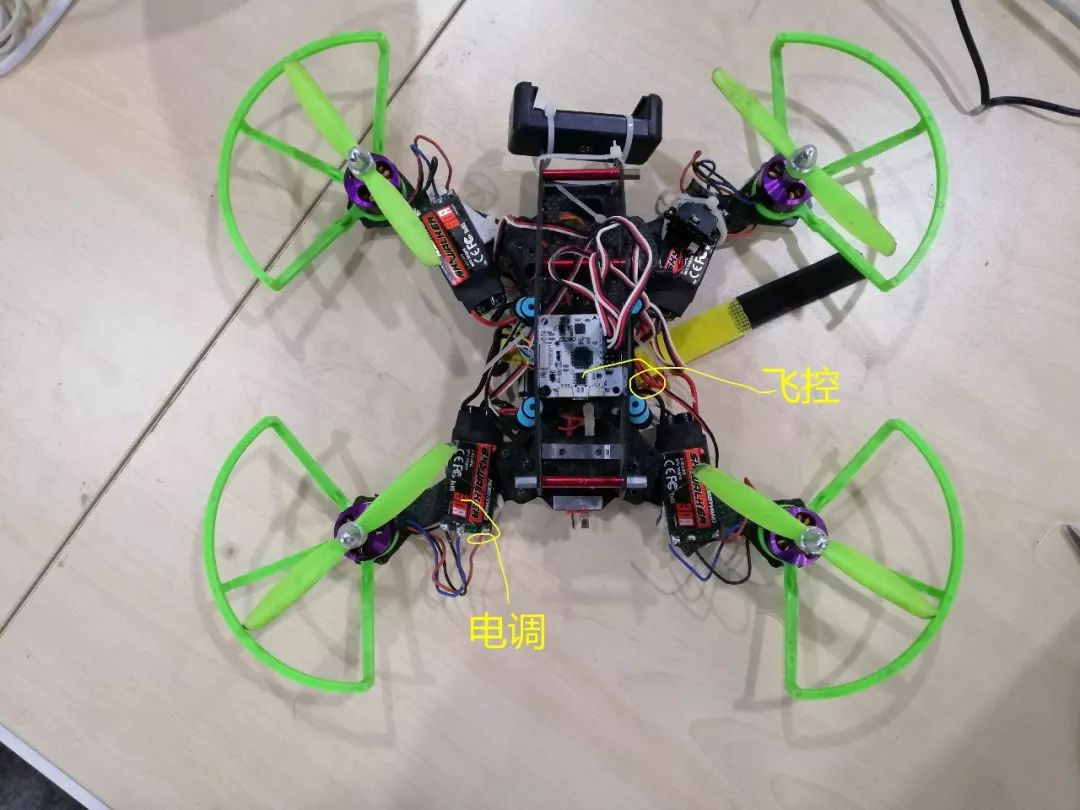
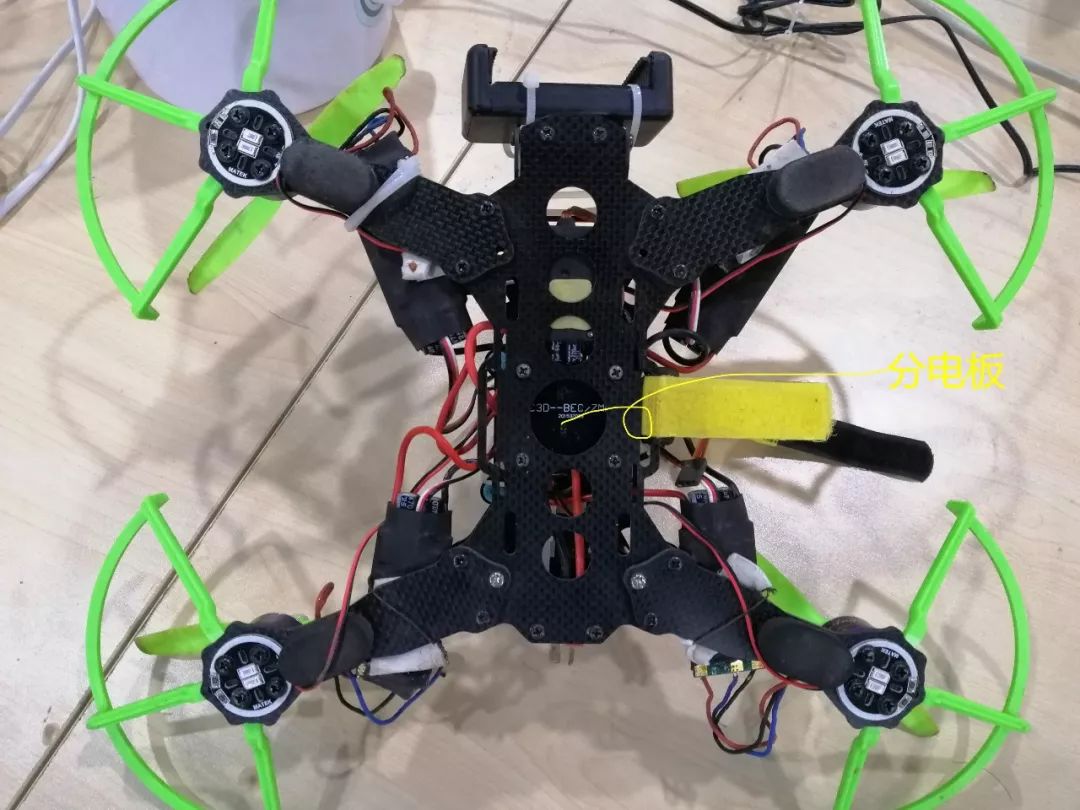
Step 4: Debugging process
(High energy warning, below is the super detailed debugging process prepared for everyone by the technicians)
1. Before debugging, first remove the propellers
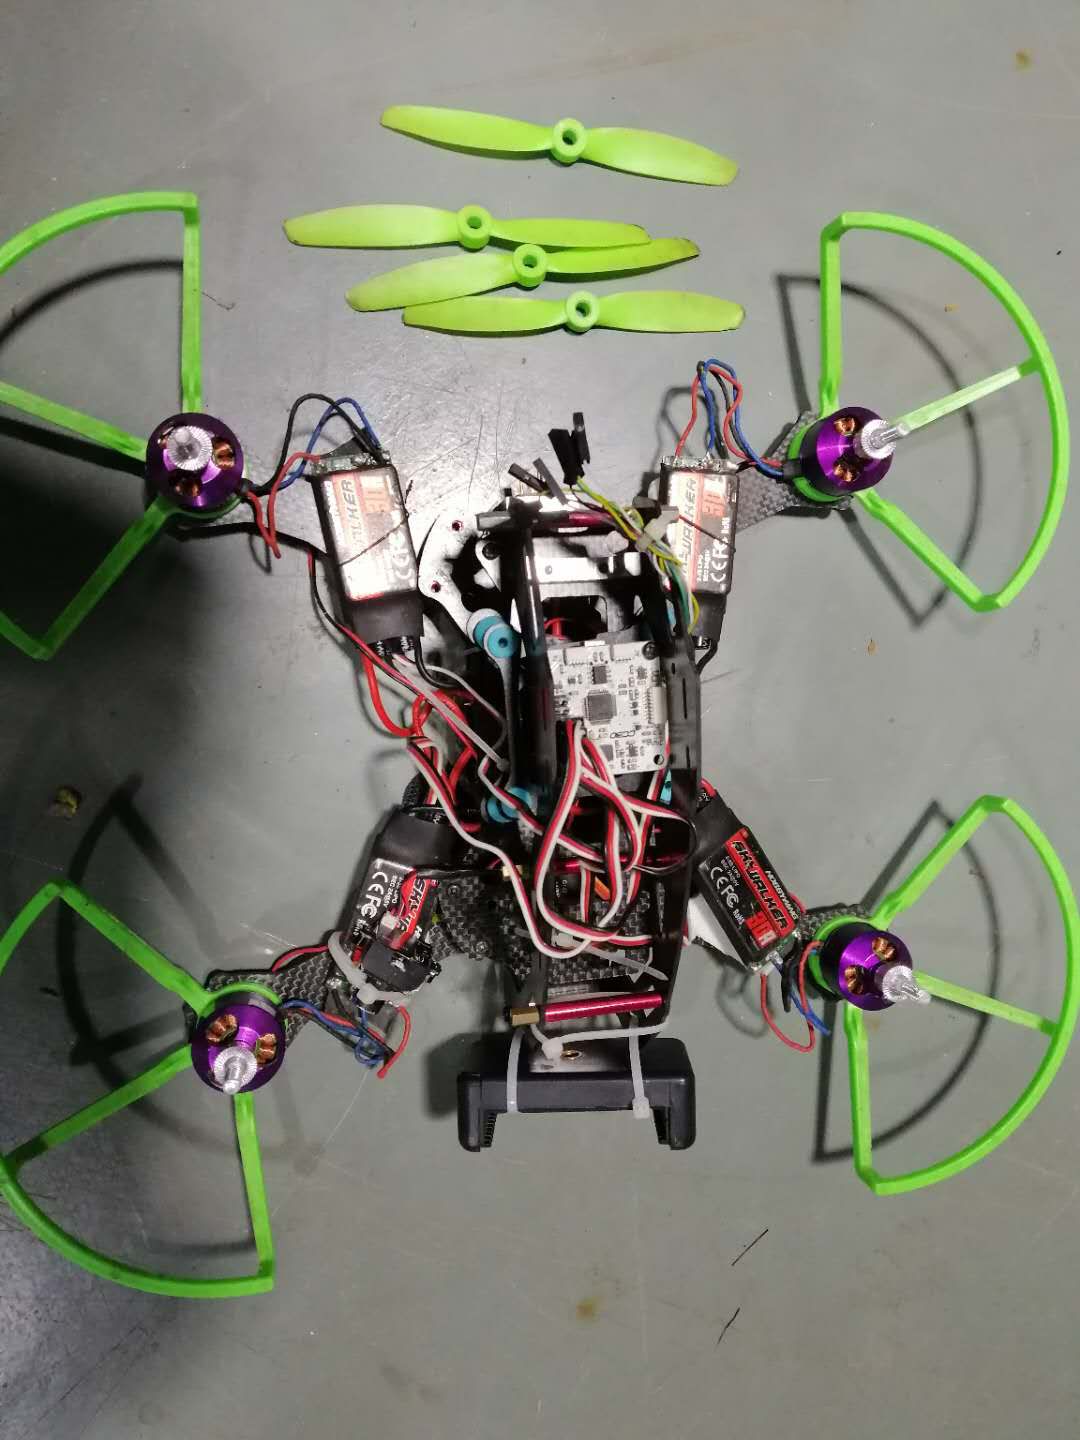
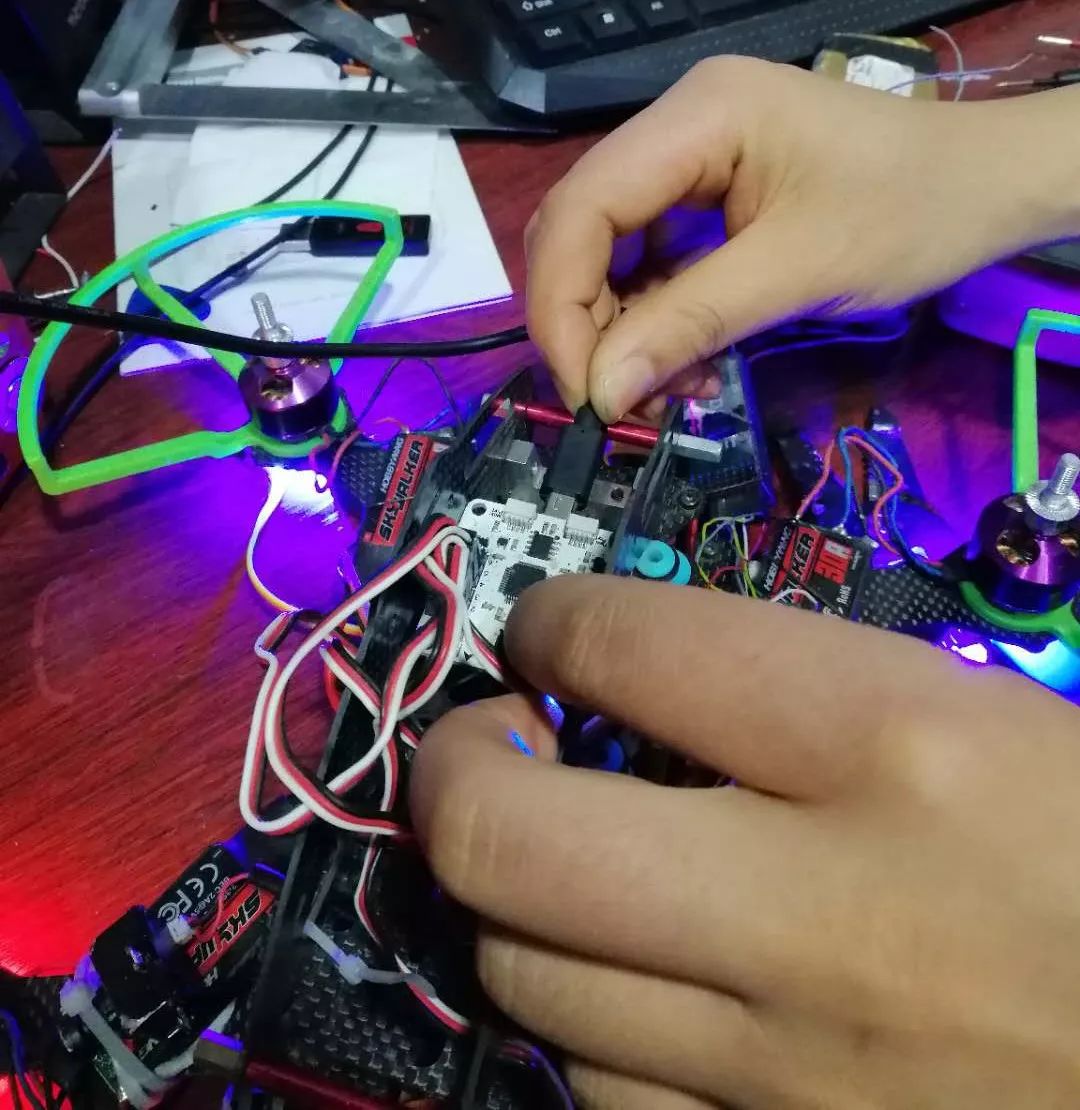
2. Use a USB cable to connect the flight controller to the computer
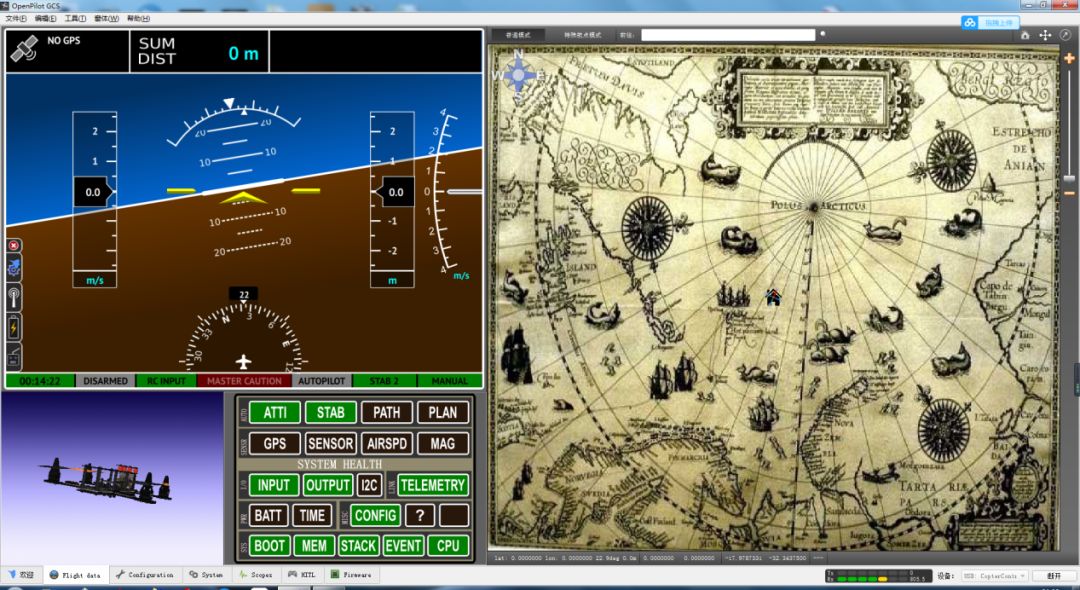
3. Start the CC3D flight control debugging software OpenPilotGCS on the computer to begin debugging. After starting the debugging software, the interface will display as shown below:
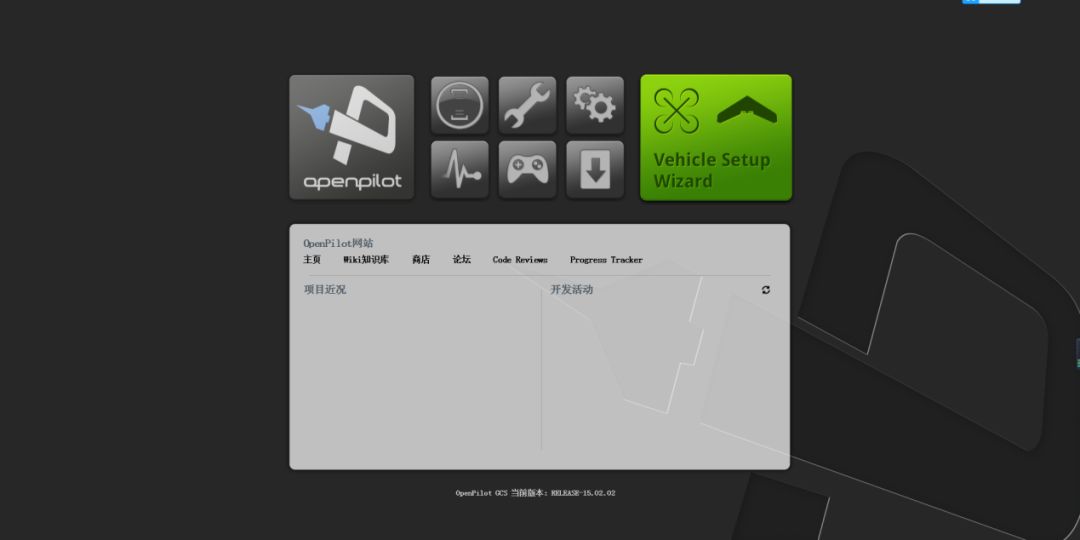
4. Click on Vehicle Setup Wizard to proceed to the next step, enter the setup wizard page, and click next again to go to the firmware update page
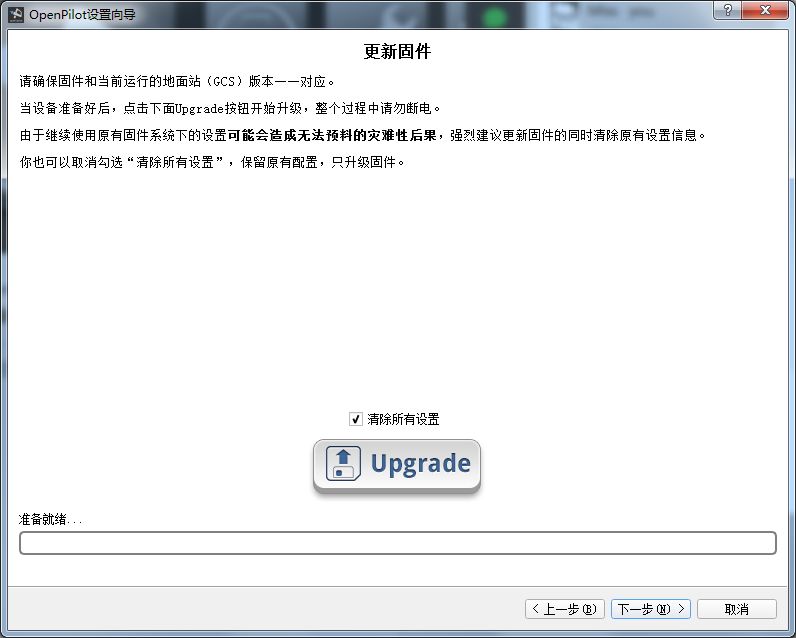
5. Click Upgrade, and then click next again to enter the device identification page,
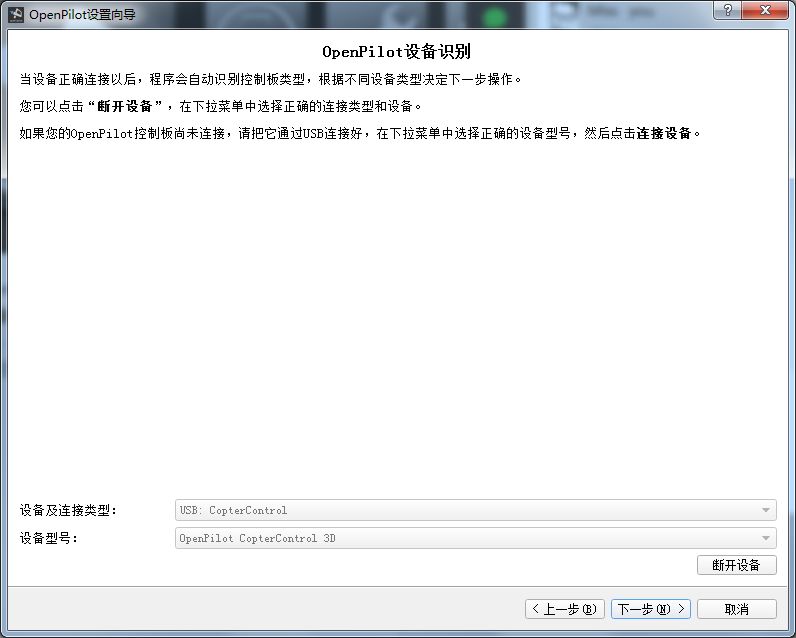
6. Click next to enter the remote control type settings, select PWM,
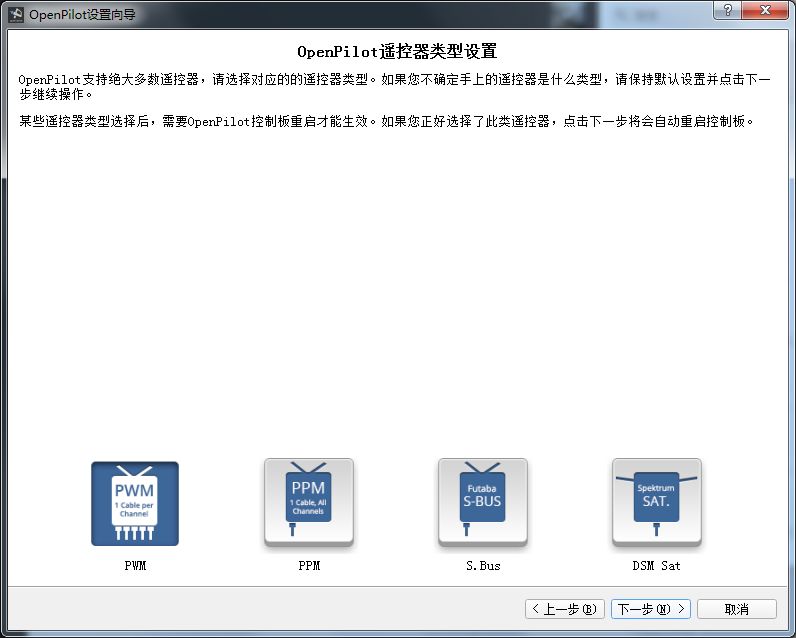
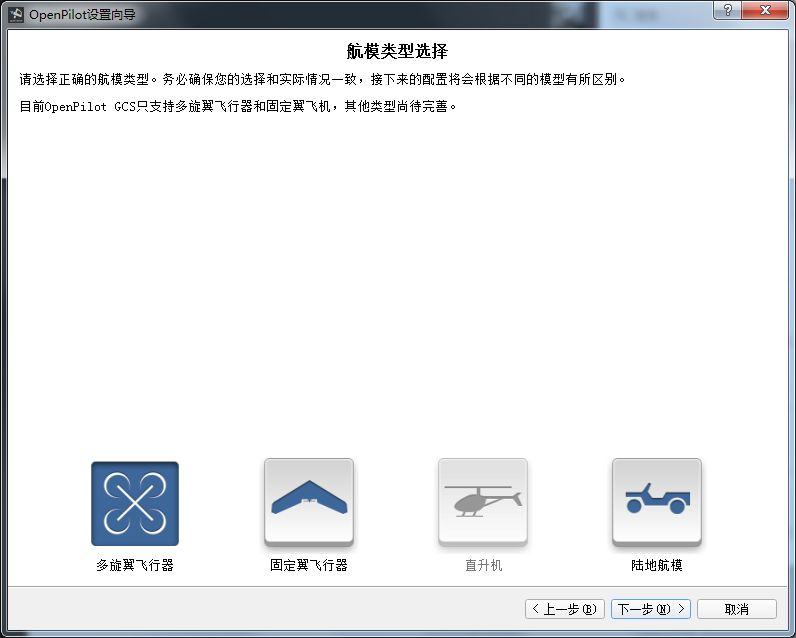
7. Choose the type of aircraft, such as: multirotor aircraft, click next to enter the multirotor flight settings page, and click next again,
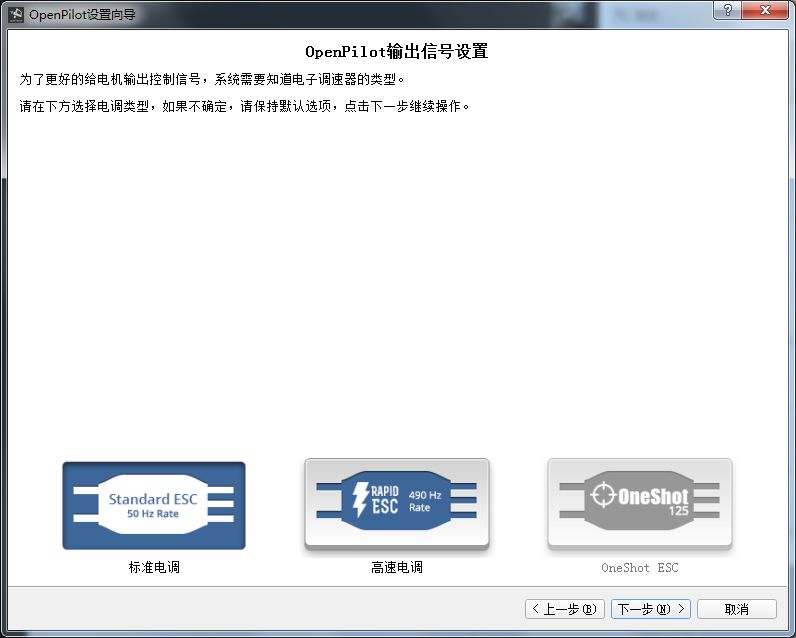
8. Based on the type of ESC for the aircraft, select the appropriate ESC type and confirm, click next to enter the summary settings, and click next again to enter the sensor calibration interface
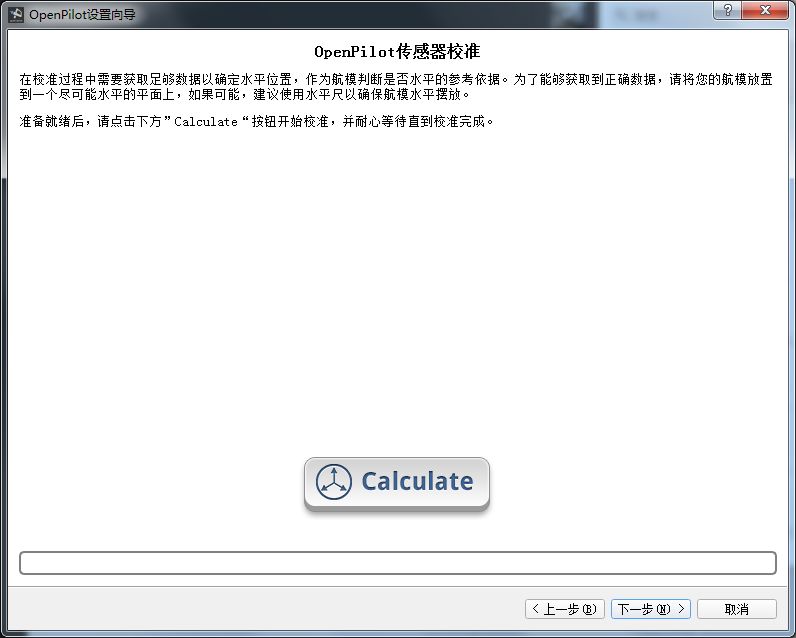
9. Click the Calculate button to calibrate, then click next to enter the ESC calibration interface
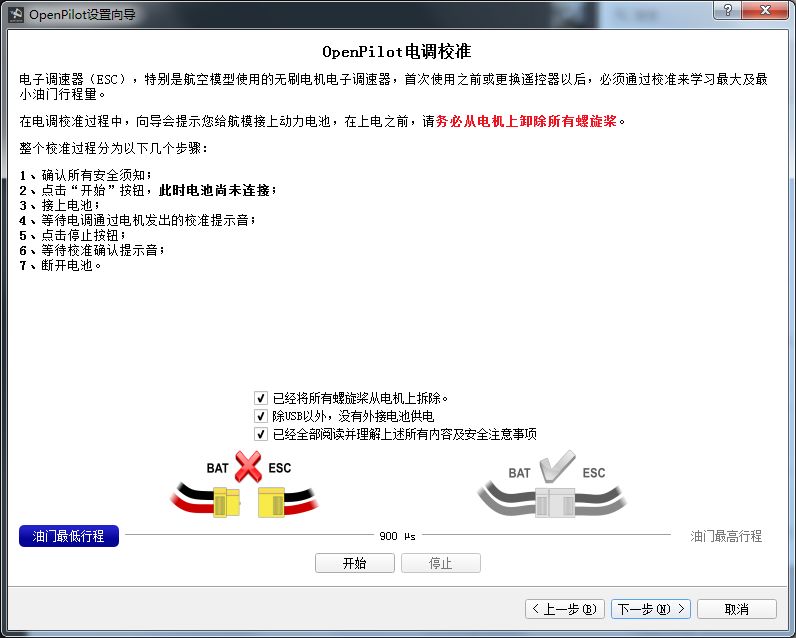
10. In the state where the battery is not connected, click the “Start” button, then connect the battery, wait for the ESC to emit a calibration prompt sound through the motor before stopping the button, wait for the calibration confirmation prompt sound, and disconnect the battery.
Then click next to enter the motor output calibration interface, follow the prompts to debug each of the four motors one by one, click start, drag the mouse to the approximate value position, using the keyboard<img to gradually increase the value until the motor just starts, click the stop button, at this time, the calibration of motor 1 is complete. Follow this step to debug the other three motors one by one.
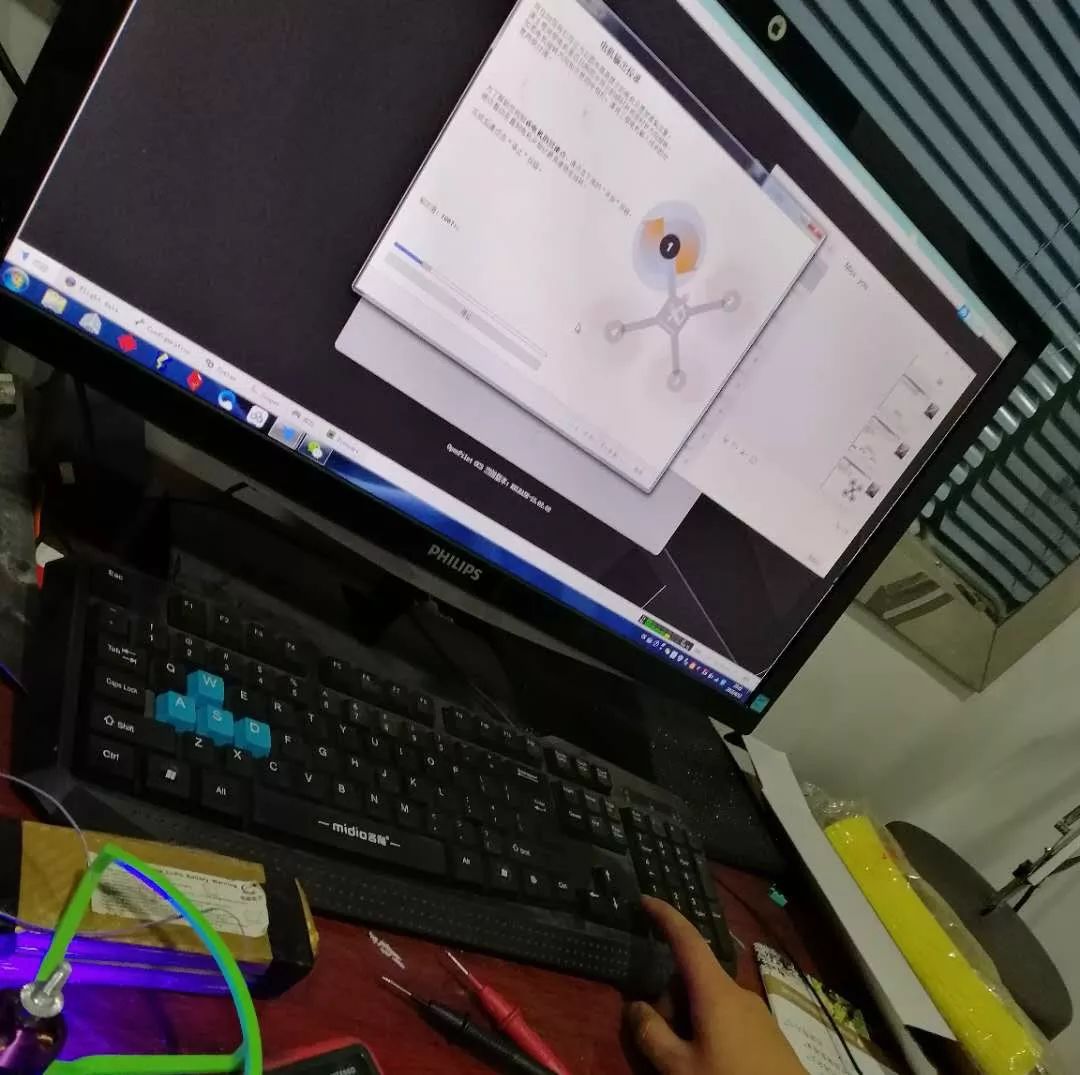
11. Click next to enter the preset steady flight parameters interface
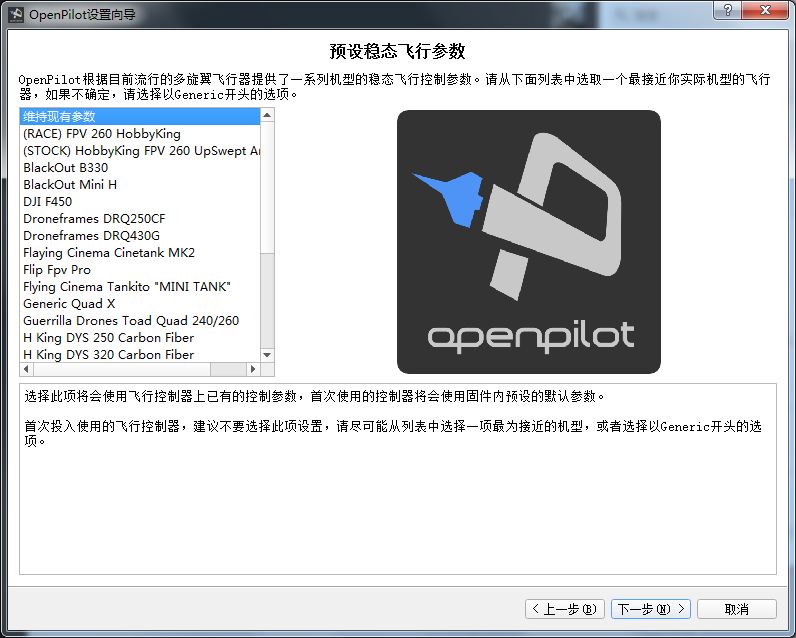
12. Select parameters according to the type of aircraft, taking (RACE) FPV 260 HObbyKing as an example, select this parameter, and click next
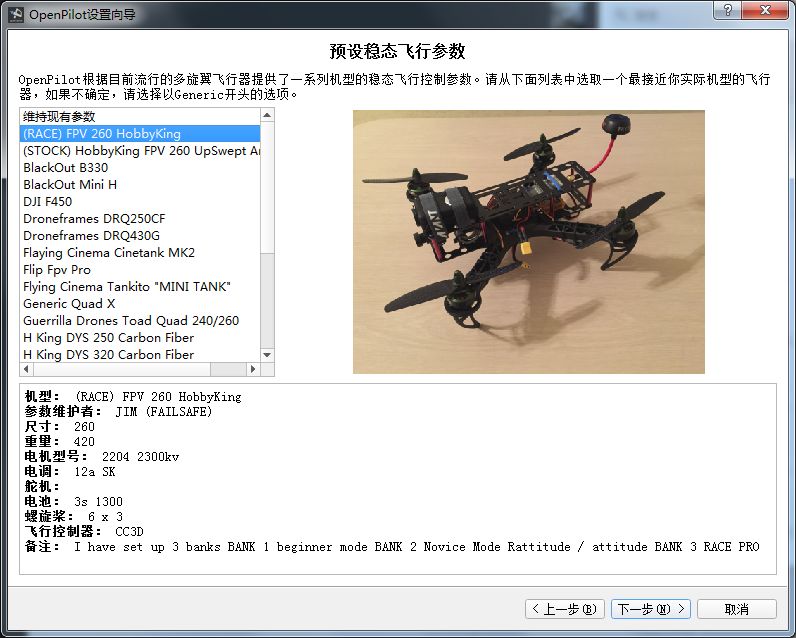
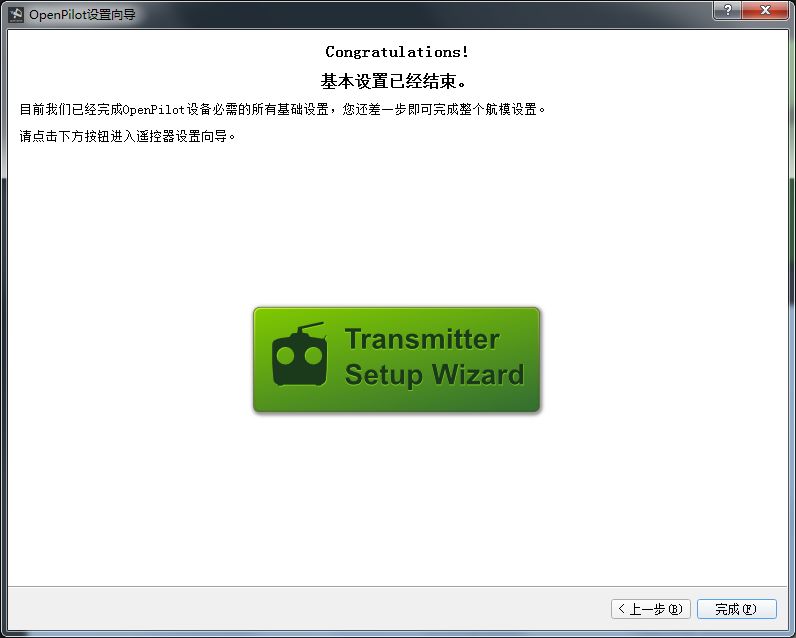
13. At this point, the flight control parameters have been set, next set the remote control parameters, click the Transmitter Setup Wizard button
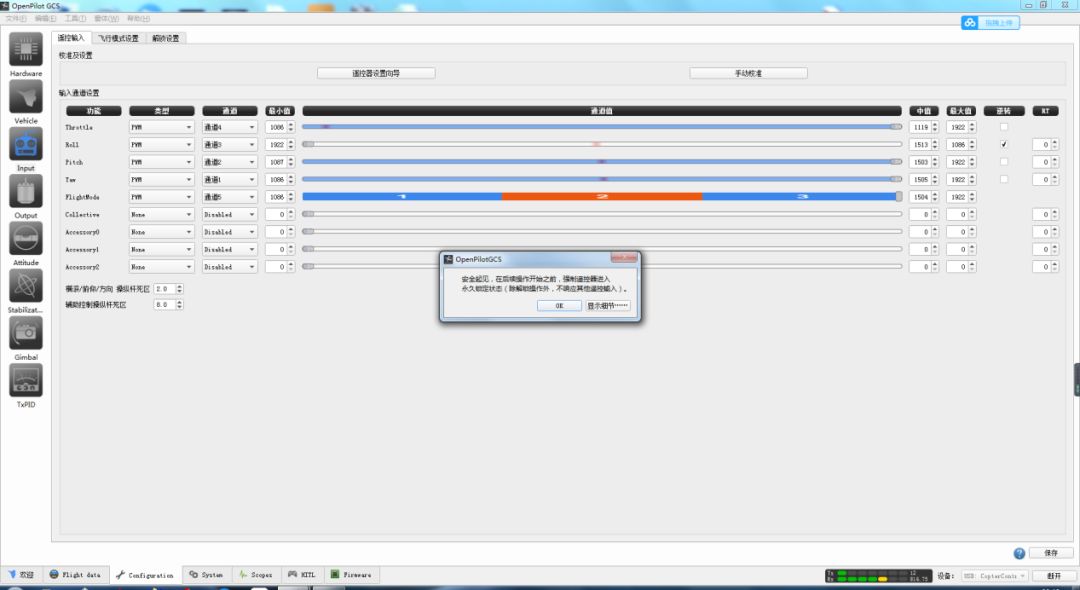
14. Click the OK button to go to the next page, click next to enter the remote control type selection page
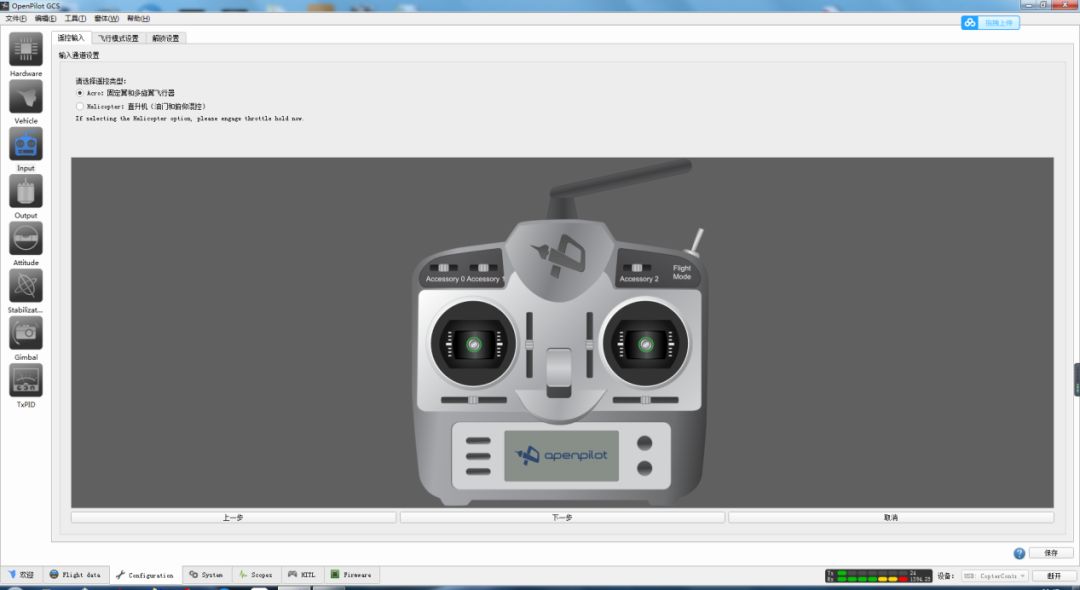
15. Choose the type of aircraft based on personal preferences, taking multirotor aircraft as an example, select fixed-wing and multirotor aircraft types, and click next
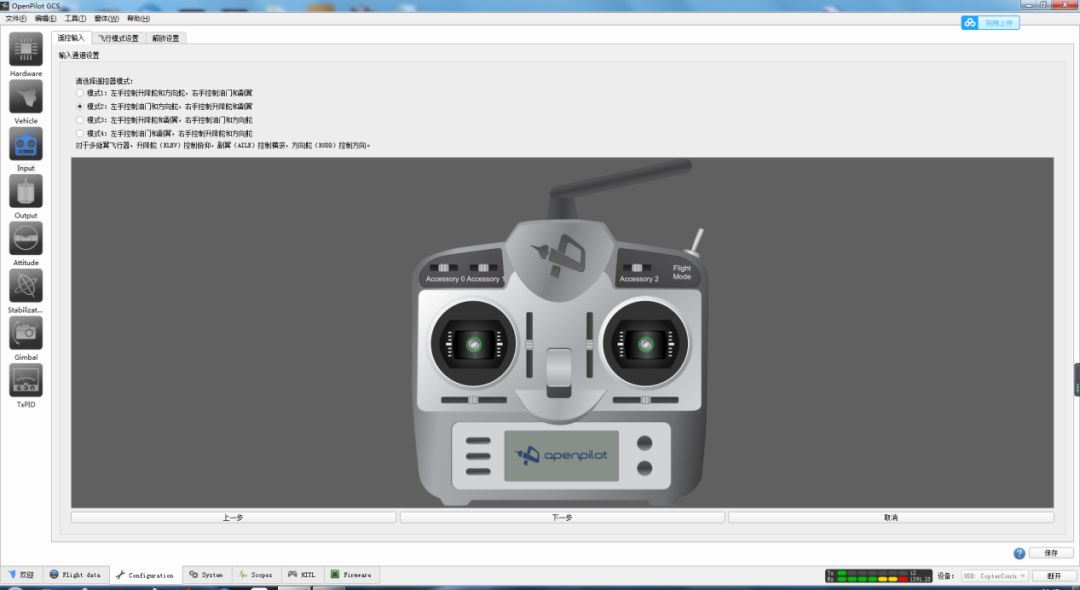
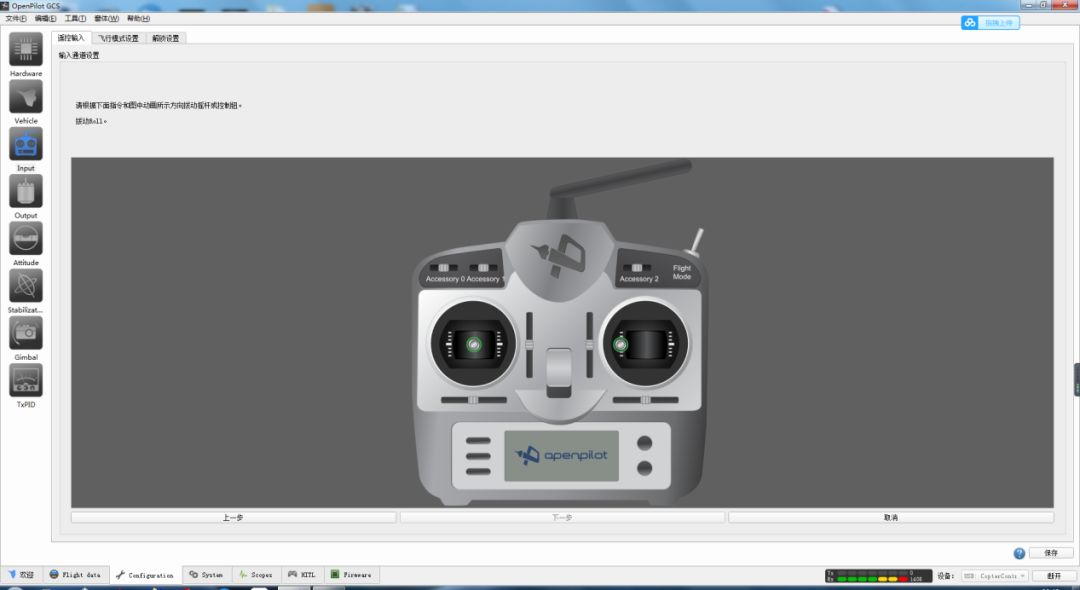
16. Follow the instructions, move the remote control stick to calibrate. When the remote control stick and the animation stick direction are the same, the calibration is correct; if the directions are different, observe the channel changes on the remote control and adjust the corresponding channel plug on the remote receiver accordingly. After the calibration is complete, click next.
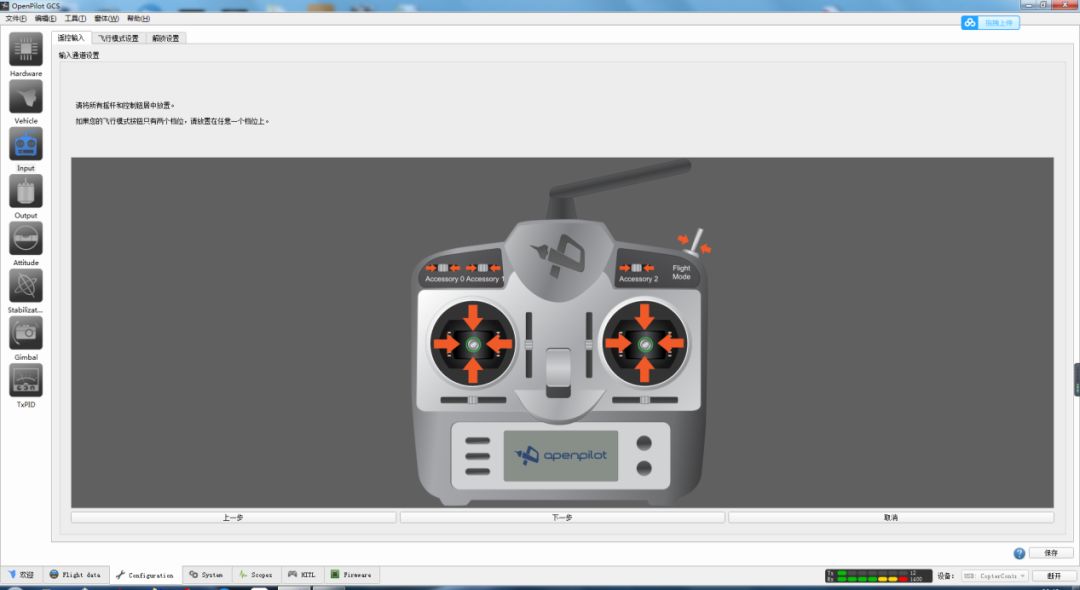
17. Keep all remote control sticks in the centered position (try to return all channels to the neutral position, except for the two-position toggle switch), click next
18. Move the remote control stick to cover its maximum stroke, then confirm and click next
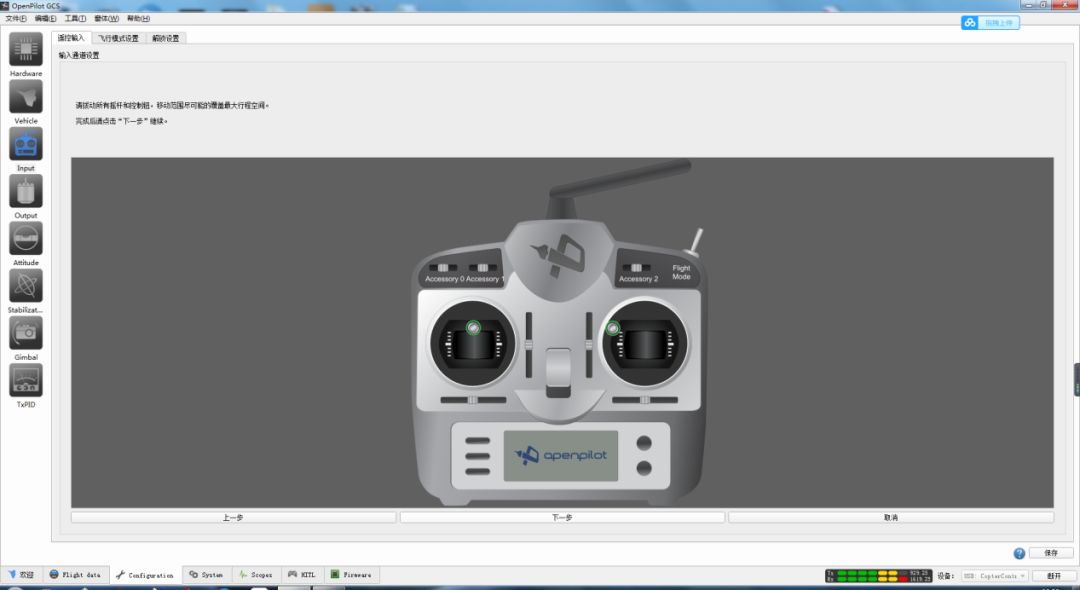
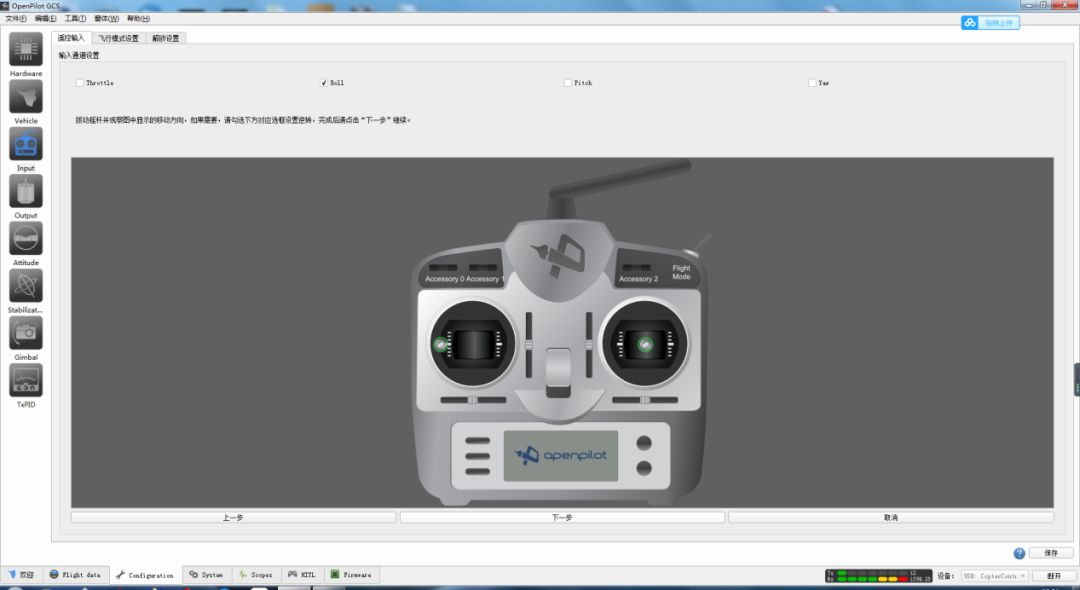
19. Move the stick and observe the displayed direction of movement; if the direction of the stick matches the displayed direction, select the reverse setting, then click next.
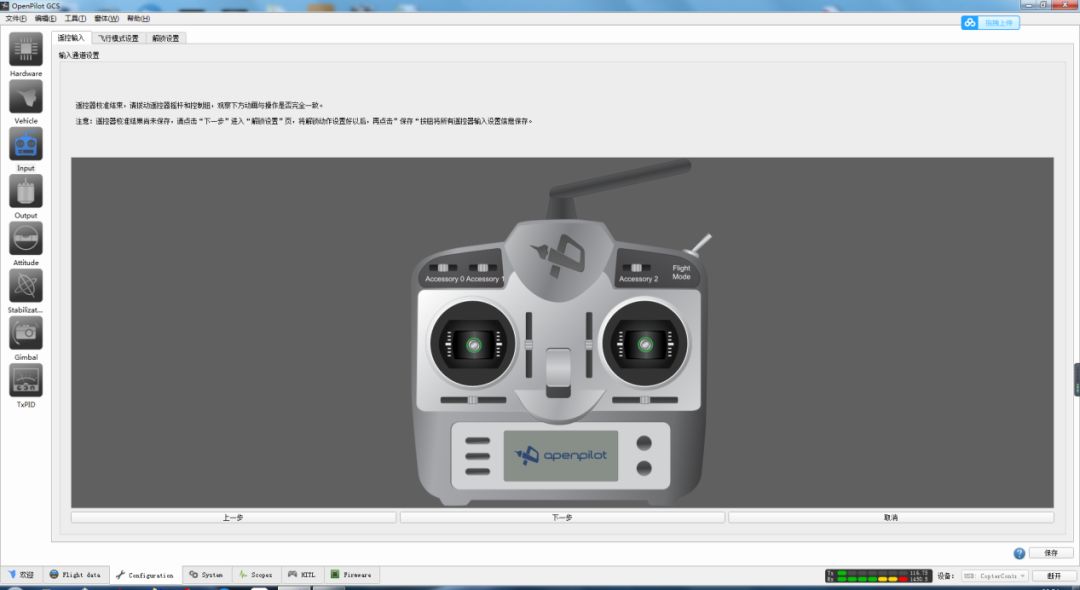
20. At this point, the remote control calibration is complete. Move the stick and observe whether the operation matches the animation; once confirmed, click next.
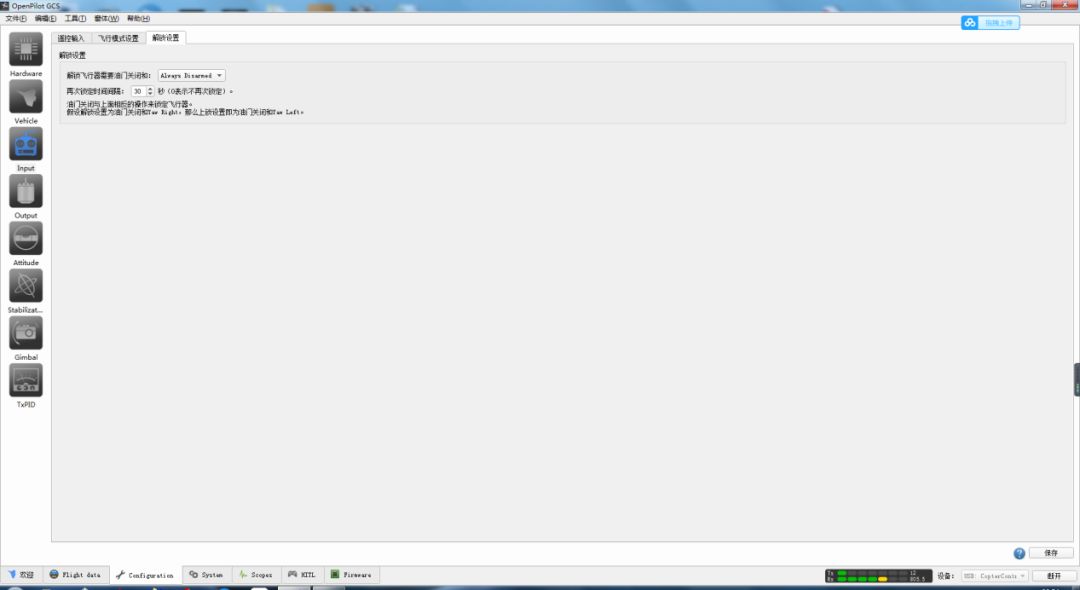
21. Enter the remote control unlock settings page, and choose the unlock position according to personal habits. For example, selecting Yaw Right means unlocking by moving the stick to the right, locking by moving to the left.
22. After completing, perform a horizontal calibration of the aircraft, place the aircraft on a flat surface, then check the box for “Reset gyroscope readings each time unlocked” and click the calibration button to perform calibration. After calibration, save it.
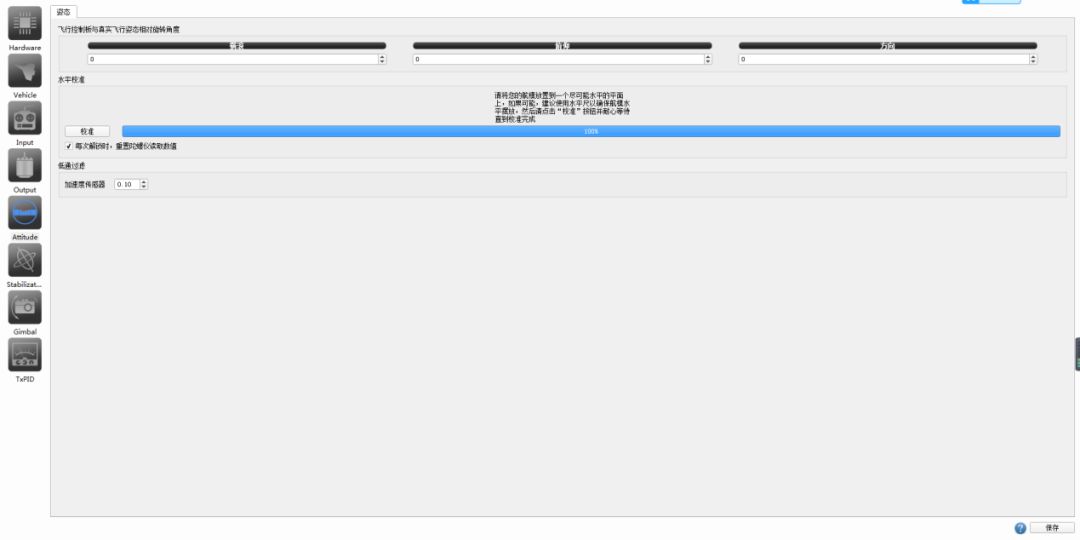
23. After saving, tilt the aircraft at various angles and observe whether the aircraft’s position matches the animations in the upper left and lower left corners of the image; if they match, calibration is successful; if not, repeat the calibration. Calibration complete, and you can fly.
Alright, that’s our detailed tutorial on drones today
Today is our unexpected update
If you like this type of sharing
Let us know in the comments
Wishing everyone a happy weekend
End
MORE| For more exciting articles, click the link below
You might also like
The Xi’an Planetary Engine Spring Festival Twelve Sounds Program Has Been Loaded, We Choose Hope!
The Strongest Four-Wheel Drive Car, Controlled by Heartbeat, Reproducing the Charge!
Perfectly Reproducing Alita’s Super Rocket Hammer, This is Definitely the Coolest Bounty Hunter!
Handcrafted True Light Saber, Burning Explosively at Thousands of Degrees!


Tap to view again before leaving~