Store receipts need to be printed, embedded systems require local storage, and devices must operate offline—complex protocols, size constraints, and long development cycles often hinder good ideas at the “last mile.”
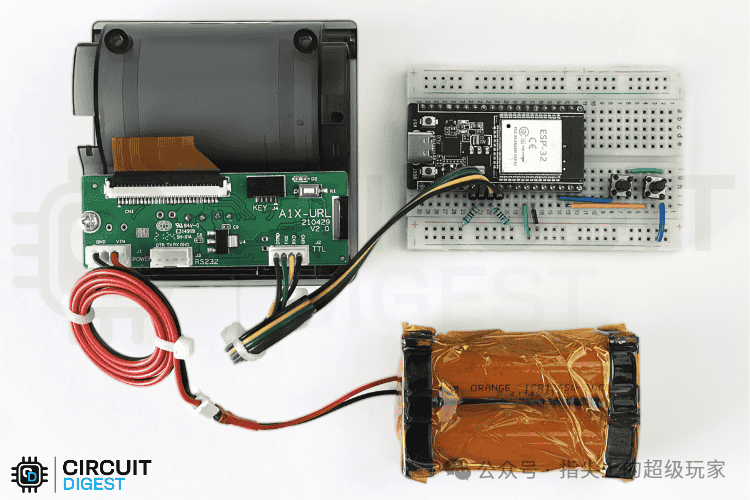
Now, there is a thermal printing solution based on the ESP32: direct serial connection, simple commands, supporting text/QR codes/barcodes/images, allowing for quick setup of POS receipt or IoT embedded printing capabilities, all running on a single board.This project demonstrates how to interface the ESP32 with the PNP-500/RS203 thermal printer, supporting multi-format printing, serial command control, demonstration buttons, invoice examples, and more.
Core Value
The core advantages of this project are “quick to get started, wide coverage, and low cost.” The UART serial interface can directly connect to the printer, and ESC/POS commands enable output of text, barcodes, QR codes, and images, balancing performance and resource usage; it also provides both command line and button dual-mode interaction, suitable for rapid validation and mass production solidification.
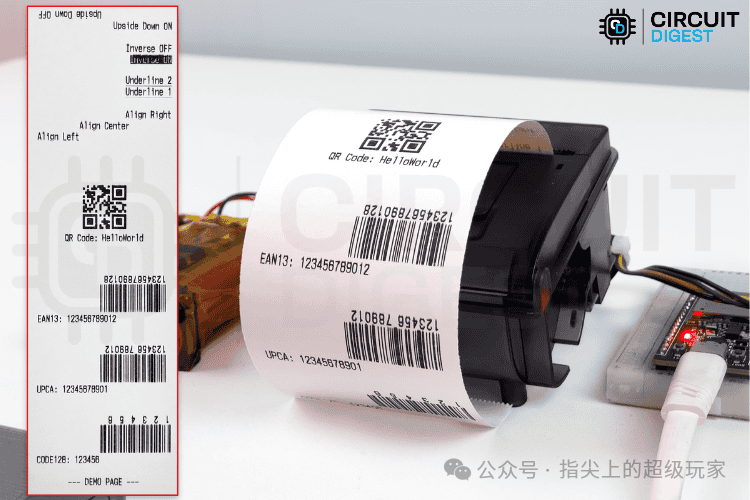
- • Multi-format output: text, images, QR codes, barcodes (CODE128, UPC-A, EAN13)
- • Professional output specifications: 8 dots/mm resolution, 50-80mm/s printing speed
- • Easy integration: UART communication, built-in bitmap chunk processing, adapted to ESP32 memory limitations
- • Dual interaction: serial command line (HELP/QRCODE/BARCODE…) + two button demonstrations
- • Real case: includes tax invoice/receipt printing examples for easy modification
Project Features
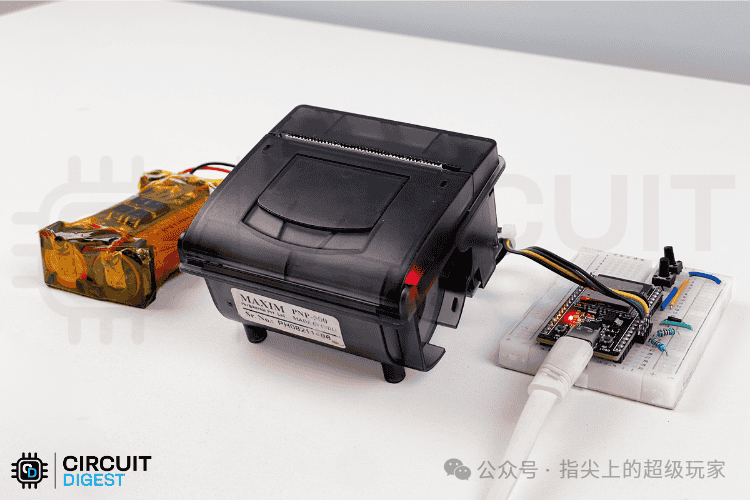
In summary: use the ESP32 to drive ESC/POS thermal printers via UART, providing command interfaces and examples, supporting bitmap, QR code, barcode, and other output capabilities.
- • Communication protocol: TTL UART (ESP32 TX2/RX2 connected to printer RX/TX)
- • Wiring points: GPIO17→TTLRX, GPIO16→TTLTX, common ground, external 7.4V power supply for the printer 0
- • Button functions: GPIO22 switches images, GPIO23 prints demonstration page
- • Bitmap limitations: maximum width of 384 pixels, optimized memory usage through chunk printing
- • Power recommendations: 6V or higher for better image density, 5V may be too light
- • Command set: supports HELP, QRCODE, BARCODE, BITMAP, ALIGN, DARKNESS, TEXTMODE, etc.
Usage Scenarios
- • POS receipt/invoice printing: quickly generate professional receipt output
- • IoT device offline logging: logs, status, alarm stickers
- • QR code/barcode labels: asset management, temporary workstations, meeting sign-ins
- • Embedded teaching/demonstration: a system that can be set up in one hour
Practical Code Examples
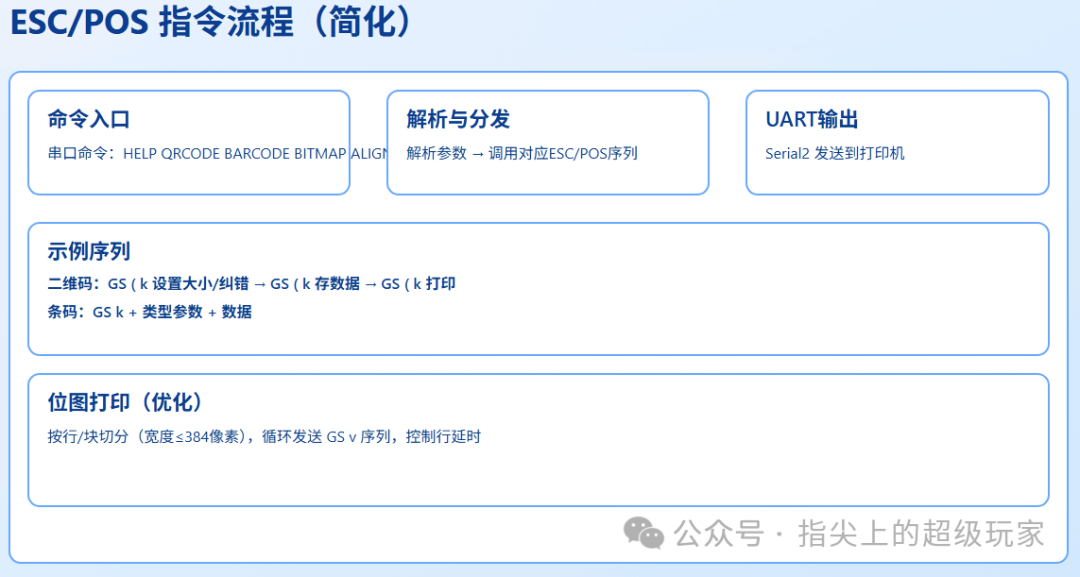
Note: The following examples are based on Arduino style, using ESP32’s Serial2 connected to the printer via GPIO17/16; note that image width ≤ 384 pixels.
- • Example 1: Initialize serial and basic printing (text/new line)
// GPIO17 -> Printer RX, GPIO16 -> Printer TX
void setup() {
  Serial.begin(115200);
  Serial2.begin(115200, SERIAL_8N1, 16, 17); // RX=16, TX=17
  delay(200);
  // Center alignment
  Serial2.write(0x1B); Serial2.write('a'); Serial2.write(1);
  Serial2.print("Hello ESP32 Thermal Printer\n");
  // Feed 3 lines
  Serial2.write(0x1B); Serial2.write('d'); Serial2.write(3);
}
void loop() {}- • Example 2: Print QR code (based on common ESC/POS sequences, specific models may vary)
void printQR(const String& data) {
  // Set QR code module size (3-16), here taking 6
  Serial2.write(0x1D); Serial2.write('('); Serial2.write('k'); Serial2.write(3); Serial2.write(0);
  Serial2.write(0x31); Serial2.write(0x43); Serial2.write(6);
  // Error correction level: 48(L)/49(M)/50(Q)/51(H) -> choose M
  Serial2.write(0x1D); Serial2.write('('); Serial2.write('k'); Serial2.write(3); Serial2.write(0);
  Serial2.write(0x31); Serial2.write(0x45); Serial2.write(49);
  // Store data
  int len = data.length()+3;
  Serial2.write(0x1D); Serial2.write('('); Serial2.write('k'); Serial2.write(len); Serial2.write(0);
  Serial2.write(0x31); Serial2.write(0x50); Serial2.write(0x30);
  Serial2.print(data);
  // Print
  Serial2.write(0x1D); Serial2.write('('); Serial2.write('k'); Serial2.write(3); Serial2.write(0);
  Serial2.write(0x31); Serial2.write(0x51); Serial2.write(0x30);
}- • Example 3: Interact via “command line interface” (send commands via serial)
// Open the serial monitor and send directly:
// HELP            -> view all commands
// QRCODE https://your.link
// BARCODE CODE128 123456
// BITMAP yourImageName
// DARKNESS 80 500 -> set density and line delay (microseconds)
// These commands are interpreted by the firmware and drive the printer
The above commands such as QRCODE/BARCODE/BITMAP/ALIGN/DARKNESS/TEXTMODE/FEED, etc., have been implemented in the project, adapting to the ESC/POS printing process.
Advantages and Disadvantages Analysis
| Dimension | Advantages | Disadvantages |
| Integration Cost | Direct UART connection, complete open-source examples, quick to get started | Requires matching suitable power supply and printing paper |
| Output Capability | Text/images/QR codes/barcodes are all available, including receipt examples | Images only support 1-bit color, width ≤ 384px |
| Performance | 8 dots/mm, 50-80mm/s meets receipt needs | Continuous high-speed printing requires heat dissipation and power margin |
| Resource Usage | Bitmap chunk processing has been done, adapted to ESP32 memory | Very large images still need attention to memory and flow control |
| Interaction | Serial commands + button demonstration, friendly for debugging | Complex layouts need to be arranged and packaged manually |
Data point: PNP-500 prints at a width of 48mm, paper width of 57mm, 8 dots/mm resolution, print head life can reach 50km; it is recommended to use ≥6V power supply for better image density.
Conclusion and Access Method
This solution is like giving the ESP32 a “pen”: it can write (text), draw (bitmap), and also create QR codes/barcodes; it can serve both toy-level demonstrations and engineering-level implementations. Want to create receipts, labels, or IoT status sheets? It is your “mini printing factory” at hand.Project address: https://github.com/Circuit-Digest/Interfacing-Thermal-Printer-POS-ESC-with-the-ESP32
Skills 3:
- • Based on the theme, I have generated 6 accompanying images locally (cover, system architecture, wiring diagram, command flow, key features, application scenarios), all in SVG+JPG, easy for secondary editing and publishing.
- • Structured images use a 16:9 or 800×600 canvas, with light blue as the main color, dark blue for list items, 16-point font, and a unified style.
- • Can continue to expand to topics such as printing specifications, ESC/POS command mapping, etc. (total ≤ 10).
-
If this is useful to you, please give it a thumbs up.
For more hardware DIY and ESP32 software tutorials, feel free to follow this public account.
-
Previous highlights:
ESP32 + VNC protocol cross-platform display + control, making microcontrollers easily display computer desktops!!
Only 2 files needed to achieve embedded debugging with hierarchical logs, multiple output targets, and dynamic control, saying goodbye to printf debugging!
ESP32 creates a high-quality control webpage, cross-platform UI, intranet penetration, easy development, very appealing!
Low-cost ESP32 oscilloscope, Wi-Fi direct connection + web interface + real-time sampling doubles debugging efficiency!
Tired of the ordinary HomeAssistant interface? A novice gives HomeAssistant a high-end IOS interface!