The advancements in technology today are truly astonishing. Just a few years ago, the 3D printing technology seemed magical and sci-fi, but now it has become a common DIY project for many households. This generation of children has so many ways to engage with the world, making them more sensitive to technology than we were. So when my child asked for a 3D printer as a birthday gift, my first reaction was: Huh? My second reaction was: Sure!
Of course, both my child and I have heard of 3D printing but don’t really understand it, so we were both clueless about where to start. I believe many people feel the same way: they want to own a 3D printer but don’t know how to begin. Today, let’s explore this together, hoping that through this article, those of us who know nothing can learn a bit and step into the exciting world of 3D printing!
1. First, Let’s Understand What 3D Printing Is
Although the term ‘3D printer’ includes ‘printer’, it is quite different from the flatbed printers we usually use. First, the physical appearance of the machines varies greatly, with many brands and names that are hard to remember; second, 3D printers rely on specialized software to create specific blueprints, which can be a high barrier for many beginners, requiring certain hardware specifications and software skills; third, personal users’ needs for 3D printing technology are not yet clear. Many jump in impulsively, without knowing what they can do or want to do with the machine, often spending thousands to print a small toy, which can be quite wasteful. Therefore, before purchasing, we can do some homework to understand 3D printing technology and printers, which will help us gradually figure out what kind of machine we really want and what we want to do with it.
1. What is 3D Printing?
3D printing technology is an additive manufacturing technique that uses a computer to slice the 3D model of the object to be printed into countless cross-sections with a certain small thickness and specific shape, which are then assembled into a three-dimensional physical object.
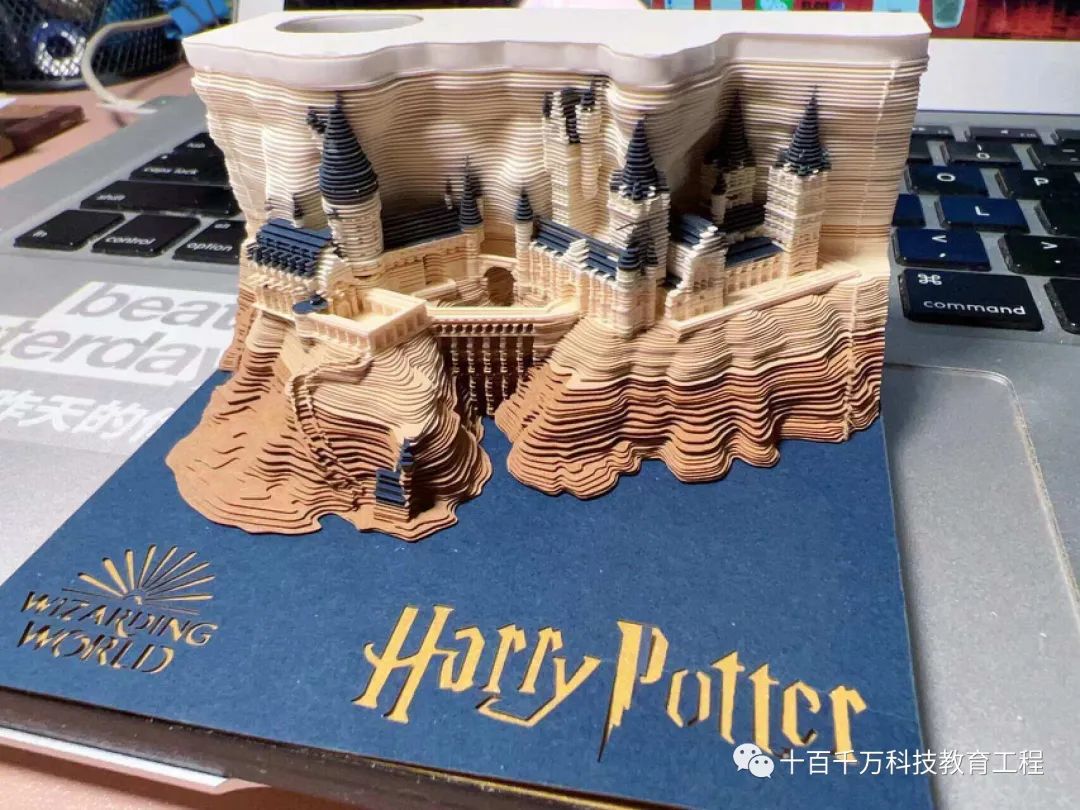
▲ For example, the finished product printed by a 3D printer looks like this 3D sticky note, which is formed by stacking countless flat layers.
In the past, if we wanted to create a finished product, we might need traditional cutting and polishing tools, and if it were industrial, molds would be necessary. Both of these points are not realistic for ordinary households. Now, with a 3D printer, complex structures can be manufactured, simplifying production processes and shortening manufacturing cycles. Most importantly, compared to manual production, it is indeed much simpler.
2. What Technologies Are Available in Household 3D Printers?
Currently, the applications of 3D printers are mainly divided into consumer-grade, industrial-grade, and professional-grade. As ordinary consumers, we are more concerned about consumer-grade 3D printers. The technologies for consumer-grade printers are divided into two categories: Fused Deposition Modeling (FDM) and Stereolithography (SLA).
1. Fused Deposition Modeling (FDM):
FDM involves melting the material and filling in the desired shapes while cooling it down to achieve the desired model.
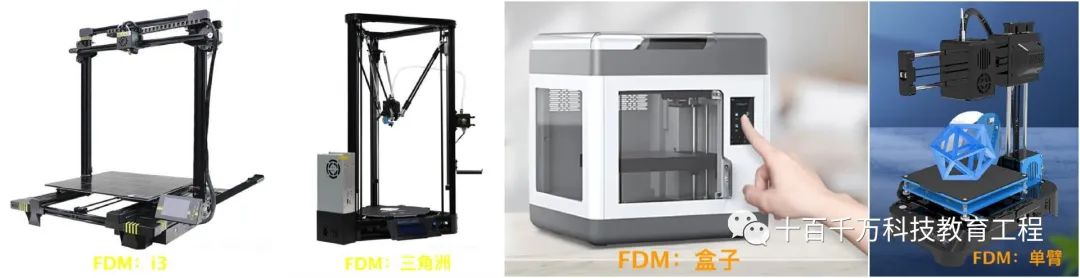
The principle of FDM technology is universal and can be subdivided into different architectures: i3, box, delta, and single-arm. Most consumers interested in 3D printing enjoy DIY and creativity, making FDM-type 3D printers a great choice.
2. Stereolithography (SLA):
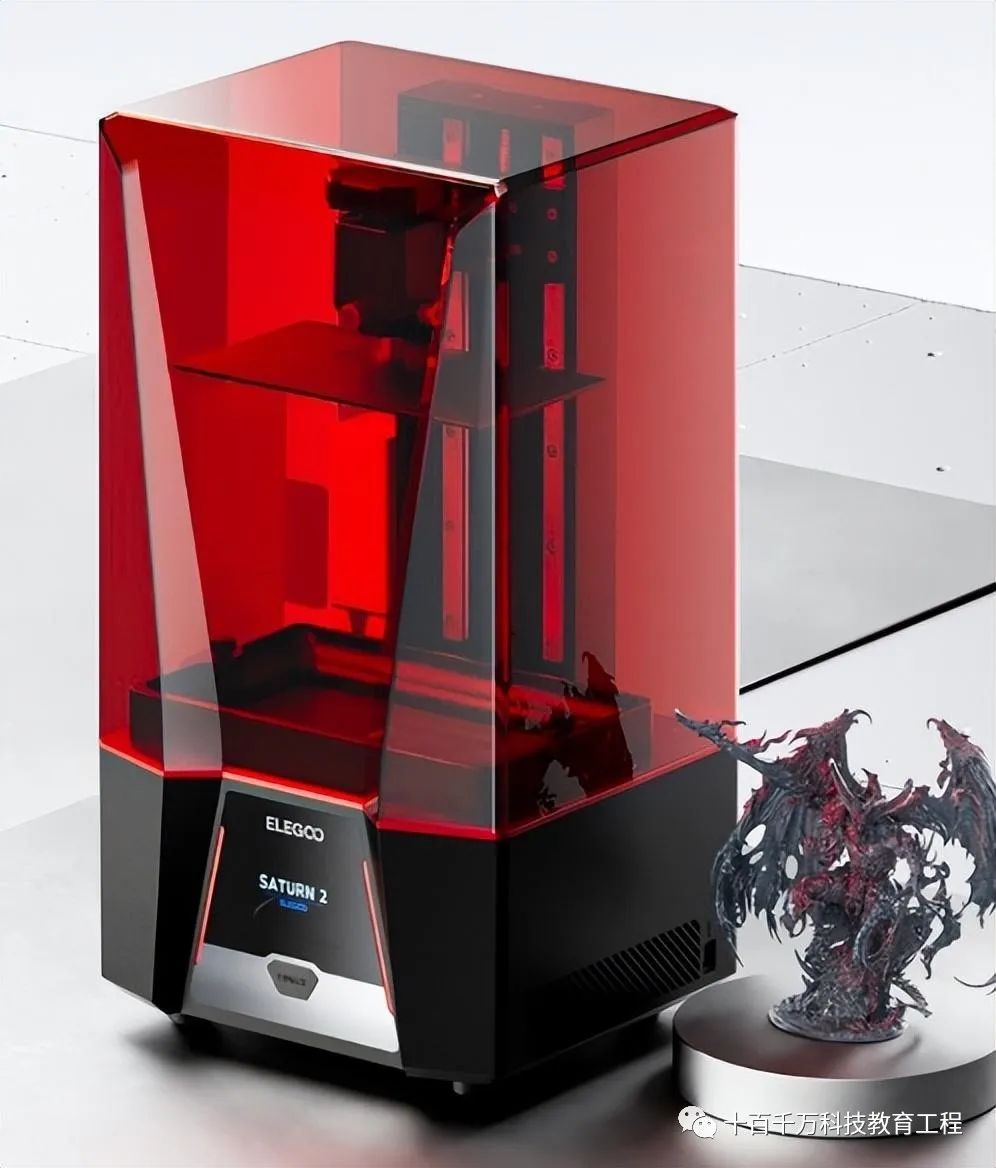
SLA uses light to cure liquid resin, primarily utilizing the characteristic of photosensitive resin that solidifies after a certain exposure time. By exposing different areas, a target 3D model is built layer by layer. This type of printer’s technology is mainly divided into LCD, DLP, and SLA. Compared to FDM devices, desktop 3D printers based on SLA/DLP technology have micron-level ultra-high printing precision and very smooth and delicate model surfaces. However, even the cheapest and most popular LCD-type SLA printers are still priced significantly higher than FDM models, making them less recommended for entry-level users.
Summary: Through this technology comparison, we can see that if we are purchasing a 3D printer, focusing on the FDM type will suffice.
3. How to Choose a Household Desktop 3D Printer?
Most ordinary consumers start with household desktop 3D printers, which are smaller and more affordable, suitable for beginners to learn and use. A so-called desktop 3D printer is a small 3D printer that can be placed on a desk, featuring a compact size and simple operation. However, the price varies significantly based on the different 3D printing technologies used, such as FDM, SLA, and DLP.
1. Material Used:
FDM 3D printers typically use thermoplastic filaments, most of which can handle ABS, PLA, PVA, TPU, and various PLA blends (for example, mixed with wood, ceramics, metals, wax, carbon fiber, etc.).
FDM materials generally come in standard sizes of 1.75mm or 2.85mm, and the color options are very rich, allowing us to print beautiful works for daily use.
On the other hand, SLA 3D printers use relatively singular materials, generally liquid photosensitive resins and some special resins for industrial use. However, the color choices for SLA 3D printer materials are limited and may not be as diverse.
2. Precision:
If we talk about precision, SLA 3D printers can achieve micron-level accuracy, while FDM printers generally have a printing precision of around 0.1mm. In comparison, if precision is what you seek, you should definitely choose SLA-type 3D printers.
3. Printing Costs:
Many products themselves are not expensive, but the materials can be costly, especially for 3D printers that consume a lot of materials, so it is essential to check the cost calculations before considering a purchase.
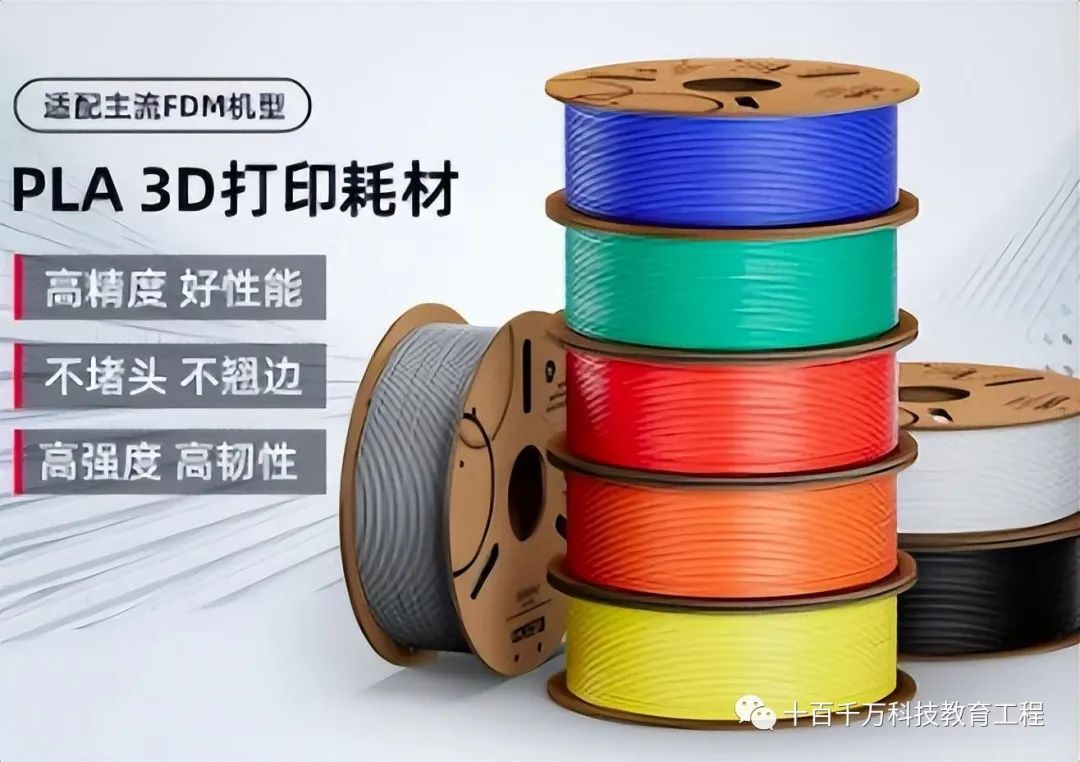
In FDM 3D printers, consumables include nozzles and filament rolls. The price of a nozzle is generally just a few dollars, while the standard material roll price has been decreasing over the past few years, approximately 80 yuan per kilogram.

In contrast, the consumables for SLA 3D printers, standard resin, cost about 150-200 yuan for one liter. If used for an extended period, the overall costs are still higher than FDM printers. Additionally, SLA 3D printers have parts that wear out, such as certain screens that need to be replaced every six months, and light sources that also need periodic replacement. The resin vat may get scratched and need replacement as well, so all these add up to a significant expense.
4. Finished Product Quality:
Many factors affect the quality of the finished product. For example, FDM 3D printers allow for easy demolding and maintain the integrity of the appearance. They are also easy to clean, requiring just a spatula. However, the finished products from FDM printers can be rough, requiring sanding to achieve a smoother surface.
SLA 3D printers have the advantage of producing smooth finished products that typically do not require sanding. However, they are harder to remove from the print bed, requiring some skill, and usually leave a lot of resin on the bed, which requires more effort to clean up afterward.
Summary: Based on these points of comparison, I still recommend that beginners first try using FDM-type 3D printers. Even if the initial failure rate is high, considering the low cost of materials, it is manageable.
2. Introduction to the ELEGOO Neptune 3 Pro
After clarifying my purchasing thoughts, I tentatively set my shopping plan as follows:
1. A beginner-friendly FDM-type 3D printer;
2. A budget-friendly option under 3000 yuan;
3. To ensure larger finished products, it is best to choose an i3 type, but not too large;
4. Simplicity of operation is preferred.
After selecting and getting recommendations from friends, I finally acquired an ELEGOO Neptune 3 Pro 3D printer, as my key to entering the magical world of 3D printing.
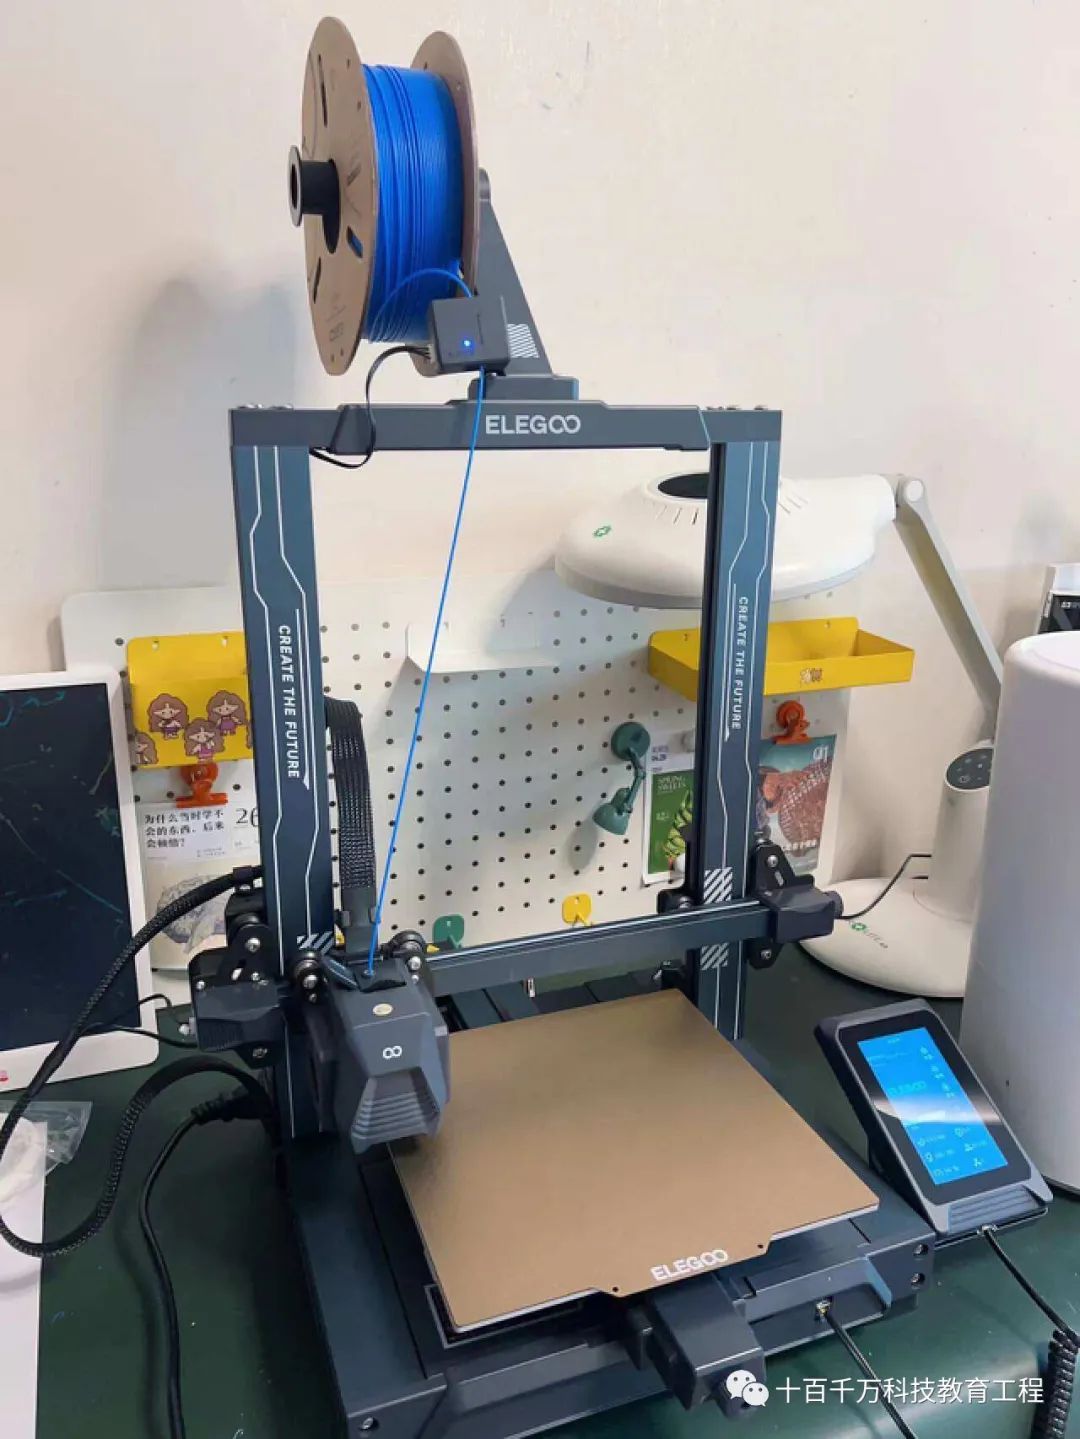
▲ This printer has a compact footprint, fitting on either a dining table or a desk without taking up much space. I found it easy to lift from the ground to the table, and it’s light enough for even older kids to move it around easily.
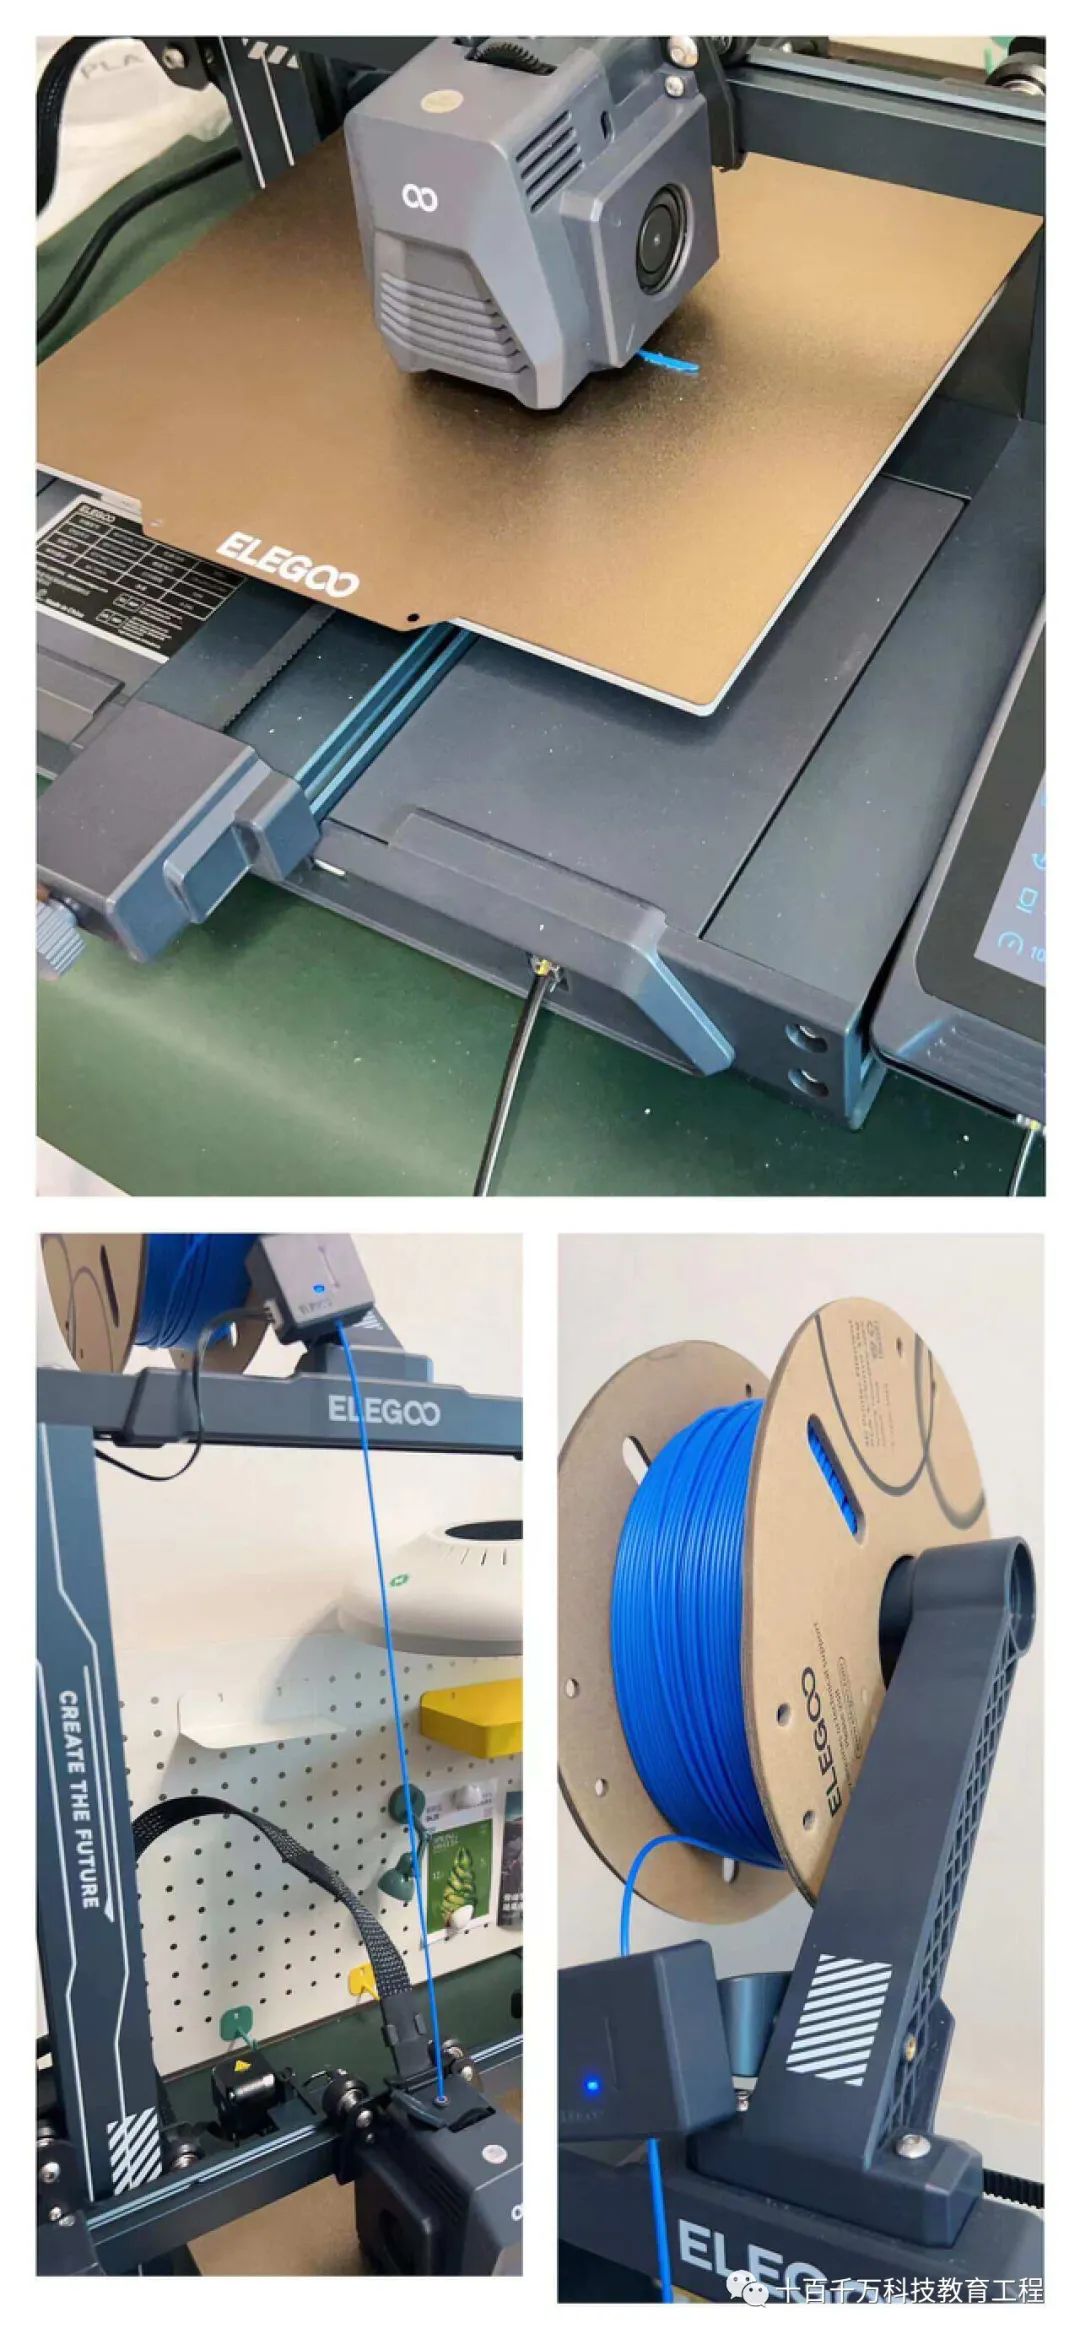
▲ The machine mainly consists of a base, gantry, and other small components. The entire assembly process is relatively easy, and with the assembly video on the included TF card, it can be completed fairly quickly, in about 20-30 minutes. Be careful with the numerous wiring connections.
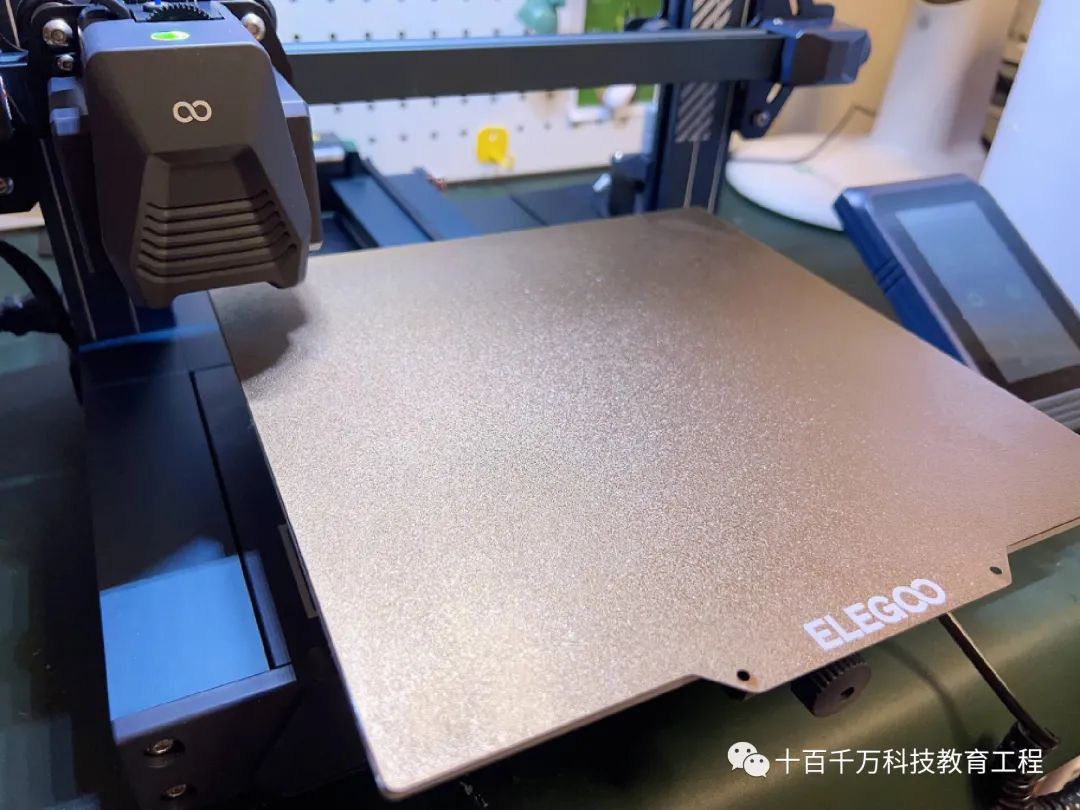
▲ The main part of the 3D printer is the heated bed platform, which has a special PEI coating. The surface feels rough with a matte texture. The advantage is that after the platform cools down, the model can easily detach without needing a spatula, so if you’re not in a hurry, you can wait until it cools to remove it.
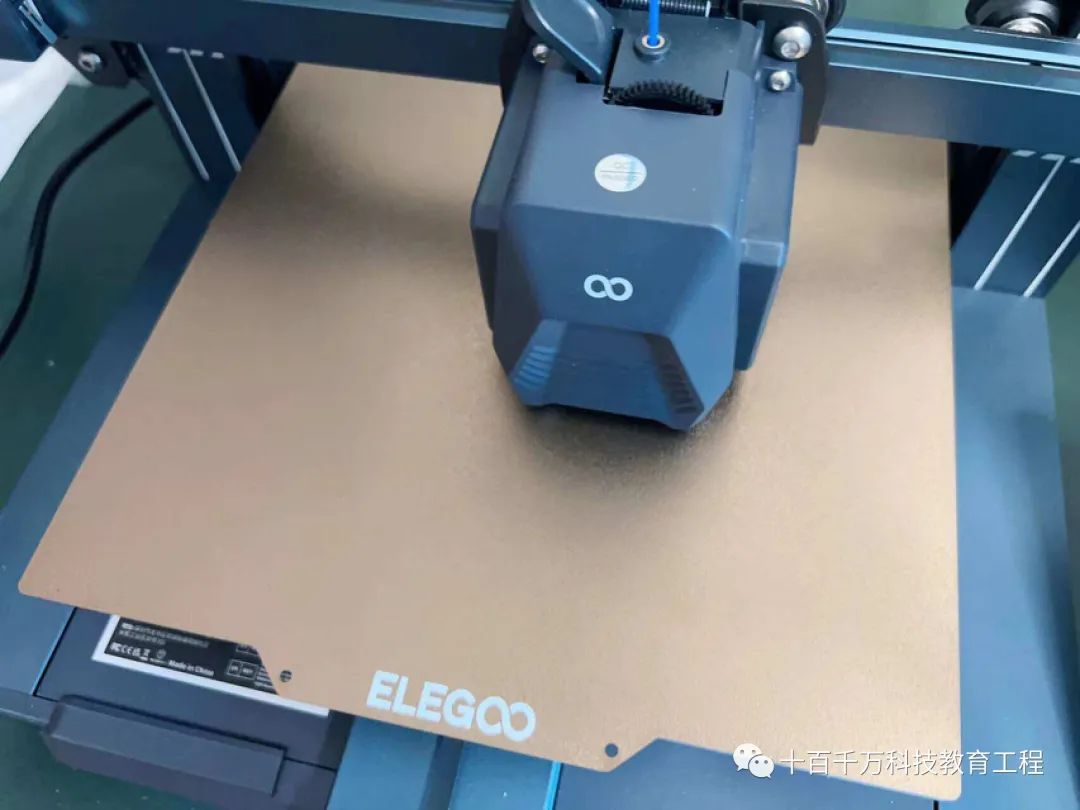
▲ Additionally, this printer’s heated bed has a large power of 250W, heating quickly. It takes about 1 minute and 57 seconds to reach 60°C and approximately 5 minutes and 57 seconds to reach 100°C, so the overall preheating waiting time is not long. The heated bed heats evenly, preventing warping during printing, resulting in better-looking finished products.
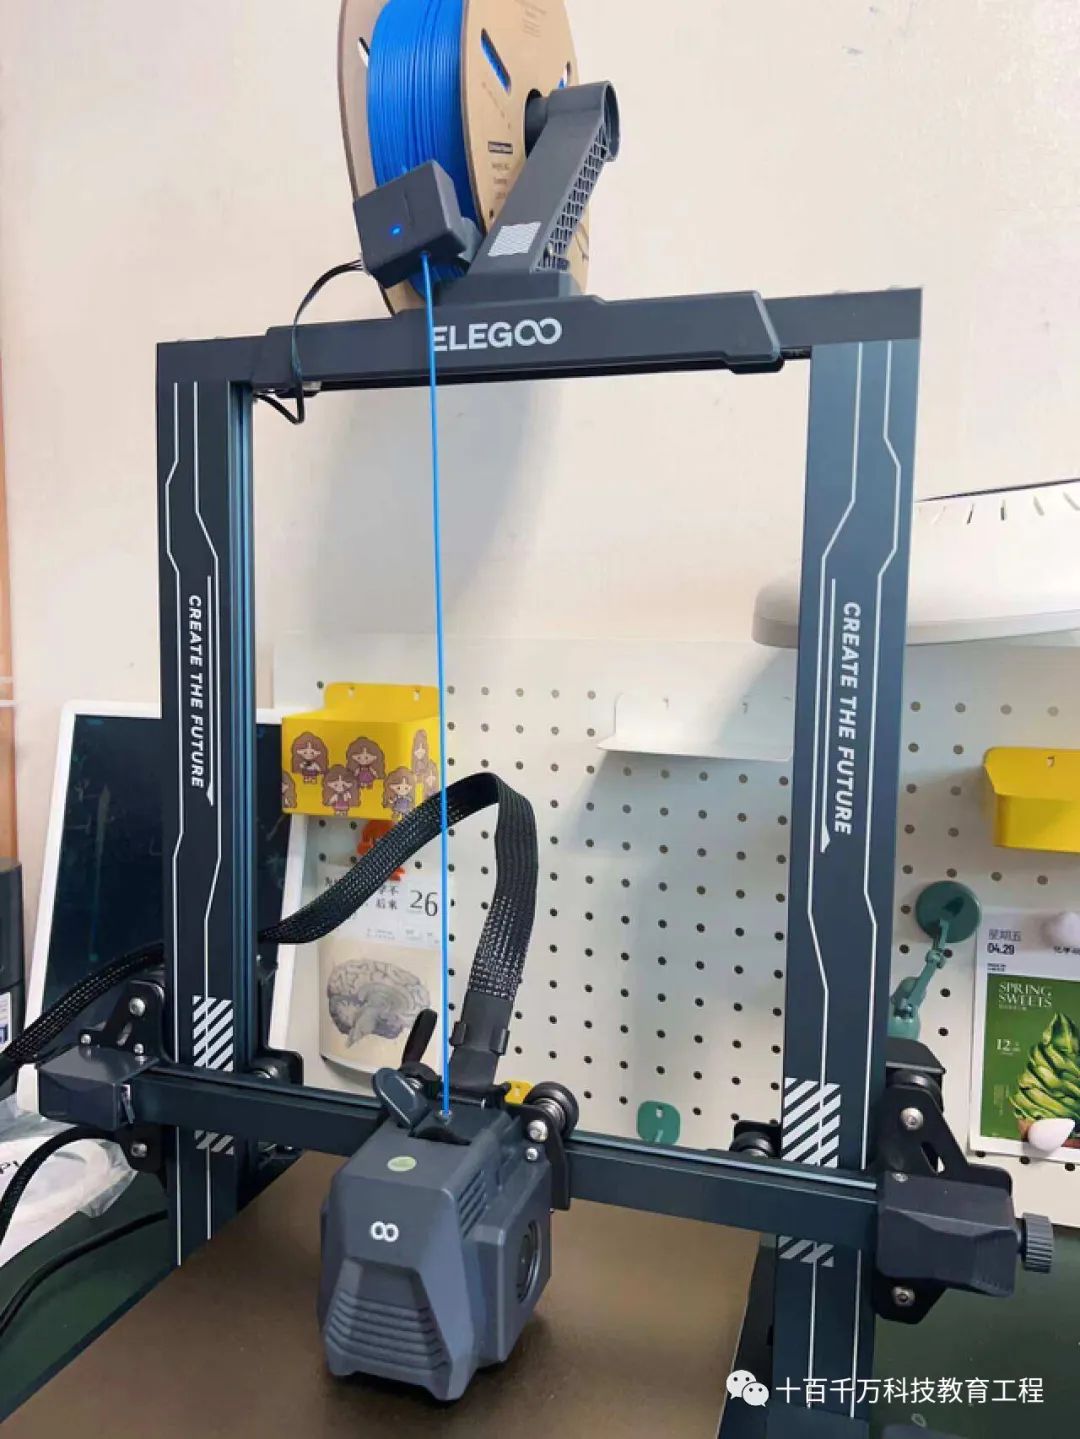
▲ The gantry is a “load-bearing” component that holds the print head, filament tube, and filament holder, so I recommend securing it first before installation for convenience.
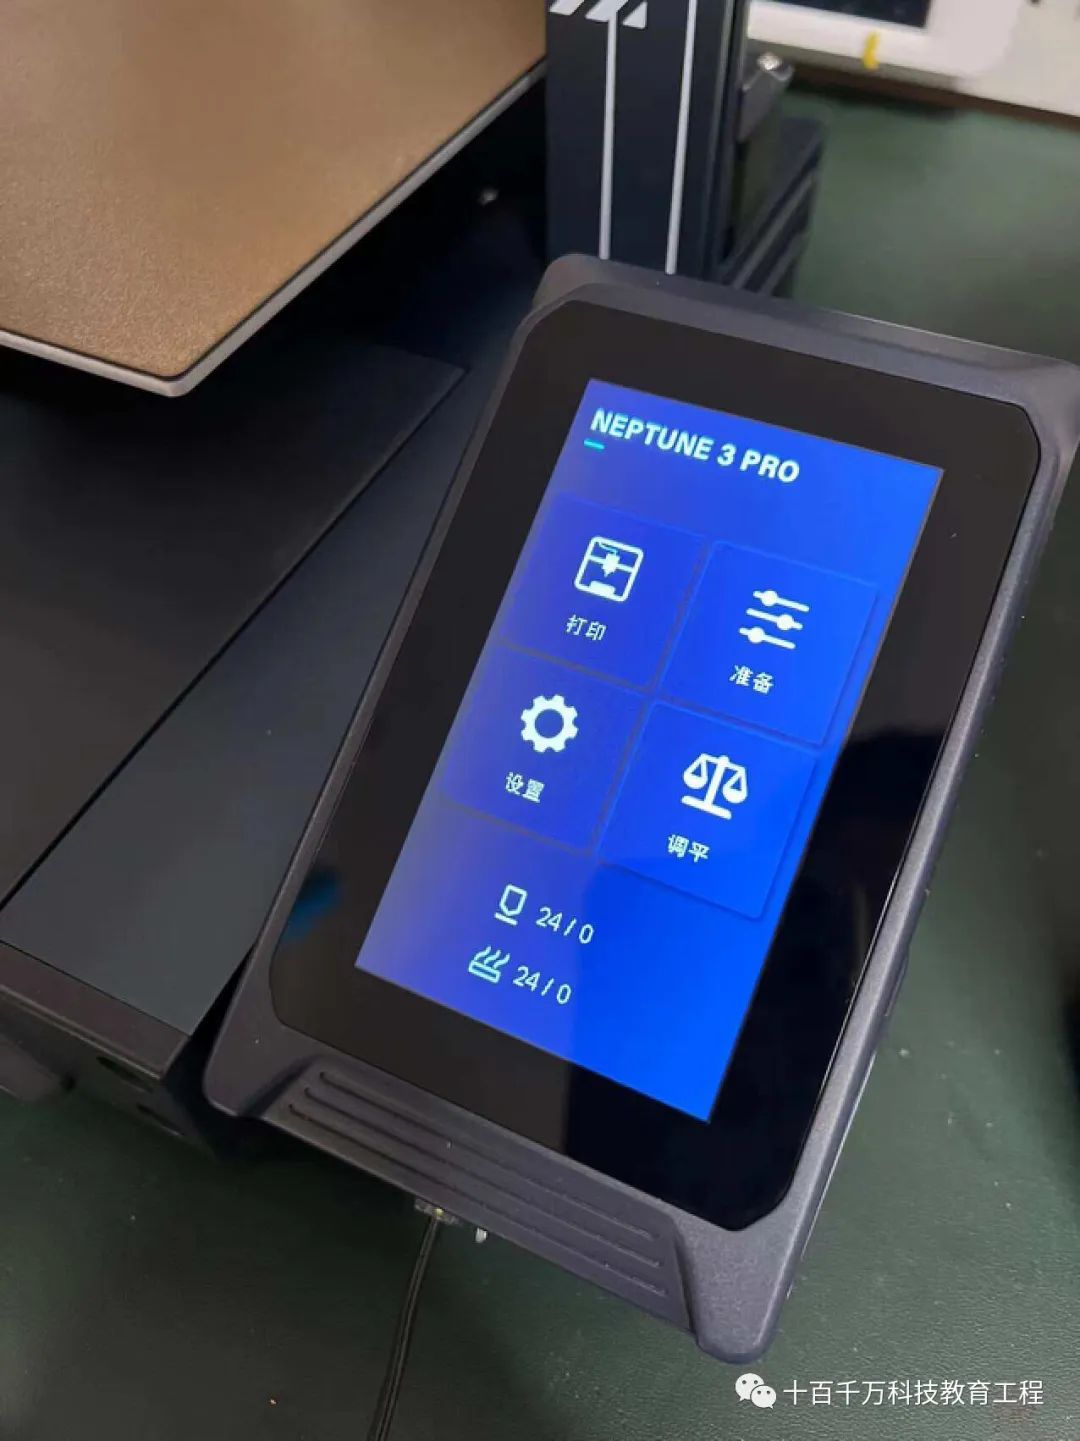
▲ Once installed, we can start printing! After powering on, the display shows an English interface, but the Neptune 3 Pro supports eight languages, including Simplified Chinese. For those unfamiliar with English, you can set the language to Simplified Chinese in the settings menu.
▲ Before rushing to print something, let’s first debug the machine. To achieve good printing results, we need to start with leveling. I often see experts online teaching how to level manually, but the numerous data can intimidate beginners.
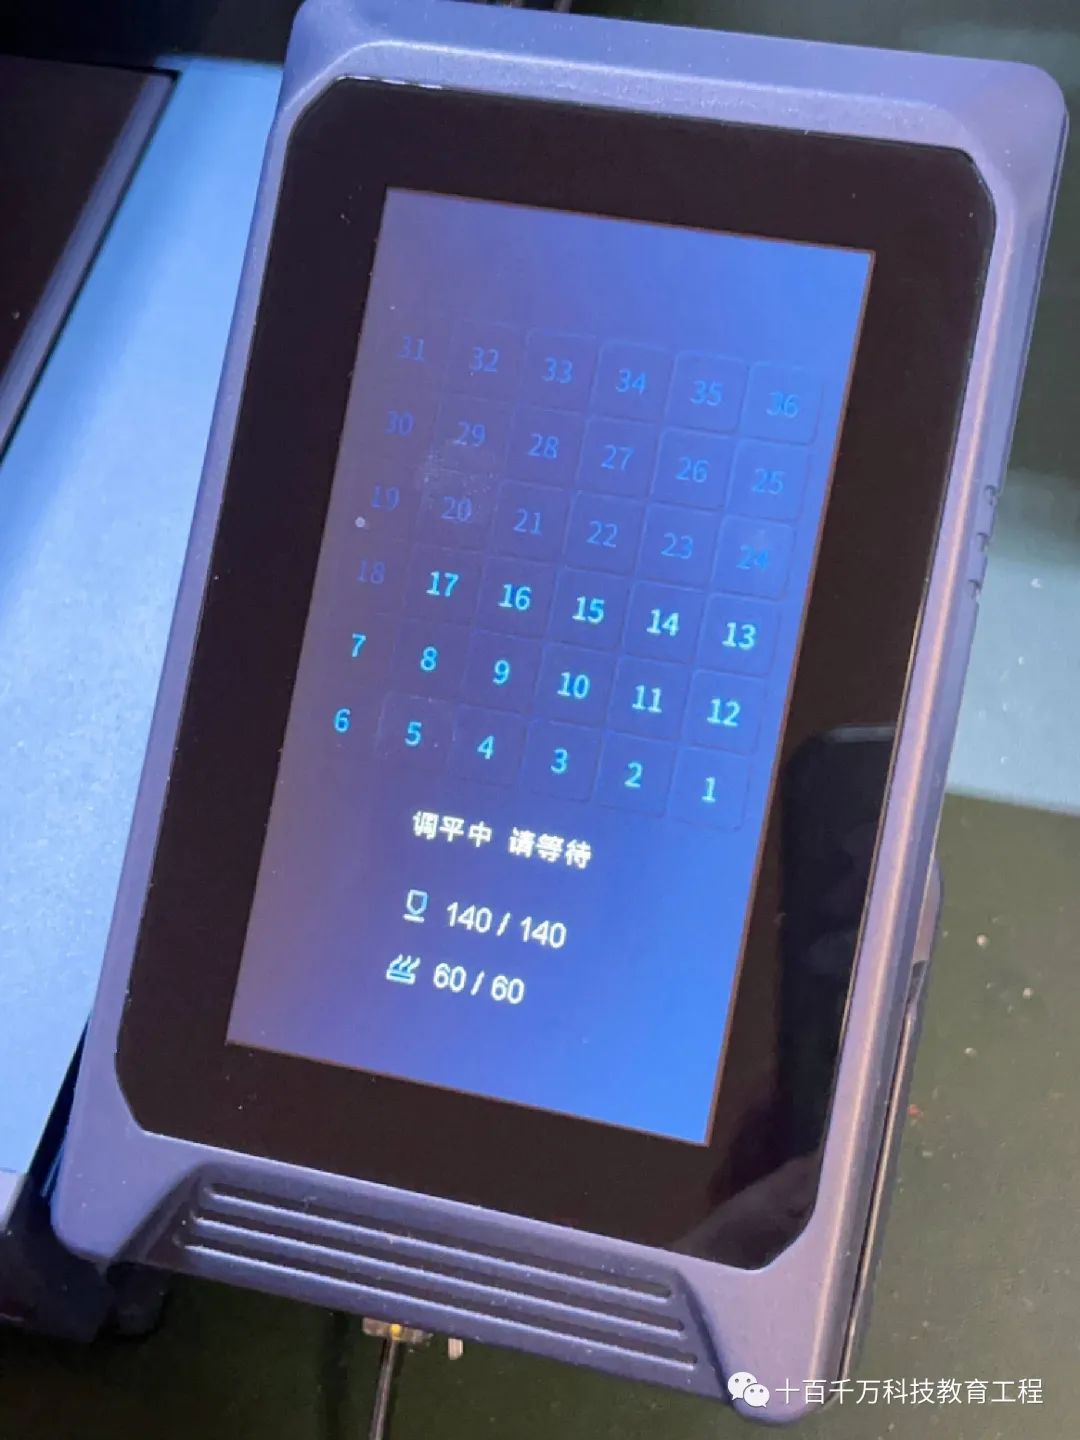
▲ However, this smart printer has an automatic leveling program that uses a non-contact high-precision sensor to collect data from 36 points, allowing for precise and quick leveling. Of course, when I advance from a novice to an expert, I can perform manual fine-tuning through the screen on the right for more precision and personalization.
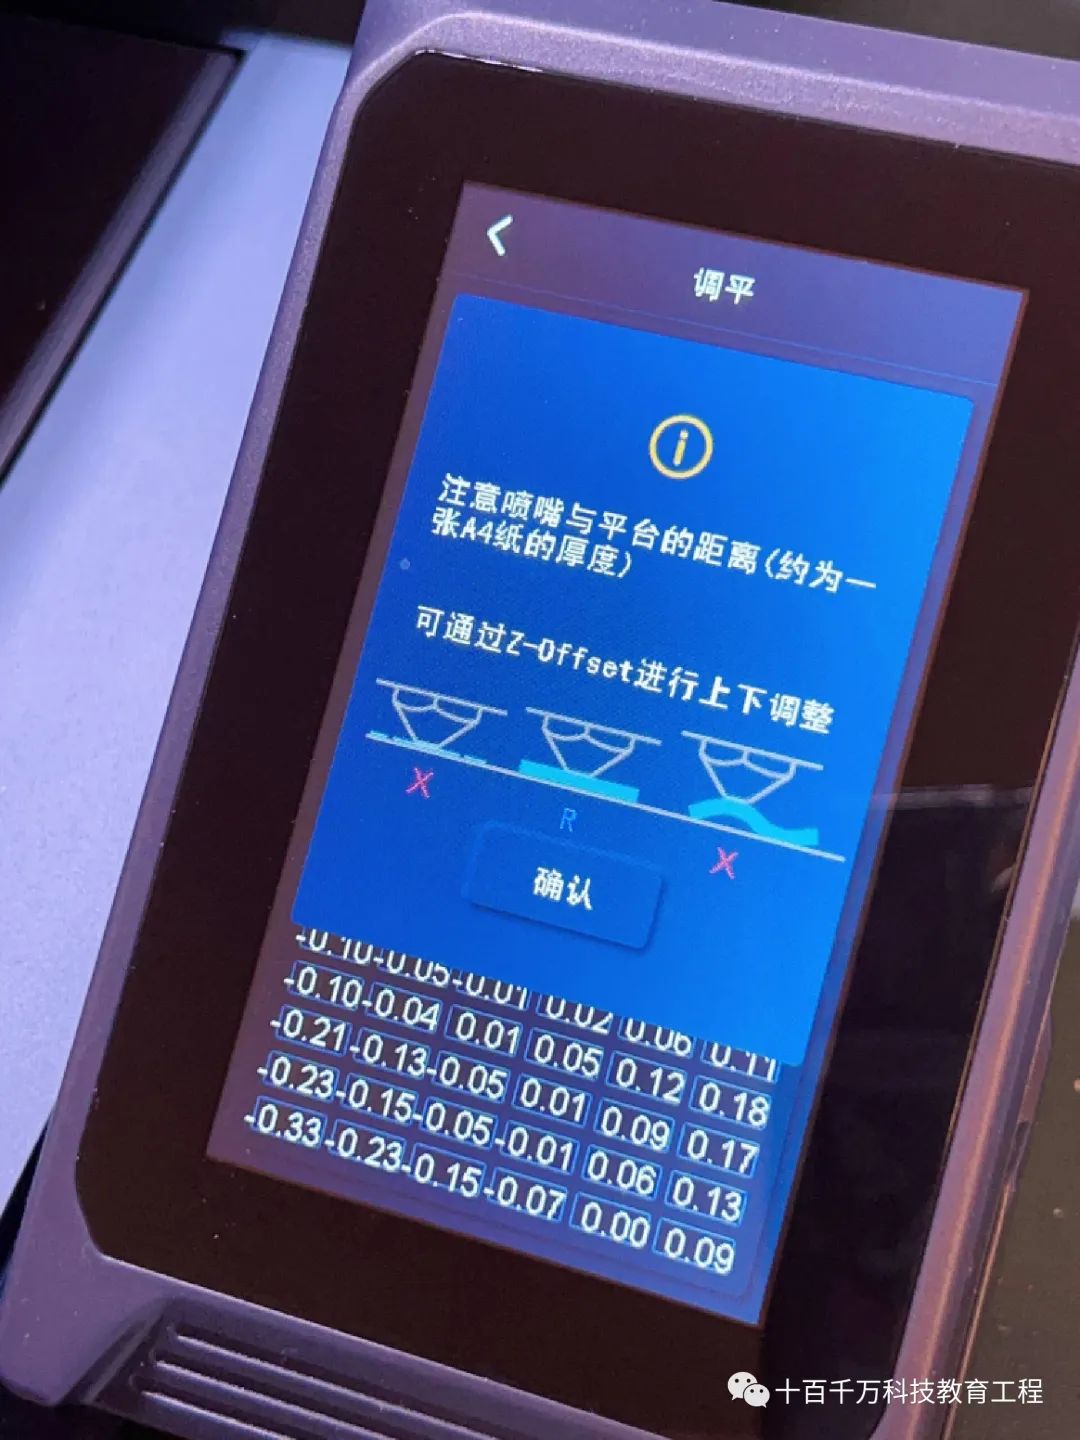
▲ After leveling, we also need to set the compensation, adjusting the optimal distance between the print head nozzle and the print platform. You can place a sheet of paper to adjust the distance between the nozzle and the platform.
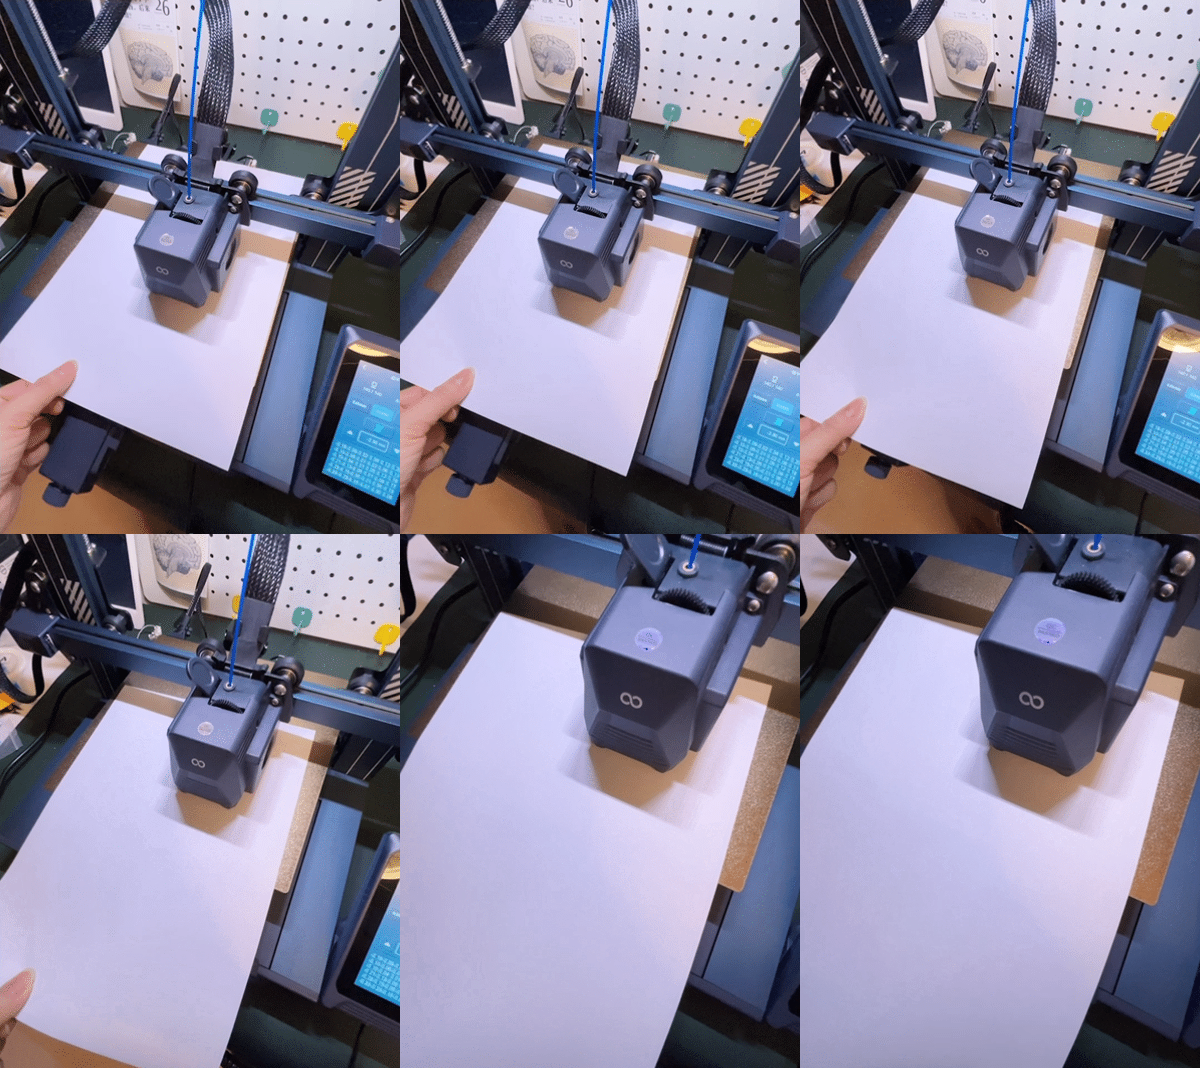
▲ The recommended distance is to be able to pull out the paper, but not too easily, leaving scratches, but not too hard either.
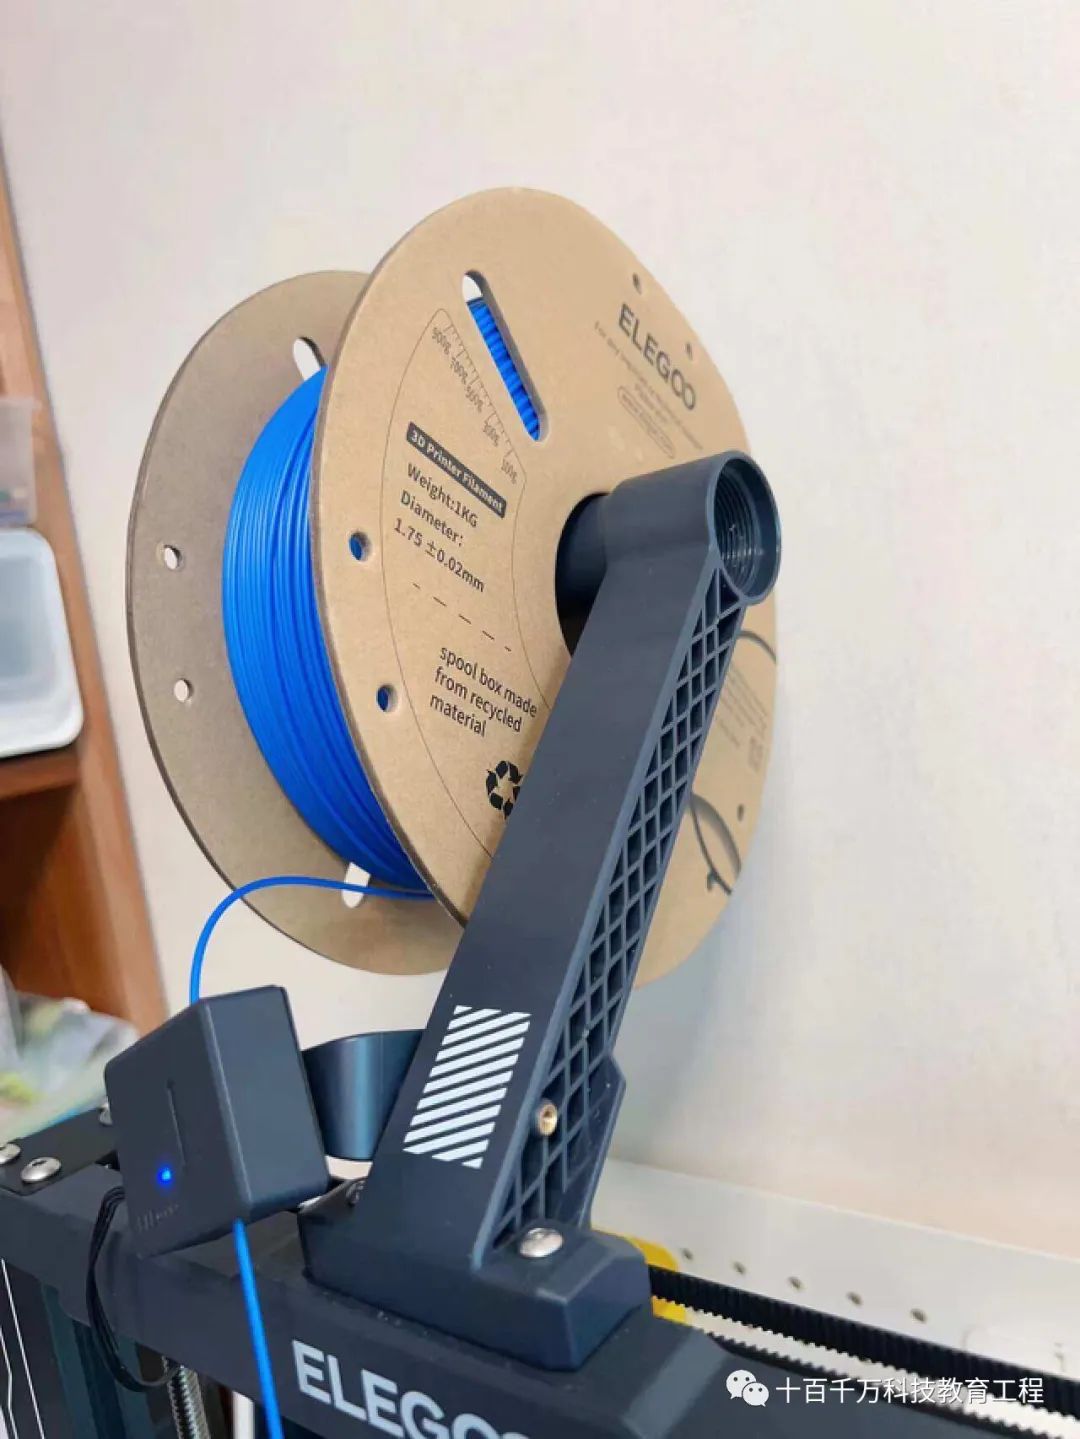
▲ Once the machine is adjusted, we can load the filament. One advantage of FDM printers is the low cost of materials, and I chose PLA material. It is biodegradable, environmentally friendly, odorless, and non-toxic, making it safe to use and not harmful to the environment. A large spool of about 1000g costs only a few dozen yuan, allowing for a lot of good prints. Moreover, as a beginner, frequent failures are expected, so the low material cost makes it a great entry point into the world of 3D printing.
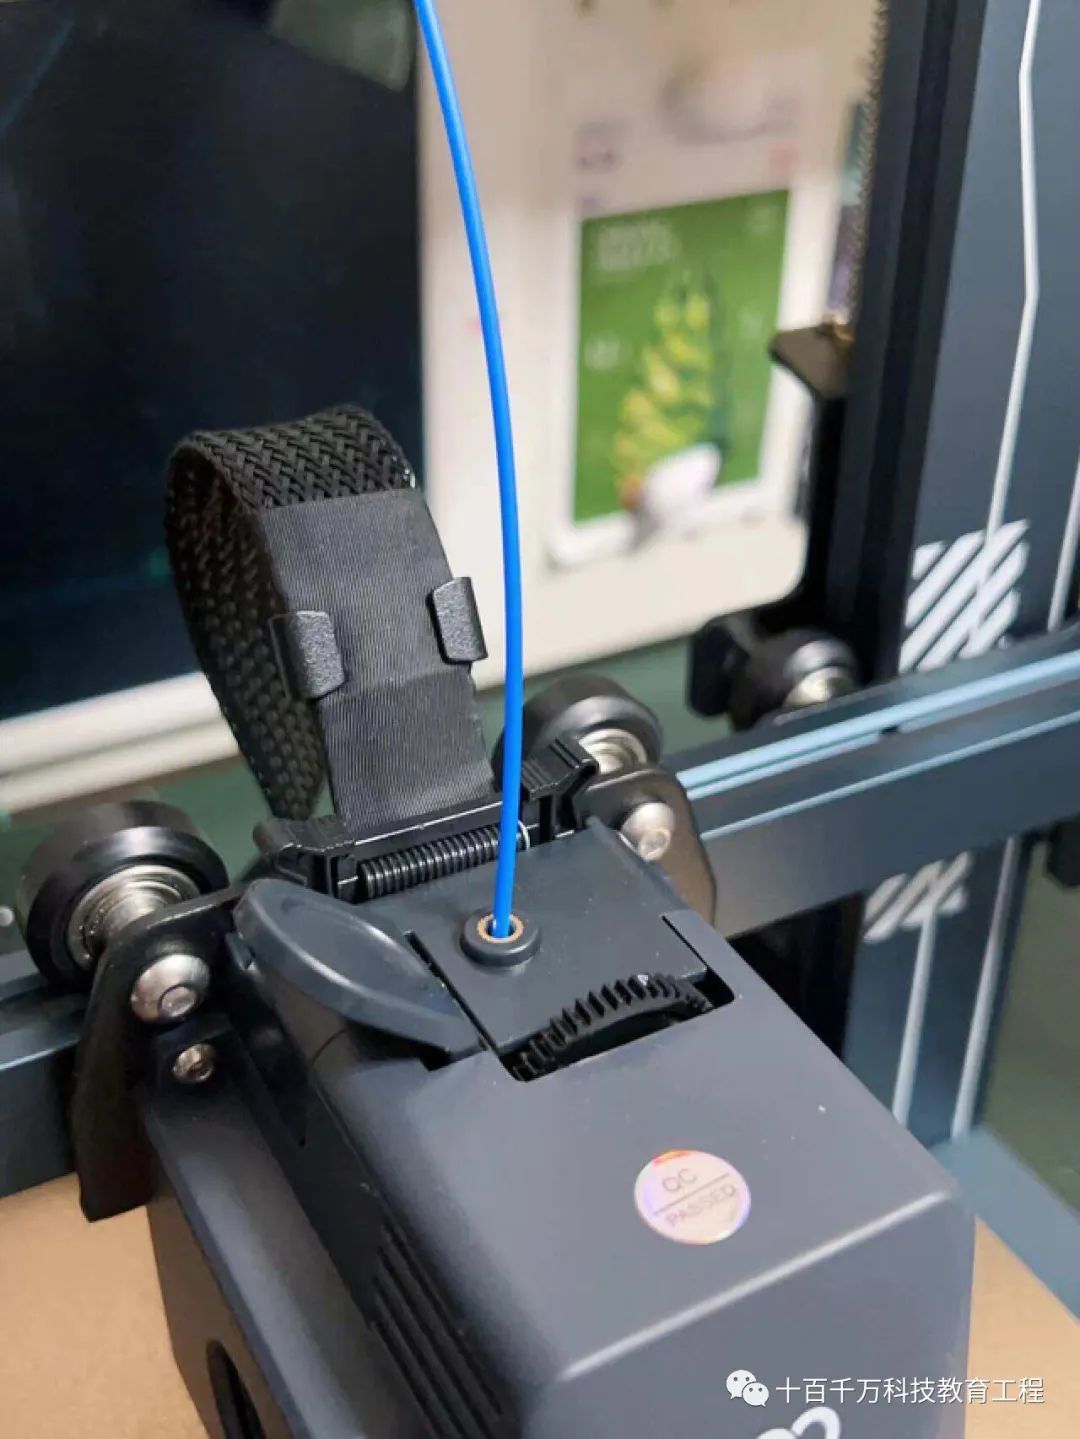
▲ There’s a small trick for loading filament: the filament itself has a certain hardness, so bending it slightly at the start makes it easier to insert accurately.
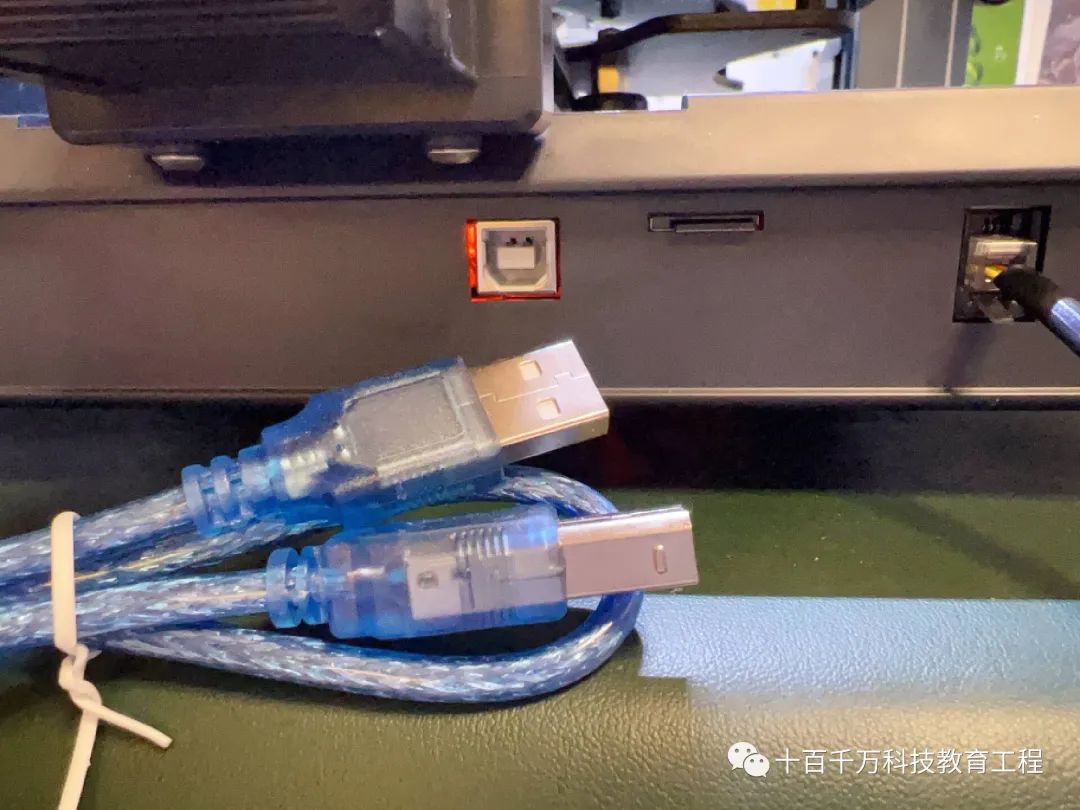
▲ Since it’s a printer, the items to be printed must have source files. We can connect the printer to the computer via a cable to print the model directly, or we can copy the files to a TF card and insert it into the machine.
▲ Just a little complaint: the Neptune 3 Pro uses a TF card, which is quite small, and the slot is a bit tight, making it a bit challenging to insert and remove. I hope the manufacturer can improve this.
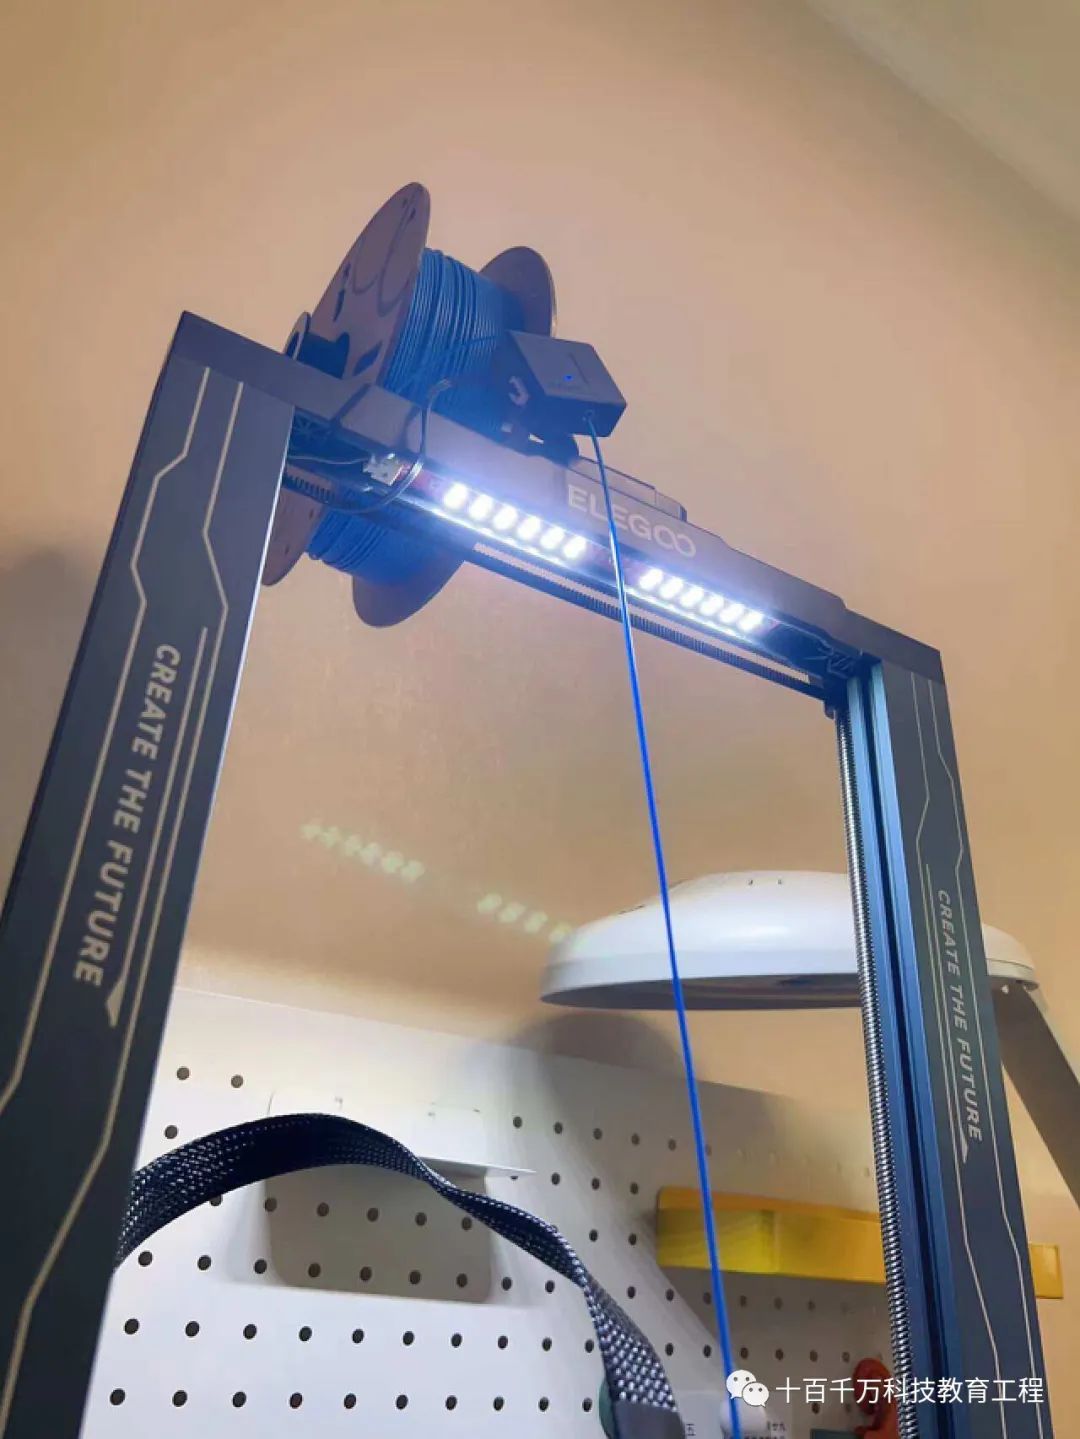
▲ Of course, this machine has some excellent features, such as the LED light bar on the top beam, which can be turned on and off via the buttons on the screen for convenience when using and maintaining the machine in low-light conditions. It’s a very thoughtful design.
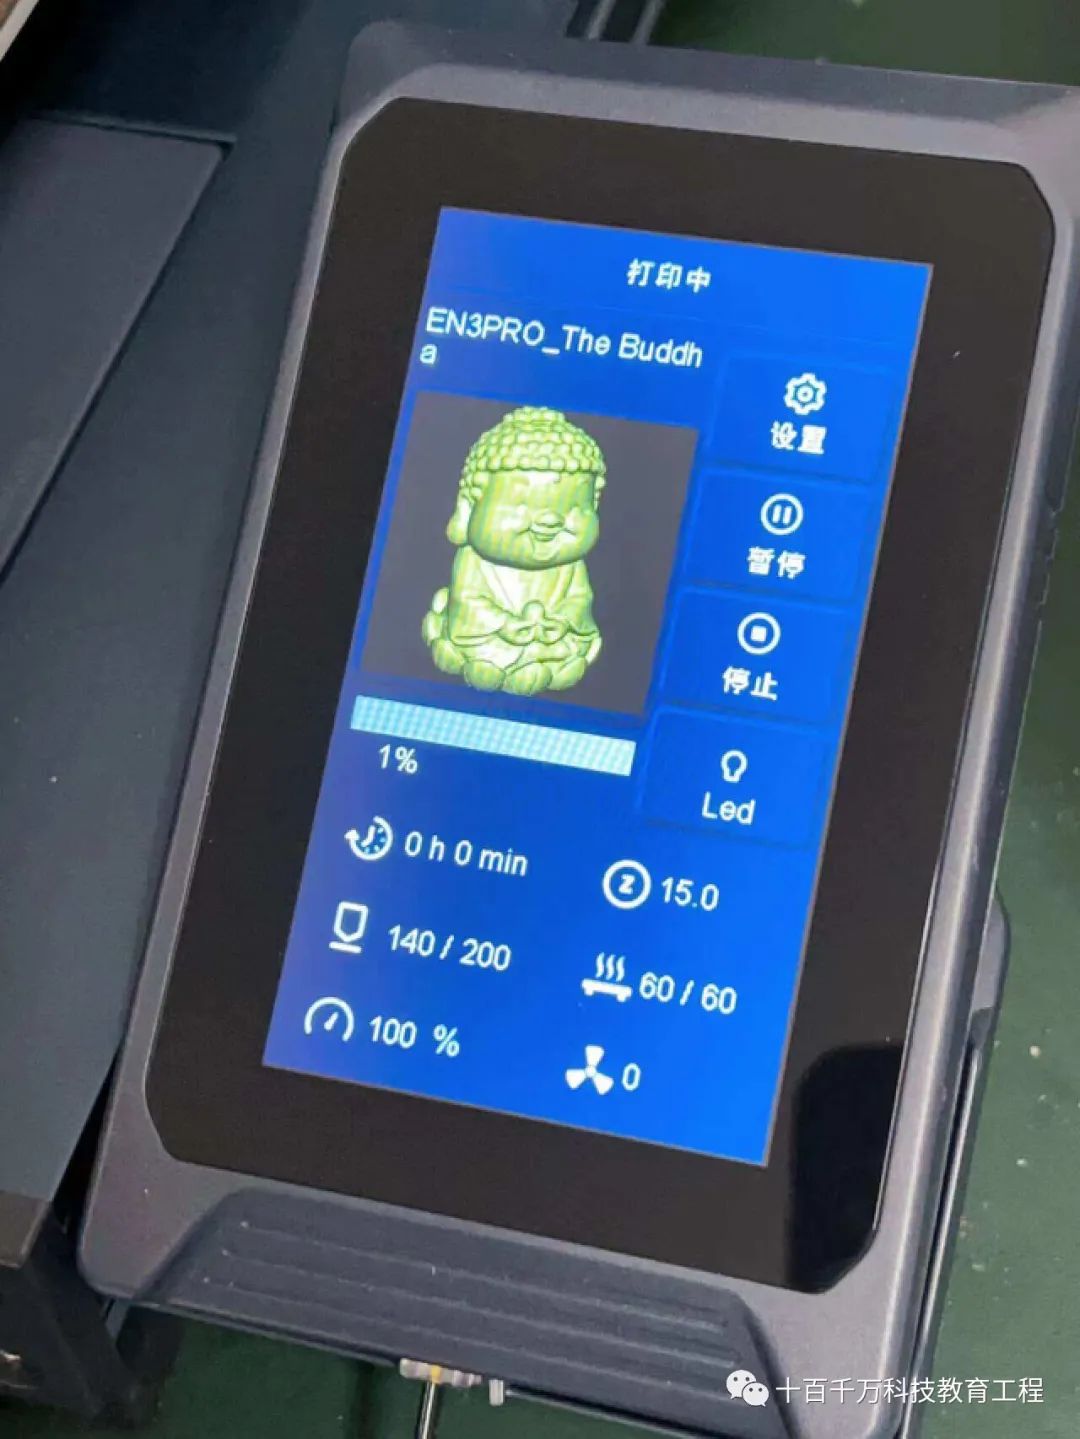
▲ Additionally, this 3D printer comes standard with a 4.3-inch vertical color capacitive touch screen with a magnetic design, which can be used on the stand or held in hand for operation. Especially for beginners, the touch operation is quite simple, and it allows previewing models and checking printing progress during the printing process.
3. Applications of the ELEGOO Neptune 3 Pro
The most exciting part is here; it’s time to witness the miracle! We are finally going to transform a two-dimensional drawing into a three-dimensional finished product. Many people instinctively think that 3D printing is “too advanced/I can’t do it/I’ll just end up broke if I buy it,” but in fact, after trying it out, I found it’s not as complicated as I thought.
1. Where to Find Models?
When it comes to 3D printing, we first think of the cool models designed by enthusiasts at home and abroad. They look impressive but seem very difficult. Indeed, the modeling process is a significant barrier for most beginners in 3D printing. Therefore, I recommend that newbies first search online for interesting 3D printing model websites to download pre-designed models, which are easier to work with.
http://www.dayin.la/product/category.html
▲ This website is a popular 3D material site in China, and the best part is that it’s entirely in Chinese. Most online 3D printing sites are in English, which can be challenging for someone like me who has been out of touch with English for years. The all-Chinese website is a pleasant surprise!
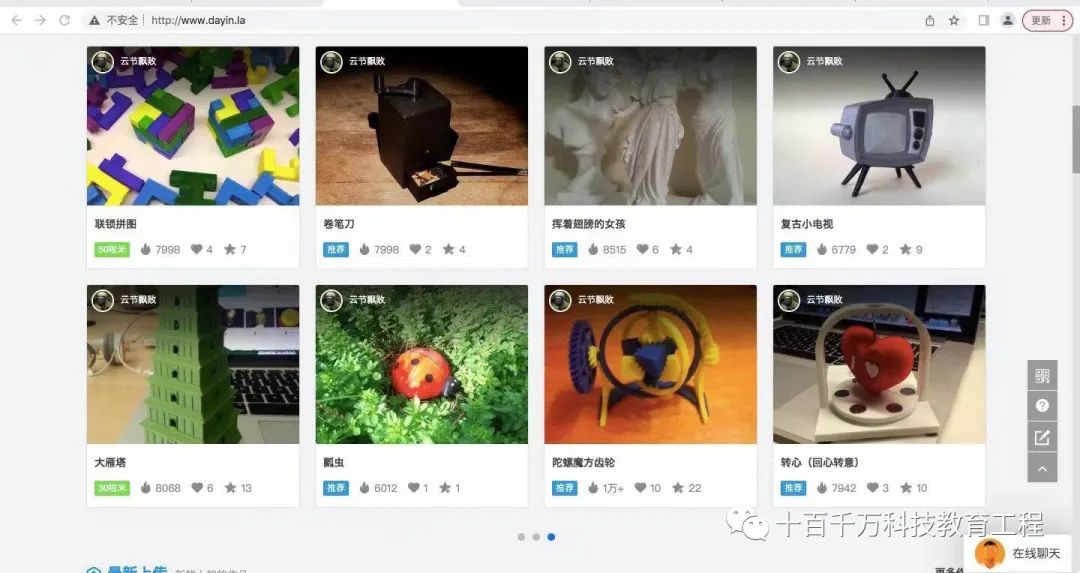
▲ The site has a vast array of materials with various themes. If you’re unsure of what to print, just flip through a few pages, and you’ll find something you like.
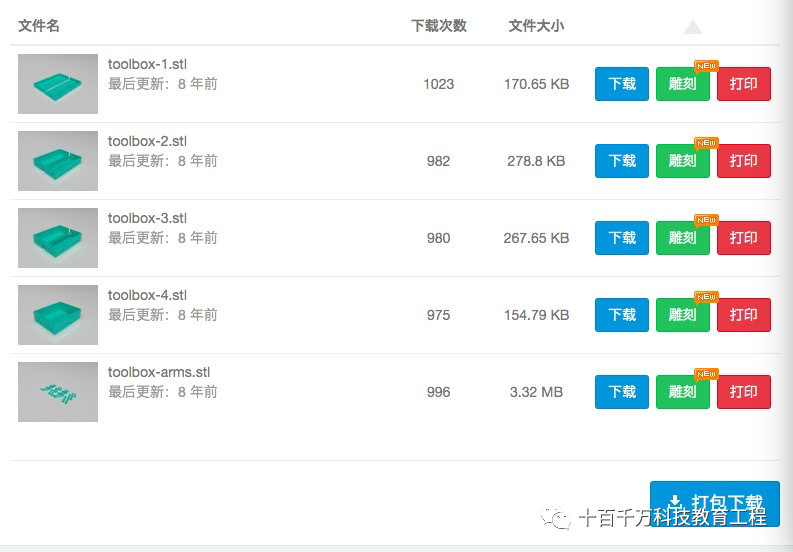
▲ The models on the webpage can be printed online or downloaded for printing. I generally prefer to download them because many large works take several hours to print, and it’s unrealistic to keep the connection on without shutting down.
2. How to Convert Model Formats?
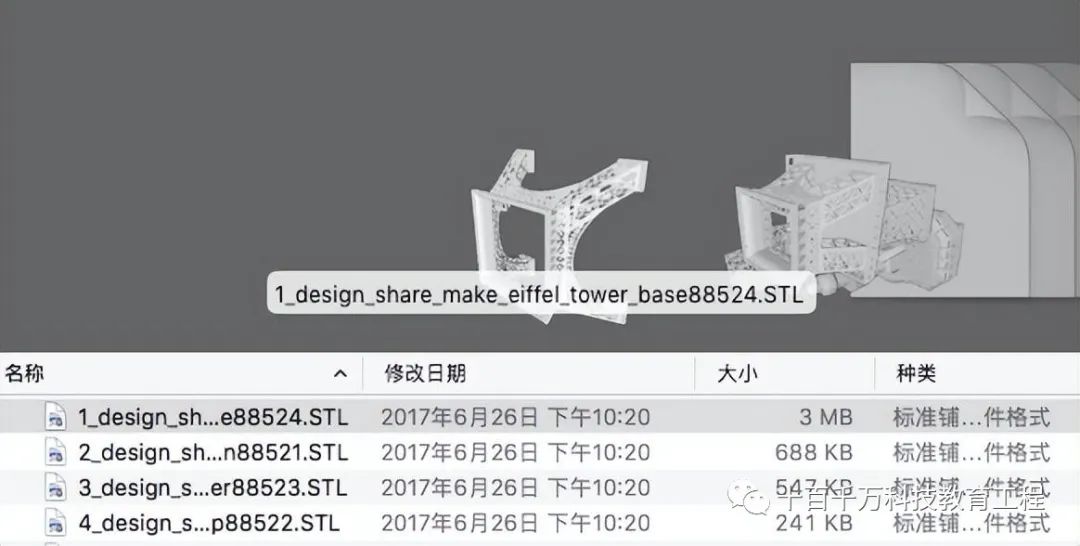
▲ I couldn’t wait to download several 3D printing models from the internet, including household items and toys. However, most downloaded models are in STL format, which cannot be printed directly. You need to use slicing software to convert STL, OBJ, etc., into the G-code format required for 3D printers.
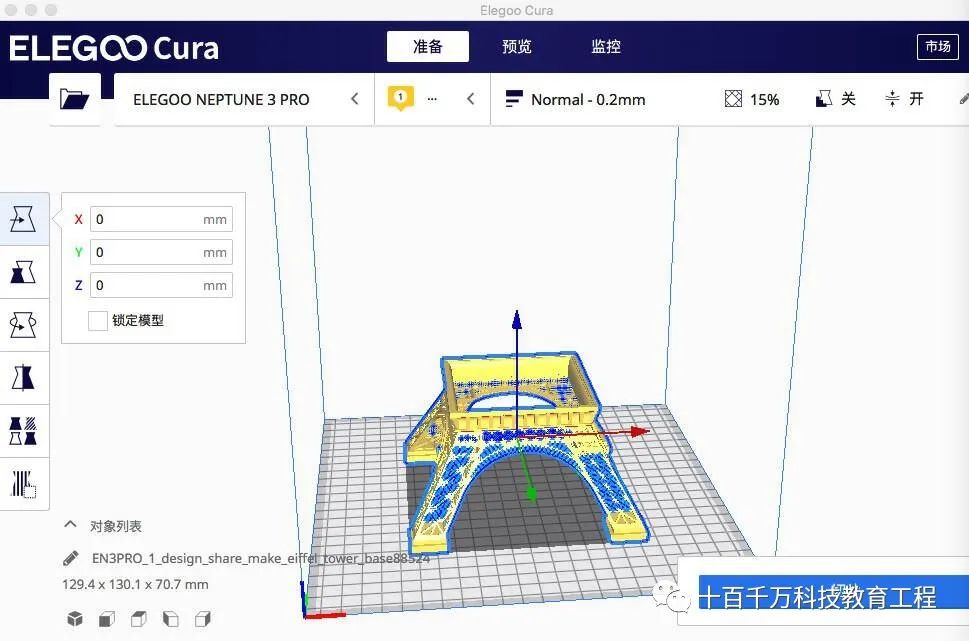
▲ The design software provided by ELEGOO can help us complete the conversion. Not only that, but it can also check whether this model can be printed on our printer. By importing the model into the software, we can view the model’s status through a series of settings on the left-hand side, and we can also choose to print solid or hollow models.
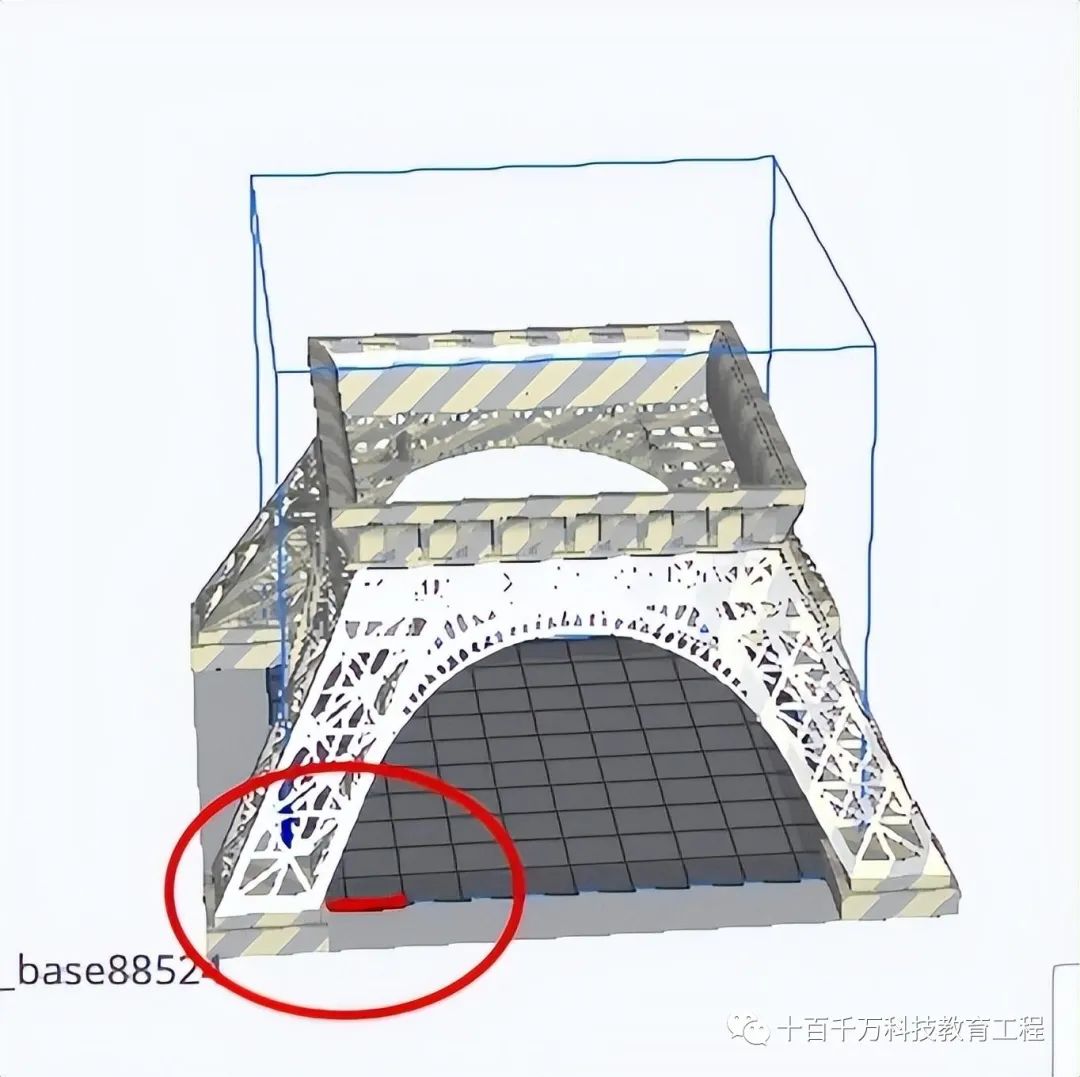
▲ Most importantly, check whether the model size exceeds the printable size. In the slicing software, if the model exceeds the blue build area, it will light up in red, indicating that this part cannot be printed. We need to adjust the model to an appropriate size, ensuring everything is blue; otherwise, the model may be too large to print successfully, wasting time and materials.
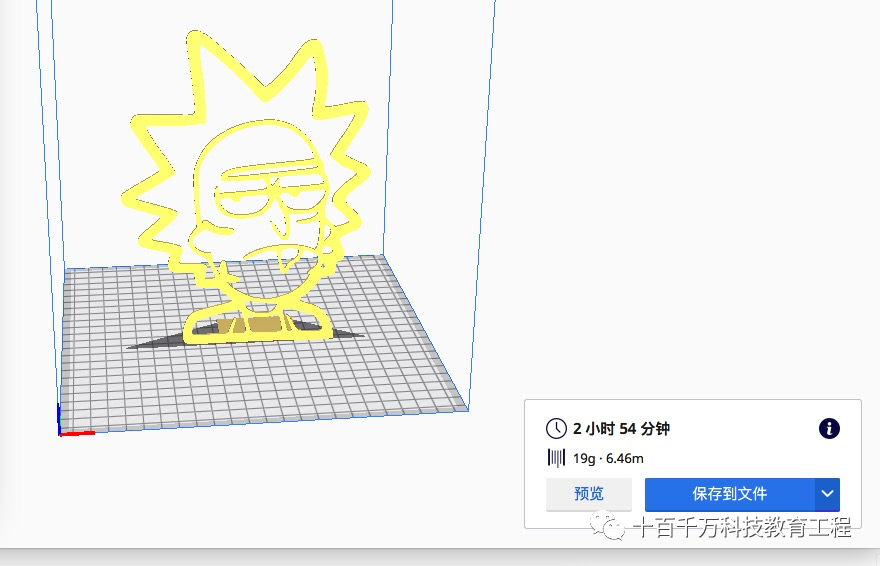
▲ Once adjusted, we can start slicing. The sliced file is copied onto the TF card, and we can start printing. Pay attention; the software will also inform us of the estimated time required to print this model, allowing us to plan our time accordingly.
3. Initial Printing Attempt: Coaster
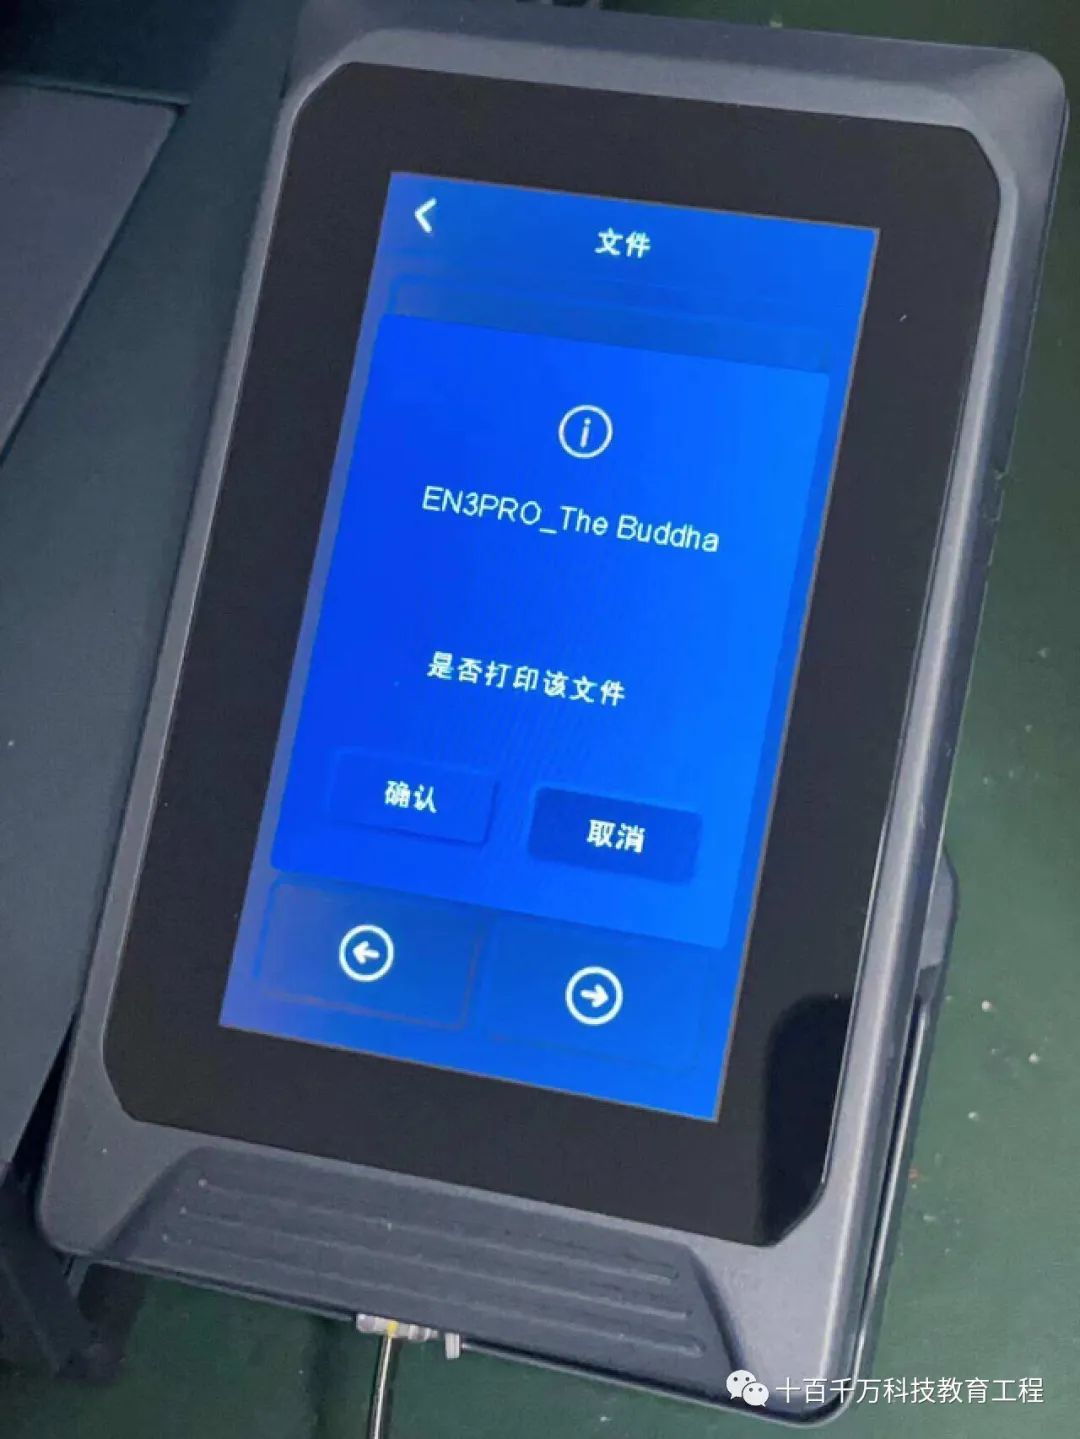
▲ This smart FDM printer is genuinely easy to operate. First, set the printing properties and choose the type of material to be used. The nozzle can reach a maximum temperature of 260°C, and the heated bed can reach a maximum temperature of 100°C, allowing you to set different printing temperatures based on the material.
▲ With a gentle press, the machine starts printing. You can see the nozzle evenly extruding material, layer by layer. The Neptune 3 Pro’s print head uses a dual-gear extruder design, which provides greater extrusion pressure than other extruders, allowing for smoother material flow. The built-in titanium alloy throat design effectively reduces clogging and prevents skipping, resulting in higher printing precision.
The print head uses a 4V wheel design, which runs more smoothly than the common 3V wheel FDM printers on the market, extending the machine’s lifespan. The V wheels are made from high-quality POM material, ensuring a long service life and relatively low noise during operation.
The cooling control of the print head is excellent, significantly reducing the risk of clogs due to high temperatures in the throat section. I printed many items without encountering a single clog, indicating great quality control. Throughout the process, the machine runs smoothly and quietly. If used in a study, you can’t hear it with the door closed.
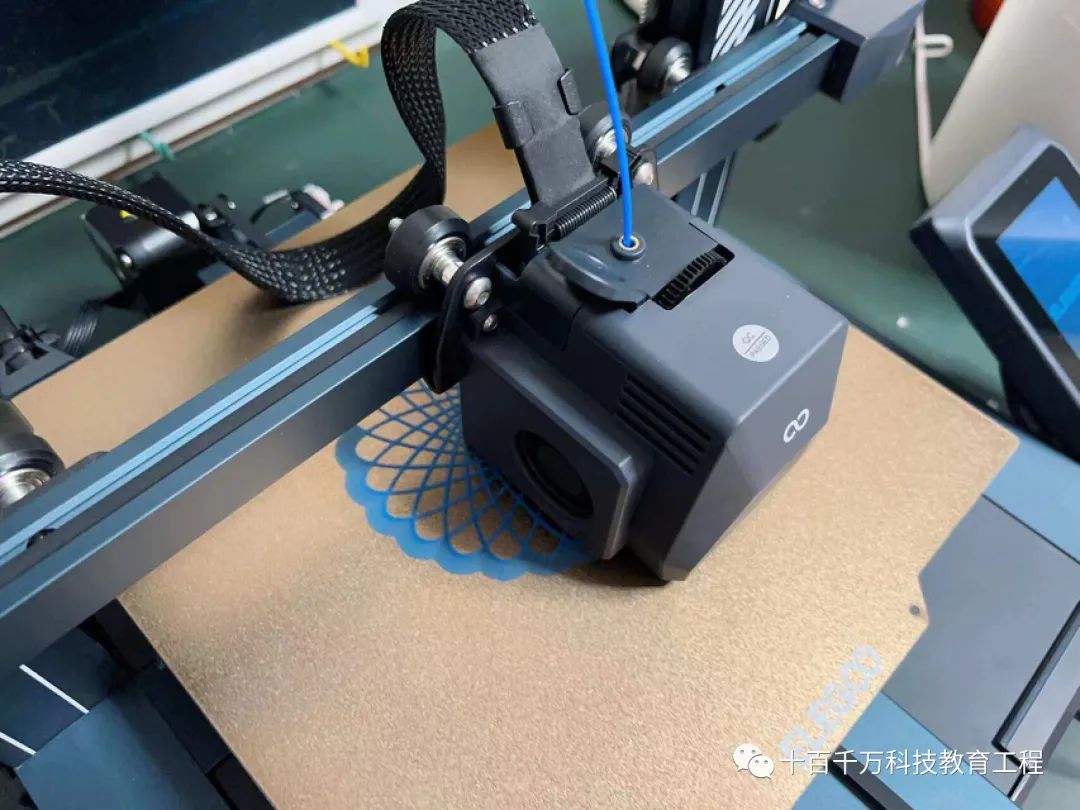
▲ The entire printing process is fully automated, allowing you to do other things while printing. Once completed, the machine will stop automatically, so you don’t need to monitor it continuously, making it very convenient.
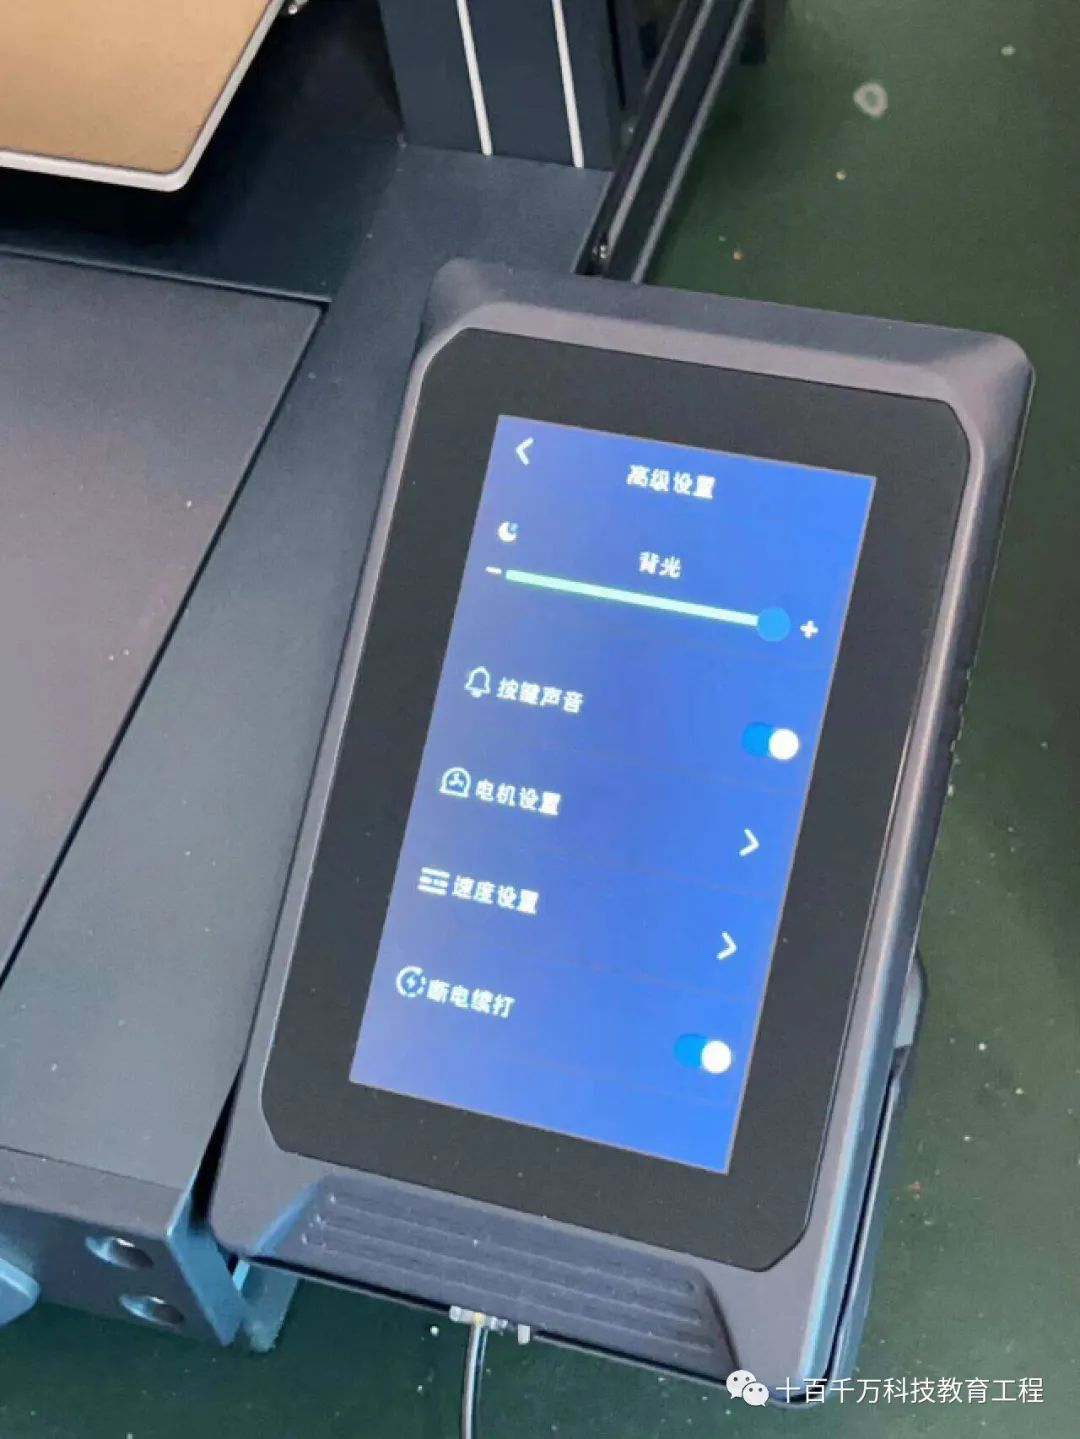
▲ Most importantly, this machine supports power recovery, meaning if there’s a sudden power outage, it can resume printing once power is restored. After all, printing a model takes a long time, and if it’s 99% done when the power goes out, I would go crazy if I couldn’t continue.
▲ The printing precision of this 3D printer reaches ±0.1mm, which is quite precise for me. The printing speed ranges from 30 to 180mm/s, with the official recommendation being 60mm/s, which is not very fast but is normal for this level.
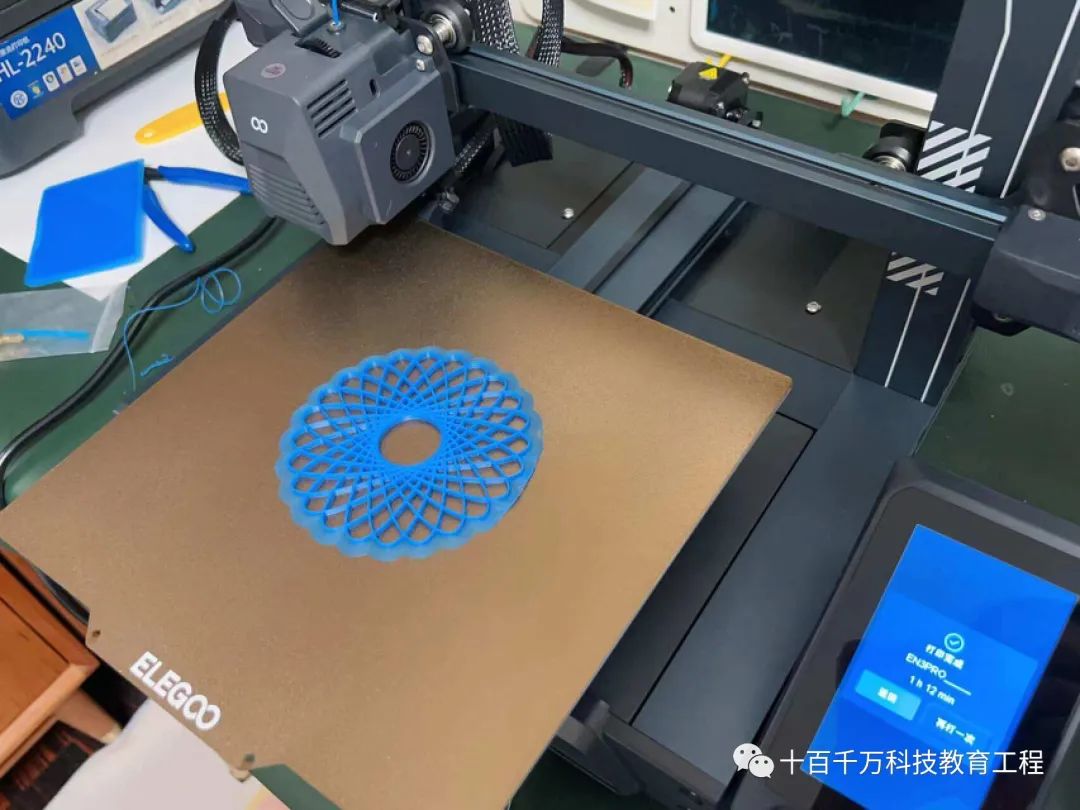
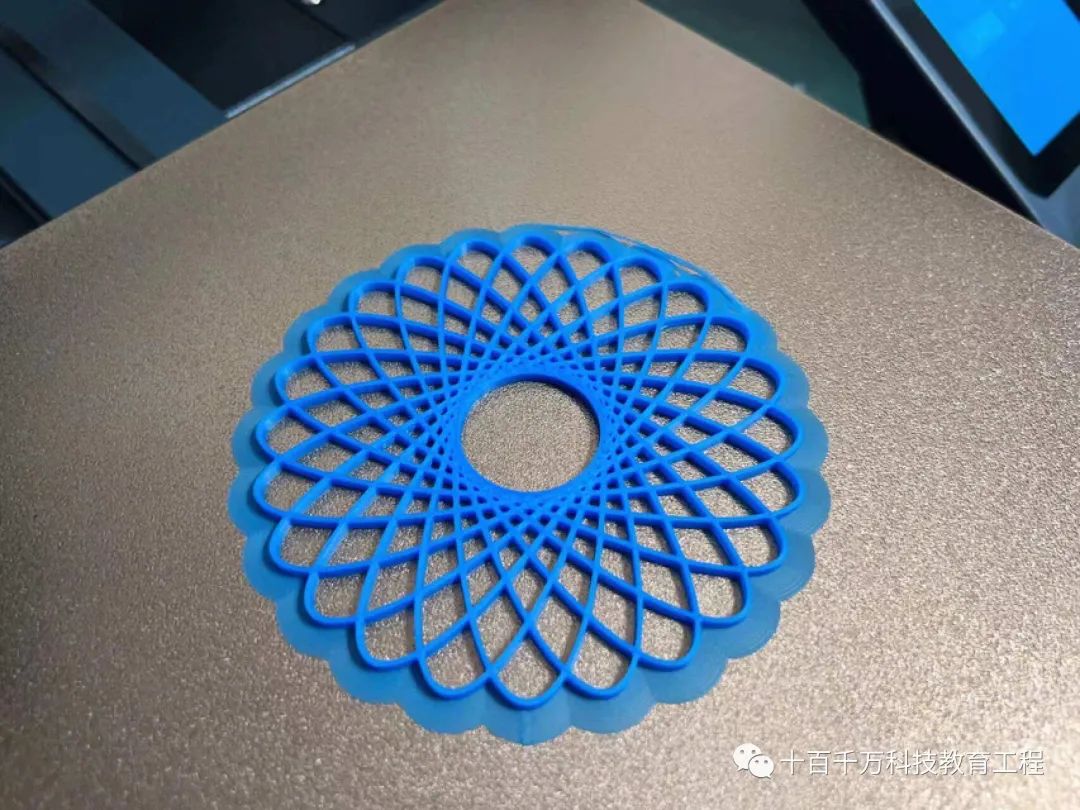
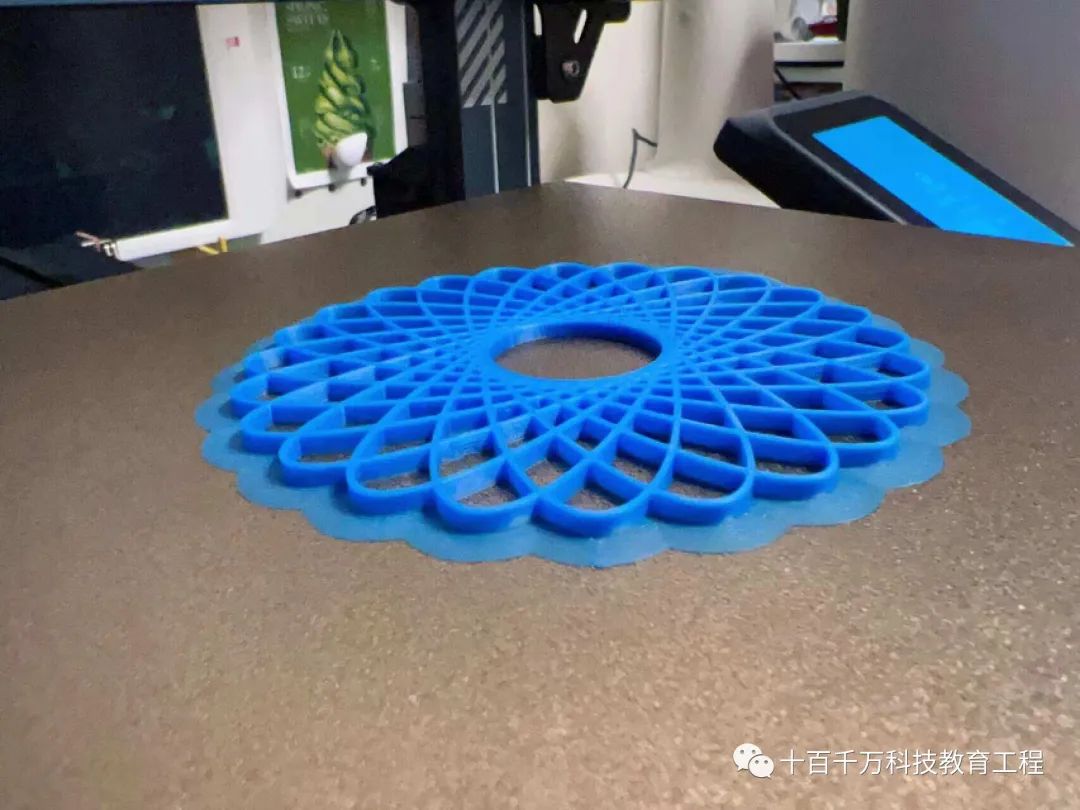
▲ How is the printing effect? For my first print, I chose a relatively simple coaster model. The surface of the entire model is smooth and not rough, with delicate textures, and the overall effect is commendable.
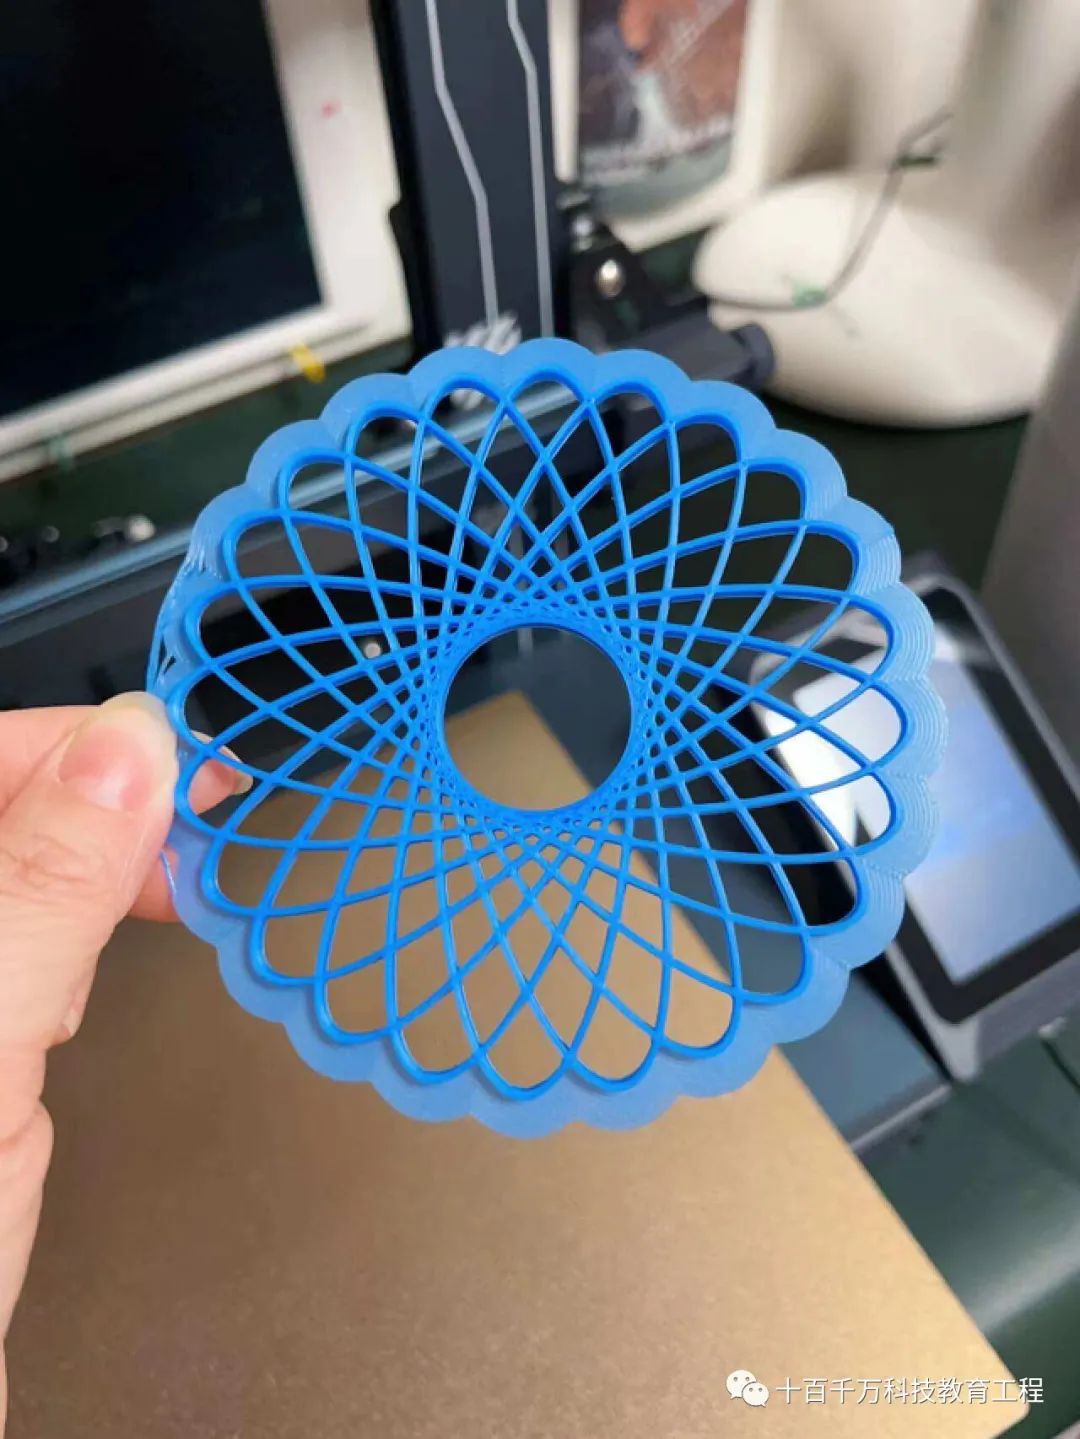
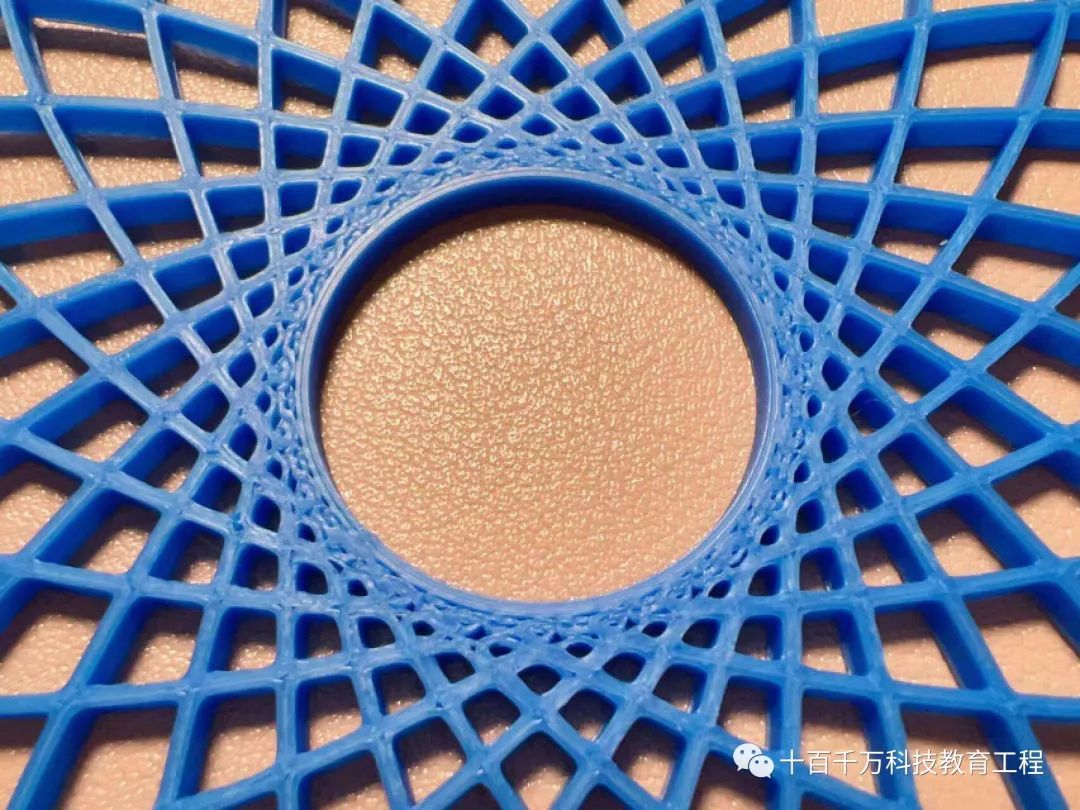
▲ Upon closer inspection, some details hold up well, such as the clear mesh intersections in the center and the smooth edges. Overall, this piece is quite successful.
3. Printing Again: Gear Drawing
After completing this simple piece, my interest was piqued, and I suddenly wanted to recreate the drawing gear toy from my childhood. I couldn’t wait to have it again. The steps are the same: first download the model STL file, check in the software if it exceeds the limits, and then convert it to G-code format.
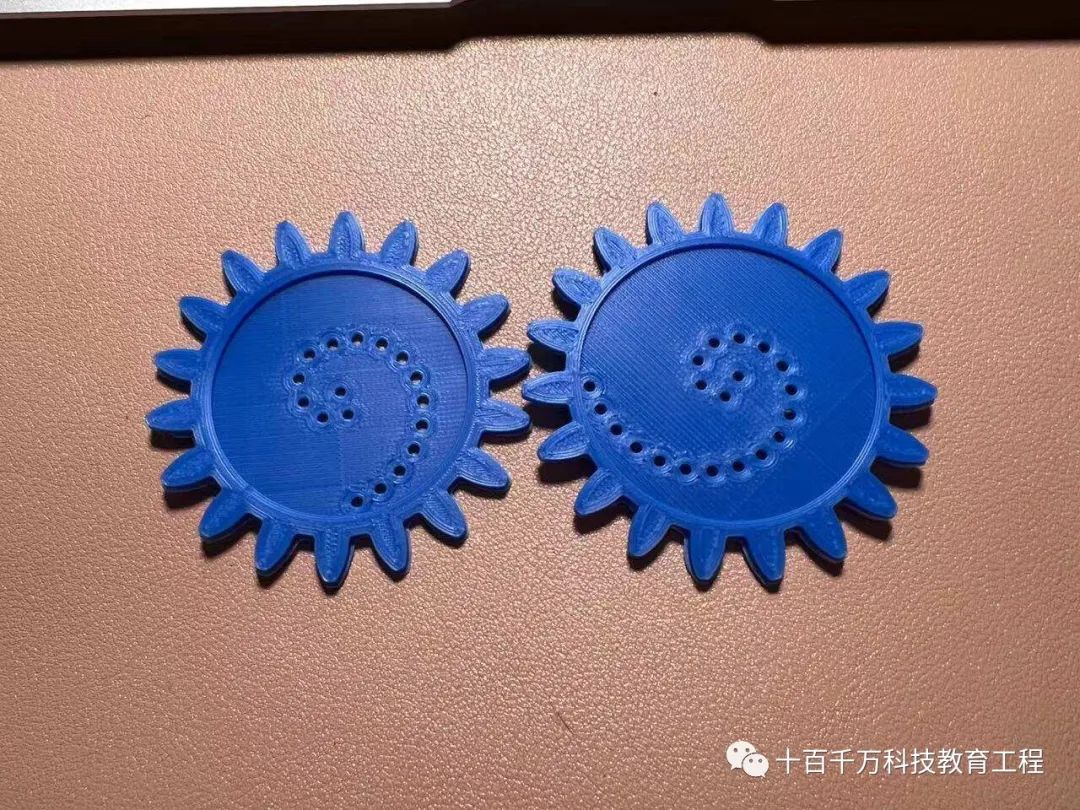
▲ This model has several components that need to be printed separately and then assembled. Printing requires patience, but fortunately, this printer allows for unattended printing, so you don’t have to waste time watching it; you can go about your other activities.
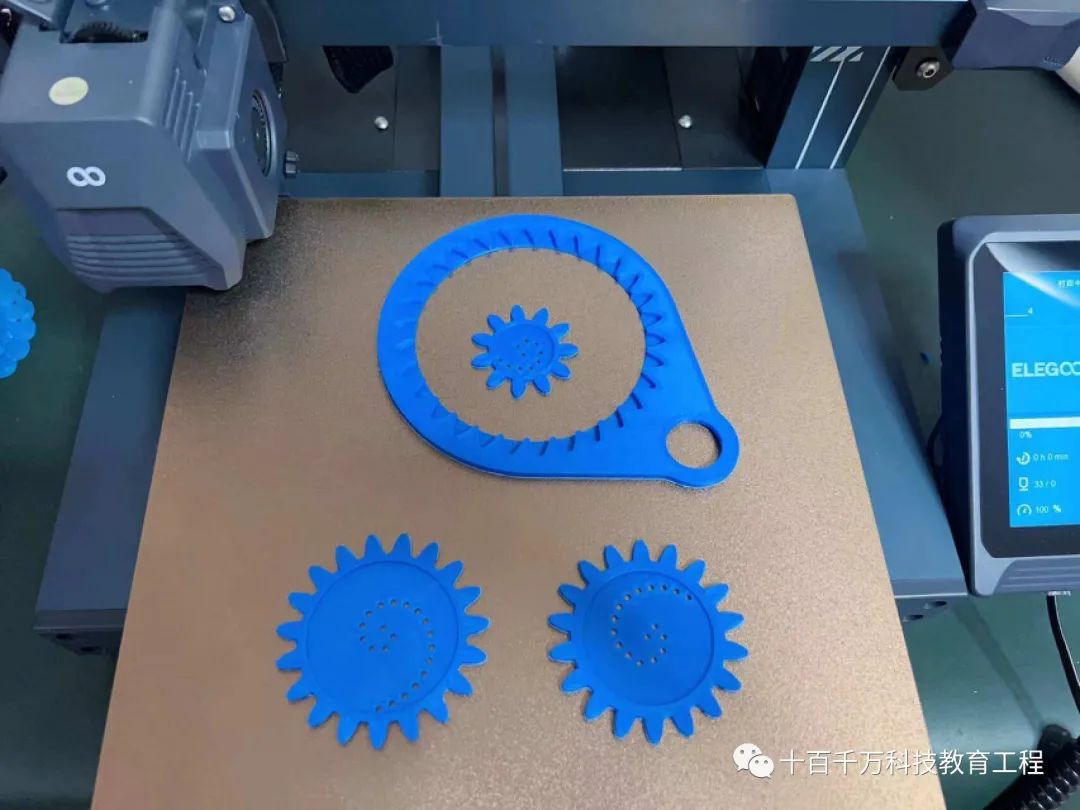
▲ However, I want to mention that after printing, although the machine automatically stops and begins cooling, there is no alert sound. If you need to print multiple items, this could waste some time, so I hope this can be improved.
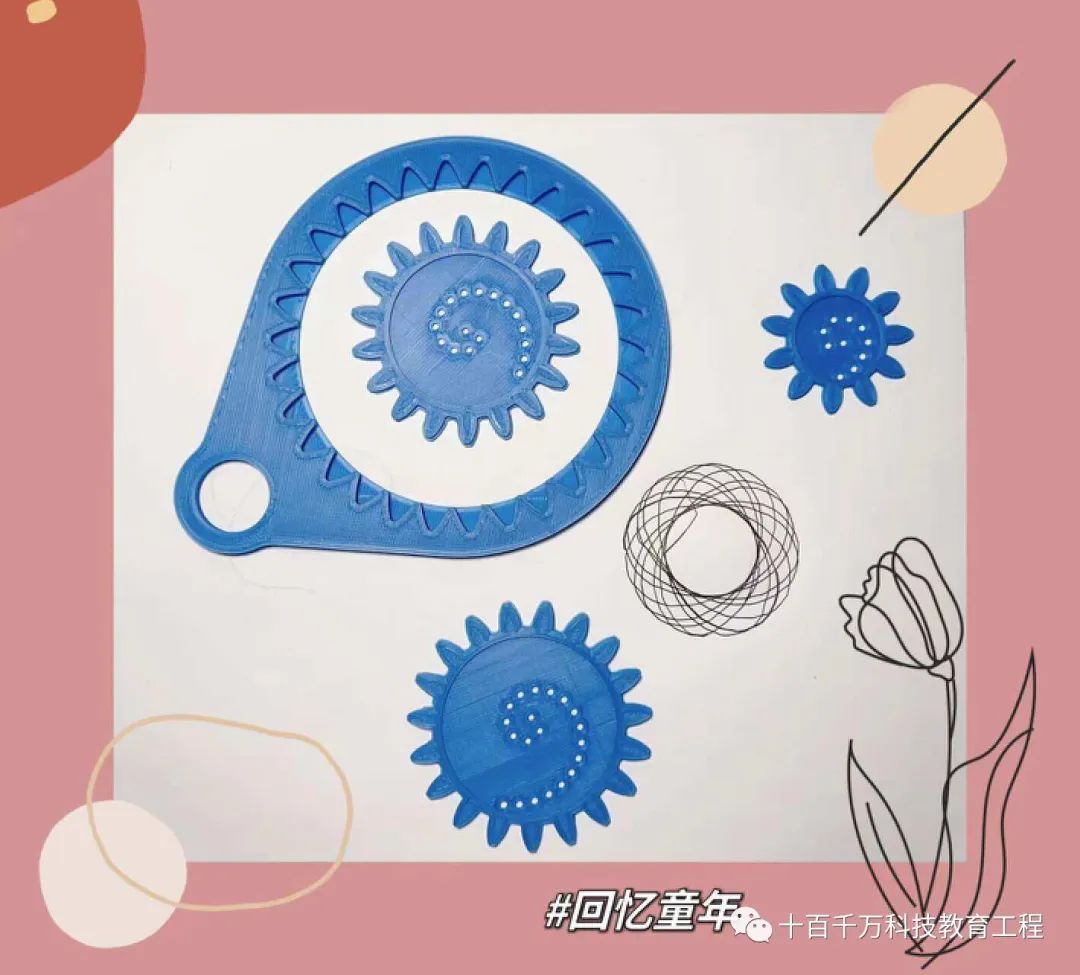
▲ All components are printed. Younger friends might not know how to play with it, but this is a particularly imaginative and creative toy. Almost everyone can draw completely different patterns, making it very interesting.
4. Printing Again: Eiffel Tower
After printing a few small items, I gradually became bolder and wanted to challenge something more difficult. Today, I will try a large project—the Eiffel Tower.
▲ Compared to the previous models, the Eiffel Tower is more complex in both size and intricacy. The total printing time for the sliced file exceeds 26 hours, so you need to set aside at least two days for printing.
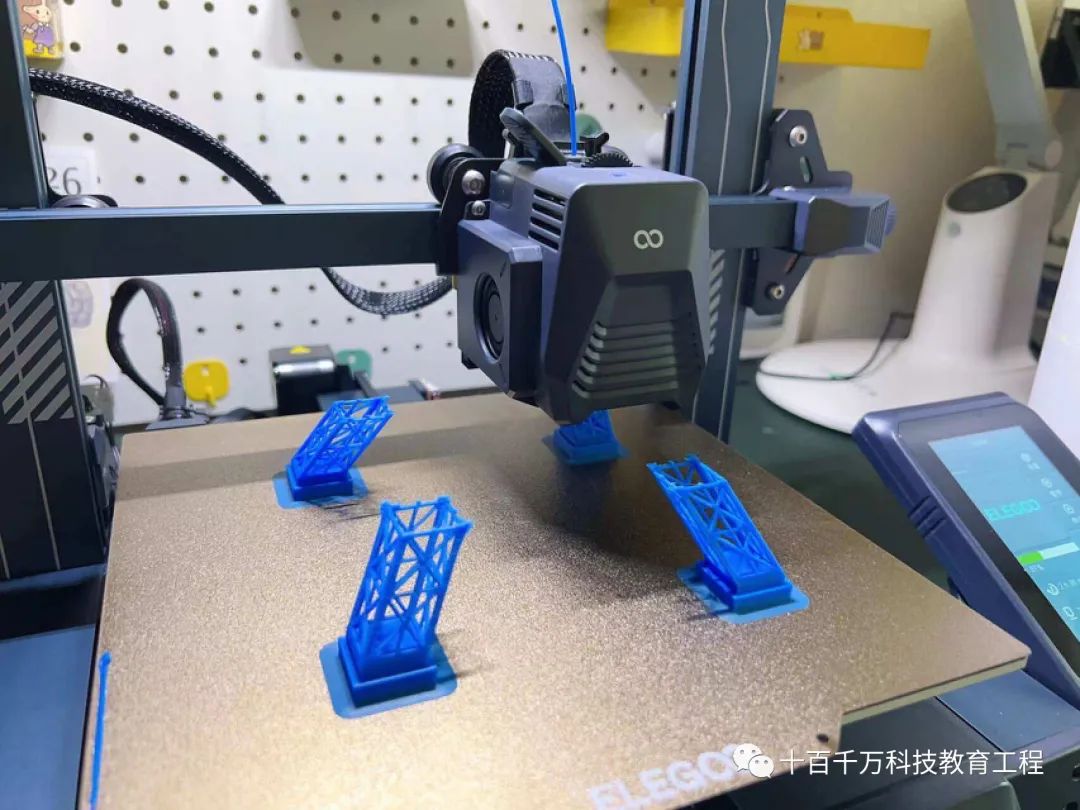
▲ During the printing process, you can feel that the Eiffel Tower model has a strong three-dimensional and hollow sense, which truly tests the capabilities of the printer.
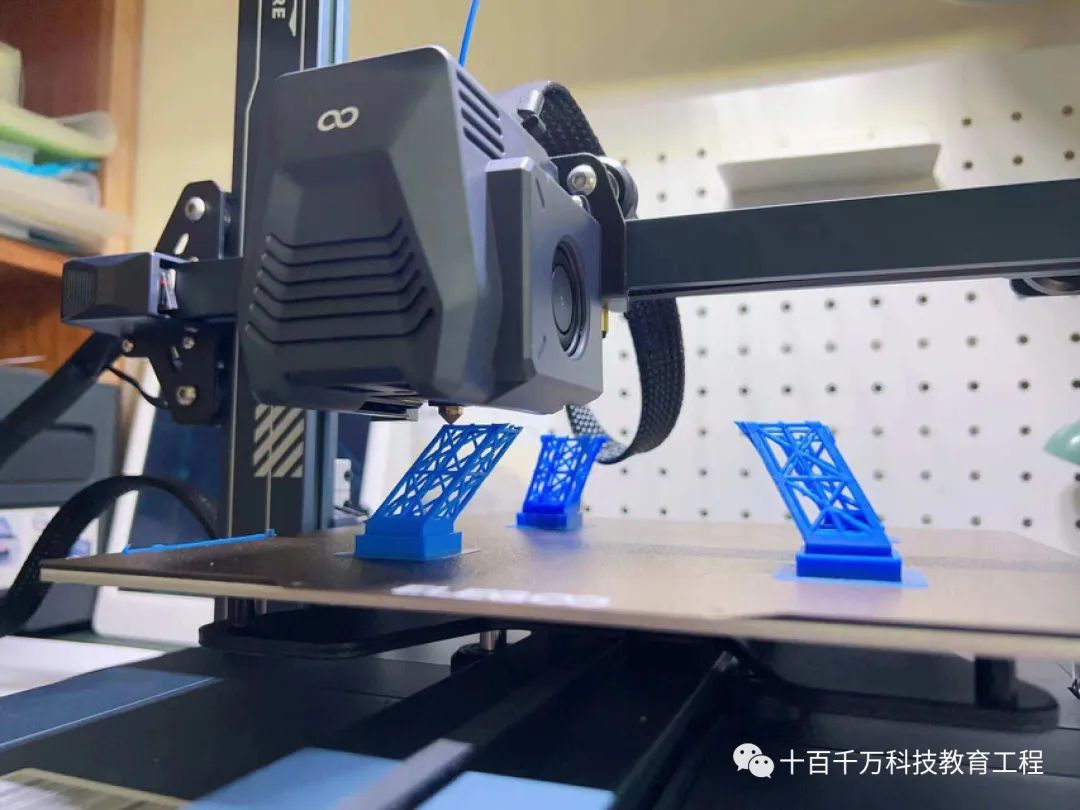
▲ The machine’s parameter settings are crucial. The main parameters include layer height, printing speed, infill, and support structures. Layer height determines printing quality, and the software defaults to a layer height of 0.2mm, which is a relatively ideal value.
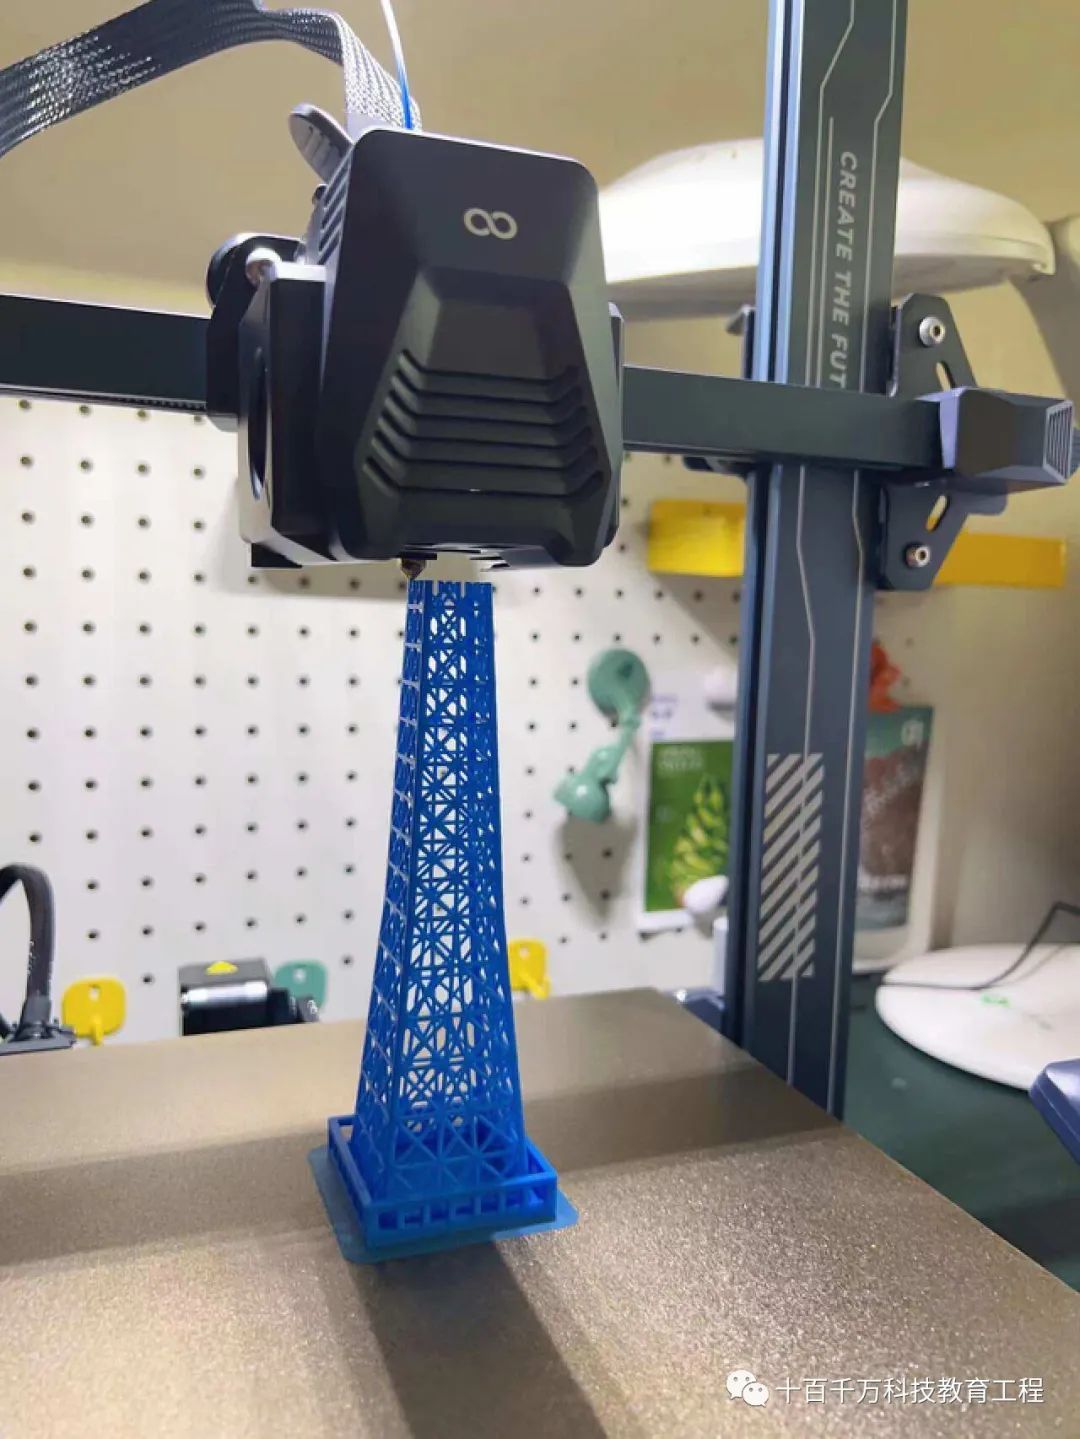
▲ Setting it too high may cause poor adhesion to the platform, leading to printing failures. Speed settings, infill ratios, and support structures also affect printing speed. Currently, I feel that the default values of this machine are very suitable for general home use, so beginners can use it with confidence.
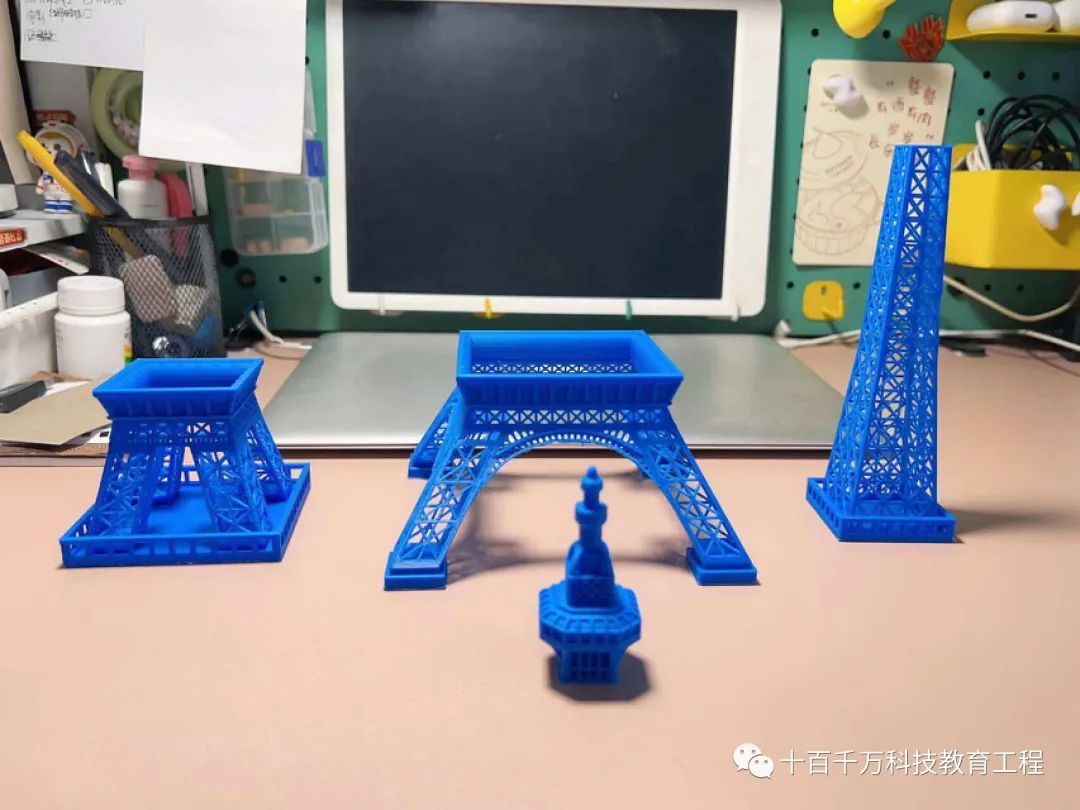
▲ All four components are equally complex, but the printing effect is indeed impressive. Many details, including the hollow structure of the tower and decorative patterns, are fully captured. Although it’s a scaled-down version of the tower, the overall grandeur is well represented.
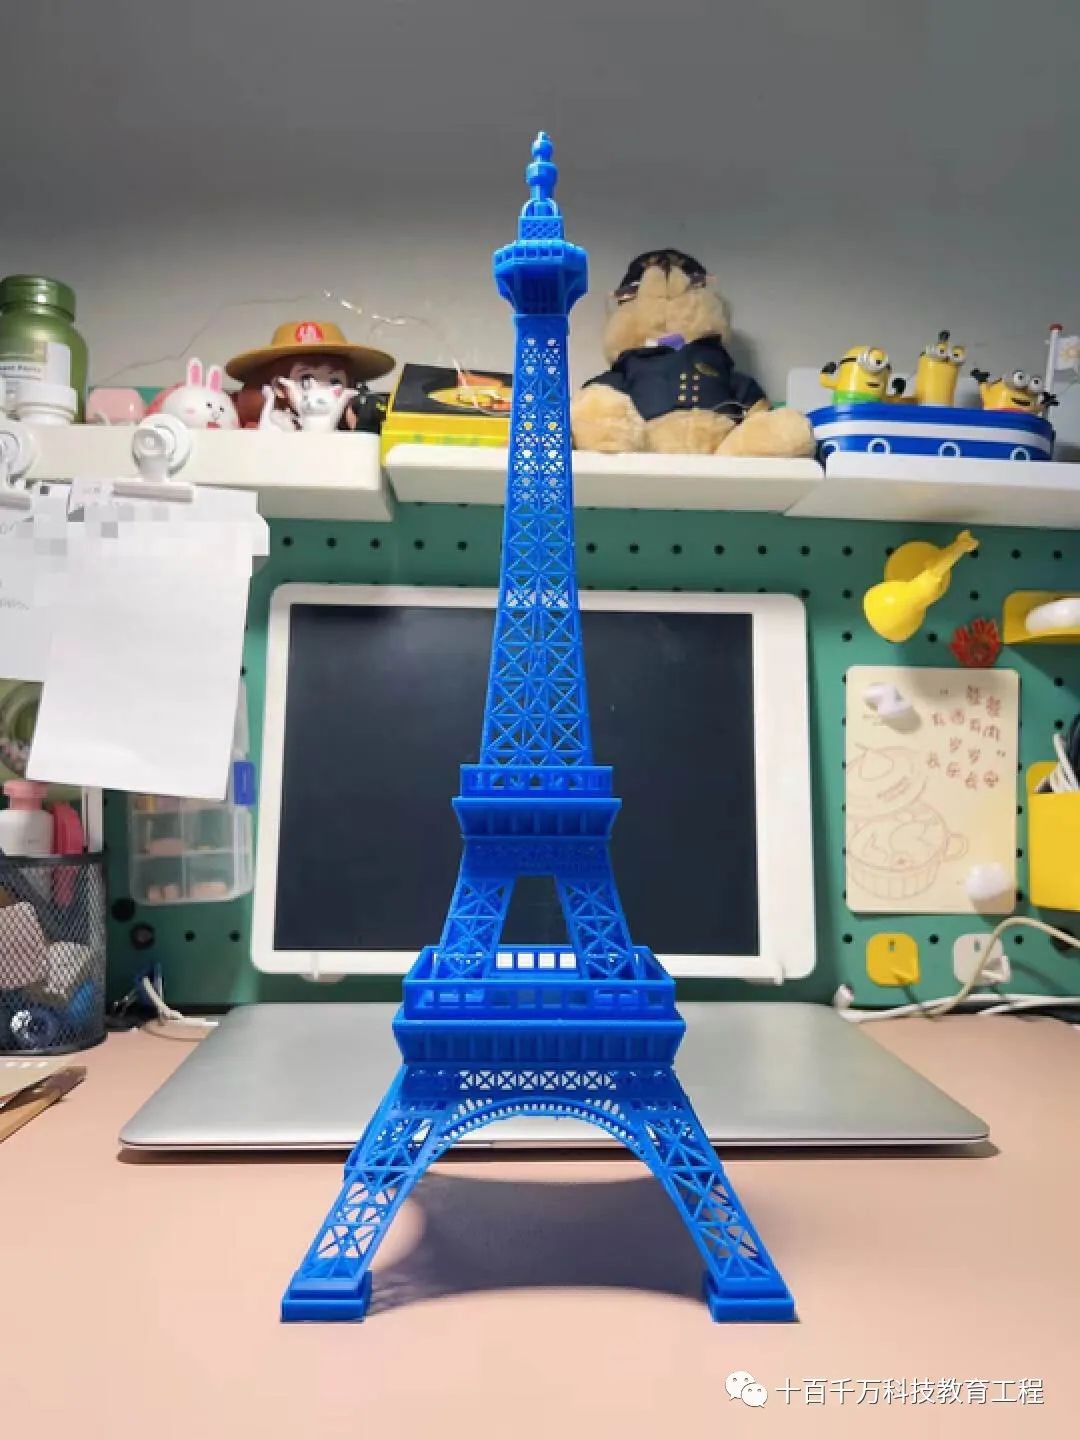
▲ I believe that this decorative piece can serve not only as a beautiful ornament for your desk or shelf but also makes a great gift.
5. Ultimate Printing Experience: Self-Modeling Design
After printing several models designed by others, I felt the urge to try designing and modeling according to my needs. This process of going from zero to one is undoubtedly a challenge.
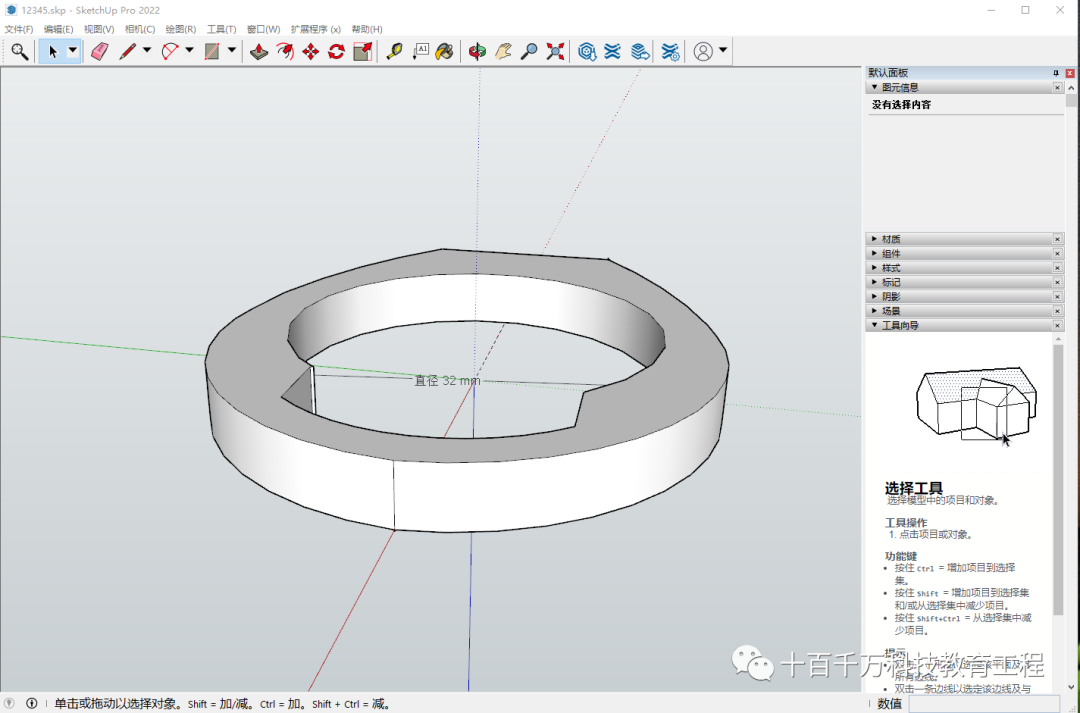
▲ Actually, self-modeling isn’t too difficult. First, sketch the general shape on paper, and then model it in software. I used SketchUp, which is quite simple; just ensure the data is accurate.
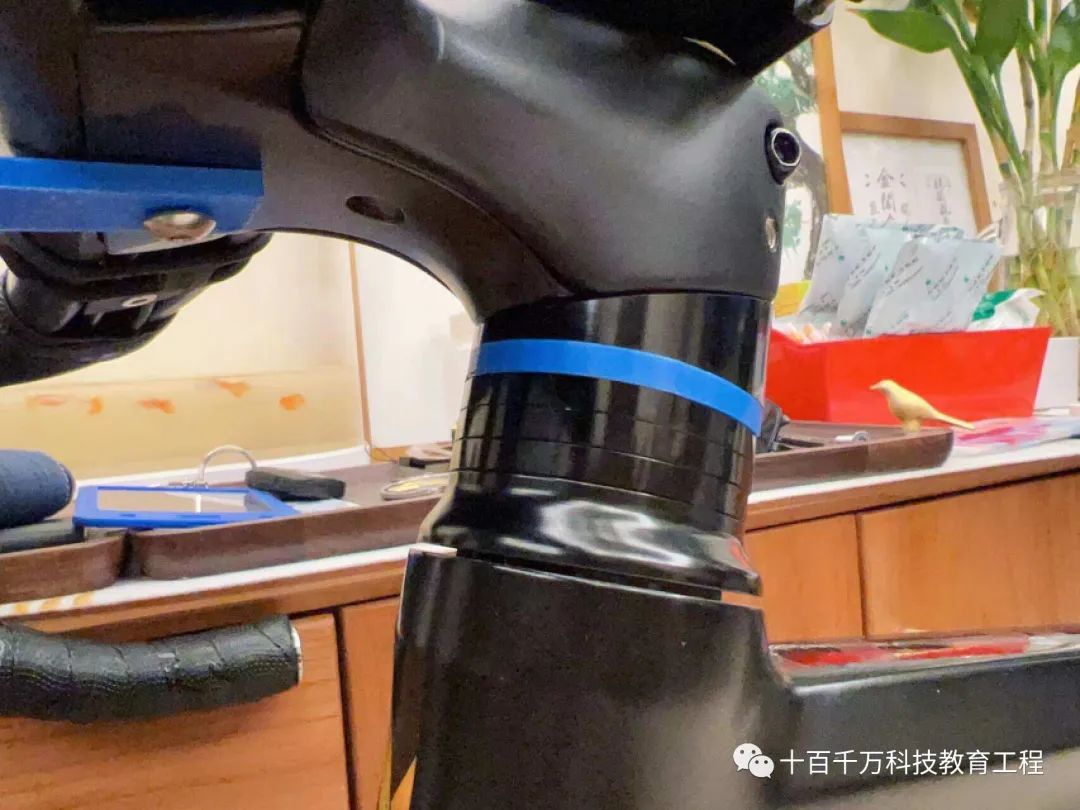
▲ I printed a bicycle handlebar washer. Although it’s available on Taobao, it might not fit your size, and the logistics are currently slow, taking several days to arrive. Printing it myself is significantly cheaper, and the sense of accomplishment is quite strong.
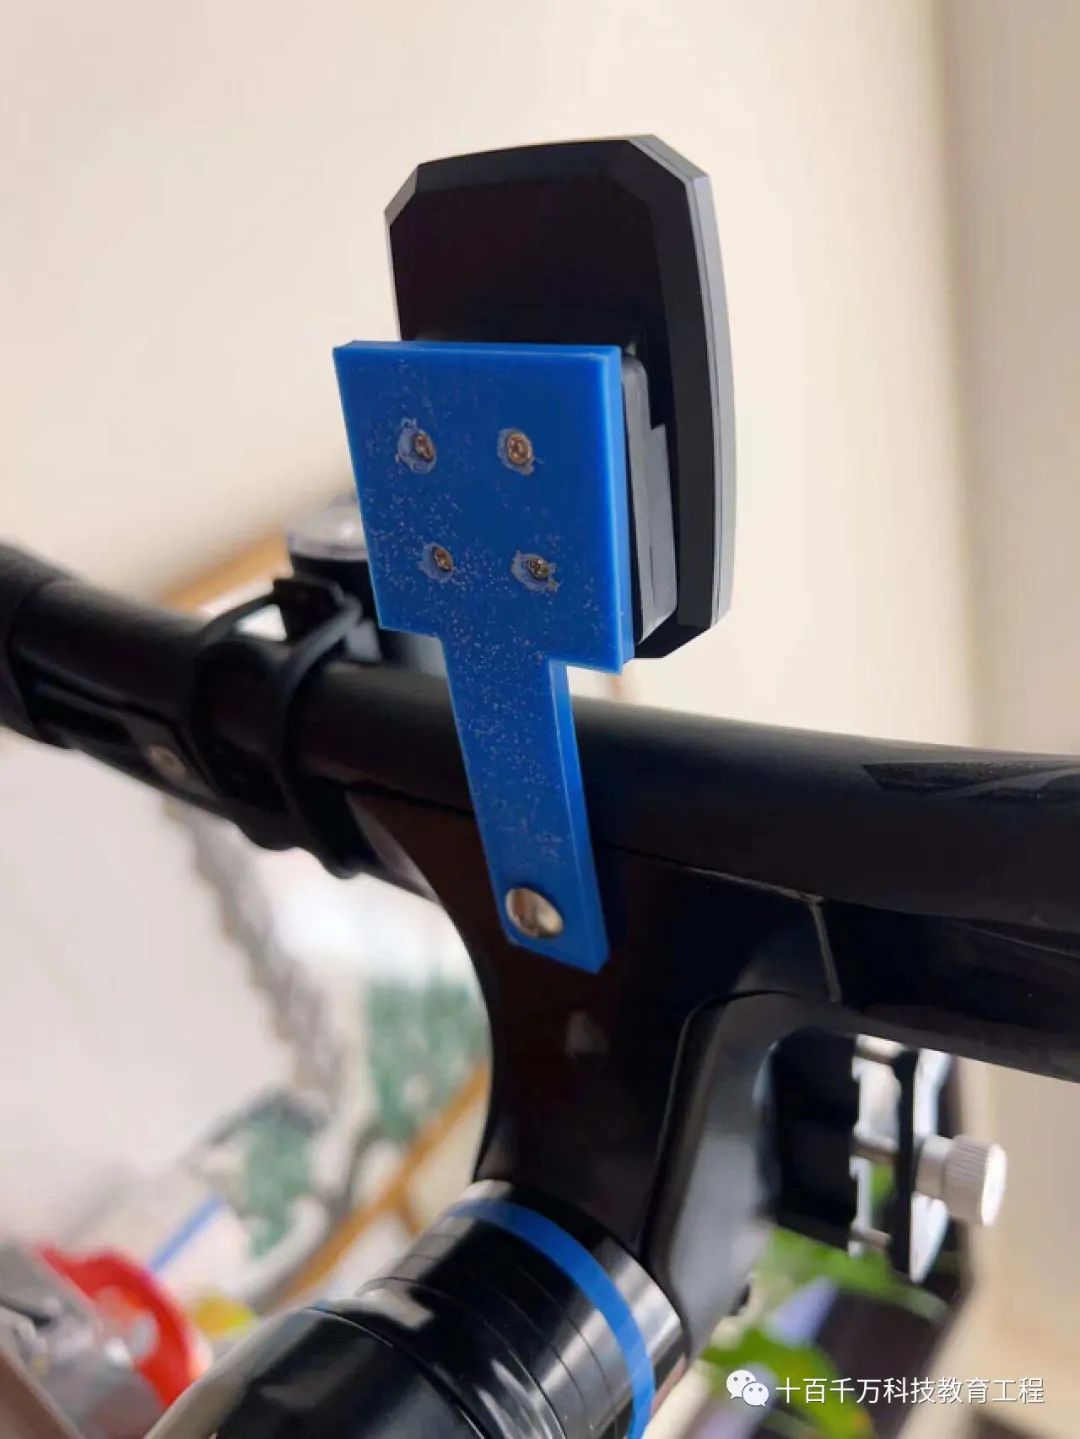
▲ Additionally, with the year-end approaching, many deliveries are not being shipped. However, I wanted to try out my new cycling computer, but I had no mount for it. I thought, why not print a simple one to use temporarily to solve my urgent need? This is the everyday significance of a 3D printer: helping you meet all your needs in life!
4. Conclusion
I initially thought the world of 3D printing was incredibly complex, requiring engineering skills for modeling, slicing, and other advanced operations. However, after spending some time getting familiar with this 3D printer, I found that it’s not as difficult as I imagined. Over this period, I printed many interesting items. As an amateur, especially with no drawing skills, I currently rely on downloading works shared by experts online. Overall, the ELEGOO Neptune 3 Pro I purchased is indeed a great first choice for beginners like me venturing into 3D printing.
1. Reasonable Product Configuration
The overall configuration of the product is quite reasonable. Features like ±0.1mm printing precision, a nozzle temperature of 260°C, an efficient intelligent cooling system, automatic leveling, a 250W heated bed, power recovery, and filament detection can meet the ordinary printing needs of a typical household. The actual printed results are satisfying, and it’s entirely untrue that FDM printers are outdated. In fact, they are entirely sufficient for home use.
2. Easy to Use
Thanks to the touch screen, the entire printing process is particularly simple, and the machine is easy to operate. You can learn how to use it just by looking at the PDF instructions, and the included ELEGOO Cura software can be mastered after a couple of tries.
3. High Product Success Rate
As long as you choose suitable models and adjust reasonable data, the printed works so far have been of very good quality, with uniform and clear textures, and a high degree of model fidelity without burrs or similar issues. You could say the success rate is very high.
The only downside might be that the time for printing large works is indeed quite long, but if the speed increases, the failure rate will also rise. So everyone must adjust the speed properly and avoid chasing speed too much.
Since I got this 3D printer, it feels like a window has opened in my life. Things that used to be thrown away due to damage can now be replaced with printed parts, bringing them back to life. Children’s small toys can also be printed, and even drawings made by kids can be printed out, allowing their imaginative ideas to take physical form. For children, it’s both a technological enlightenment and an encouragement. This change in life due to the 3D printer truly allows us to experience what the joy of technology is all about!