
Last week, we drew a Raspberry Pi Pico for everyone, and today we have brought some experimental routines. This includes several basic experiments, along with code and results.
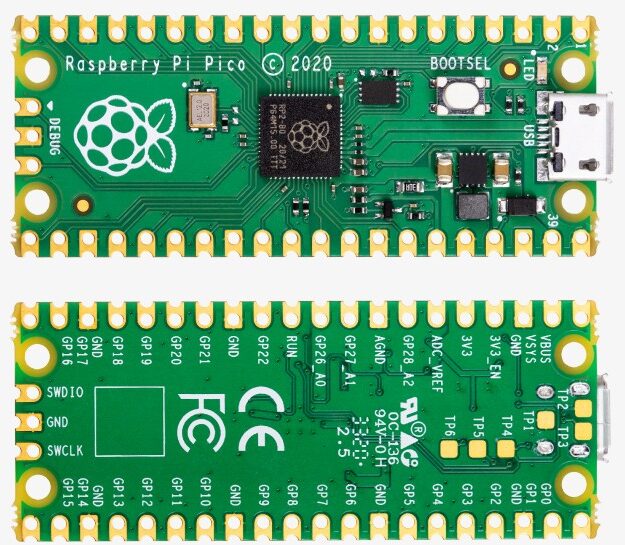
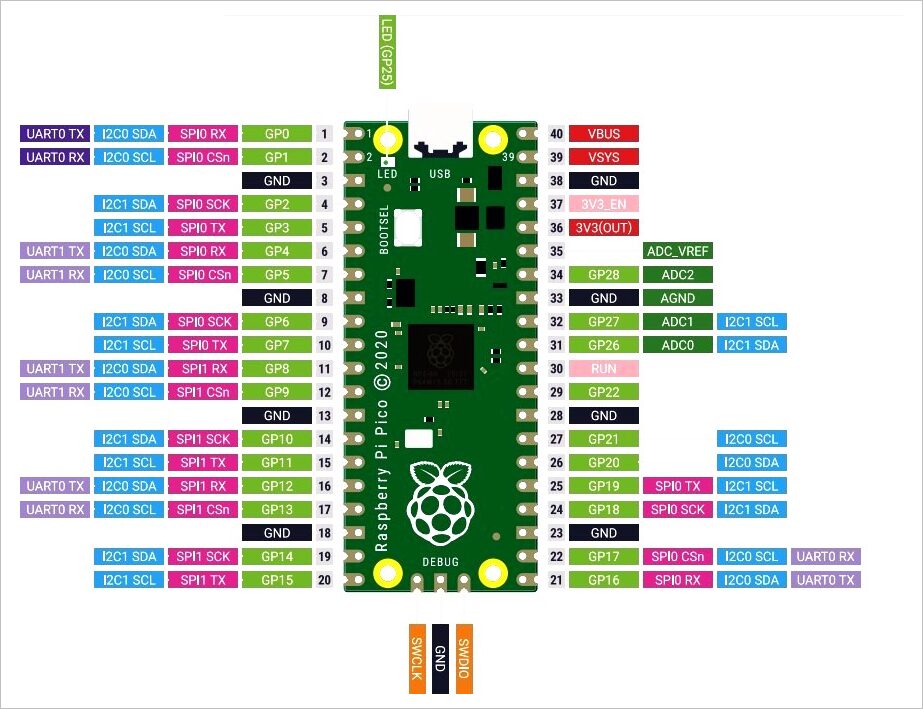
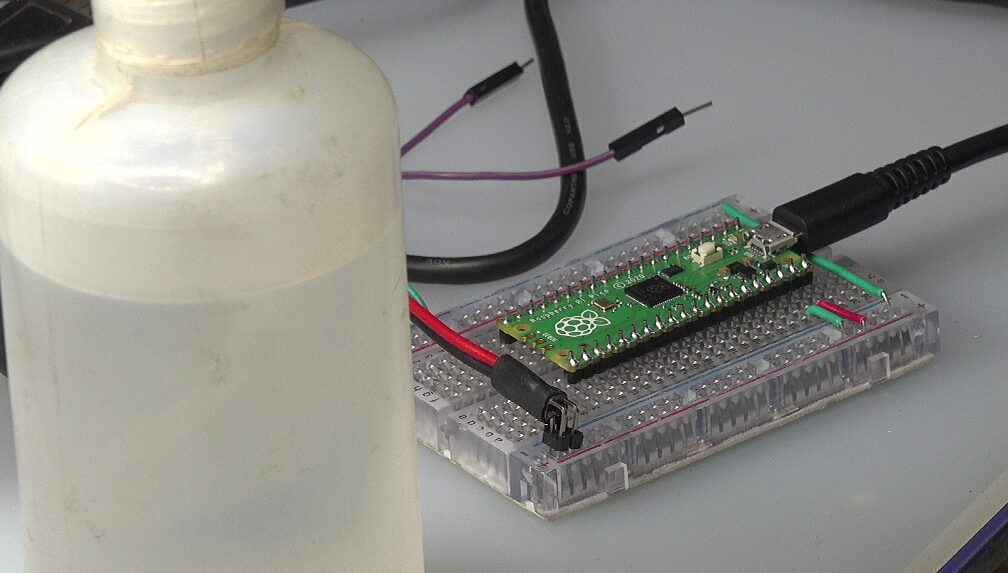
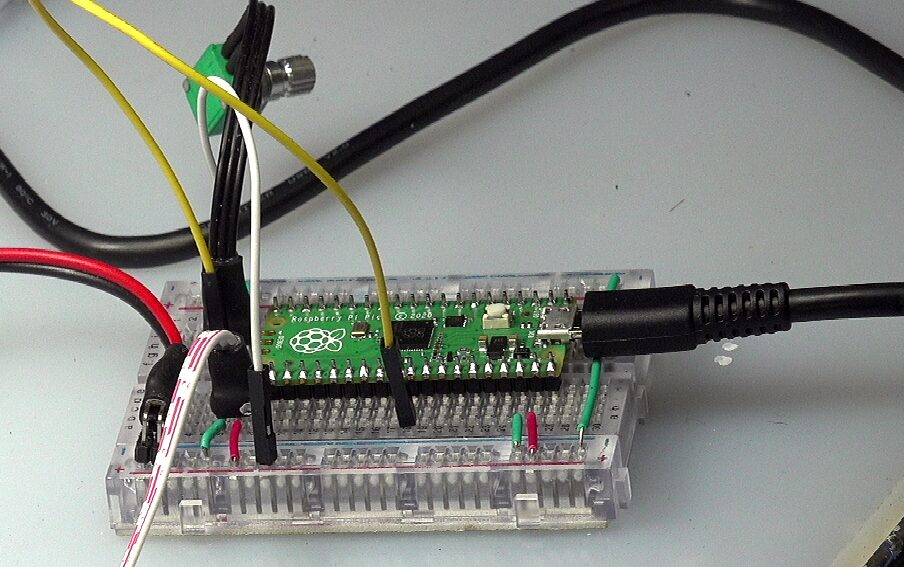
▌01 PI Pico Experiment Board
▌02 Basic Tests
1. Flash LED on Board
from machine                import Pin,Timer
from time                   import sleep_us

led = Pin(25, Pin.OUT)
tim = Timer()

print("Flash LED.")

def tick(timer):
    global led
    led.toggle()

tim.init(freq=2, mode=Timer.PERIODIC, callback=tick)
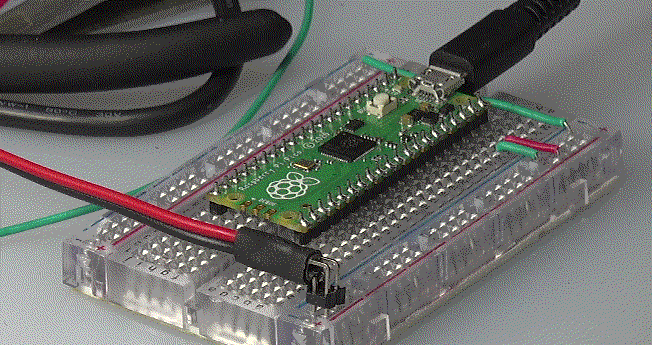
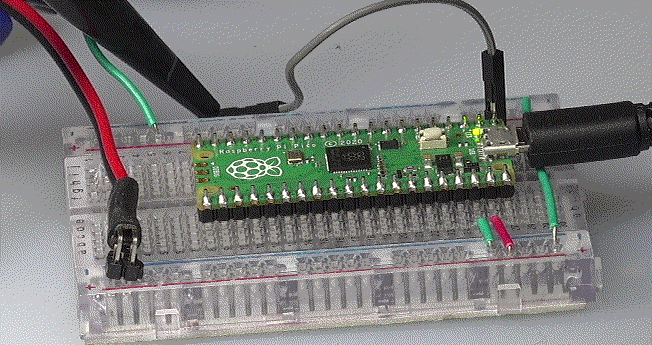
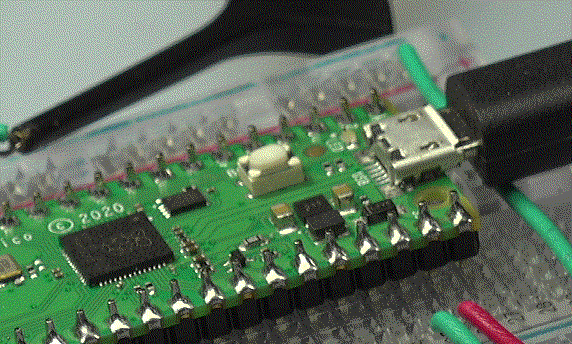
▲ Experimental Circuit Board
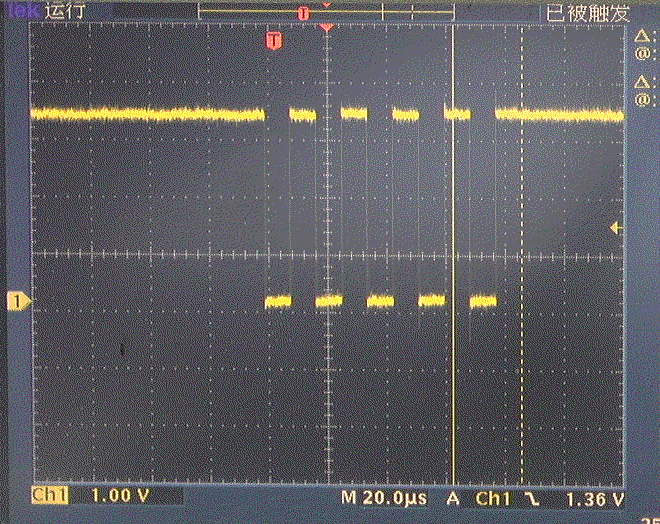
2. UART
(1) Test Program
from machine                import UART,Pin,Timer
from time                   import sleep_us

uart = UART(0, baudrate=115200, tx=Pin(0), rx=Pin(1), bits=8, parity=None, stop=1)
led = Pin(25, Pin.OUT)

tim = Timer()

print("Send UART.")

def tick(timer):
    global uart, led

    led.toggle()
    uart.write(b'\x55')

tim.init(freq=10, mode=Timer.PERIODIC, callback=tick)
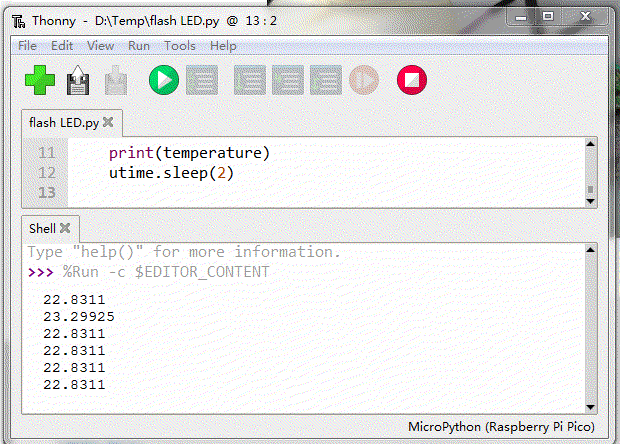
3. ADC
import machine
import utime

sensor_temp = machine.ADC(4)
conversion_factor = 3.3/(65535)

while True:
    read = sensor_temp.read_u16() * conversion_factor

    temperature = 27 - (read - 0.706) / 0.001721
    print(temperature)
    utime.sleep(2)

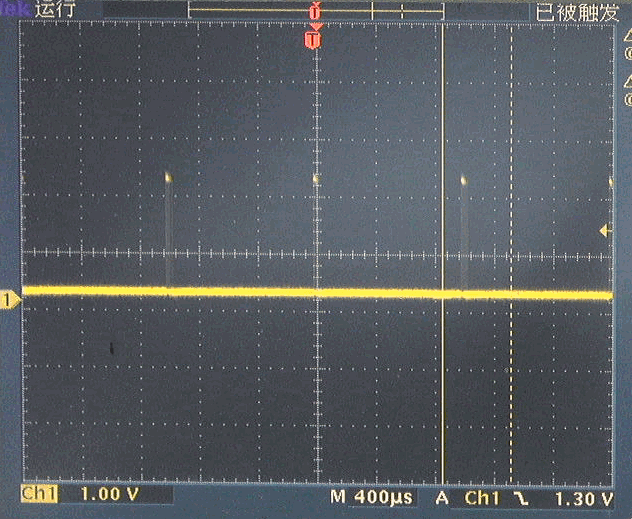
4. PWM
(1) PWM Driving LED
from machine                import Pin,PWM
import time

pwm = PWM(Pin(25))

pwm.freq(1000)

duty = 0
direction = 1

for _ in range(16*255):
    duty += direction

    if duty > 255:
        duty = 255
        direction = -1
    elif duty < 0:
        duty = 0
        direction = 1

    pwm.duty_u16(duty*duty)
    time.sleep(0.001)
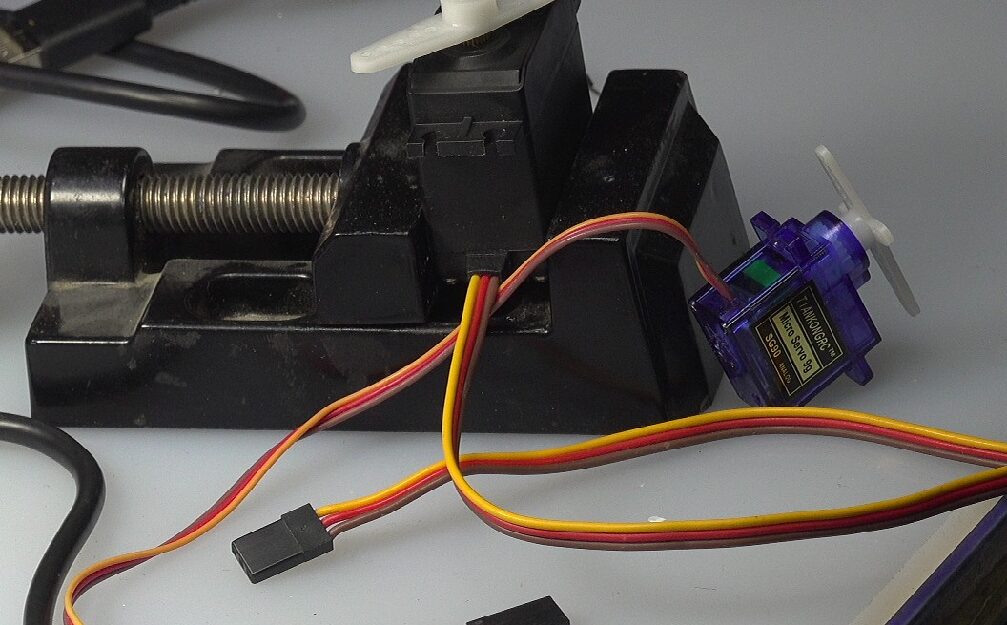
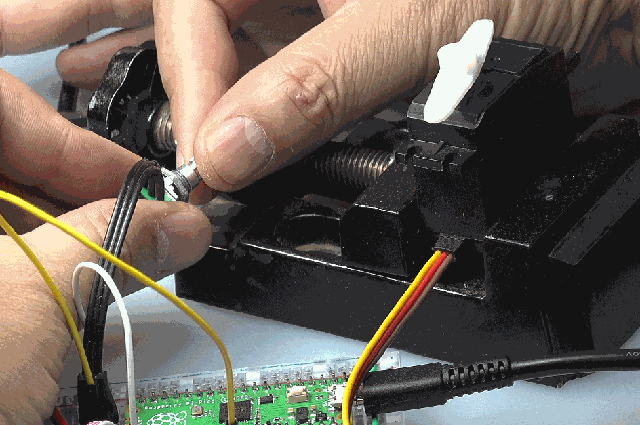
(2) PWM Driving Servo
from machine import Pin,PWM
import time
pwm = PWM(Pin(15))
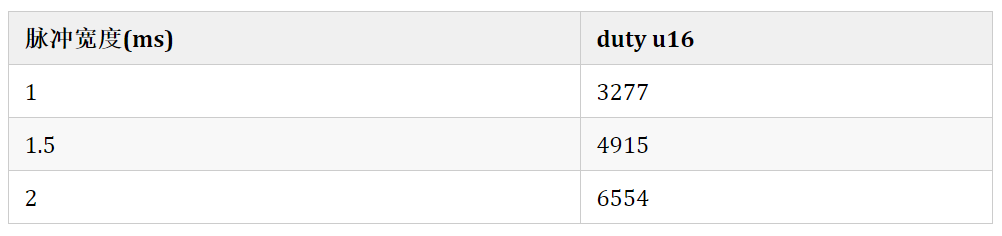
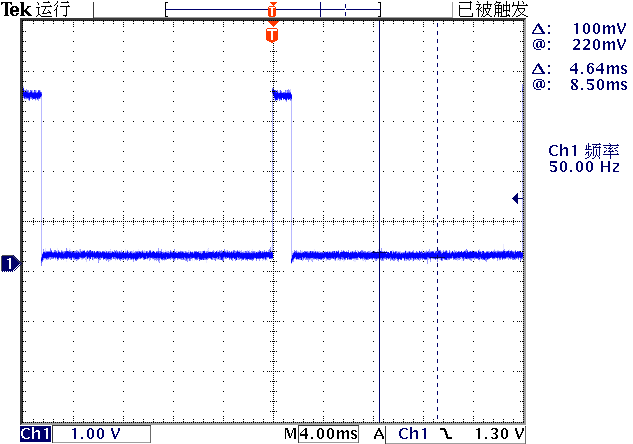
pwm.freq(50)
pwm.duty_u16(4915)
-
Brown: GND -
Red: +4.5 ~ +6V -
Yellow: Command pulse signal

from machine                import Pin,PWM
import time

pwm = PWM(Pin(16))

pwm.freq(50)

for _ in range(100):
    pwm.duty_u16(3276)
    print("Out pulse width : 1ms")
    time.sleep(1)

    print("Out pulse with : 2ms.")
    pwm.duty_u16(6553)
    time.sleep(1)
(3) PWM + ADC Experiment
from machine                import Pin,PWM
import time

pwm = PWM(Pin(16))

pwm.freq(50)

control = machine.ADC(0)

for _ in range(1000):
    adc = control.read_u16()
    duty = int(adc * (6553-3276)/0xffff) + 3276
    pwm.duty_u16(duty)
    time.sleep(0.1)
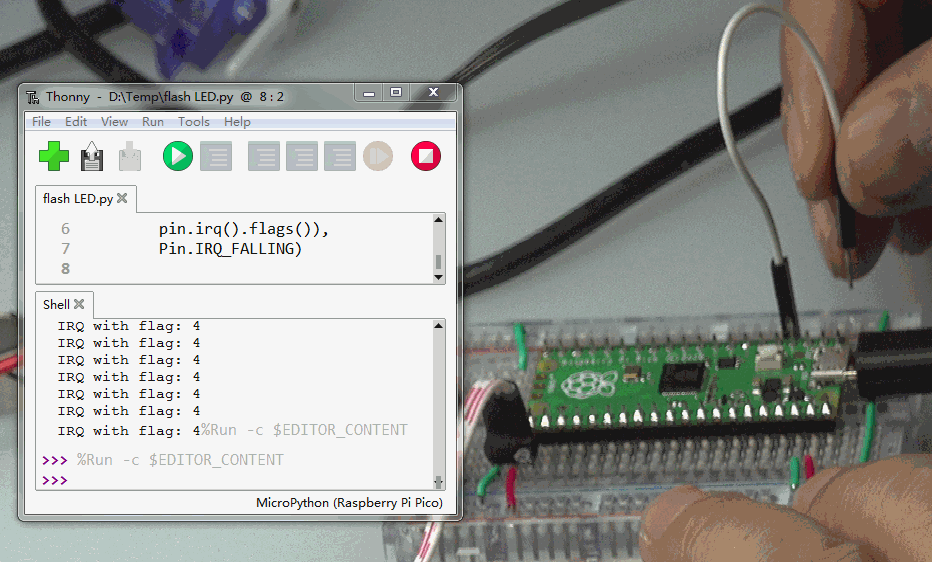
5. Interrupt IRQ
from machine                import Pin

p2 = Pin(2, Pin.IN, Pin.PULL_UP)

p2.irq(lambda pin:print("IRQ with flag:",
        pin.irq().flags()),
        Pin.IRQ_FALLING)
03▌Conclusion


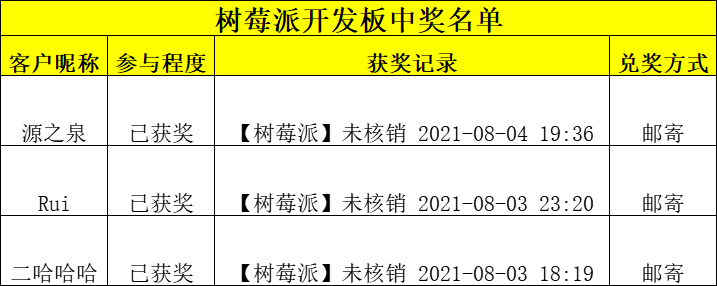
In last week’s event, we gave away some Raspberry Pi Pico, come and check out the lucky draw~
References
https://zhuoqing.blog.csdn.net/article/details/114037888
[2] Installing Thonny Development Environment:

1
Free Programmer’s Guardian: Easy Learning Embedded Systems
2
Didn’t expect Linux commands could be played like this!
3
Programmers also need to jump higher? Here’s a legendary job-hopping strategy for you.