“Raspberry Pi”, also known as RPi or RasPi, is a microcomputer designed for learning computer programming, based on the Linux system.
Since its launch, it has been sought after by numerous computer enthusiasts and makers, once being difficult to obtain. Despite its credit card size, it can perform video, audio, and other functions, making it a “small but mighty” device.
Today, I will introduce how to implement deep learning-based object detection using Raspberry Pi through the experiments of my senior, Chen Chenglin. (This article is packed with valuable content and resources, so please read carefully.)
1. Experiment Purpose
To implement deep learning-based object detection on a new Raspberry Pi board.
2. Experiment Steps
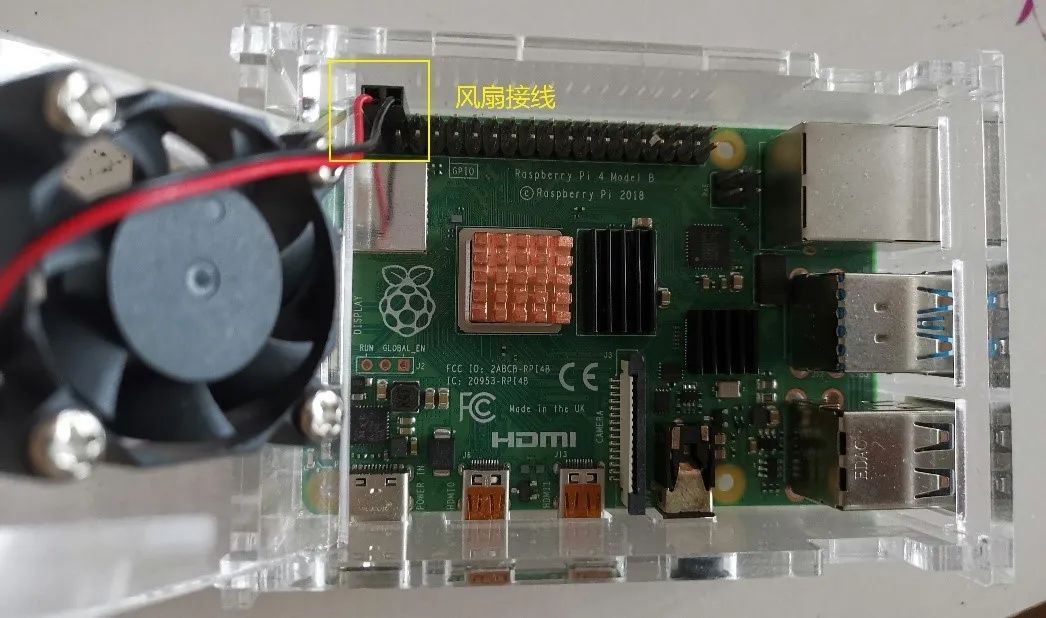
1. Assemble the Raspberry Pi
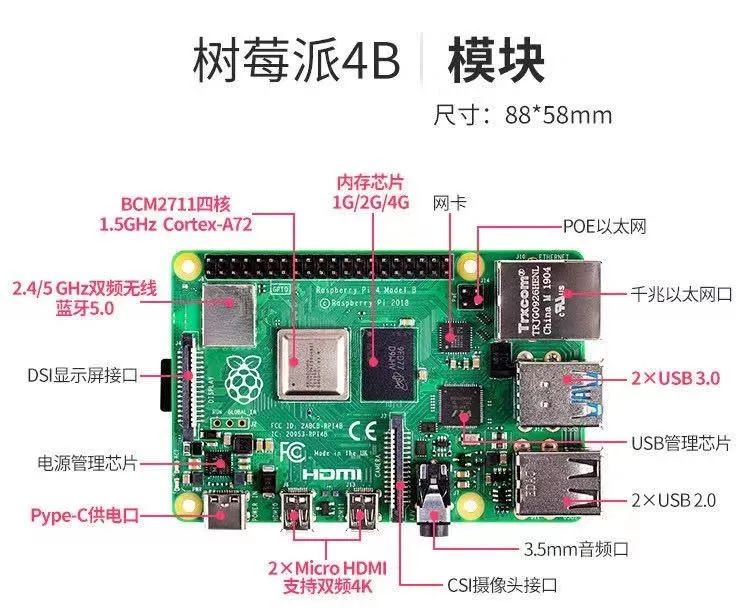
Attach heat sinks to the memory chip, USB management chip, and BCM2711 quad-core processor;
Connect the monitor to the HDMI port and Raspberry Pi peripherals (mouse, keyboard, etc.) to the USB port.
2. Enter the System
(1) Prepare an SD card with more than 8GB and a card reader;
(2) Go to the Raspberry Pi official website
(https://www.raspberrypi.org/) and download the required Debian with a graphical interface from the downloads page. Debian has many versions (buster, stretch, jessie, etc.). I downloaded the latest buster version before. After downloading and unzipping, you will get an .img file. The path cannot contain Chinese characters.

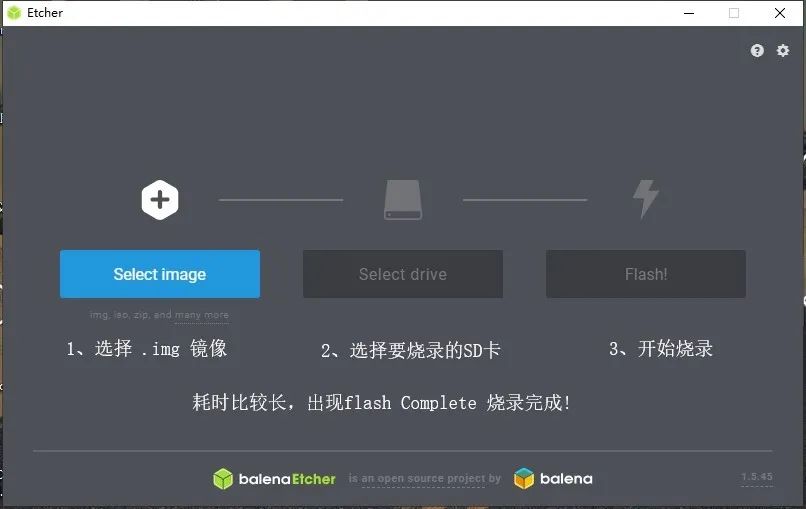
(3) Use Etcher software on Windows to burn the image.
Download the Etcher software and then burn the system.
In addition to using Etcher to burn the system, there is another method using win32diskimager, but you need to format the SD card with SD Formatter 4.0 first. This method is relatively more complicated than the first one, and there are many tutorials available online.

(4) Once the SD card has been burned, simply insert it into the Raspberry Pi and power it on to boot into the Raspbian system environment. You can set the language, Wi-Fi, etc.
3. Set Up the Environment
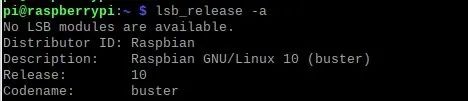
3.1 Change Sources
lsb_release –a Check the version of your Raspberry Pi system; mine is buster
·sudo apt-get install gedit Install gedit, which is simpler than vim and nano editors.
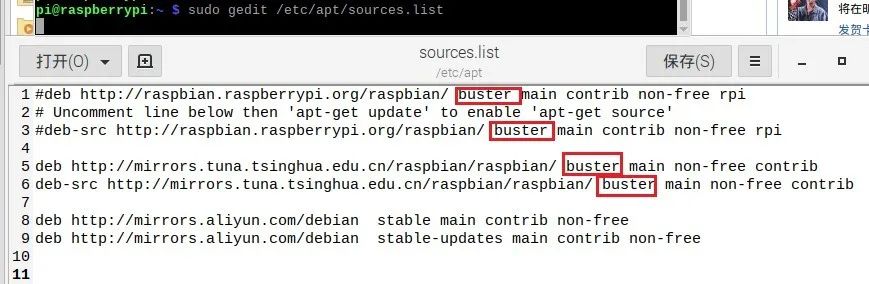
·sudo gedit /etc/apt/sources.list Modify the software source.
Change the URLs inside to Tsinghua source and Aliyun URLs.
·deb http://mirrors.tuna.tsinghua.edu.cn/raspbian/raspbian/ buster main non-free contrib
·deb-src http://mirrors.tuna.tsinghua.edu.cn/raspbian/raspbian/ buster main non-free contrib
·deb http://mirrors.aliyun.com/debian stable main contrib non-free
·deb http://mirrors.aliyun.com/debian stable-updates main contrib non-free
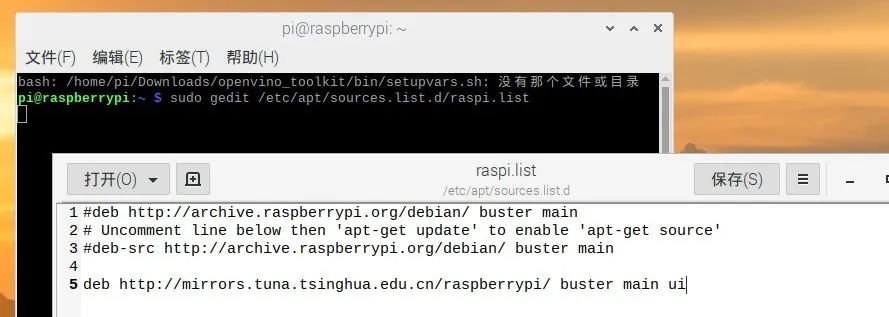
·sudo gedit /etc/apt/sources.list.d/raspi.list Modify the system update source.
·deb http://mirrors.tuna.tsinghua.edu.cn/raspberrypi/ buster main uis
# After modifying, you need to update
sudo apt-get update
sudo apt-get upgrade
Note, if you installed a version other than buster, you need to replace buster with the name of your Debian version, but some may not work, so it is best to search online for the corresponding dedicated source. Other options include 163 source, NetEase source, etc.
3.2 Python Environment
The system comes with both 2.x and 3.x versions by default. You can check the default Python version with:
python –V to check the default Python version
python3 –V to check the version of Python 3.x.
If some systems do not come with a 3.x version, you need to install it yourself.
sudo apt-get install python3.x where 3.x is the desired version number, such as 3.6/3.7, etc.
To install libraries, use sudo pip install xxx; if you want to install libraries in a specified Python environment, you need to specify the environment name, for example, sudo python3 -m pip install xxx. If you want to install directly with pip, you must modify the Python soft link:
(https://blog.csdn.net/qq_36758461/article/details/105426493)
3.3 TensorFlow Environment
First, change the pip source; otherwise, the download and installation will be very slow.
python -m pip install –upgrade pip
pip config set global.index-url
https://pypi.tuna.tsinghua.edu.cn/simple
(1) Install OpenCV-related environments
There are many tutorials online
(https://blog.csdn.net/ninwji/article/details/100798014?utm_medium=distribute.pc_relevant.none-task-blog-BlogCommendFromMachineLearnPai2-1.channel_param&depth_1-utm_source=distribute.pc_relevant.none-task-blog-BlogCommendFromMachineLearnPai2-1.channel_param), first follow the tutorial to install OpenCV.
(2) Install the Matplotlib library
sudo pip install matplotlib
(3) Install the compilation environment
sudo apt-get install python3-pip python3-dev
sudo apt install libatlas-base-dev
sudo apt-get install libhdf5-dev
(4) Install TensorFlow
cd to the folder where you want to install TensorFlow, then enter sudo pip install tensorflow==x.x.x where x.x.x is the desired version. If the installation fails, try again a few times; if it still doesn’t work, you can download the tensorflow-1.8.0-cp37-none-linux_armv7l.whl file for offline installation. Some dependency files can also be downloaded offline. The downloaded .whl file should be selected for linux_armv7l and none-any architecture. Download from GitHub, pypy (https://www.pypy.org/download.html), etc. using a VPN.
# Test if TensorFlow is installed successfully python import tensorflow as tf If there are no errors, the installation was successful.
4. Implement Object Detection with DNN Module
Note that the Raspberry Pi has limited memory, so use pre-trained models. Do not expect to train on it; train elsewhere and then call it directly.
Some tutorials can be learned from the pyimagesearch website;
URL: https://www.pyimagesearch.com/category/raspberry-pi/
Here, I will demonstrate a demo using the OpenCV-DNN module. You can also use the TensorFlow Object Detection API for real-time object detection. There are many tutorials online for using this API.
· Ensure that OpenCV is successfully installed before using the OpenCV-DNN module, as it can directly call models from TensorFlow, PyTorch, Caffe, etc. It is user-friendly for beginners.
Preparation:
1. Model and label files (using .caffemodel and .prototxt here)
2. Code files
real_time_object_detection.py # Real-time object detection
detect_faces_video.py # Real-time face detection
detect_faces.py # Image-face detection
Links to the above files:
https://pan.baidu.com/s/12RTrbocTqpGDc1Q2XV1vFA Extraction code: d2f2
Modify the model paths in the files and install the required library files to run.
This can actually run on both Windows and Linux. The Raspberry Pi just changes the environment; the rest of the code remains the same. Additionally, due to the limited memory of the Raspberry Pi and lower computational load, it is advisable to choose lightweight networks and pre-trained models.
Example of running results:
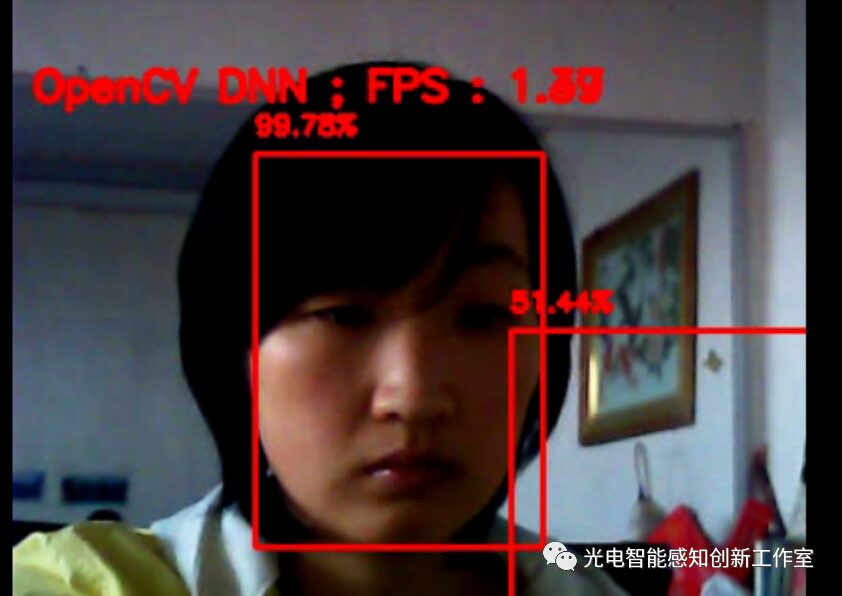
Face
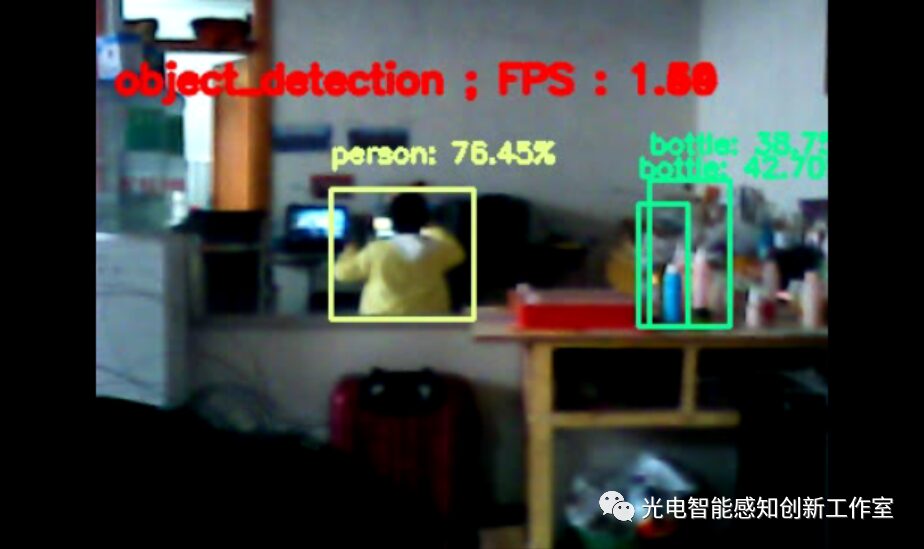
Object
The computational capability of the Raspberry Pi is relatively weak, so real-time performance is not very good. If you want to use OpenVINO for accelerated computing, you need to configure the Neural Compute Stick Movidius, which needs to be purchased separately.
Specific procedures will not be discussed here; installation of NCSDK and OpenVINO is required.
3. Experiment Summary
The code here is just an example using OpenCV-DNN; in fact, besides this, you can also use TensorFlow Object API, YOLO, SSD, and other networks to achieve object detection. The specific methods are basically the same as on Windows.
Author of this article: Chen Chenglin
Currently a second-year master’s student in Instrument Science and Technology
Research direction: Deep learning-based object detection
