The Raspberry Pi is an inexpensive small computer. When I bought it, it was around 300 yuan, which is very practical. It can be used as a personal computer or as a server.
For DIY enthusiasts, starting from scratch to assemble it is quite fun. I encountered many problems but finally completed it. The result is shown below:
1. Introduction to Raspberry Pi DIY
Previously, when logging into the company’s Linux server, I was often restricted by various permission issues and didn’t even know what the server looked like, as I had never been to the server room.
Later, I often used ssh/serial/adb to log into the company’s Linux/Android devices.I also used adb/usb to log into my phone for remote operations.
After that, I played with Linux virtual machines on Windows, but the memory was quite tight.Moreover, installing a virtual machine and then Linux on Windows is quite troublesome.
Then, I rented a cloud server on Tencent Cloud, which has a public IP address and is quite convenient.However, many ports were blocked, which felt quite bad.
So, I decided to buy a Raspberry Pi to play with. The official operating system for Raspberry Pi is Raspbian, which is actually a modified version of the Linux distribution Debian.
Therefore, we can consider Raspbian as Linux. Microsoft also started supporting Raspberry Pi from Windows 10.Although small, the Raspberry Pi is fully equipped.
2. Overview of Raspberry Pi DIY
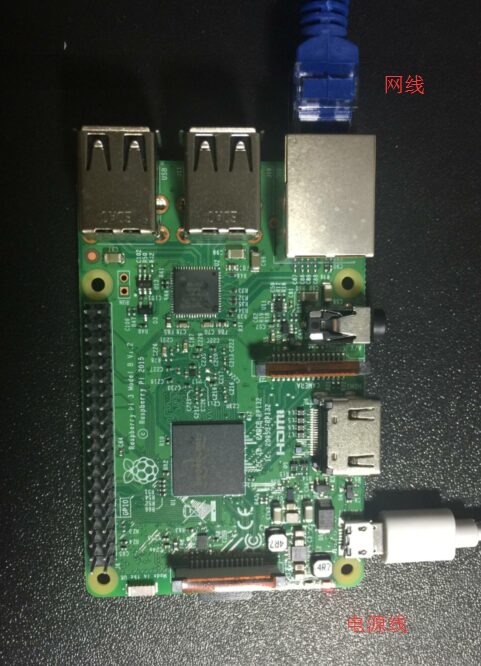
After it arrived, I started tinkering with it. Both wired and wireless networks were connected, and I could log in via ssh. Here are a few small pitfalls I encountered along the way, first, let’s take a look at the Raspberry Pi:
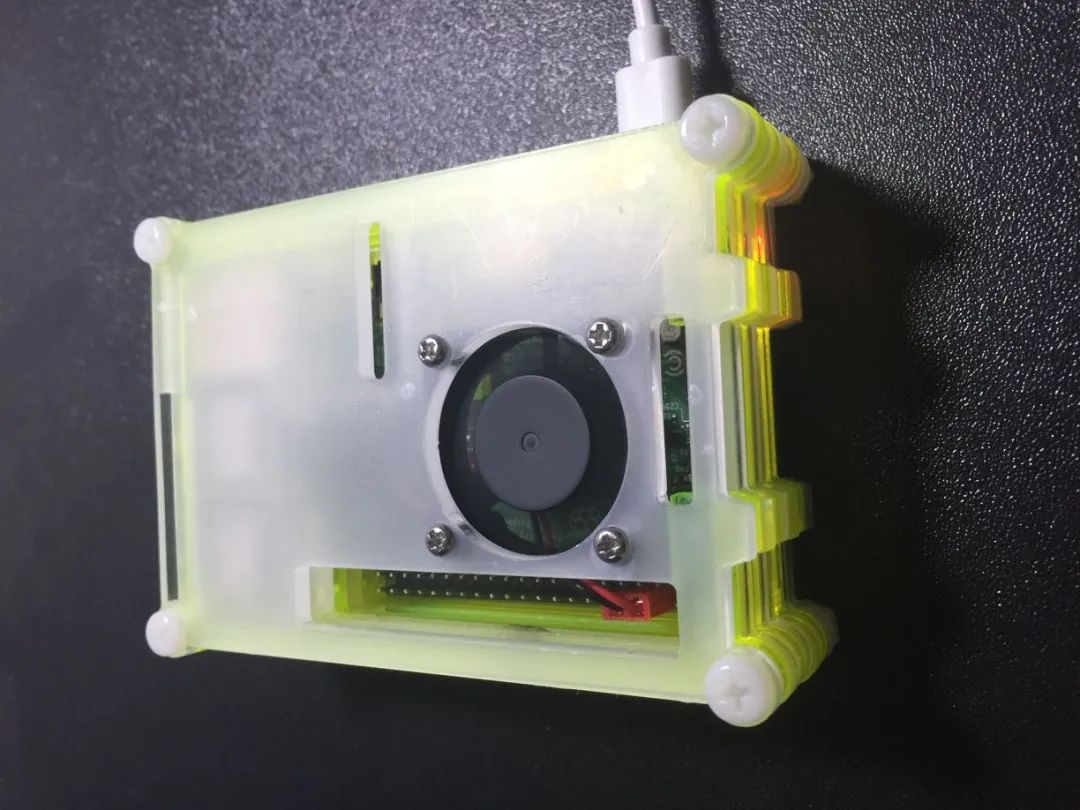
It looks a bit bare, so let’s dress it up. You can see that I haven’t installed a fan or heat sink, as shown below:
After connecting to the Raspberry Pi using SecureCrt ssh from Windows, it looks like this:
3. Raspberry Pi DIY Equipment
As the saying goes, a clever housewife cannot cook without rice. Here, I will briefly talk about the equipment and conditions for Raspberry Pi DIY, where 1, 2, 3, and 4 are included when buying the Raspberry Pi kit:
2. One 16G SD card + one card reader. Personally, I think 16G is not enough, so I bought an additional 64G card.
3. One network cable. Note that the Raspberry Pi has a built-in wireless network card, so there is no need to buy another one.
4. Raspberry Pi power supply and power cable. Although you can use a USB data cable to connect directly to your computer for power, it is still recommended to use the default power supply, which is better for protecting the Raspberry Pi.
5. One laptop. It must be able to access the internet.
4. Steps for Raspberry Pi DIY
As for the Raspberry Pi monitor, keyboard, mouse, and serial port, none of them are needed!Additionally, there is no need to buy USB and wireless network cards separately.Here are the steps briefly:
1. Insert the SD card into the card reader and connect the card reader to the USB port of the computer, so you can see the SD card on the computer.
2. Download the software and format the SD card:
https://www.sdcard.org/downloads/formatter_4/eula_windows
3. Download the Raspberry Pi operating system, the one I downloaded is RASPBIAN STRETCH WITH DESKTOP:
https://www.raspberrypi.org/downloads
4. Download the software and use this software to write the operating system downloaded in step 3 to the SD card:
http://sourceforge.net/projects/win32diskimager
Up to this point, the Raspberry Pi operating system has been created, let’s continue.
5. Remove the SD card and insert it into the Raspberry Pi, so the Raspberry Pi has an operating system. Note that you may encounter ssh connection issues mentioned in step 8.
6. Directly connect the laptop and the Raspberry Pi with a network cable, set up network sharing on the laptop, and turn on the power switch of the Raspberry Pi. This way, the Raspberry Pi can share the network from the laptop, and at this point, the Raspberry Pi will have an IP address.
7. Check the Raspberry Pi’s IP address from the laptop. There are many methods, for example: on the computer, enter the DOS interface with win + r, and use arp -a to view the IP. The dynamic IP of 192.168.137.x is the IP of the Raspberry Pi.
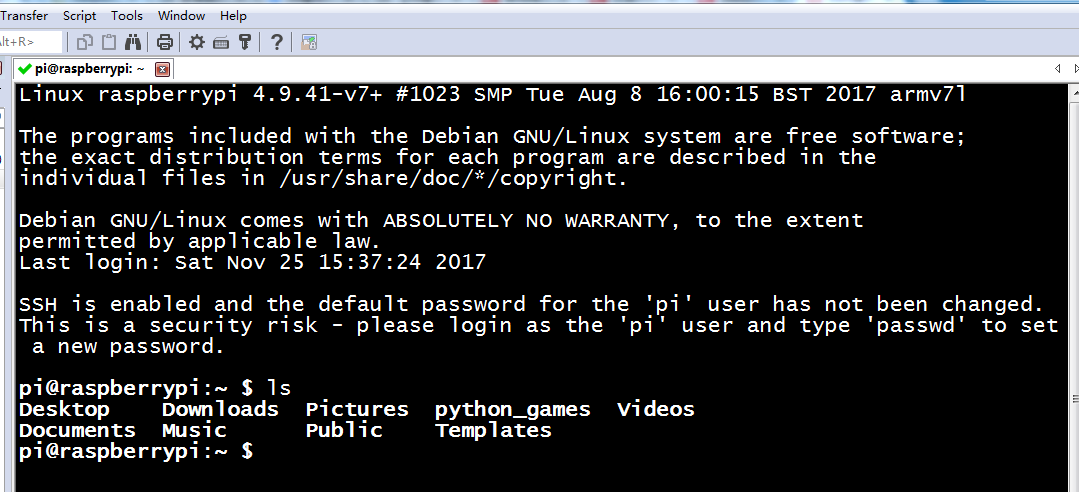
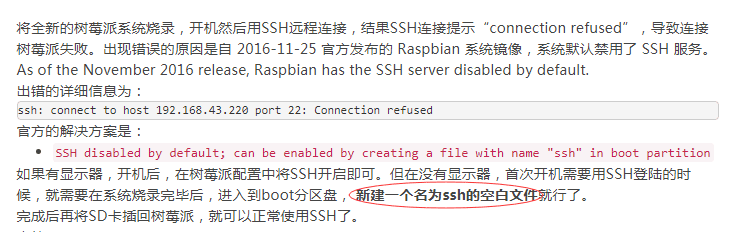
8. The default username for the Raspberry Pi is pi, and the password is raspberry. On the laptop, use SecureCrt’s ssh to connect to the Raspberry Pi, but it gets rejected.The reason is that for security reasons, the Raspberry Pi does not enable the sshd service by default. How to solve it?As shown in the screenshot, this method can solve it. Note that the ssh file should not have an extension.Then restart the Raspberry Pi, and after testing, the ssh connection works.
5. Results of Raspberry Pi DIY
After connecting with SecureCrt, I found that there was no vim command. No worries, just run sudo apt-get install vim to install it. Additionally, gcc is built-in and does not need to be installed, let’s take a look:
pi@raspberrypi:~ $ cat test.c#include <stdio.h>
int main(){    printf("I love Raspberry Pi\n");    return 0;}
pi@raspberrypi:~ $ pi@raspberrypi:~ $ ./a.out I love Raspberry Pi
pi@raspberrypi:~ $
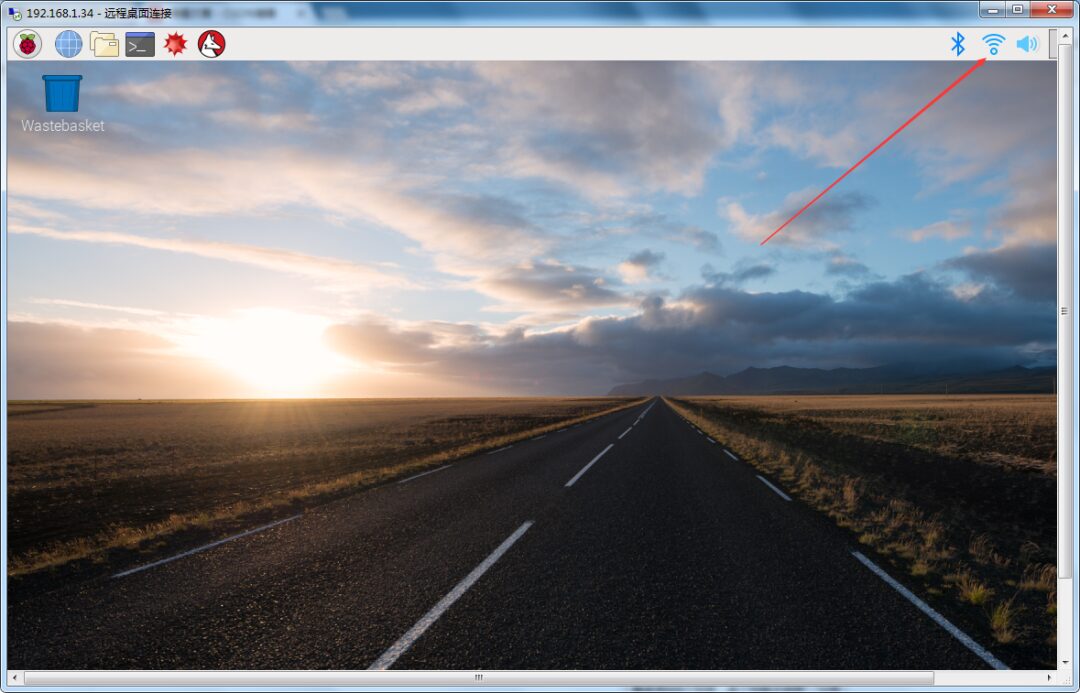
Without a Raspberry Pi monitor, how can I view the Raspberry Pi interface?Install xrdp on the Raspberry Pi, and then use remote desktop on the computer:
As shown above, this is the situation with a wired connection. In fact, the Raspberry Pi has a built-in wireless network card, so it can also connect using Wi-Fi. You can connect to Wi-Fi by operating at the upper right corner of the interface.
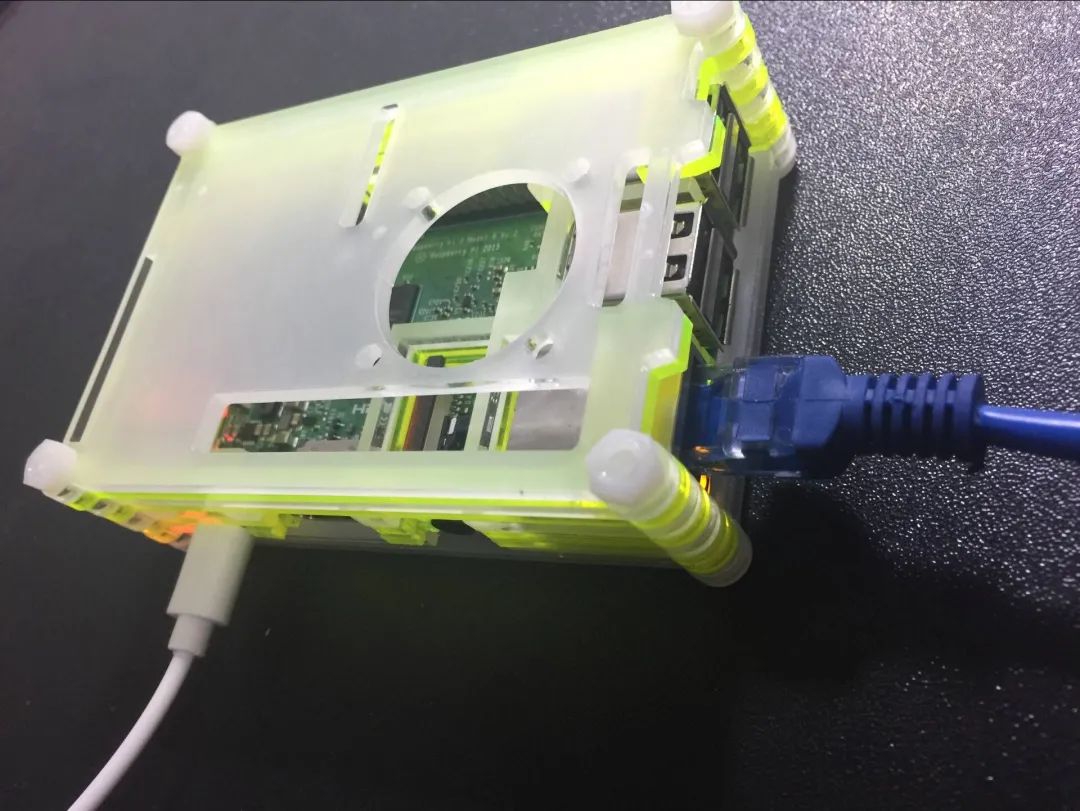
After removing the network cable, the Raspberry Pi looks like this. You can see that I have now installed the heat sink and fan. The fan is spinning very fast, so the blades are not visible:
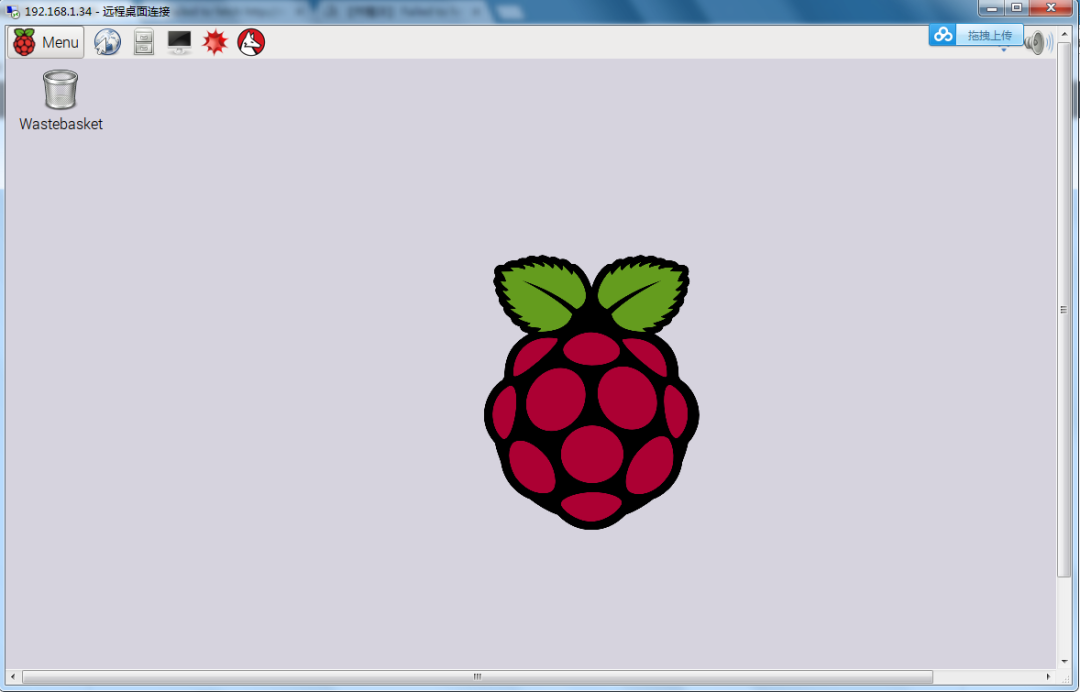
Then, the desktop looks like this. Look at the Wi-Fi icon, it’s there:
I tried it, and the wireless network works too.Raspberry Pi DIY is very simple and quite fun.
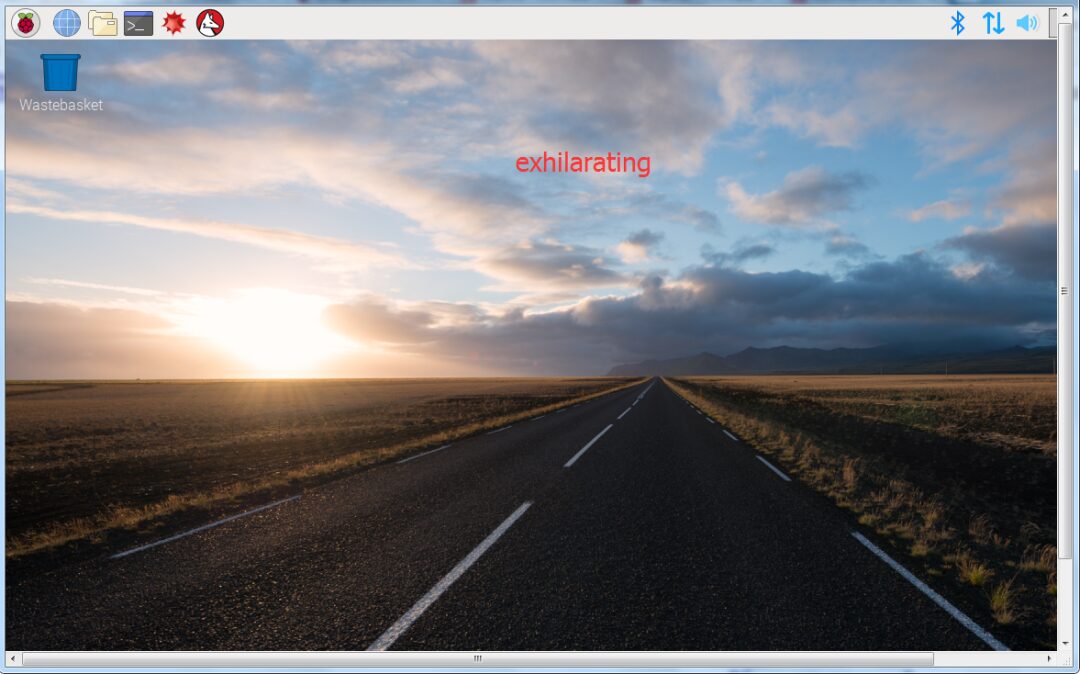
By the way, here’s an image of an earlier Raspberry Pi interface:
In comparison, the new system’s desktop is more stunning and cool. Well, this concludes the introduction to Raspberry Pi DIY assembly.Do it yourself, and you will reap the rewards.