Follow/Star Public Account to not miss any updates!

This tutorial was updated and published by the original author strongerHuang in October 2018.
Tags: Keil, MDK-ARM, µVision
Copyright: Commercial use prohibited
Disclaimer:This document is for personal learning use only. For reprints, please contact the author through the public account for authorization.
1Introduction
Currently, Keil offers four products (software): MDK-ARM, C51, C251, C166, which are very similar in usage, including the creation of new software projects discussed in this article.
This article uses the latest Keil MDK-ARM V5.26 and STM32F103 standard peripheral library as of October 2018 as an example to guide you through the specific steps of creating a new software project.
The new software project discussed here is just a basic software project (one project, one target). Only the necessary configurations have been modified, with most settings left as defaults.
If you are using Keil C51 or other MCU devices, this article is also applicable, although there may be slight differences for MCU devices.
2
Preparation
As the saying goes, “Sharpening the axe does not delay the work of cutting wood.” With proper preparation, the subsequent work of creating a basic software project becomes much easier.
This section focuses on downloading the “standard peripheral library” for STM32. If you are using C51 or not using a library, you can skip this preparation.
2.1 Download and Install Keil Tools
The essential tools for this article can be found in the previous article of this series titled “Keil Series Tutorial 01: Introduction, Download, Installation, and Registration“.
2.2 Download STM32 Standard Peripheral Library
This section is for preparing the source code (library). If you are using C51 or developing with registers, you can skip this section. Below are the official download links, and for those who find it troublesome, I also provide a Baidu Cloud link.
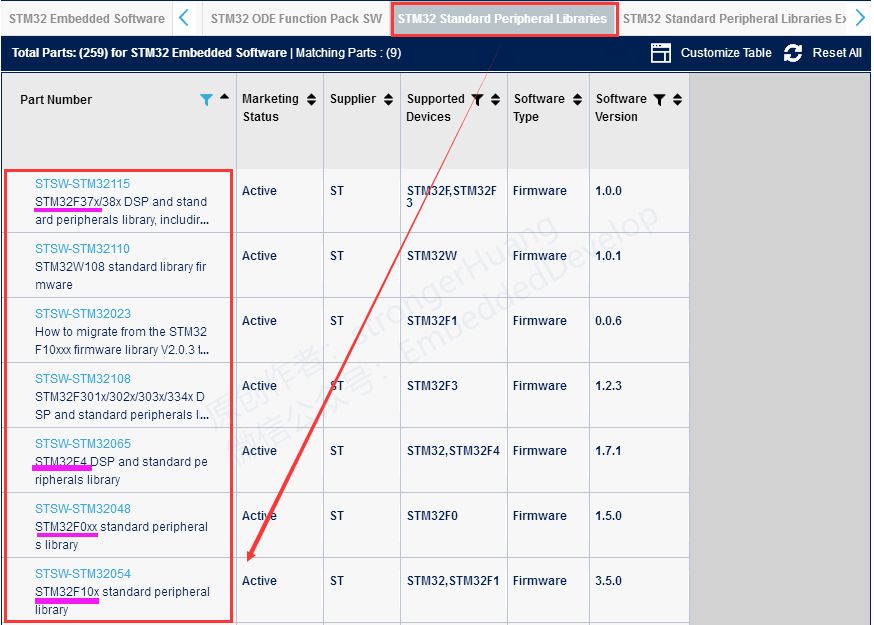
A. Official Download
http://www.st.com/content/st_com/en/products/embedded-software/mcus-embedded-software/stm32-embedded-software.html?querycriteria=productId=SC961
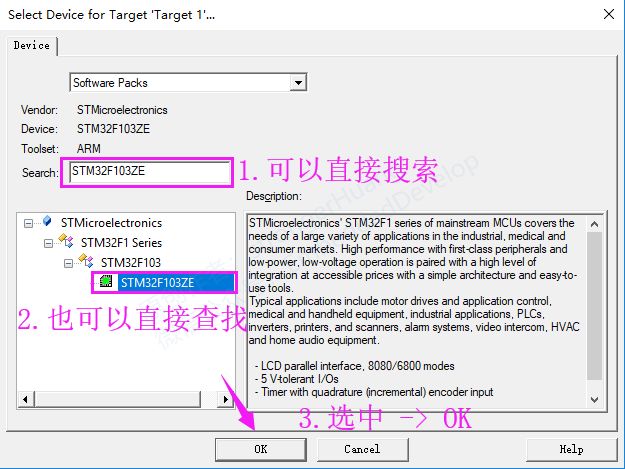
Download the corresponding standard peripheral library based on the chip model (e.g., if the chip is STM32F103ZE, download the corresponding STM32F10x_StdPeriph_Lib), as shown below:
B. Baidu Cloud
http://pan.baidu.com/s/1qYbBKMK
Note: If the above links become invalid, you can follow the public account to get updated links.
2.3 Organize Project Folder
This small section can be organized according to your own habits. The folder structure I organized follows conventional methods. If you find it reasonable, you can adopt it;
First, create a main folder to store project files: STM32F103ZE(Keil)_Demo
A. Extract ST Standard Peripheral Library Files
We only need to use part of the source code files in the ST standard peripheral library. Therefore, extract the necessary files and folders into our project.
After unzipping “STM32F10x_StdPeriph_Lib”, you will see four folders in the main directory:
_htmresc: Image files (do not extract)
Libraries: Library files (extract most)
Project: Sample project (extract a few)
Utilities: Common code, evaluation board code (do not extract)
We need to use files from the Libraries and Project directories, but there are also some files we do not need. Therefore, we need to delete the unnecessary files. (For specifics on what was kept, you can download the provided example to see.)
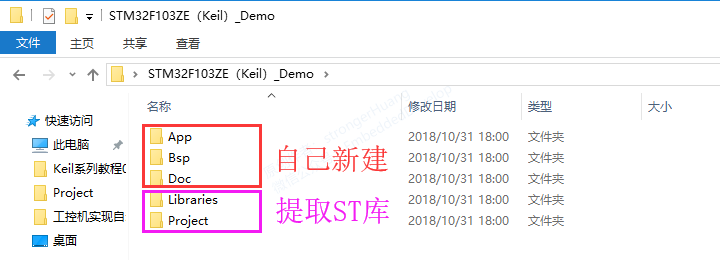
B. Create Files and Folders
In addition to the files extracted above, we need to create files and folders to store our own code. I mainly created three folders:
App: Application code
Bsp: Low-level code
Doc: Documentation
Within the newly created folders, we also need to create our source files and add the source code. The Demo project we provide implements an LED blinking function. (Details not described here.)
After completing the above two steps, we can see the organized folders under “STM32F103ZE(Keil)_Demo”:
At this point, the preparation work is complete. For the specific content of the extracted files and newly created files, please download the Demo project to check.
3
Create a Software Project
Creating a simple, basic software project generally requires three steps: create project, add files, and configure project.
Once the preparation work is done, you can create your own software project. Below, I will detail the step-by-step process of creating a software project from scratch.
3.1 Create Project
The steps to create a project are fundamental and relatively simple. Below, I will teach you step-by-step how to create an empty project.
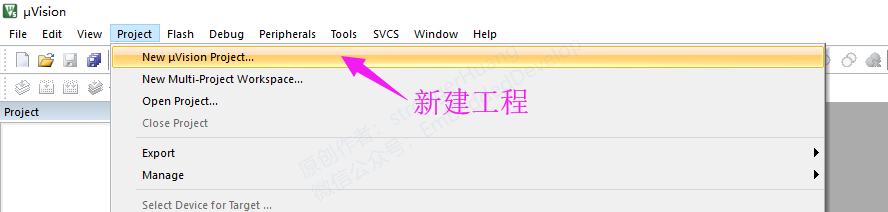
A. Open Software, Create New Project(Project -> New uVision Project)
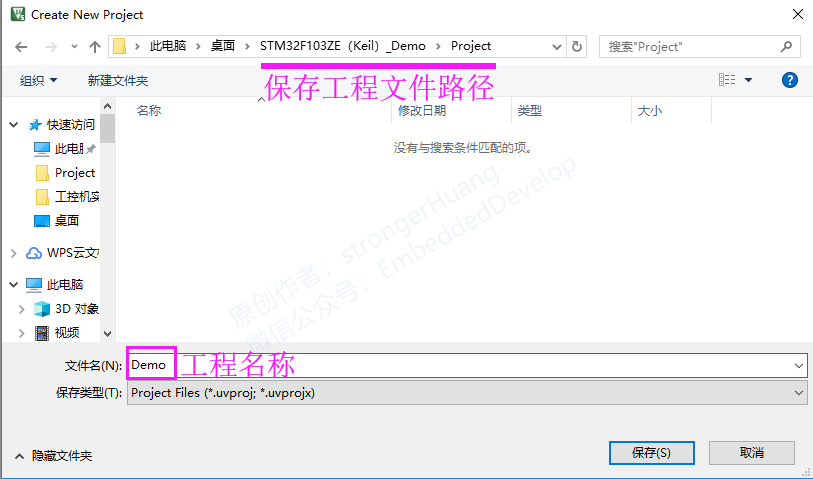
B. Choose Save Path and Name
C. Select Chip Model
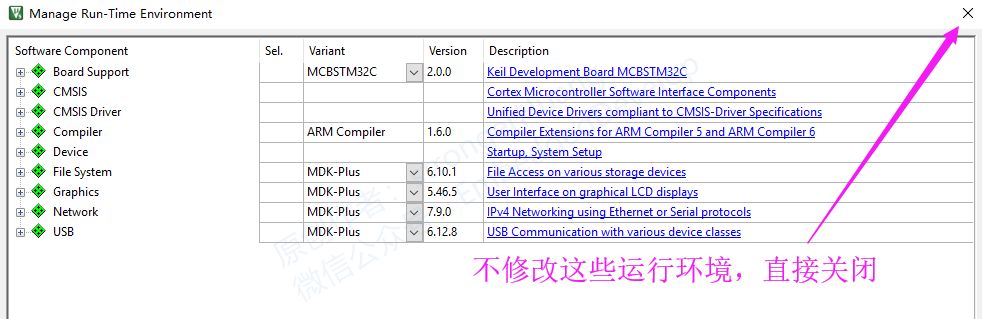
D. Basic Project
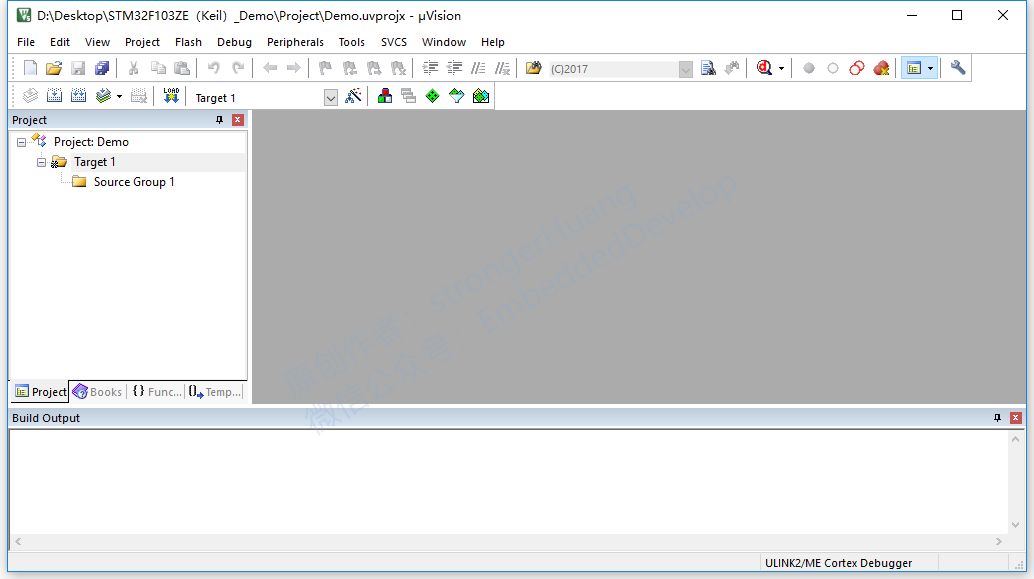
A basic project has been created, but it’s not enough; further steps are needed.
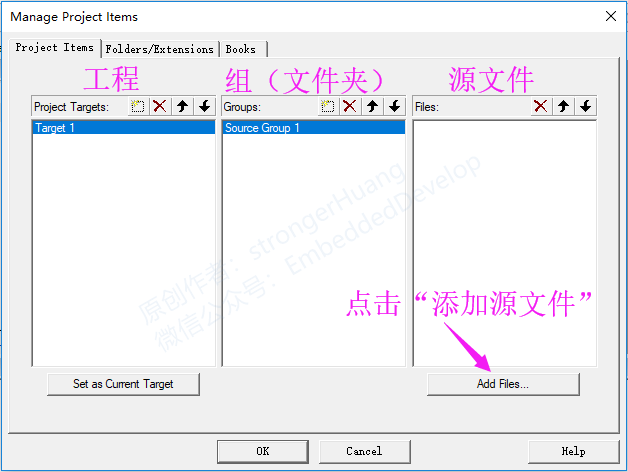
3.2 Add Files
To be precise, it should be add groups (folders) and add files. In simple terms, this means adding your own source code (the extracted libraries, newly created files, etc.) to the project.
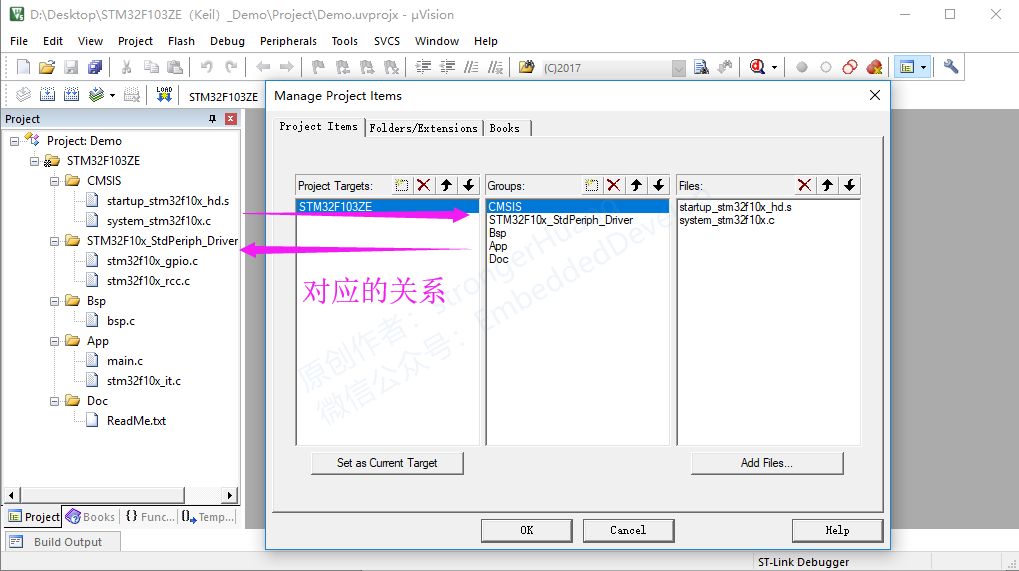
The project management here can be defined according to your own ideas (similar to categorizing and naming folders and files). I will manage the project in a conventional way.
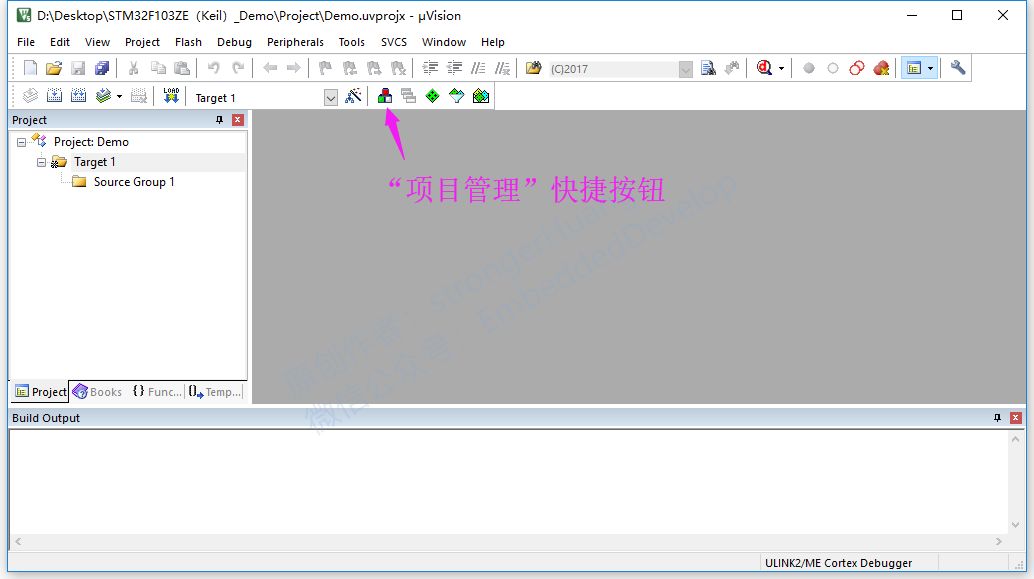
Click the “Project Management” shortcut button, or go to Project -> Manage -> Project Items to enter the “Project Management” interface.
·
·
Add step by step until completion
·
·
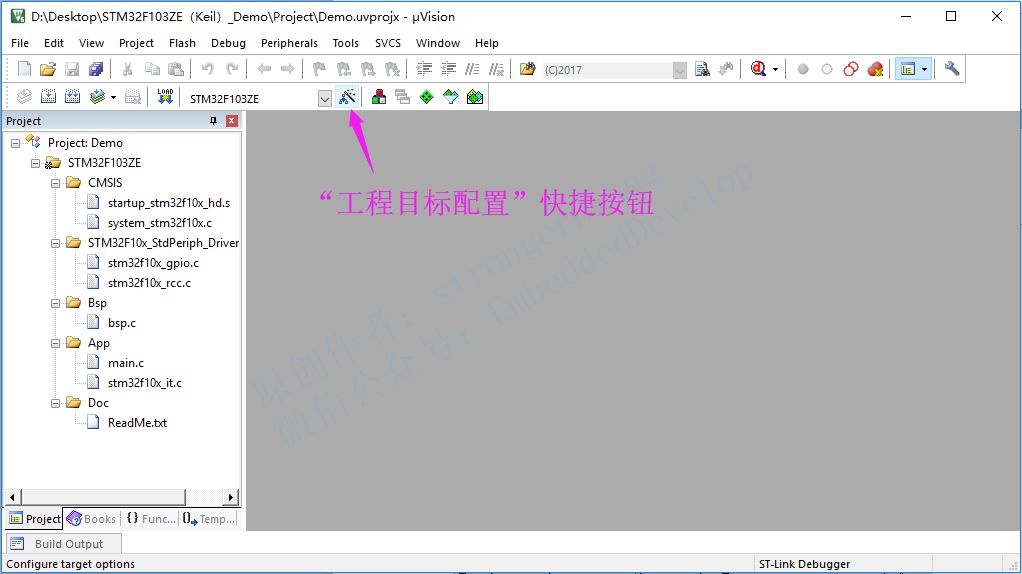
3.3 Configure Project
Configuring the project is mostly straightforward for beginners; most content can be left as default. Here, I will cover a few common configurations that meet basic functionality.
A. Click “Project Target Options” to enter configuration (or Project -> Options for Target)
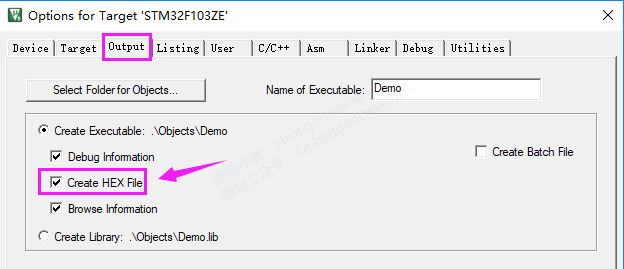
B. Output Hex File
Many beginners ask how to output a Hex file. You just need to check the box for [Project -> Options for Target -> Output] “Create HEX File”.
C. C/C++ Configuration
This option has many configuration parameters and is quite important for large projects, but for beginners, only two simple configurations are needed.
First Configuration — Predefined:
[Using STM32F103 high-capacity chip as an example]
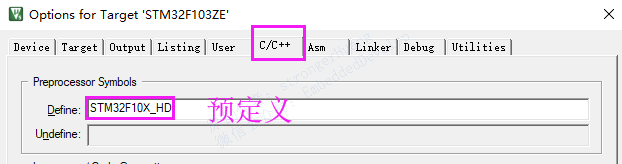
Predefined STM32F10X_HD, equivalent to #define STM32F10X_HD.
Some projects also define USE_STDPERIPH_DRIVER. Since we are using the “standard peripheral library”, I personally prefer to define USE_STDPERIPH_DRIVER in the stm32f10x.h file, so you won’t see this definition here.
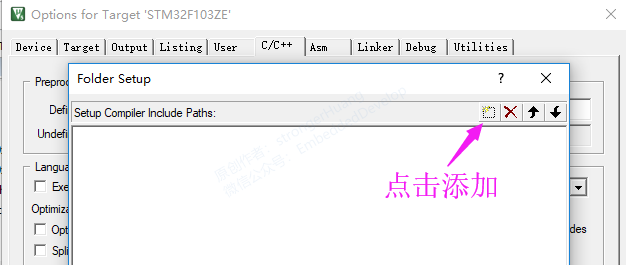
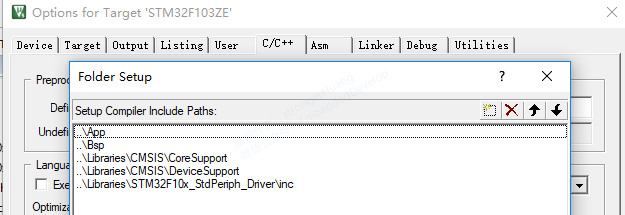
Second Configuration — Include Paths:
Since there are many folders in our project, we need to add the corresponding paths so that the compiler can find them.
·
·
Add step by step until completion
·
·
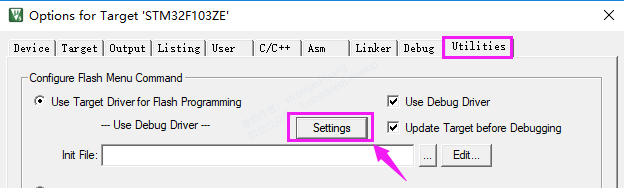
D. Select Download Debug Tool
This option depends on your download debugger (for example: ST-Link)

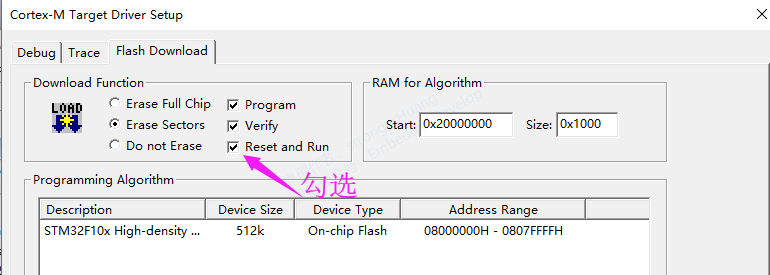
E. Download Reset and Run Settings
Some beginners ask, “Why do I need to press the reset button after downloading the program for it to run?” You just need to check the box for “Reset and Run” in the project settings to make it run immediately after downloading.

At this point, a newly created project is considered complete (of course, I added the correct source code to the newly created files). You just need to compile it, connect the downloader, and you can download and run it.
4
Download
To facilitate STM32 learners, I have already created common STM32 “Demo software projects”, which also include projects created with EWARM for everyone to download.
STM32F0 Project Template:
http://pan.baidu.com/s/1pKSkSxt
STM32F1 Project Template:
http://pan.baidu.com/s/1c1AWupM
STM32F2 Project Template:
http://pan.baidu.com/s/1o8yGWg6
STM32F3 Project Template:
http://pan.baidu.com/s/1boVXh2f
STM32F4 Project Template:
http://pan.baidu.com/s/1qYzYMuS
STM32L1 Project Template:
https://pan.baidu.com/s/1rNPC3JQD7iLchVUEJlTjCQ
Note: If the above links become invalid, you can follow the public account to get updated links.
(The public account does not support external links, please copy the link to the browser to download)
5
Explanation
1. This document is for personal learning use only, all rights reserved, commercial use is prohibited.
2. This article was edited and organized by me alone, so there may be some errors.
3. This article is included in the public account “Embedded Column”. Follow the public account and reply with 【Keil Series Tutorial】 to view the entire series of tutorials.
6Finally
If you find this article helpful, a thumbs up or share would be a great support and encouragement for me.
Scan the QR code below, follow the public account, and check the bottom menu for more exciting content!

Long press to recognize the QR code in the image and follow