
For embedded development beginners, the choice of the first development board directly determines the difficulty of getting started – choosing the right one can yield great results with minimal effort, while choosing the wrong one may lead to discouragement. This article compares five popular development boards: 51 Microcontroller, STM32, Raspberry Pi Pico, Raspberry Pi, and Arduino, providing a multi-dimensional comparison and practical testing guide to help you avoid 90% of the pitfalls and save unnecessary expenses.
 1.51 Microcontroller Development Board
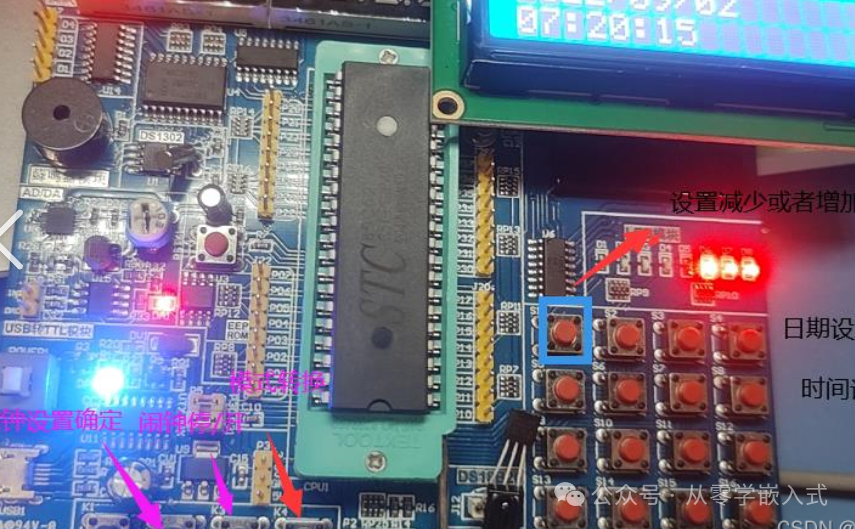
Typical Models: STC89C52, AT89S52 (can be purchased for just a few dozen yuan)
Core Advantages:
-
Low Barrier to Entry: 8-bit architecture, simple instruction set, intuitive register operations, and abundant resources like “51 Microcontroller Beginner’s Tutorial” make it easy to run the first “blinking LED” program by just copying code.
-
Controlled Cost: The complete set including the development board, USB downloader, and basic components (resistors, LEDs) costs less than 80 yuan, making it suitable for beginners to experiment without worrying about damage.
-
Transparent Principles: The hardware structure is simple, and the pin definitions and peripheral interfaces (like serial ports and timers) are easy to understand visually, facilitating comprehension of the underlying logic of how programs control hardware.
Shortcomings:
-
Weak Performance: The maximum frequency is 24MHz, and it may lag when processing complex tasks (like displaying on an LCD while collecting sensor data simultaneously).
-
Limited Peripherals: Lacks native USB, SPI, and other interfaces, requiring additional modules to drive OLED screens or temperature and humidity sensors, complicating wiring.
Suitable Audience:
Beginners with zero experience (no coding or circuit knowledge) who want to understand “what embedded systems are” or students working on course designs (like blinking LEDs, traffic lights, simple calculators, etc.).
Overall Rating (out of 10):
Beginner Friendliness: 10
Performance: 4
Expandability: 5
Cost-Effectiveness: 9
2.STM32 Development Board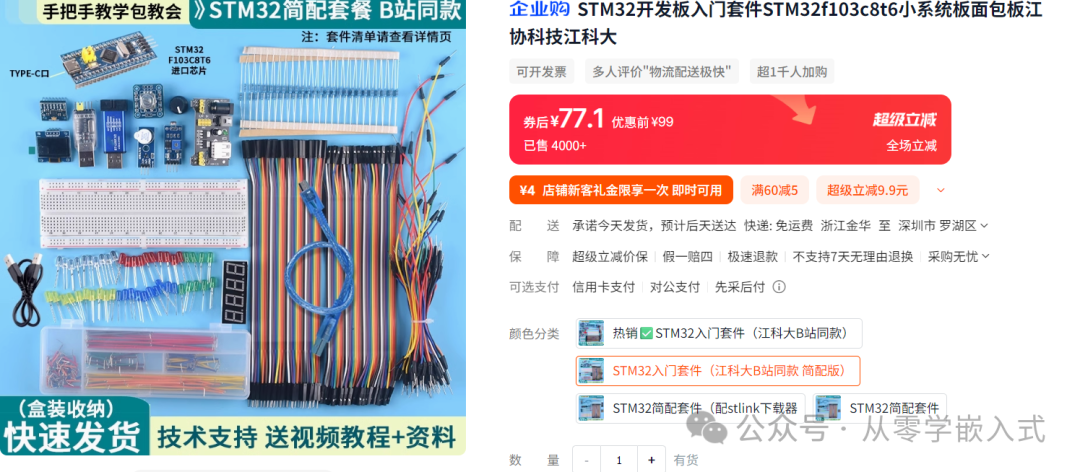
Typical Model: STM32F103C8T6 (popular in the “Blue Bridge Cup” competition, development board kit costs around 80 yuan)
Core Advantages:
- Powerful Performance: 32-bit ARM Cortex-M3 core, 72MHz frequency, computation speed is over 10 times that of the 51, capable of simultaneously processing sensor data, driving screens, and communication, suitable for complex projects like smart cars and environmental monitoring terminals.
- Rich Peripherals: Comes with USB, SPI, I2C, ADC (Analog to Digital Converter) interfaces, allowing direct connection of sensors without additional wiring, eliminating the most troublesome “wiring debugging” phase for beginners.
- Mature Ecosystem: ST provides free development tools (STM32CubeIDE), and community tutorials cover everything from basics to advanced topics (like FreeRTOS real-time systems, DMA direct memory access), enabling users to meet industrial-level development needs after learning.
Shortcomings:
- Steep Learning Curve: A large number of registers (just configuring GPIO requires manipulating 4 registers), beginners may not understand “what this line of code configures” at first; it is recommended to learn the standard library before the HAL library.
- Higher Cost: The development board plus ST-Link debugger costs about 150 yuan, which is more expensive than the 51 but cheaper than other platforms with similar performance.
Suitable Audience:
Those with a basic understanding of C (able to write simple functions) who want to delve deeper into embedded systems (such as pursuing careers in IoT or industrial control), or students needing to participate in electronic competitions.
Overall Rating:
Beginner Friendliness: 6
Performance: 8
Expandability: 9
Cost-Effectiveness: 7
3.Arduino Development Board: The Top Choice for “Take and Use” Players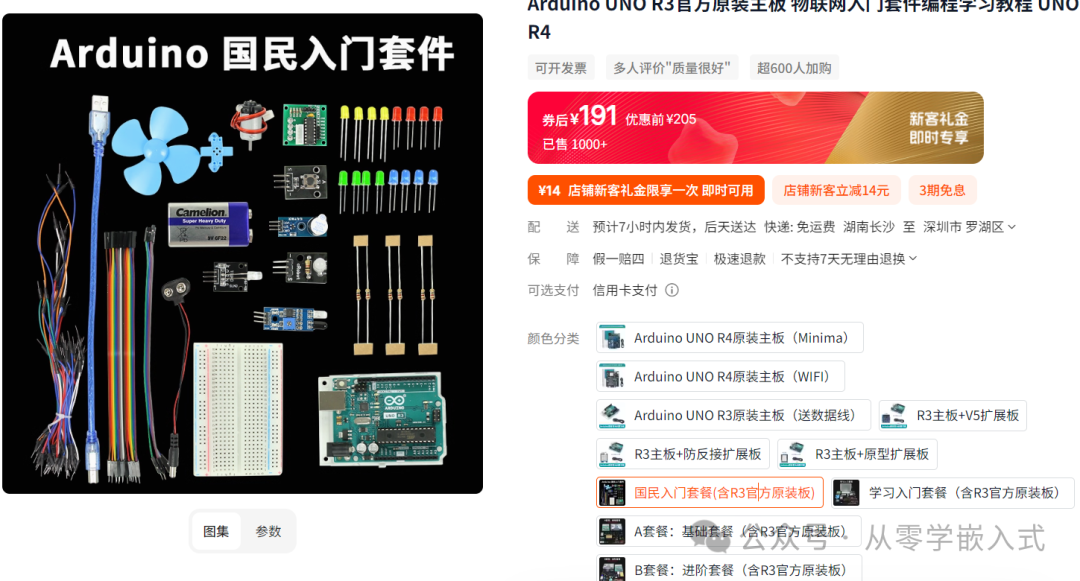
Typical Model: Arduino Uno (classic version, development board kit costs about 200 yuan)
Core Advantages:
- Ready to Use: No need to understand registers; programming is done using C-like “wrapper functions” (for example, digitalWrite(LED_PIN, HIGH) directly lights up the LED), allowing the first project to be completed in 30 minutes.
- Unmatched Module Ecosystem: The accompanying sensors and actuators (servos, displays, WiFi modules) are all “plug and play”; the official website provides ready-made library files, allowing direct reading of temperature and humidity by calling #include
without writing drivers.
- Cross-Platform Compatibility: Can connect with software like Python and Processing, suitable for creative projects (like smart home control panels and artistic installations).
Shortcomings:
- Vague Underlying Principles: Excessive encapsulation leads beginners to only know how to call functions without understanding “why this line of code can control hardware,” which is not conducive to a deeper understanding of embedded systems.
- Performance Limitations: 8-bit or 16-bit cores struggle with complex algorithms and large data volumes, making them unsuitable for scenarios requiring high real-time performance and computation speed.
Suitable Audience:
Creative developers and hobbyists who want to quickly implement project ideas (without getting bogged down by underlying principles), or for use in primary and secondary school technology education.
Overall Rating:
Beginner Friendliness: 9
Performance: 5
Expandability: 9
Cost-Effectiveness: 8
4.Raspberry Pi Development Board: The All-Rounder “Microcomputer”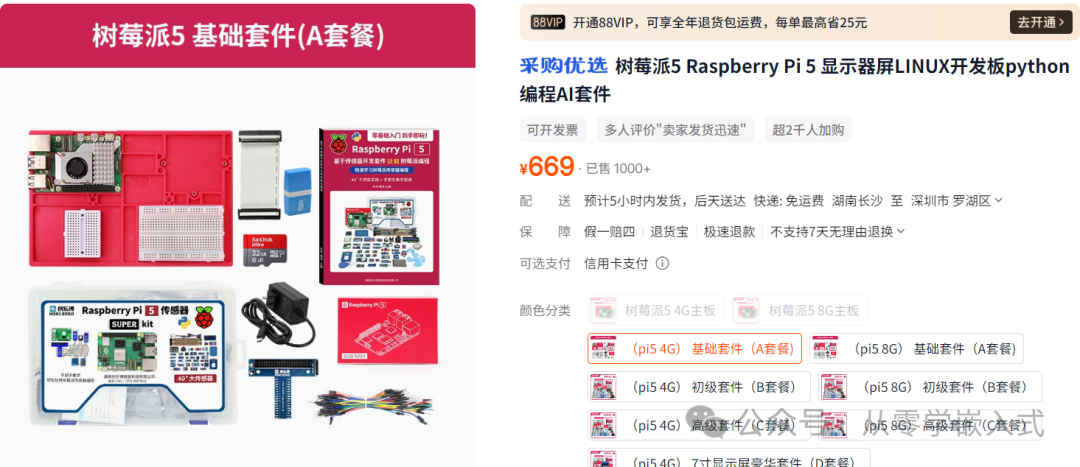
Typical Model: Raspberry Pi 4B (4GB RAM version priced around 350 yuan, kit around 600 yuan)
Core Advantages:
- Powerful Performance: For example, the Raspberry Pi 4B is equipped with a 1.5GHz quad-core ARM Cortex-A72 processor, with options for 2GB/4GB/8GB LPDDR4 RAM, capable of running a complete desktop operating system (like Raspbian), functioning as a small computer, easily handling complex calculations and graphical interface programs, such as running lightweight servers or building home media centers.
- Rich Interfaces: Integrates common interfaces like USB, HDMI, Ethernet, WiFi, and Bluetooth, and supports 4K video output, making it very convenient to connect external devices (like monitors, keyboards, mice, printers), almost meeting all connection needs across various scenarios.
- Rich Software Ecosystem: Based on the Linux system, it has a vast array of open-source software and tools, from office software to development environments, databases to graphic processing software, facilitating rapid development of complex applications.
Shortcomings:
- Higher Power Consumption: Compared to microcontroller development boards focused on low power consumption, the Raspberry Pi has higher power consumption during operation, requiring consideration of heat dissipation and electricity costs for long-term use, making it less suitable for battery-powered long-term projects.
- Relatively Higher Development Difficulty: Involves knowledge of operating systems, Linux commands, and system configurations, making the entry barrier higher than simple microcontroller development for complete beginners, who may find the complex system environment setup confusing.
Suitable Audience:
Developers with some Linux background who want to develop comprehensive projects (like IoT gateways, edge computing devices, multimedia terminals), or makers looking to create multifunctional smart devices.
Overall Rating:
Beginner Friendliness: 5
Performance: 9
Expandability: 9
Cost-Effectiveness: 6
5.How to Test a BoardGenerally, boards do not have issues, but to avoid potential problems, here are some methods for testing boards:
(1) Pin Testing
Tools Required: Digital Multimeter, Dupont Wires.
Testing Steps:
1. GPIO Pins:
Connect a GPIO pin from the development board (like P1.0 from the 51 microcontroller, PA0 from STM32, etc.) to the multimeter probe, set the multimeter to voltage mode. Write a simple program to output a high level (3.3V or 5V, depending on the board), measure the voltage with the multimeter; if the reading is close to the theoretical value, the pin output is normal; then modify the program to output a low level (0V), and if the multimeter reads 0, it is normal.
2. Serial Port Pins:
Connect the TX (transmit) pin of the development board to the RX (receive) pin of another normal development board, cross-connect RX and TX, write a serial communication program where one board sends data (like “Hello World”) and the other receives and prints it; if it can be received correctly, the serial port pins are functioning normally. If only one board is available, a USB to serial module can be used to connect to a computer, utilizing serial debugging assistant software for send/receive testing.
3. Other Peripheral Pins:
For SPI, I2C interface pins, connect corresponding sensor modules (like an SD card module for SPI, an OLED screen for I2C), run programs to read or control the modules; if data can be obtained or modules can be driven normally, the pins and related circuits are functioning correctly.
(2) Power Supply Testing
1. Check the Power Input Interface:
Carefully inspect the power input interface of the development board for any damage, deformation, or signs of short circuit, ensure the solder joints are secure, and check for any cold solder joints. For boards powered by Micro USB or Type-C interfaces, check for foreign objects inside the interface and whether the metal contacts are oxidized.
2. Power-On Testing:
Use a suitable power adapter to power the development board (note that the voltage and current must meet the board’s requirements, such as 5V for the 51 microcontroller, 5V/3A for the Raspberry Pi 4B), observe whether the power indicator on the board lights up normally. If the indicator does not light up, immediately disconnect the power and check whether the power adapter or connection cable is damaged, or if there is a short circuit in the board’s power circuit. A multimeter can be used to measure the voltage at the power output terminal to confirm the adapter’s output is normal.
3. Measure Operating Current:
Connect the multimeter in series in the power circuit (set the multimeter to current mode) to measure the current when the development board is operating normally. Compare the measured current with the parameters given in the board’s official documentation; if the actual measured current is too high, there may be a hardware short circuit or a module consuming excessive power; if the current is too low, the board may not be functioning correctly, requiring further investigation into issues like the program not running correctly or a chip not starting up properly.
Through the above multi-dimensional comparison of development boards and testing methods, beginners can accurately select the development board that suits them and ensure its hardware quality, laying a solid foundation for subsequent embedded development learning and project practice, minimizing detours and unnecessary expenses.
Next Issue: “The Complete Process of Programming for the First Time! A Step-by-Step Guide for Beginners (Part 1)”“