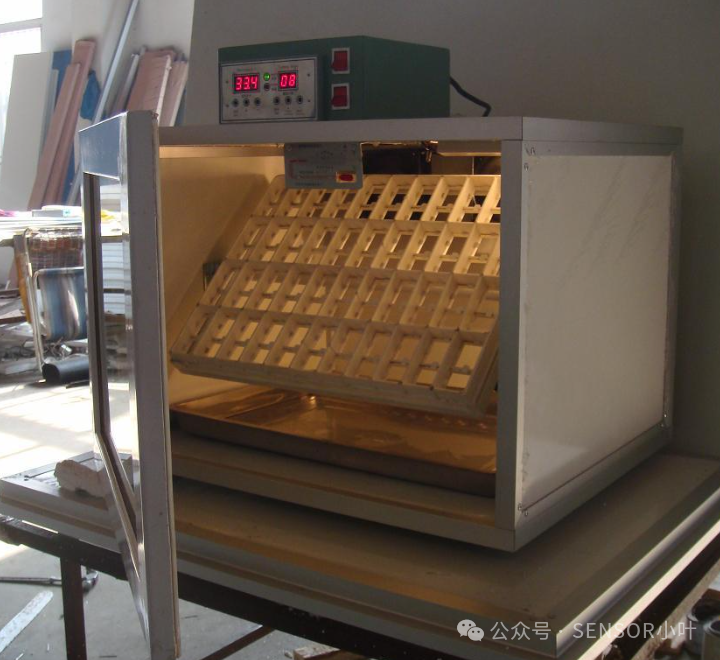
Selecting the appropriate temperature and humidity sensor for an incubator is a crucial step for successful hatching, directly affecting embryo development and hatchability. A good sensor should possess high precision, high stability, and good durability.
Below, I will provide a comprehensive selection guide covering core parameters, the pros and cons of different types of sensors, recommended brands, and installation considerations.
1. Core Selection Criteria
-
Precision
-
Temperature: The error should ideally be within ±0.1°C to ±0.3°C. Embryos are extremely sensitive to temperature, and a continuous deviation of 0.5°C can significantly reduce hatch rates or cause deformities.
-
Humidity: The error should ideally be within ±2% RH to ±3% RH. Excessively high or low humidity can affect moisture evaporation within the egg, leading to chicks that are either too large or too small, making it difficult to hatch.
Stability/Drift
-
The sensor should not exhibit significant reading “drift” over time. Some cheap sensors become inaccurate after a few months of use, which is very dangerous. Choose reputable brands for higher product stability.
Response Time
-
The sensor should respond quickly to changes in temperature and humidity. When the incubator door is opened and closed, the sensor should quickly reflect the true internal temperature and humidity changes, allowing the control system to adjust in a timely manner.
Durability and Interference Resistance
-
Condensation Resistance: The humidity inside the incubator is extremely high, and the sensor probe must be able to withstand the effects of condensation; otherwise, it may be damaged or provide inaccurate readings.
-
Corrosion Resistance: It is best to choose sensors with a corrosion-resistant coating to cope with long-term high temperature and humidity environments.
Calibration Function
-
This is the most important point! There is no absolutely perfect sensor in the world. An excellent incubator or a responsible user must be able to calibrate the sensor. Choose sensors that support manual calibration, or at least ensure that your incubator control system allows you to input a “compensation value” to correct the readings.
2. Common Sensor Types and Their Pros and Cons
| Sensor Type | Advantages | Disadvantages | Applicable Scenarios |
|---|---|---|---|
| DHT11/DHT22 | Low cost, good compatibility with development boards like Arduino. | Low precision, poor stability, slow response. DHT11 temperature accuracy ±2°C, humidity ±5%, basically unsuitable for professional incubation. | Amateur electronics enthusiasts’ non-critical temperature and humidity monitoring projects, not recommended for serious incubation. |
| SHT Series | High precision, high stability, small size. | Much more expensive than the DHT series. | Highly recommended! It is the first choice for most mid-to-high-end commercial and DIY incubators, perfectly balancing performance and reliability. |
| BME/BMP Series | In addition to temperature and humidity, it usually integrates a barometric pressure sensor, offering comprehensive functionality. | Temperature and humidity accuracy is usually slightly inferior to the same-priced SHT series, but still very good. | Very suitable for incubation projects that require pressure monitoring (such as at high altitudes), also a great choice. |
| Analog Sensors | Cheap, simple circuitry. | Low precision, easily affected by electromagnetic interference, requires separate calibration circuitry, poor stability. | Some very old or low-end incubators, not recommended. |
| Thermocouples/Thermistors | Usually only measure temperature, but have a wide temperature measurement range and are very stable. | Do not directly measure humidity, need to be used with other humidity sensors. | Used for precise temperature measurement in industrial-grade incubation equipment. |
3. Brand and Product Recommendations
1. For DIY Incubators (you need to connect the circuitry and program yourself)
-
First Choice: Sensirion SHT31 / SHT35
-
This is currently the “gold standard” in the DIY community. You can buy SHT30/SHT31/SHT35 modules on platforms like Taobao or Dajie Electronics, usually with I2C interfaces for easy connection to Arduino, ESP32, and other controllers.
-
Note: The quality of modules on the market varies greatly, so try to choose reputable sellers.
-
Second Choice: Bosch BME280
-
Also a very excellent sensor, with sufficient accuracy for incubation, and includes pressure data. If the price is right, it is also a very good choice.
2. For Replacing or Upgrading Existing Incubators
-
Identify the Original Model: First, try to find your incubator’s manual or contact customer service to see if you can purchase the original sensor.
-
Look for Compatible Modules: If you cannot find the original, look for SHT3x modules that are compatible in pin and interface definitions. However, pay attention to voltage and interface matching.
-
Select Third-Party Upgrade Parts: Some specialized incubator accessory vendors offer high-precision replacement sensors.
4. Installation and Usage Considerations
-
Installation Location:
-
The sensor should be placed in a position that can represent the air environment at the egg surface height, not too close to the heater, humidifier, or fan outlet, and not directly against the eggshell or box wall.
-
It is best to install it in a location with good airflow circulation, where it can sense the average temperature and humidity inside the incubator.
Regular Calibration:
-
It is strongly recommended to calibrate before each batch of incubation or at least every six months.
-
Temperature Calibration: Use a certified high-precision mercury thermometer or alcohol thermometer as a reference. Place the sensor and the reference thermometer in a stable environment (such as an incubator) simultaneously, compare the readings, and calculate the deviation.
-
Humidity Calibration: Use the saturated salt solution method. Saturated solutions of specific salts can generate a constant, known humidity in a closed space (such as a 75% sodium chloride solution). This is the most reliable home calibration method.
Protection:
-
Ensure that the sensing part of the sensor is not directly covered by dust, fluff, or water droplets, as this will affect the readings.
Recommended Reading
How to Determine the Quality of Humidity Sensors
ZX Galaxy Chip GXHTC3 vs. Sensirion SHTC3
Four Steps to Ensure Your Temperature and Humidity Sensor is Accurate!
Digital Temperature and Humidity Sensor SHT3x (RH/T)