Next, I will present embedded practical projects in the form of sensors + projects. Today, we will learn about the first article in the embedded sensor series – a comprehensive guide to using the GY-906 non-contact infrared temperature sensor.
In the world of embedded development, sensors act like “eyes” and “ears” that allow devices to perceive the external environment. Today, I will introduce the GY-906 non-contact infrared temperature sensor, which, due to its convenience and high accuracy in non-contact temperature measurement, has a wide range of applications in smart homes, industrial control, medical assistance, and more. Let’s take a comprehensive look at how to use this sensor.
1. Introduction to the GY-906 Module
1.1 Module Definition
The GY-906 is a non-contact infrared temperature sensor module based on the MLX90614 chip. It can measure the temperature of an object by detecting the infrared radiation emitted by the object, without direct contact with the object being measured. This module integrates an infrared sensing unit, signal processing circuit, etc., and can convert the detected temperature signal into a digital signal output, facilitating connection and data exchange with various microcontrollers.
1.2 Application Scenarios
•Smart Home: Can be used in smart air conditioners, smart thermostats, etc., to monitor indoor temperature in real-time, achieving automatic temperature adjustment and providing users with a comfortable living environment.
•Industrial Control: In industrial production processes, it can monitor the temperature of equipment in real-time, promptly detect overheating situations, prevent equipment failures, and ensure safe and stable production operations.
•Medical Assistance: Capable of performing preliminary measurements of human surface temperature, providing reference for medical diagnosis, such as in fever clinics in hospitals and morning checks in schools.
•Consumer Electronics: Can be integrated into thermometers, kitchen appliances, and other consumer electronic products to meet users’ temperature measurement needs.
2. GY-906 Module Selection and Parameters
2.1 Selection Points
Accuracy Requirements: Choose based on the accuracy requirements for temperature measurement in the actual application scenario. Different manufacturers’ GY-906 modules may have certain differences in accuracy; generally, modules with higher accuracy will be relatively more expensive.
Measurement Range: This module has different measurement ranges available for selection, and it is necessary to choose the appropriate module based on the actual temperature range to be measured.
Interface Type: The GY-906 module typically supports I2C interface communication. When purchasing, confirm that the module’s interface matches the microcontroller you are using to ensure proper connection and communication.
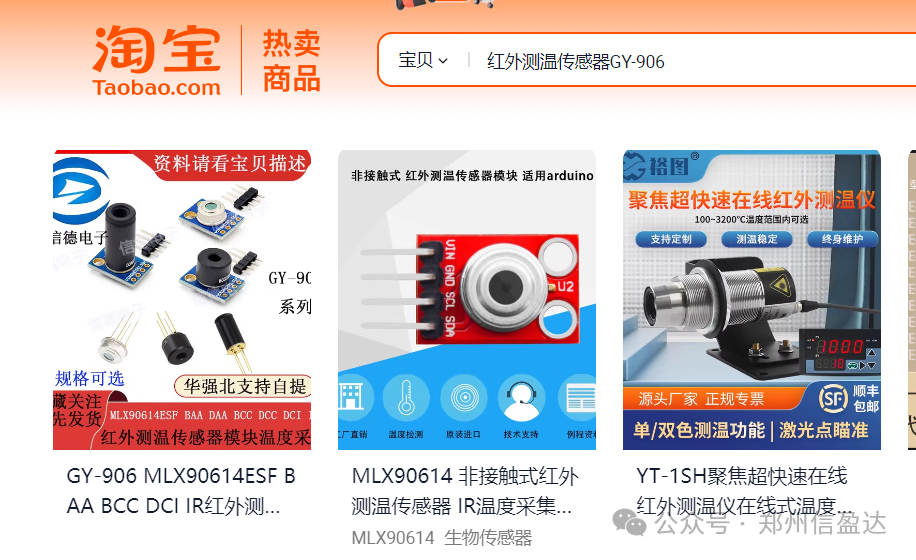
Currently, there are many channels for purchasing sensors. For most university students or DIY enthusiasts, Taobao is a commonly used platform for filtering and purchasing. By searching for “GY-906 Infrared Temperature Sensor” on Taobao, relevant suggestions will automatically pop up, and you can click to search directly.
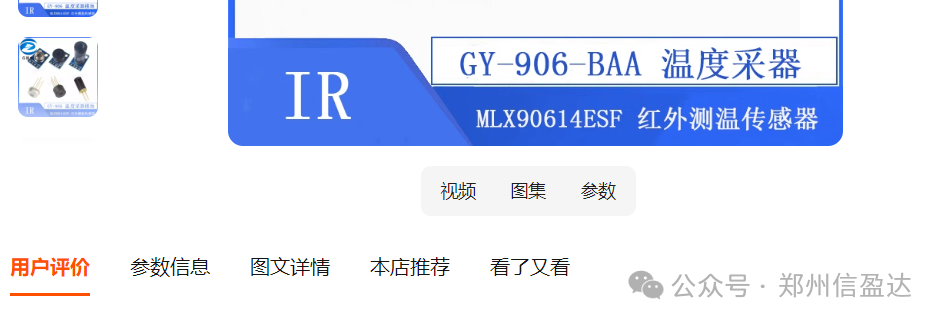
After entering the store, check the “parameter information” in the product details to confirm whether the sensor parameters meet the project requirements (such as detection range, output method, etc.). After placing an order, you can request relevant materials from the seller, which generally include basic driver code and module documentation.
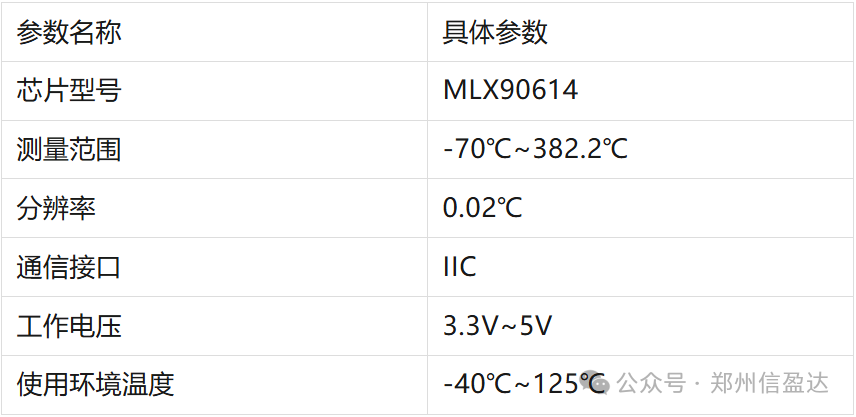
2.2 Core Parameters
3. GY-906 Hardware Connection and Communication Protocol
3.1 Pin Description and Connection
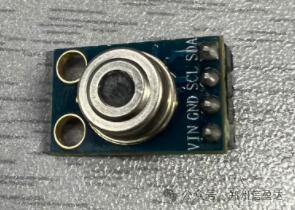
The GY-906 module typically has 4 pins: VCC, GND, SDA, SCL.
VCC: Connects to the 3.3V power output of the microcontroller to provide the working voltage for the module.
GND: Connects to the ground of the microcontroller to ensure that the potential reference of the module is consistent with that of the microcontroller.
SDA: Connects to the data pin of the microcontroller for data transmission between the module and the microcontroller.
SCL: Connects to the clock pin of the microcontroller to synchronize the communication rhythm between the module and the microcontroller.
3.2 Communication Protocol
This GY-906 module will use the SMBus communication protocol for data exchange with the microcontroller. The SMBus communication protocol is a two-wire serial communication protocol based on I2C, inheriting the simplicity and reliability of data transmission of the I2C interface while adding stricter specifications such as timeout mechanisms.
•Address Setting: The module can modify its address through hardware or software to adapt to scenarios where multiple modules operate simultaneously. This is consistent with the SMBus support for multi-master and multi-slave communication topologies, allowing different devices to be identified through addresses.
•Data Transmission Format: The module sends temperature data to the microcontroller via SMBus, with the data format typically being a 16-bit binary number, which includes the integer and decimal parts of the temperature. This conforms to the definition of the data part in the fixed frame structure of SMBus, and the microcontroller needs to parse and convert the received data according to the SMBus communication specifications to obtain the actual temperature value.
4. Steps to Implement STM32 Driver
4.1 Confirming Pin Connections
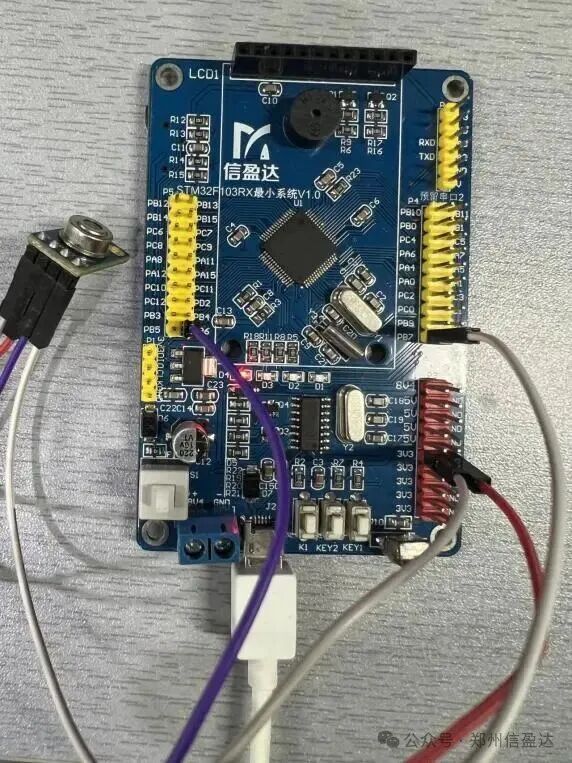
Before developing the STM32 driver, first confirm that the GY-906 module is correctly connected to the STM32 microcontroller. According to the module’s pin definitions, connect the module’s VCC to the STM32’s 3.3V power pin, GND to the STM32’s ground pin, SDA to the STM32’s data pin PB7, and SCL to the STM32’s clock pin PB6. After completing the connections, carefully check that they are secure to avoid poor contact issues.
4.2 Initialization Function
void SMBus_Init(){ GPIO_InitTypeDef GPIO_InitStructure; /* Enable SMBUS_PORT clocks */ RCC_APB2PeriphClockCmd(RCC_APB2Periph_SMBUS_PORT, ENABLE); /* Configure SMBUS_SCK, SMBUS_SDA as open-drain output */ GPIO_InitStructure.GPIO_Pin = SMBUS_SCK | SMBUS_SDA; GPIO_InitStructure.GPIO_Mode = GPIO_Mode_Out_OD; GPIO_InitStructure.GPIO_Speed = GPIO_Speed_50MHz;GPIO_Init(SMBUS_PORT, &GPIO_InitStructure); SMBUS_SCK_H(); SMBUS_SDA_H();}5. Algorithm or Instruction Content
Temperature data reading algorithm, send read command: Send a command to the GY-906 module via SMBus to read temperature data, specifying the type of temperature to be read.
Receive Data: After receiving the read command, the module will send the temperature data to the STM32 microcontroller via SMBus, and the STM32 must receive the data according to the SMBus communication mechanism.
Data Parsing: The received data is a 16-bit binary number, which needs to be parsed according to the instructions in the module’s data manual. For example, extract the high 8 bits and low 8 bits from the 16-bit data, and then convert it using a specific formula to obtain the actual temperature value. The conversion formula is usually: Temperature value (°C) = (Received 16-bit data × 0.02) – 273.15.
u16 SMBus_ReadMemory(u8 slaveAddress, u8 command){ u16 data; // Data storage u8 Pec; u8 DataL=0; // Low data byte storage u8 DataH=0; // High data byte storage u8 arr[6]; // Buffer for sending bytes u8 PecReg; // Calculated PEC byte storage u8 ErrorCounter; // Define the number of attempts to communicate with MLX90614ErrorCounter=0x00; // Initialize error counter slaveAddress <<= 1; // Bits 2-7 represent the slave address do {repeat: SMBus_StopBit(); // Stop communication if the slave sends NACK --ErrorCounter; if(!ErrorCounter) { break; } SMBus_StartBit(); // Start condition if(SMBus_SendByte(slaveAddress))// Send slave address, LSB Wr=0 indicates the next command to write { goto repeat; // Repeat communication } if(SMBus_SendByte(command)) // Send command { goto repeat; // Repeat communication } SMBus_StartBit(); // Repeat start condition if(SMBus_SendByte(slaveAddress+1)) // Send slave address, LSB Rd=1 indicates the next read data { goto repeat; // Repeat communication } DataL = SMBus_ReceiveByte(ACK); // Read low data, master device must send acknowledgment DataH = SMBus_ReceiveByte(ACK); // Read high data, master device must send acknowledgment Pec = SMBus_ReceiveByte(NACK); // Read PEC byte, master device must send acknowledgment SMBus_StopBit(); // Stop condition arr[5] = slaveAddress; arr[4] = command; arr[3] = slaveAddress+1; arr[2] = DataL; arr[1] = DataH; arr[0] = 0; PecReg=PEC_Calculation(arr);// Calculate CRC}while(PecReg != Pec);// If the received CRC matches the calculated CRC, exit the do-while loop data = (DataH<<8) | DataL; return data;}float SMBus_ReadTemp(void){ float temp; temp = SMBus_ReadMemory(SA, RAM_ACCESS|RAM_TOBJ1)*0.02-273.15; return temp;}Main Function
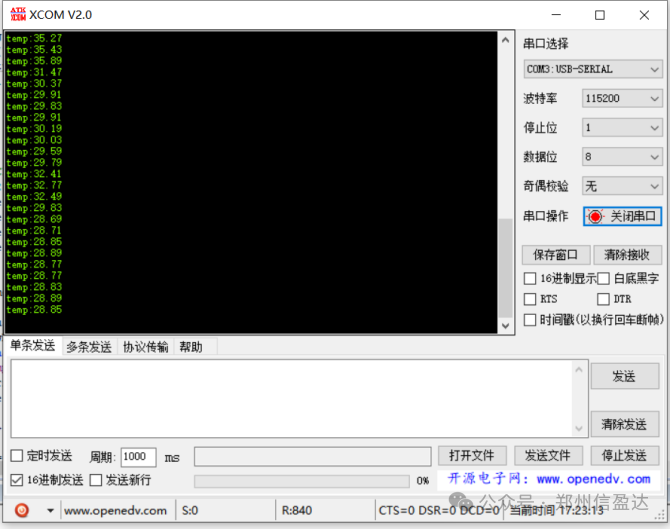
#include "main.h"#include "init.h"#include "mlx90614.h" float temp = 0; int main(){ JTAG_SWD_Config();// Disable JTAG function, enable SWD function SysTick_Config(72000);// Timer initialization NVIC_SetPriorityGrouping(5);// Interrupt priority grouping USART1_Config(115200);// Serial port initialization SMBus_Init(); while(1) { if(device_time > 200) { temp = SMBus_ReadTemp(); printf("temp:%.2f\r\n",temp); device_time = 0; } }}The following is the data collected by the GY-906 module, displaying the detected temperature data on the serial assistant.
6. Conclusion
The GY-906 non-contact infrared temperature sensor plays an important role in various fields due to its unique advantages in non-contact temperature measurement. Through this article, I believe everyone has gained a comprehensive understanding of the basic knowledge of this module, selection points, hardware connections, communication protocols, STM32 driver implementation, and related algorithms and instructions.
In practical use, it is essential to select the appropriate module based on specific application scenarios and strictly follow connection specifications for hardware connections, correctly write driver programs and data processing algorithms to ensure that the sensor can operate accurately and stably. I hope this article can provide strong assistance when using the GY-906 module, making your journey in embedded development smoother. If you have any questions or experiences to share during use, feel free to leave comments for discussion!