Produced by 21ic Forum Yilu Xiangbei lm
Website: bbs.21ic.com
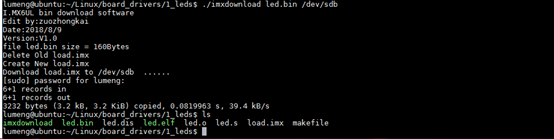
1. Flashing with imxdownload (for NXP 6ULL development board)Copy imxdownload to the root directory of the project. We need to copy imxdownload to the root directory of the project, which is the same folder as led.bin; otherwise, the flashing will fail. After copying, as shown in the figure.  Grant executable permissions to imxdownload. After copying the software imxdownload from Windows to Ubuntu, it does not have executable permissions by default.We need to grant imxdownload executable permissions using the command “chmod”, as follows:
 After granting executable permissions to imxdownload, its name turns green; if it does not have executable permissions, its name color is white.Flash the bin file to the SD card using imxdownload. The command format is as follows: /imxdownload <.binfile> <SD Card> where .bin is the bin file to be flashed, and SD Card is the SD card you want to flash. For example, my computer uses the following command to flash led.bin to /dev/sd: ./imxdownload led.bin /dev/sdb. During the flashing process, you may be prompted to enter your password; just enter your Ubuntu password to complete the flashing. The flashing process is shown in the figure:
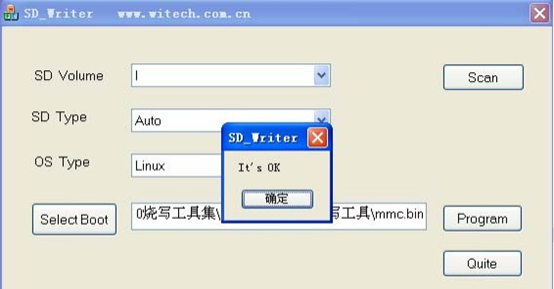
  2. Flashing with USB + DNW + Uboot (for Samsung 6410, 2440 series) _Writer.exe will flash mmc.bin to the SD card, and set the development board to boot from the SD card. (For specific methods, refer to the Feiling development board Linux 3.0.1 user manual.pdf)
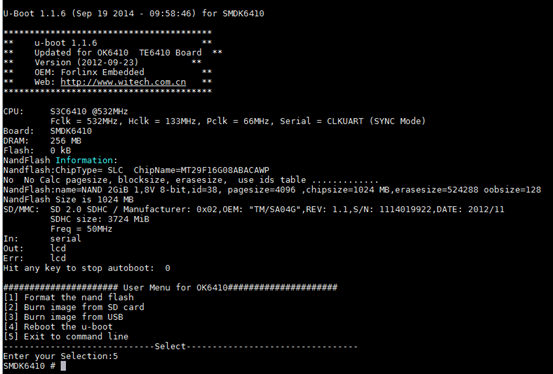
 Install the SD card into the development board and start it. Quickly press the space bar to stop at the uboot startup screen, as shown in the figure below. When the menu box appears, select 5 to enter the command.
 3. Install DNW and USB drivers (XP environment)4. Execute the following commands to flash. The flashing principle is to use the Linux uboot command to write the program to the development board.. Input: dnw 50008000 to download the program you want to flash.. Then from dnw’s usbport->Transmit->Transmit send the .bin file you want to download.. Input: nand erase 0 100000 to erase the first 1M space of nandflash.. Input: nand write.uboot 50008000 0 1000000 to write the 1M data from memory address 50008000 to nandflash’s 0 ~ 100000 space (i.e., the first 1M bytes).. Set the development board to nand boot and restart the development board.5. Use network verification of bare-metal programs in uboot (universal board, as long as your uboot has the network function ported)Before learning embedded Linux, it is still necessary to understand the bare-metal programs of embedded processors.However, some tutorials provide relatively complex methods for flashing bare-metal programs, some require using SD cards for flashing, formatting the SD card before flashing, and adding header information to the bare-metal program (6ULL, 6410/2440 do not require this), using dedicated download host software for flashing.In fact, bare-metal programs serve only as a guide in our learning of embedded systems, to understand how these processors work. Therefore, after writing the bare-metal program, it is not necessary to actually flash it into the system; just let it run and observe the experimental phenomena.Uboot generally provides various file transfer methods, such as tftp, nfs, xmodem, ymodem, etc. Choose a method supported by the uboot on the board. If unsure, you can use the pri command to check and select the corresponding command to view help information, such as tftp help, etc. (different uboot commands may vary).Download the compiled bare-metal bin file to the corresponding address, noting that this address needs to be the same as the address specified when linking the bare-metal program (described in the .lds file or specified during the linking process), such as specifying to 0x87800000.Then download to address 0x87800000, and after completion, let uboot directly jump to this address to run the bare-metal program:go 0x87800000. It should be noted that in cases of board reset or power cycling, the default program will run instead of the bare-metal program, so this method is not flashing but merely copying to memory for execution, omitting many necessary steps for flashing the bare-metal program.NFS service mode:Use nfs to verify bare-metal, uboot, and kernel on 6ULL. The virtual machine needs to have nfs service installed and enabled. For specific operations, refer to the second section of the development environment setup. The development board runs in the uboot interface, modifying its IP, service IP, gateway, etc., ensuring it can ping the server (virtual machine) IP normally.
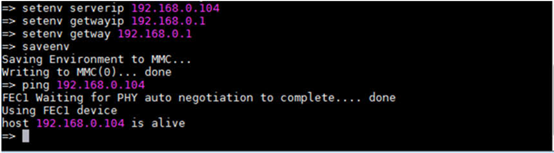 Once prepared, you can use the nfs command to download the bare-metal program to the development board DDR at address 0x87800000, with the command as follows:nfs 87800000 192.168.0.104:/home/lumeng/linux/nfs/uart.bin
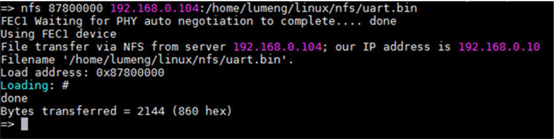 Use the go command to jump to 0x87800000 to execute the serial port print result:
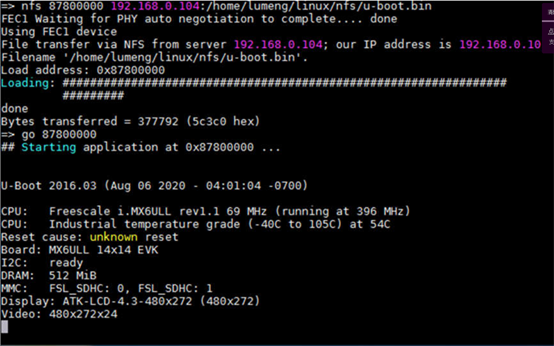
 Not only can you test the bare-metal program, but you can also load uboot and the kernel to test uboot and the kernel! Use nfs to transfer uboot and execute as follows:
 Use nfs to transfer the kernel + device tree and start the kernel as follows, using the nfs command to download the kernel and device tree to DDR.nfs 80800000 192.168.0.104:/home/lumeng/linux/nfs/zImage nfs 83000000 192.168.0.104:/home/lumeng/linux/nfs/6ull.dtb
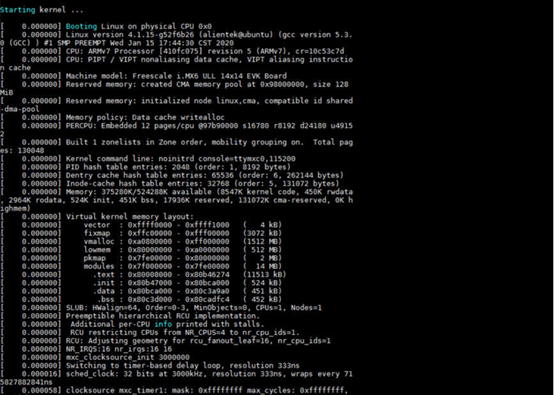
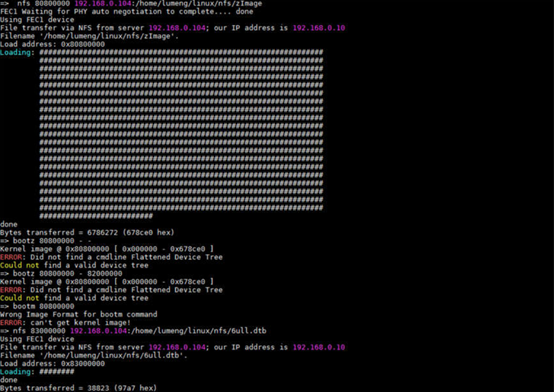 Use the bootz command to start the kernel bootz 80800000 – 83000000
 3.2 TFTP service mode:Use tftp to verify bare-metal, uboot, and kernel on 6ULL. The virtual machine needs to have nfs service installed and enabled. For specific operations, refer to the second section of the development environment setup. The development board runs in the uboot interface, modifying its IP, service IP, gateway, etc., ensuring it can ping the server (virtual machine) IP normally.
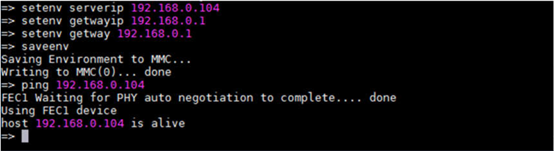 Once prepared, you can use the tftp command to download the bare-metal program uart.bin to the development board DDR at address 0x87800000, with the command as follows: tftp 87800000 uart.bin, and use go 87800000 to execute the bare-metal.
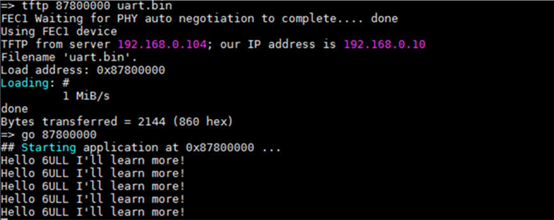 Use tftp to test uboot and the kernel as follows, similar to nfs, not elaborated here.
This article is an original work by 21ic Forum user Yilu Xiangbei lm