 Ultrasonic waves are sound waves with frequencies higher than the highest frequency audible to the human ear, typically above 20kHz. Dolphins in nature communicate using ultrasonic waves, while bats use them for navigation and obstacle avoidance. Ultrasonic waves can be used to measure distance. This experiment will learn how to use Arduino to implement ultrasonic distance measurement.1. Experiment Materials 1. Arduino development board ×1 2. LCD1602 module ×1
3. 10kΩ potentiometer ×1 x1
4. Ultrasonic module ×1
5. Breadboard ×1
6. Dupont wires (male to male) × several
7. USB data cable ×1
2. Experiment Principle2.1 Ultrasonic Distance Measurement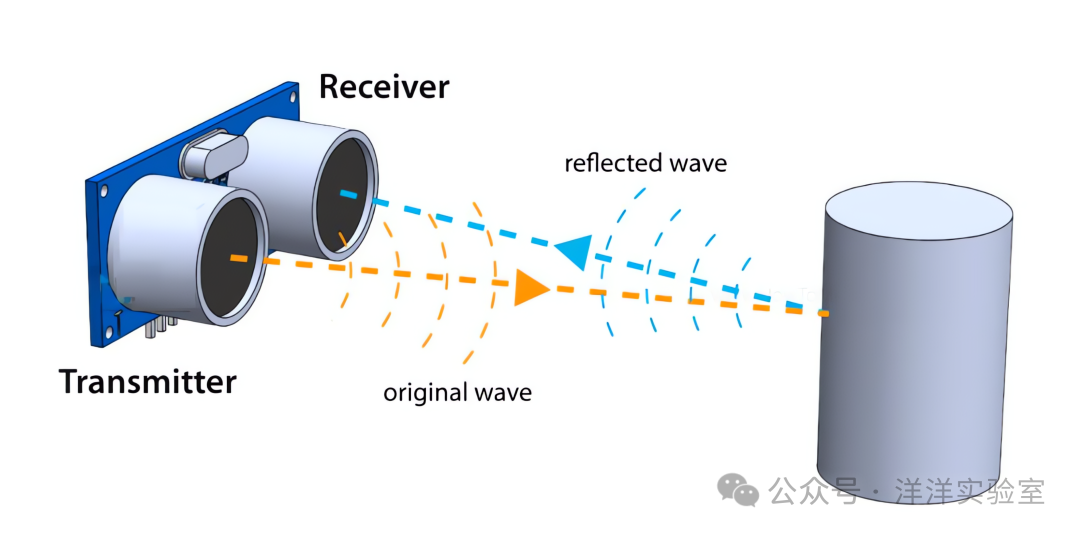
Ultrasonic waves are sound waves with frequencies higher than the highest frequency audible to the human ear, typically above 20kHz. Dolphins in nature communicate using ultrasonic waves, while bats use them for navigation and obstacle avoidance.
Ultrasonic waves can be used to measure distance, and the basic principle is: measure the time difference between the emission and reception of ultrasonic waves, and then calculate the distance.
In an environment at room temperature of 20℃, the speed of sound in air is approximately 344m/s. Assuming the round-trip time of the ultrasonic wave is 600μs, the measured distance is
344 × (600 ÷ 10³ ÷ 10³) ÷ 2 = 0.1032 m = 10.32 cm
It can be calculated that the propagation time of ultrasonic waves at a distance of 1cm is approximately 58μs.
2.2 Ultrasonic Module
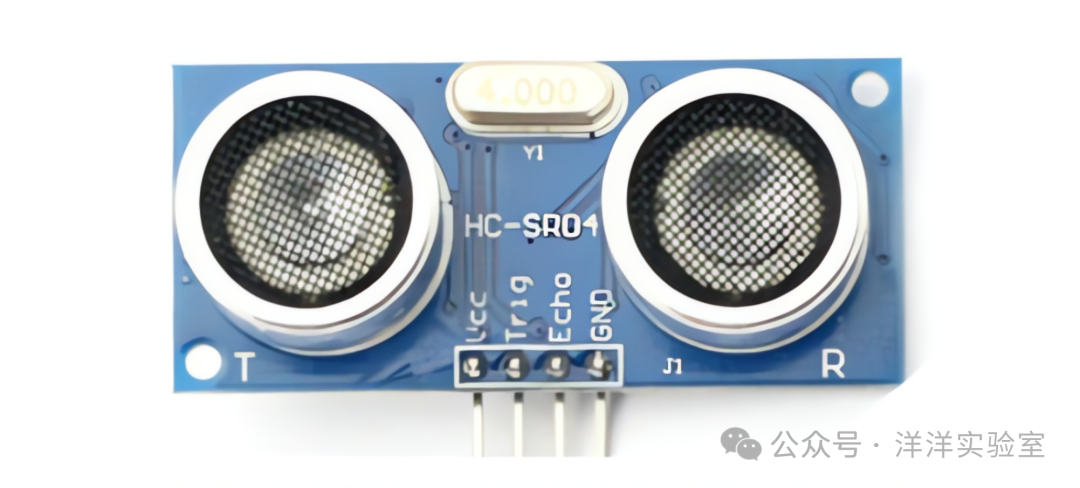
The ultrasonic sensor module contains 2 ultrasonic working components, which look like 2 eyes, responsible for emitting and receiving ultrasonic waves, respectively. Its main parameters are as follows:
-
Operating voltage and current: 5V, 15mA
-
Detection distance: 2~400cm
-
Detection angle: ≤ 15°
-
Measured object area: ≥ 50cm²
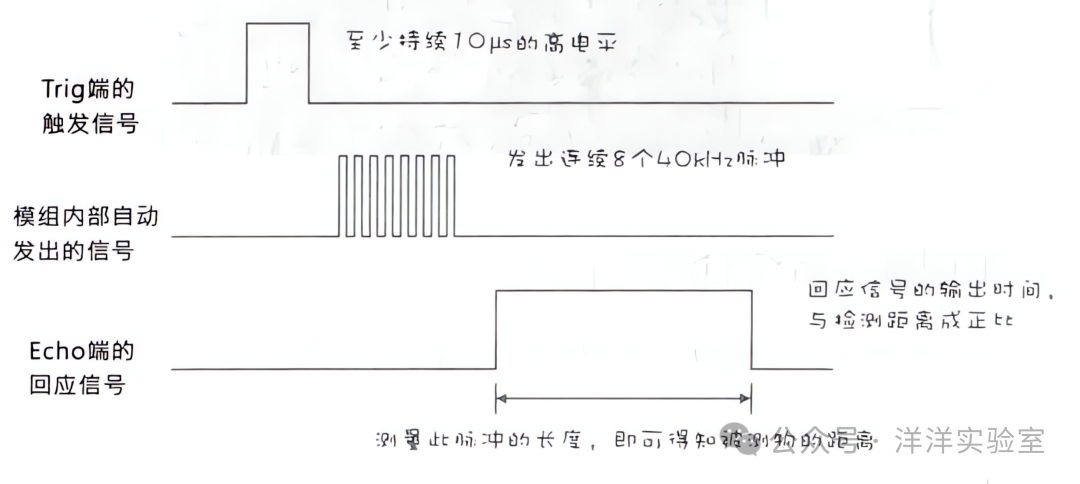
By inputting a high level of more than 10μs on the Trig pin of the ultrasonic module, ultrasonic waves can be emitted. After emitting the ultrasonic waves, the Echo pin will output a high-level pulse before receiving the returned ultrasonic waves, with the pulse width equal to the time difference between the reception and emission of the ultrasonic waves.
3. Experiment Content
Based on the “Arduino Basic Experiment 5: LCD Experiment”, connect the D4~D7 of the LCD module to the Arduino digital pins 10~7, place the ultrasonic module in a suitable position on the breadboard, and connect according to the table below:
| Ultrasonic Module | Arduino UNO |
| Vcc | 5V |
| Trig | Digital Pin 3 |
| Echo | Digital Pin 2 |
| Gnd | GND |
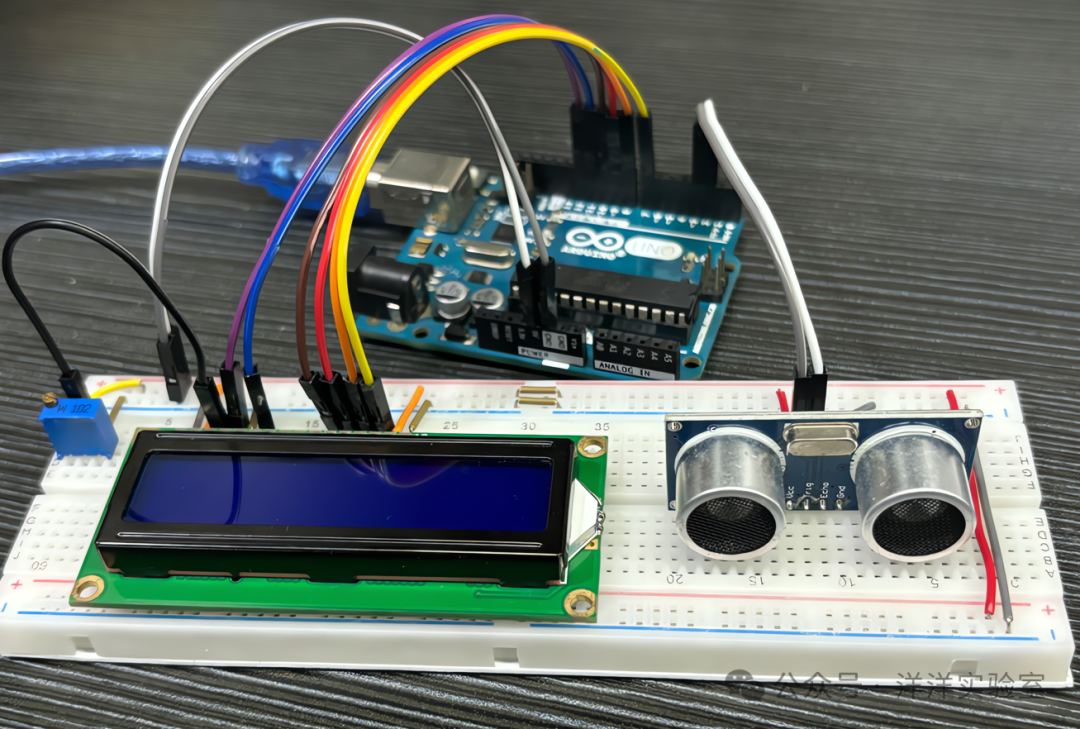 Then upload the Arduino example program, the program code is as follows:
#include <LiquidCrystal.h>const int rs = 12, en = 11, d4 = 10, d5 = 9, d6 = 8, d7 = 7;LiquidCrystal lcd(rs, en, d4, d5, d6, d7);
const int TrigPin = 3;const int EchoPin = 2;
void setup(){  pinMode(TrigPin, OUTPUT);  pinMode(EchoPin, INPUT);  lcd.begin(16, 2);}
void loop(){  digitalWrite(TrigPin, LOW); // Output low level  delayMicroseconds(2);  digitalWrite(TrigPin, HIGH); // Output high level  delayMicroseconds(10);  digitalWrite(TrigPin, LOW); // Output low level
  float distance = pulseIn(EchoPin, HIGH) / 58.0; // Distance calculation
  lcd.clear();  lcd.setCursor(0, 0);  lcd.print("Distance:");  lcd.setCursor(0, 1);  lcd.print(distance);  lcd.print("cm");
  delay(1000);}
Wave your hand in front of the ultrasonic module and observe the changes in the LCD screen values.