 Click the blue text to follow me for more AI insights~Paying tribute to the extraordinary, honoring the ordinary
MultiAgentPPT is an intelligent presentation generation system that integrates A2A (Ask-to-Answer) + MCP (Multi-agent Control Protocol) + ADK (Agent Development Kit) architecture, supporting multi-agent collaboration and streaming concurrency mechanisms.
https://github.com/johnson7788/MultiAgentPPT
MultiAgentPPT
A multi-agent system based on A2A + MCP + ADK, supporting streaming concurrent generation of high-quality (online editable) PPT content.
🧠 Project Overview
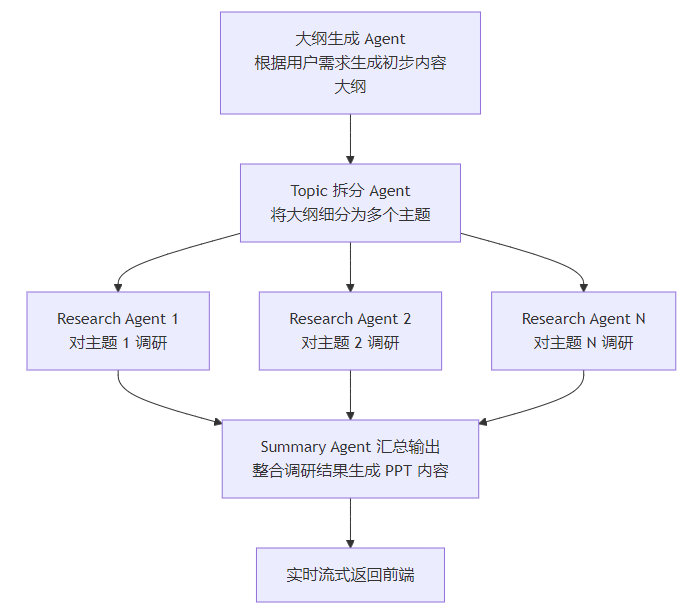
MultiAgentPPT utilizes a multi-agent architecture to automate the process from topic input to complete presentation generation, with the main steps including:
- Outline Generation Agent generates an initial content outline based on user requirements.
- Topic Splitting Agent breaks down the outline content into multiple topics.
- Research Agent Working in Parallel multiple agents conduct in-depth research on each topic.
- Summary Agent Outputs compiles the research results to generate PPT content, returning it to the frontend in real-time streaming.
Advantages
- Multi-Agent Collaboration improves the efficiency and accuracy of content generation through parallel work by multiple agents.
- Real-time Streaming Return supports streaming return of generated PPT content, enhancing user experience.
- High-Quality Content generates high-quality content outlines and presentations by combining external retrieval and agent collaboration.
- Scalability the system is designed flexibly, making it easy to expand with new agents and functional modules.
Interface Screenshots
The following are core functionality demonstrations of the MultiAgentPPT project:
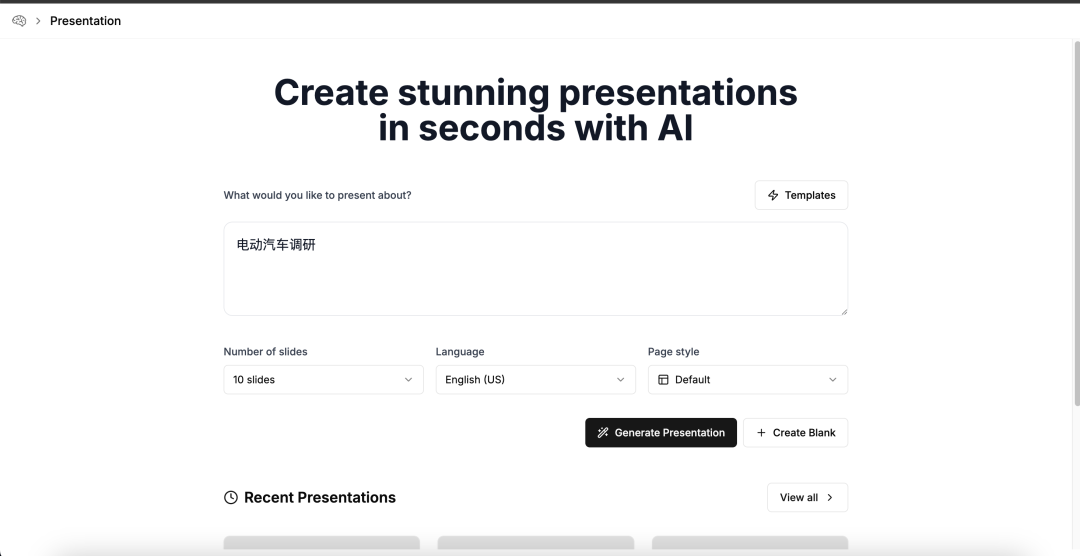
1. Topic Input Interface
The user inputs the desired PPT topic content in the interface:
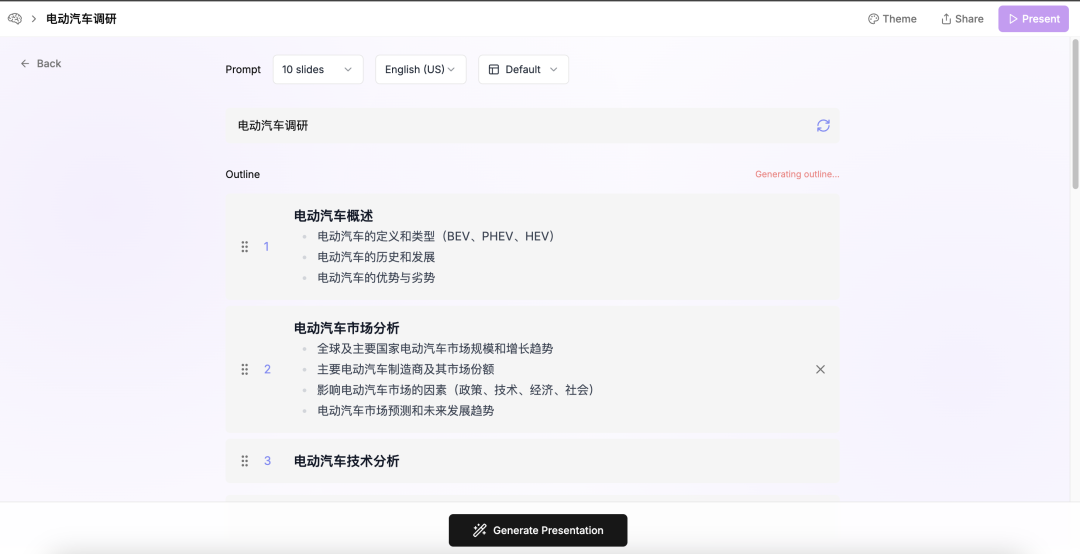
2. Streaming Outline Generation Process
The system returns the generated outline structure in real-time based on the input content:
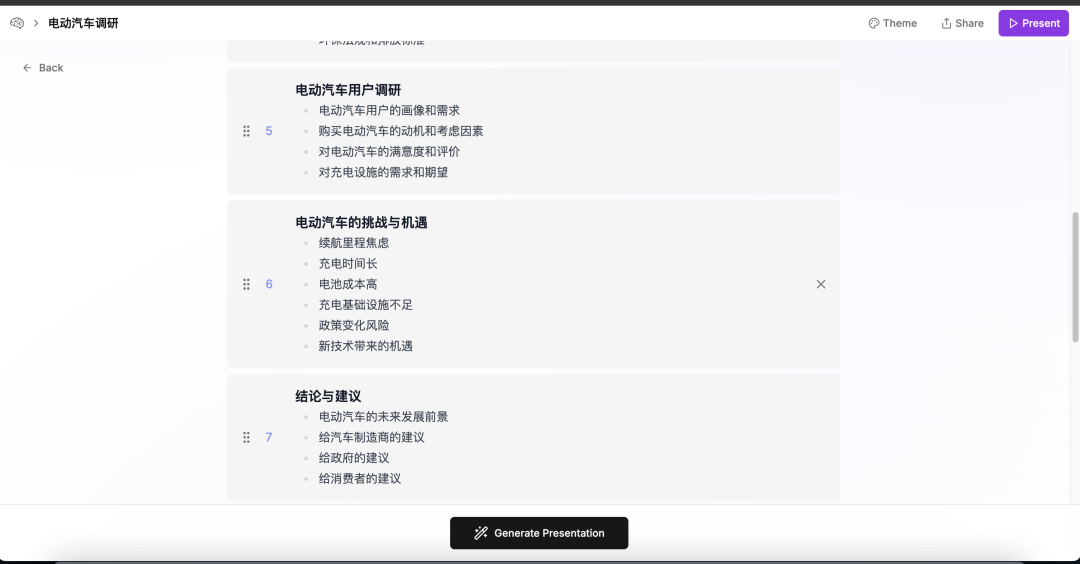
3. Complete Outline Generation
The final system will display the complete outline for user confirmation:
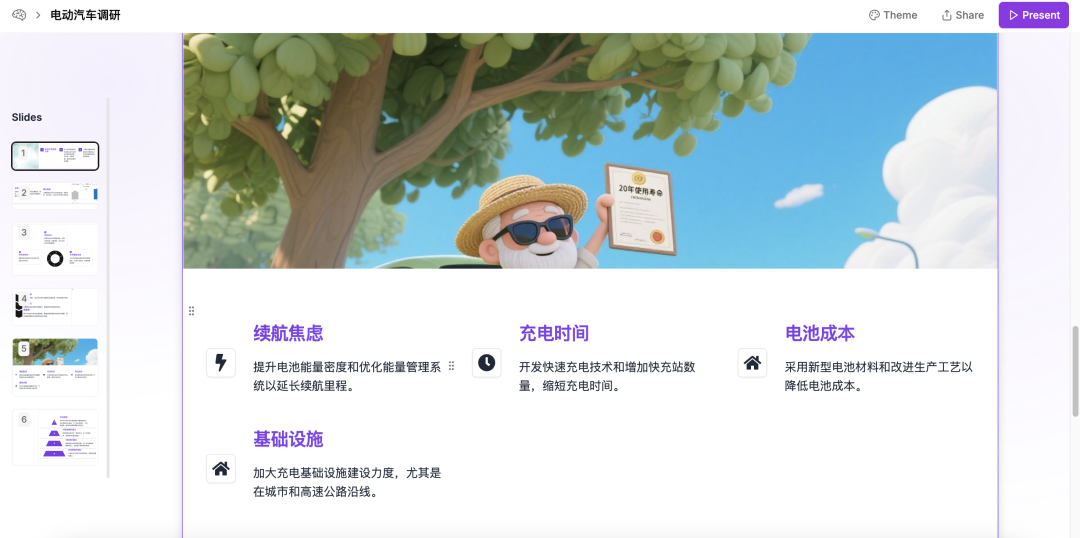
4. Streaming PPT Content Generation
After confirming the outline, the system begins to stream generate the content for each slide and returns it to the frontend.
Concurrent Multi-Agent Collaboration Process
Project Structure

Quick Start
Backend Environment Configuration (Python)
1. Create and activate a Conda virtual environment:
conda create --name multiagent python=3.12
conda activate multiagent
2. Install dependencies:
cd backend
pip install -r requirements.txt
3. Set backend environment variables:
# Copy template configuration files for all modules
cd backend/simpleOutline && cp env_template .env
cd ../simplePPT && cp env_template .env
cd ../slide_outline && cp env_template .env
cd ../slide_agent && cp env_template .env
Start Backend Service

Frontend Database Setup
Database for storing user-generated PPT:1. Start PostgreSQL using Docker:
docker run --name postgresdb -p 5432:5432 -e POSTGRES_USER=postgres -e POSTGRES_PASSWORD=welcome -d postgres2. Install dependencies and push database models:
pnpm install
pnpm db:push
3. Insert default user (if the frontend reports no user, please try manually inserting a user data record:
frontend/insert_one_user.sql)
<span><span><span>4. .env</span></span></span> Example configuration:
DATABASE_URL="postgresql://postgres:welcome@localhost:5432/presentation_ai"
A2A_AGENT_OUTLINE_URL="http://localhost:10001"
A2A_AGENT_SLIDES_URL="http://localhost:10011"
Frontend Installation and Running (Next.js)
1. Install dependencies:
cd frontend
npm install
2. Configure environment variables:
cp env_template .env3.Run the frontend development server:
npm run dev4.Open the browser and visit:http://localhost:3000

 Lao Zhu Reads AI Honoring the extraordinary Honoring the ordinary
 Click ‘Looking’ if you think you are the best