Not long ago, Raspberry Pi released an all-in-one machine called “Raspberry 500 Plus”. This reminded me that I had a smaller development board, the Orange Pi Zero 2W, and I thought maybe I could turn this small development board into a “mini computer”. Let’s take a look at the result: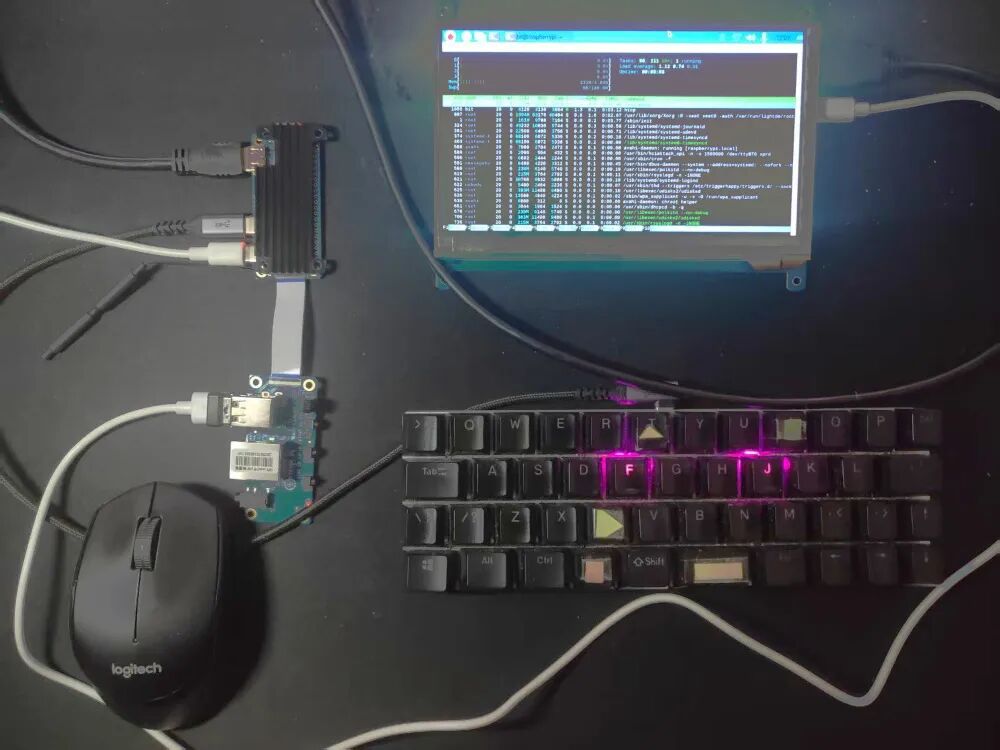 It looks a bit messy, but the core components are just these two boards: the Orange Pi Zero 2W (on the right) and an expansion board (on the left). They are connected by a ribbon cable.
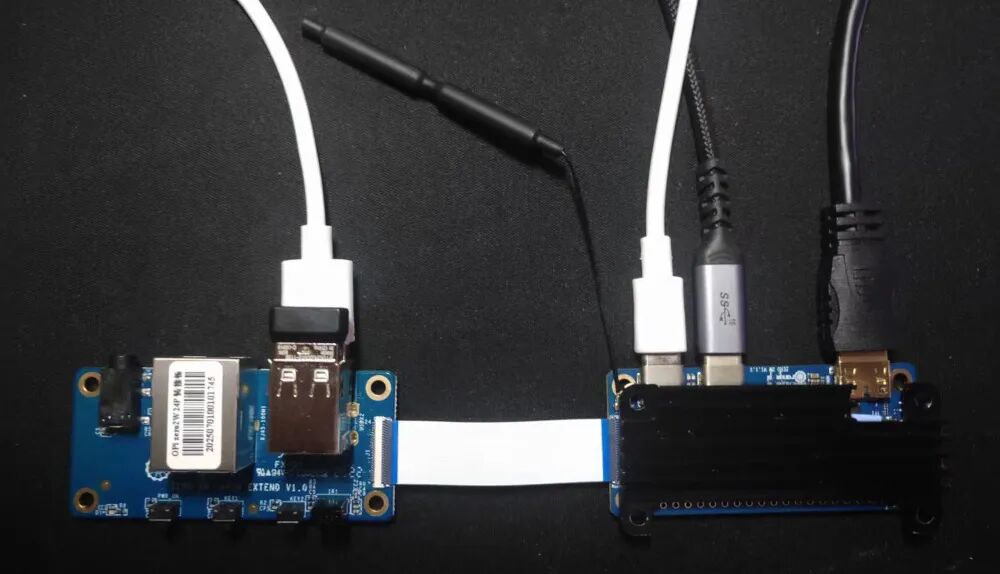 As shown in the image, the main board on the right also comes with a built-in Wi-Fi antenna.The keyboard in the picture is the one I assembled earlier, and it has almost become a daily tool.To get to the conclusion, is this system feasible? Yes, it can run, but it depends on how you use it, as the computer is quite small.Let’s elaborate a bit …DisplayI found this 7-inch screen with a resolution of 1024 x 600 and touch functionality for 120 yuan on Xianyu. This screen connects to the Orange Pi and also supports touch functionality. The wiring method is exactly the same as with the Raspberry Pi:
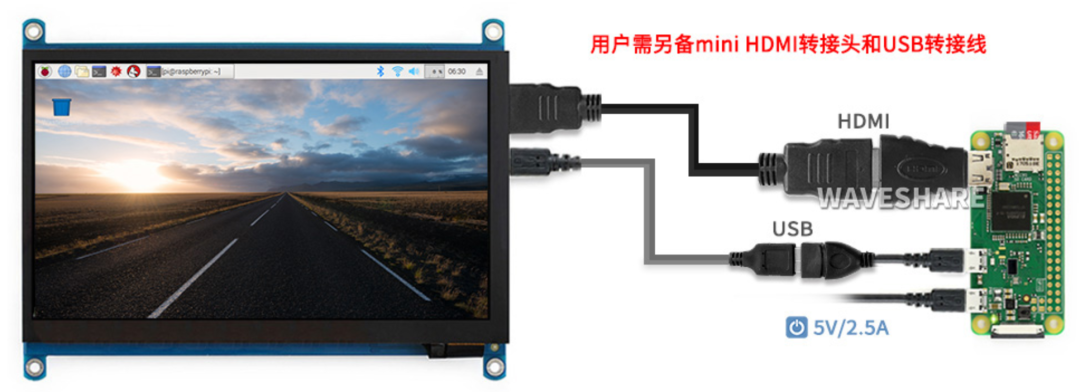 The above image is the wiring diagram for the Raspberry Pi. You need to prepare a mini HDMI to HDMI adapter separately; the other connections use the expansion board of the Orange Pi …Expansion Board
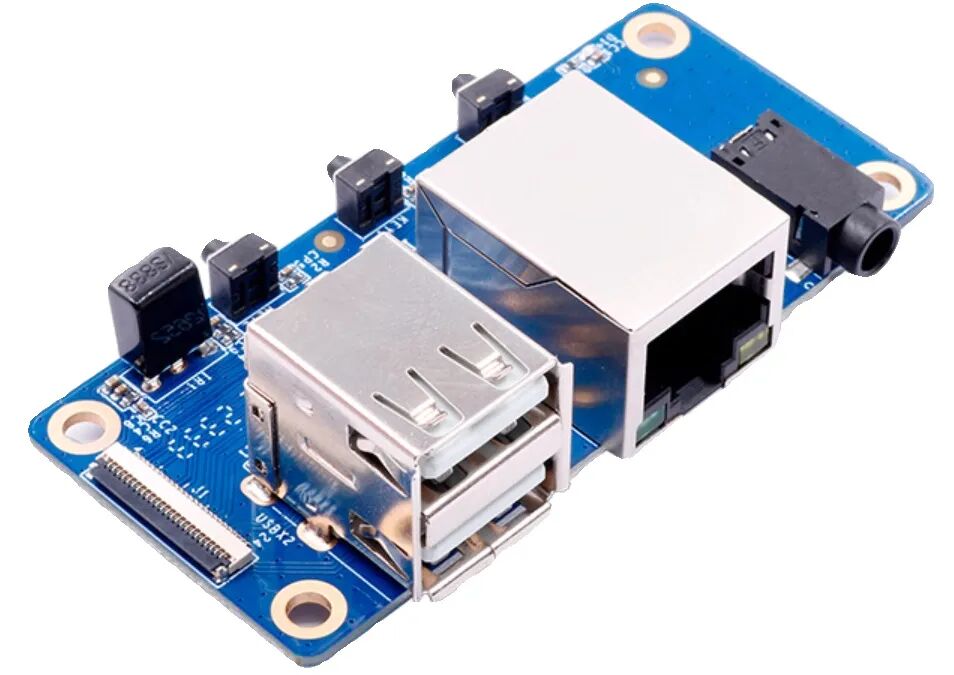 On the official website of Orange Pi, this expansion board is sold for 20 yuan.The expansion board has two USB ports (version 2.0): one for the mouse and one for the display (power + touch).Additionally, the expansion board also has a 3.5 mm headphone jack and a wired network port. Tests have shown that both ports can be used after the system is installed.All the above connections can be represented in one image:
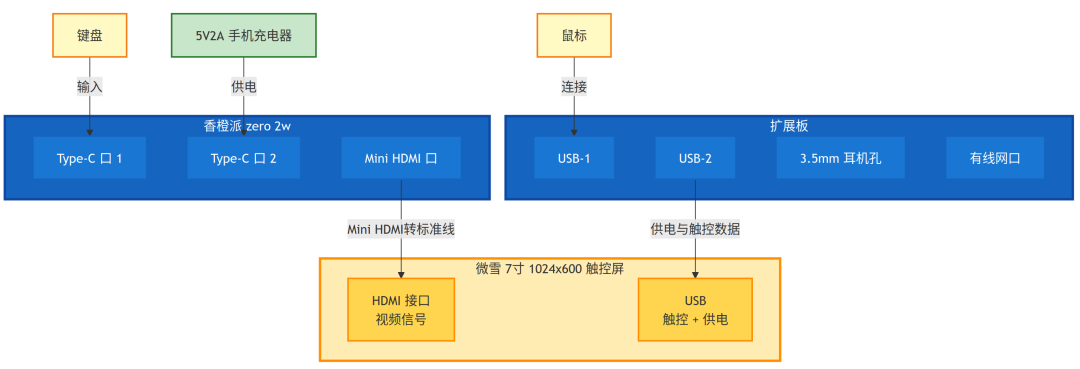 After the hardware connections are complete, let’s talk about the software …Installing the System on the Development BoardRegarding the installation of the system, it involves writing the downloaded image to an SD card using burning software, and then inserting the card into the development board. Once powered on, the system will automatically run, and then you can proceed with the setup.If it is a system without a graphical interface (server version), you will install the required software via the SSH command line.If there is a graphical interface (desktop version), as in this case, you can directly operate on the screen using the keyboard and mouse.If you have assembled a computer before, you can think of the computer motherboard as a “large” development board; installing a non-desktop version of the system is like installing a server; installing a desktop version is like assembling a computer.Testing Three SystemsSystem images suitable for the Orange Pi Zero 2W can be found on the official Orange Pi website:http://www.orangepi.cn/html/hardWare/computerAndMicrocontrollers/service-and-support/Orange-Pi-Zero-2W.htmlFor comparison, I installed three systems locally. Below is not a review, just a brief overview …Orange Pi OS (Arch) is the official system of Orange Pi, with an image size of 1GB. The installation process is a one-click installation. Personally, I feel the interface is very clean (you can search online to see), but it seems that the system comes with a lot of software. It is possible to streamline the system, but it can be a bit troublesome and may affect system stability.
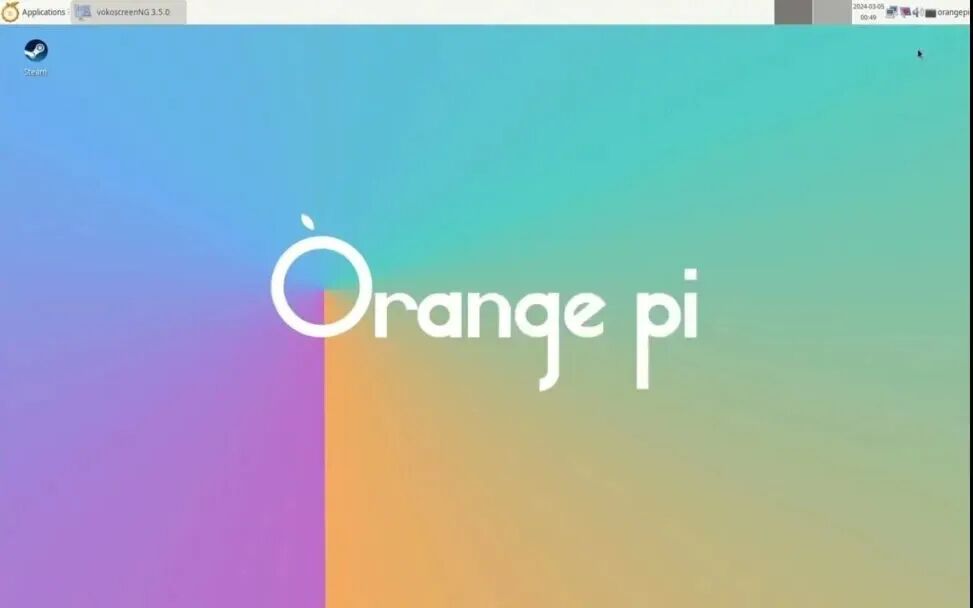 DietPi as the name suggests, is streamlined, with an image installation package of only 220MB. However, don’t get too excited too soon; the installation process requires internet access, so the network port on the expansion board comes into play. The installation takes about twenty to thirty minutes. The savings in the image are all downloaded via the network.The system load is actually not low,as shown in the image (upper right corner) where the red box indicates that the system occupies 606MB when idle:
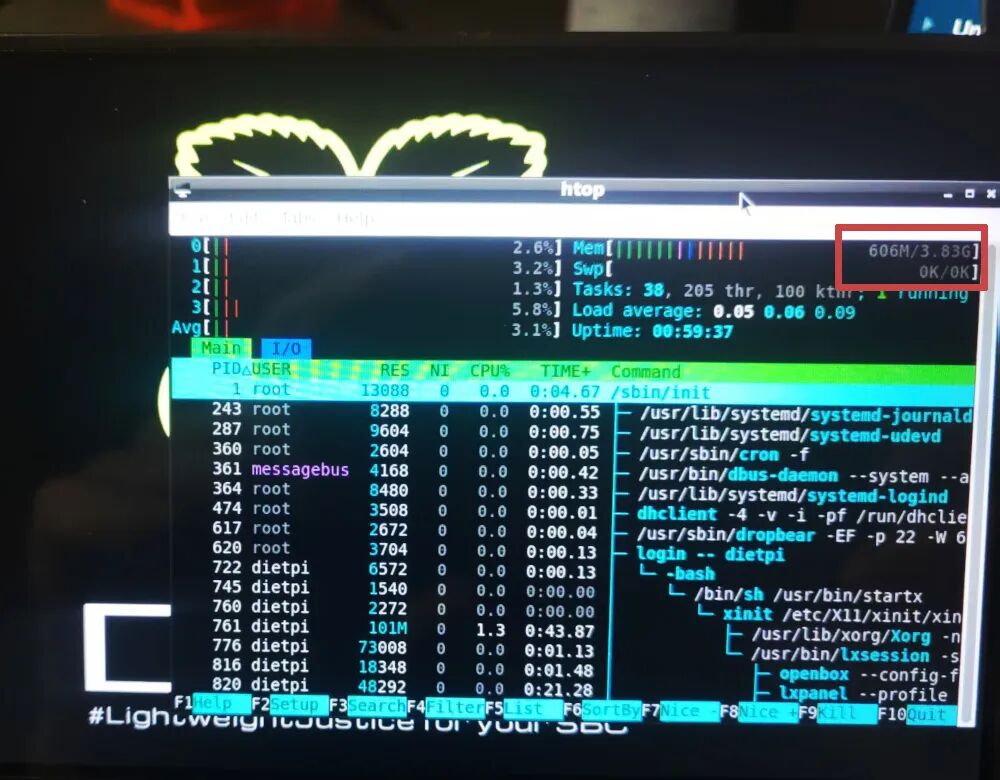 Moreover, there is a problem where Chinese characters cannot be displayed on the webpage. I decisively gave up.Then, I encountered the most satisfying system so far …Raspberry Pi OSRunning Raspberry Pi on the Orange Pi? I accidentally found this download link on the official Orange Pi website:
https://github.com/leeboby/raspberry-pi-os-images
The image is 1.1GB. After downloading, do not use the Raspberry Pi burning tool; a universal burning tool will suffice, and the installation process is very smooth.Insert the SD card into the Orange Pi, and after powering on, wait a moment for the system to boot: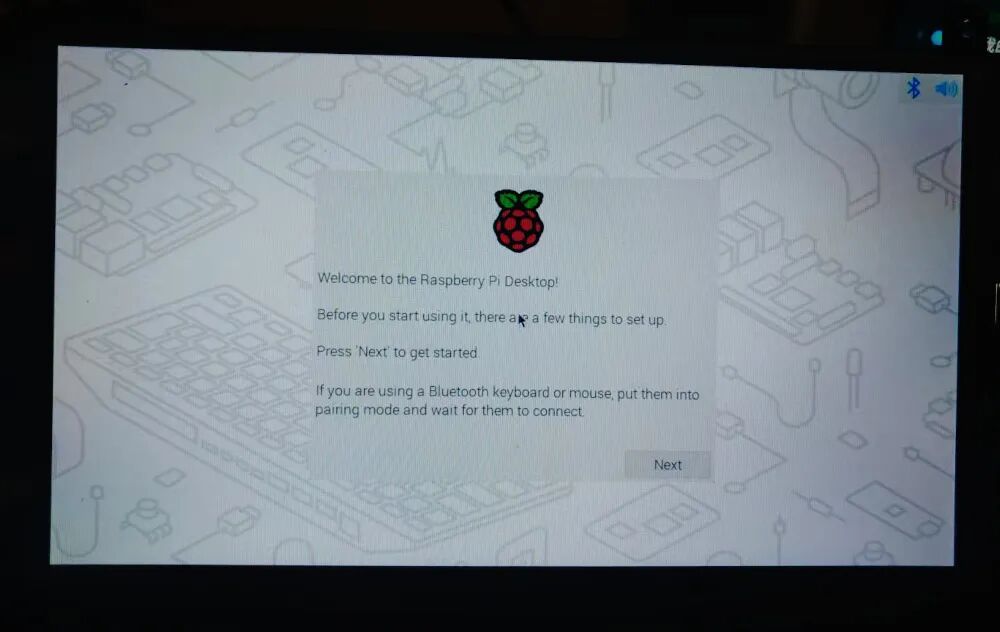 After setting the language (expanded below), username, password, and Wi-Fi, you will enter the classic Raspberry Pi interface:
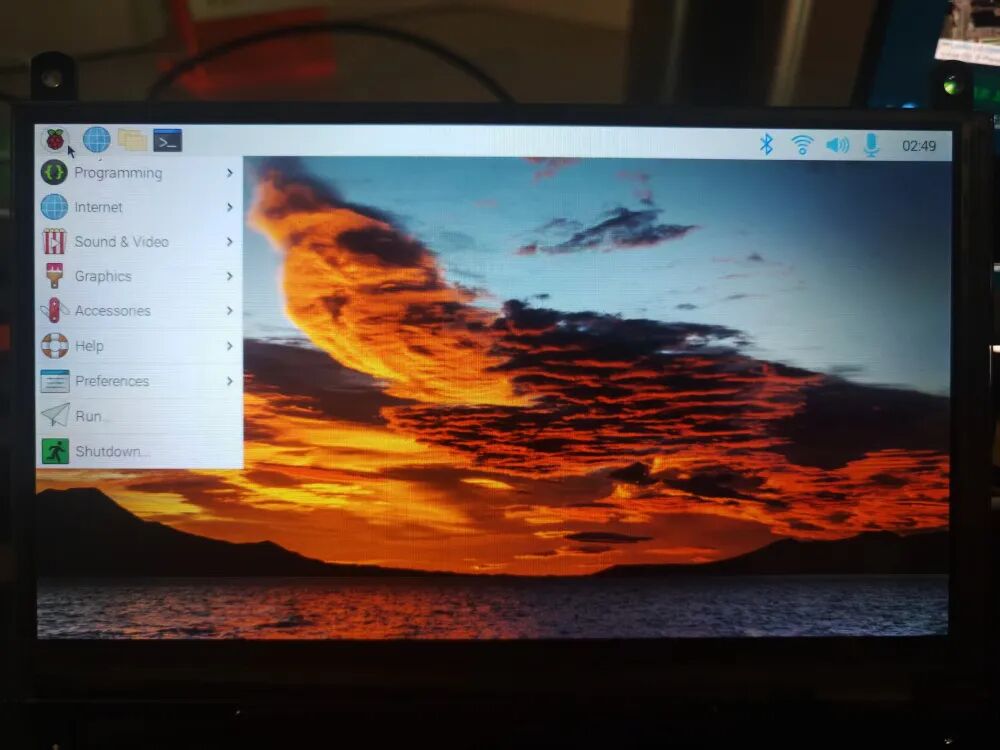 Enabling SSHThis system has SSH disabled by default and needs to be manually enabled.The method to enable it: open the command line and run:sudo raspi-config → Interface Options → select ssh → Yes:
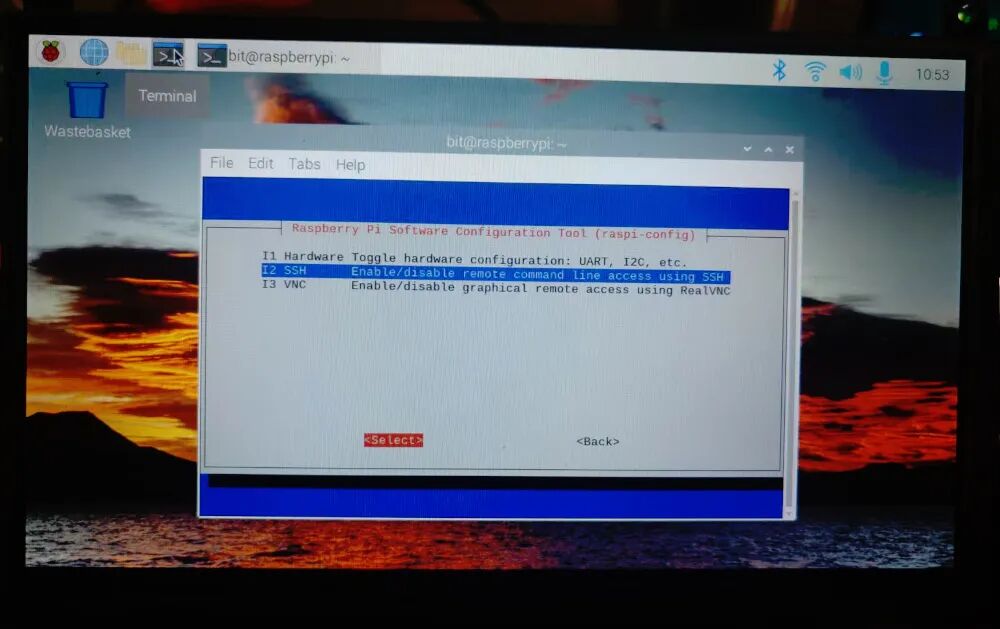 After saving and rebooting, find the IP address of the Orange Pi in the router, and then run “ssh username@ip_address“, entering the password you just set to access the Orange Pi via the SSH command line.Thus, we have two methods to access the current system: one is using a mouse and keyboard, and the other is accessing remotely via SSH from another machine.Using SSH to access this system, you can see that the memory usage is around 230MB when idle:
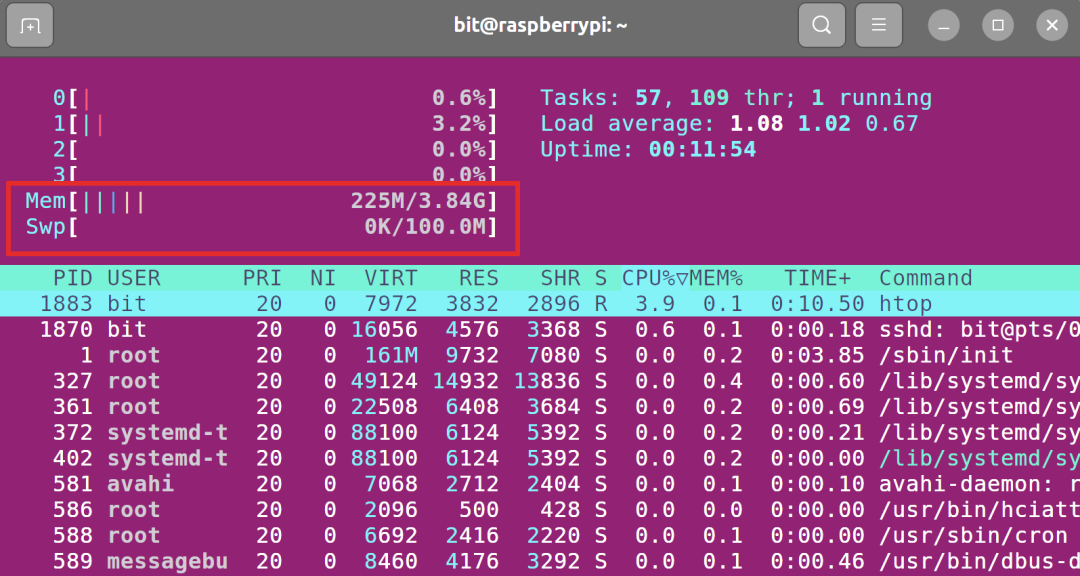 Language SettingsJust a reminder, how to install Chinese input method might be a problem.As with installing other Linux systems, it is recommended to set the system language to English at the beginning. Why?One benefit of doing this is to ensure that all paths in the system are in English, to avoid issues where programs cannot run due to Chinese characters in the paths.Conversely,even if you set the language to Chinese, the system will not automatically configure the Chinese input method for you.Setting it to English initially may affect the time zone, but it doesn’t matter; first install the system, and then modify the time zone after entering the system:sudo raspi-config → Localization Options Configure language and regional settings → Asia → ShanghaiBy the way, the above settings can be found in the usage guide on GitHub, which also mentions how to expand the SD card, so you can utilize all the space on your SD card.Minimal SystemThe development board is already small, and the Zero series is the smallest among development boards. Running a desktop system on this hardware platform cannot have high expectations, which is why I chose a 7-inch display as the main reason.This means that the purpose of this hardware system is: “Portability + Minimalism“, running minimal software in a minimal desktop environment, while not compromising on the tactile experience: using a mechanical keyboard.Moreover, there is an added benefit; you can run Docker, using this device as a portable micro server.Additionally, this device is quite power-efficient; an ordinary 5V2A phone charger can power the entire system.As can be seen from the screenshot, the current environment has no fan; I just placed a heatsink temporarily on the development board. Can it play videos? It seems so:
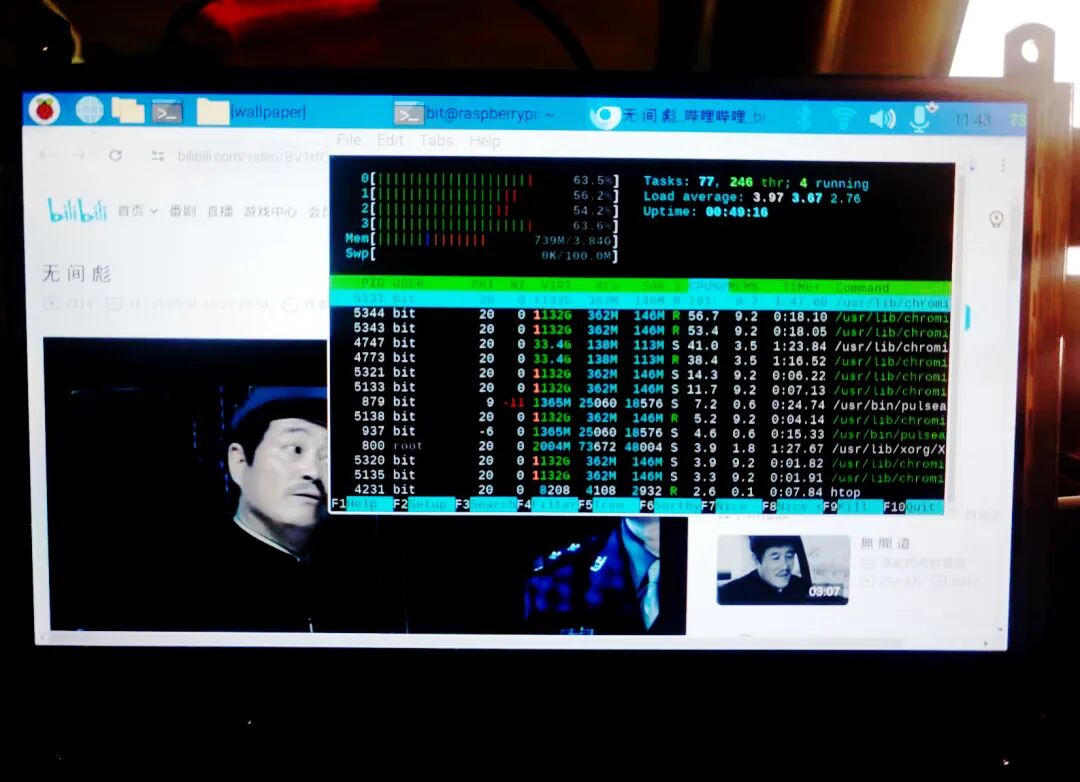 The system memory usage is 739MB, and the CPU temperature is 73 degrees (upper right corner).Of course, setting up this system is definitely not for watching videos …ConclusionThe case of running a desktop system on the Orange Pi Zero 2W mentioned in this article can be considered an extreme case, and whether it is feasible will take some time to determine.Can it be further streamlined? If you use a Type-C to expand USB, the expansion board can also be omitted, and audio can be transmitted via Bluetooth.Regardless, it is necessary to further streamline the current system software, with the principle being to uninstall anything that is not needed.Of course, there is another direction. A more feasible solution would be to use a slightly larger development board, and the screen could also be a bit larger … but then again, wouldn’t that just be a laptop?Returning to this issue, the next step could be to 3D print a case and encapsulate all these components …