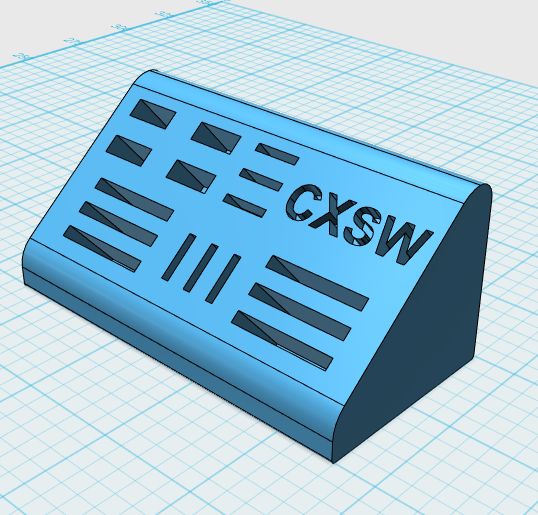
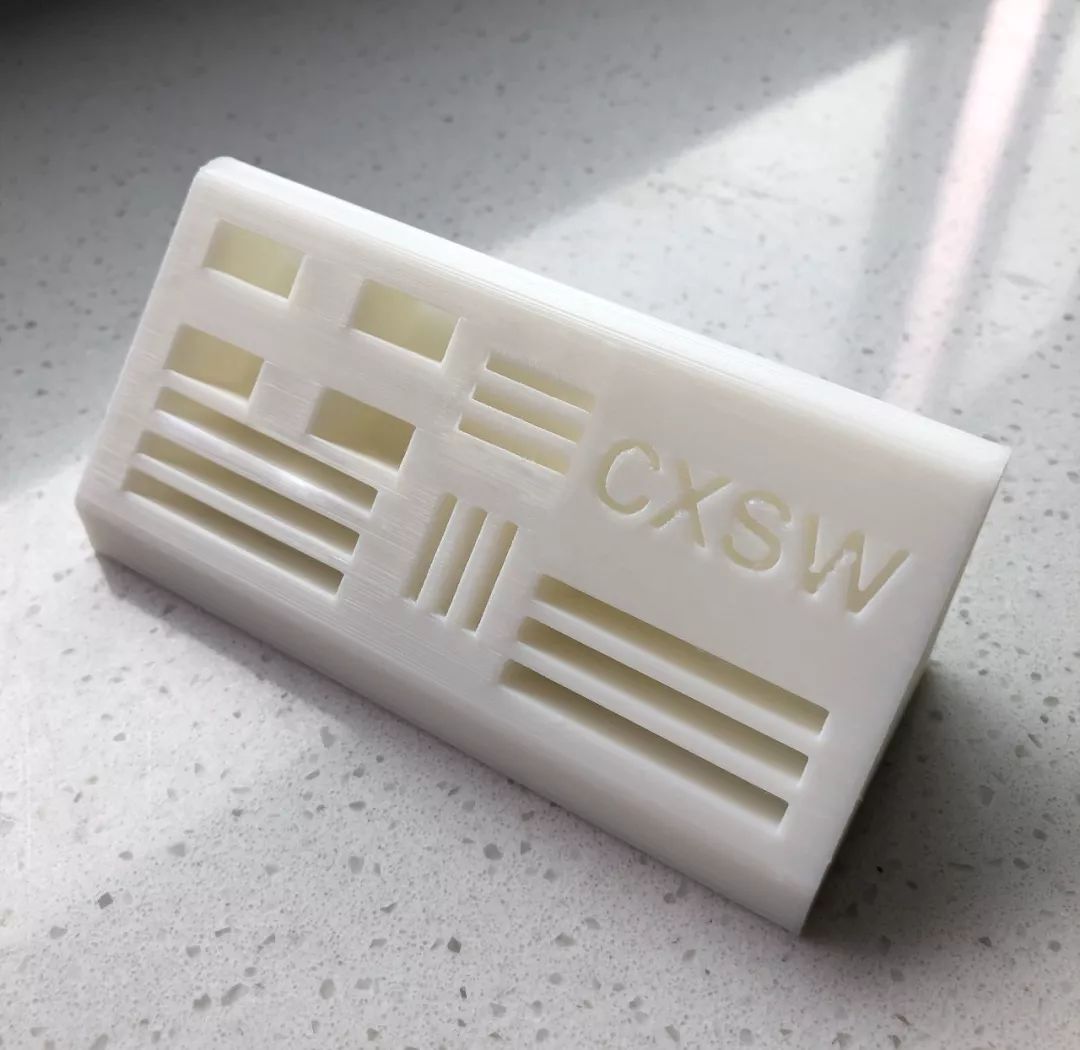
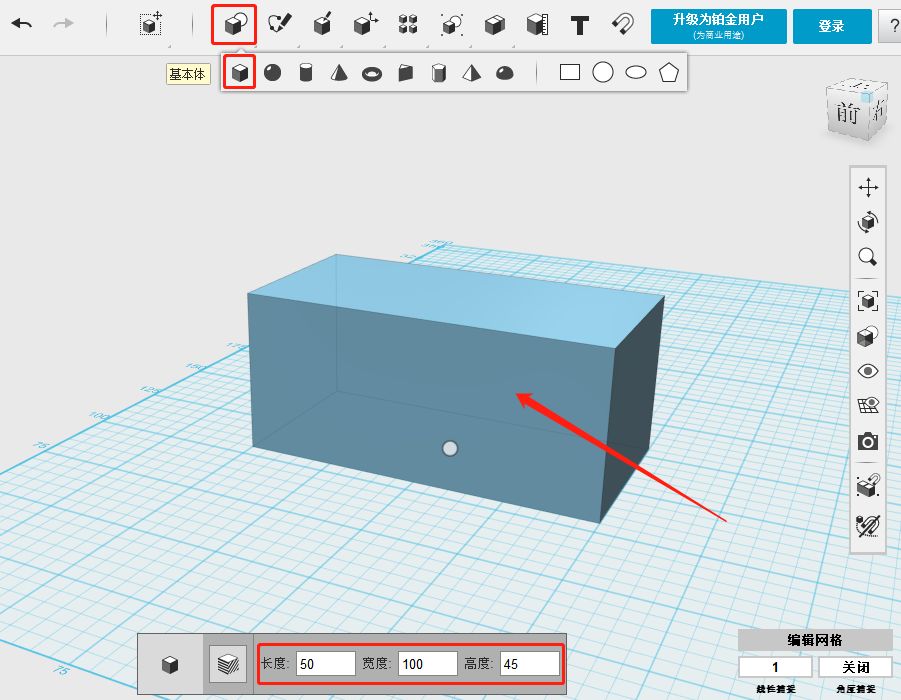
 Have you often found thatyour SD card or USB drive frequently gets lost?Are you still troubled by the inability to organize various cards?Don’t worry!Today, I will teach youhow to create a portable SD card and USB drive storage slot using a 3D printer.1. Small Tips1. Use 123D software, which can be downloaded from the official website (www.cxsw3d.com). Extraction code: 9qje2. During the making process, there are 5 commands used: Box, Extrude, Rectangle, Copy, Paste.2. Notes1. When drawing a line segment on one face of the shape, you need to first select the face of the model, and then click the command.2. The length of each small grid on the bottom mesh is 5mm.3. Shortcuts: Ctrl+T to move and rotate entities, Ctrl+C to copy, Ctrl+V to paste.4. The default unit for the software is mm (millimeters).Operation Steps1:Click on the basic shapes → Box command to create a box that is 50mm long, 100mm wide, and 45mm high.
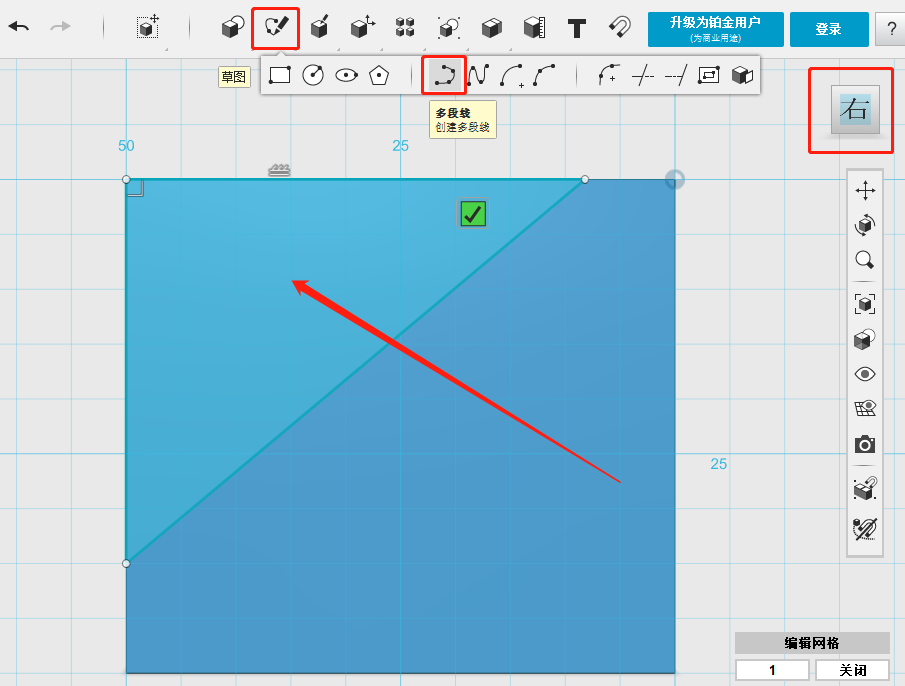
 2:Select the right view, click on the sketch → Polyline command, and draw a closed triangle on the side of the box (the side length can be customized).
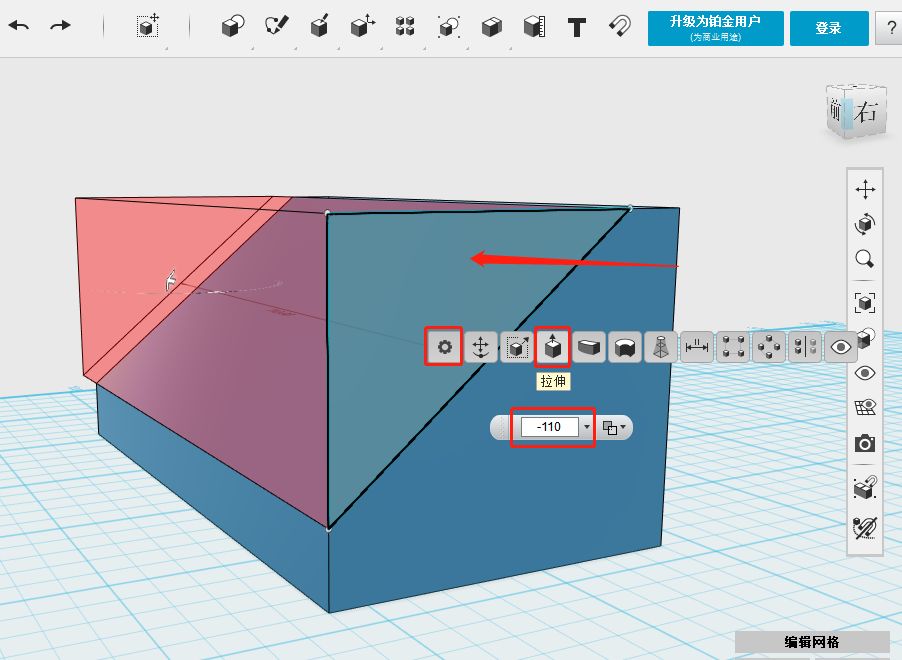
 3. Select the triangle, click on the Extrude option to extrude the height to-110mm.
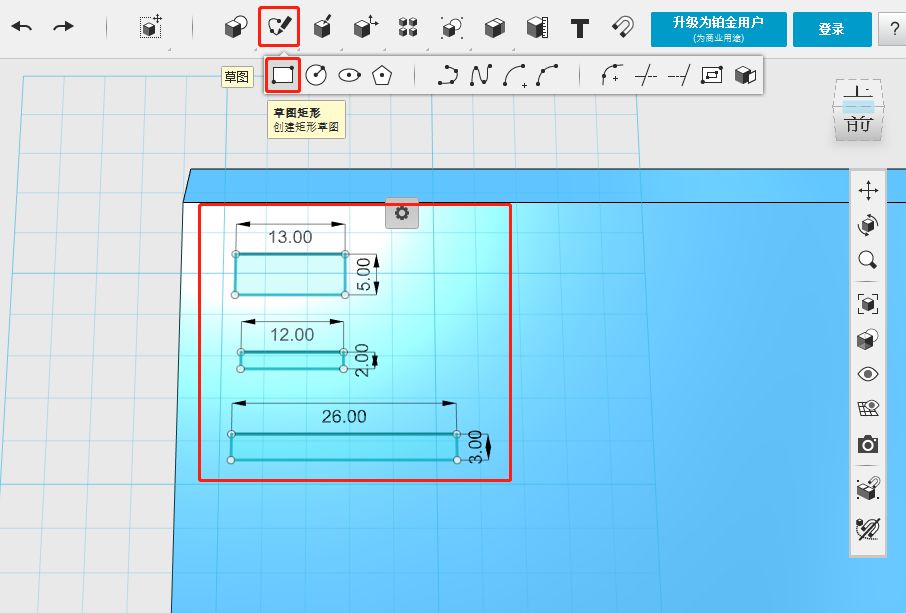
 4. Select the recently extruded face, click on the sketch → Rectangle command, and draw a rectangle of 13mm long and 5mm wide, a rectangle of 12mm long and 2mm wide, and a rectangle of 26mm long and 3mm wide (these are the sizes of the 3 types of slots).
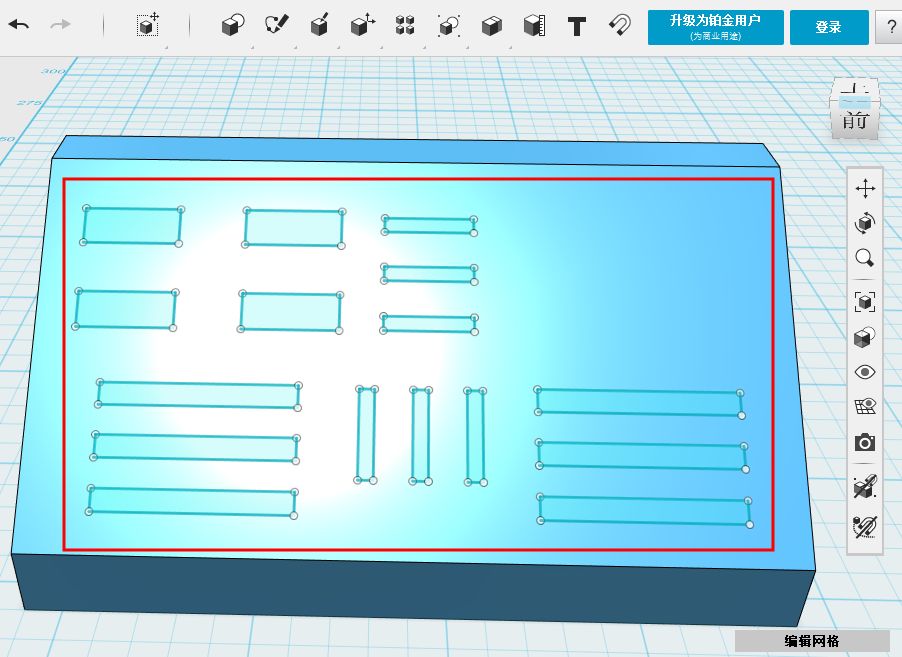
 5. Select one of the rectangles and use the copy and paste command (Ctrl+C, Ctrl+V) to create multiple rectangles,Ctrl+T to move, and place them randomly, as shown:
 6. After positioning, we can extrude; you can hold down Ctrl to select multiple items to extrude together. The USB slot should be extruded to -13mm, the small storage card slot to -7mm, and the large storage card slot to -20mm.
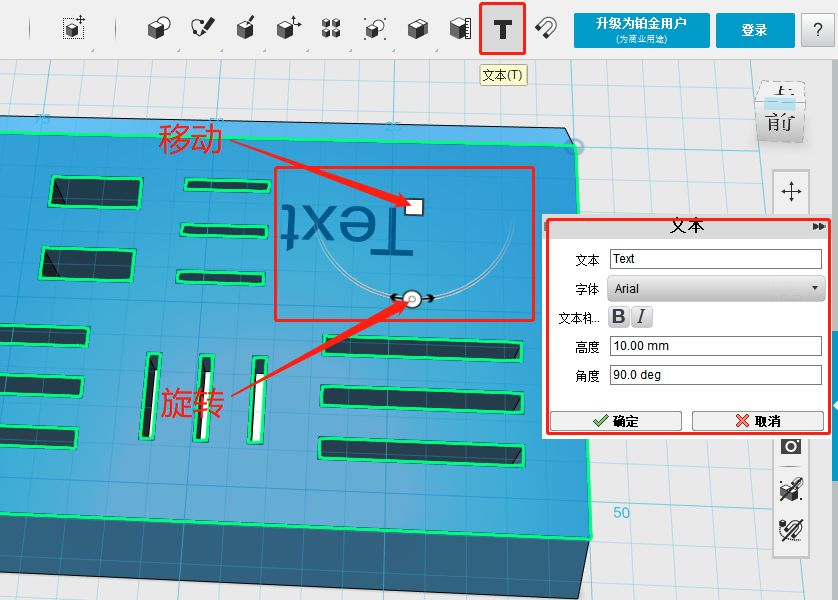
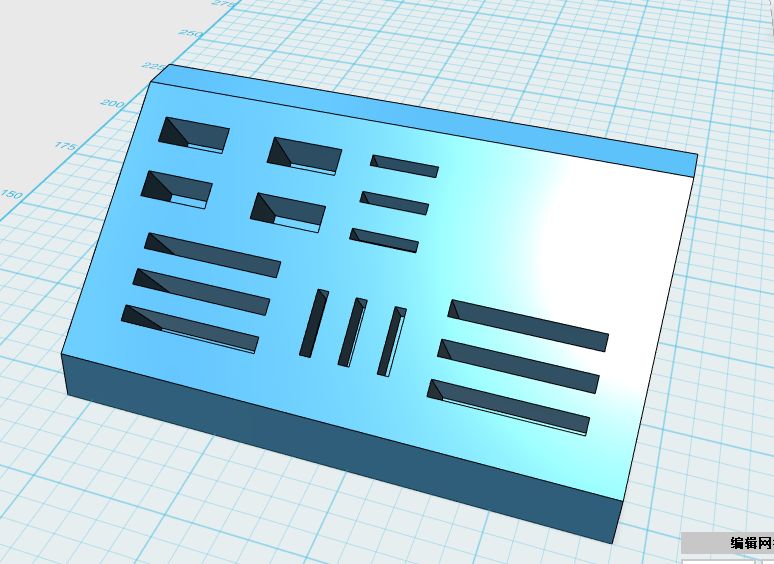 7. The blank area in the upper right corner is not very aesthetic; we can add a little identifier, such as a name. Click on the text option, click the face to create text. Click on the identifier in the image to move and rotate the text.
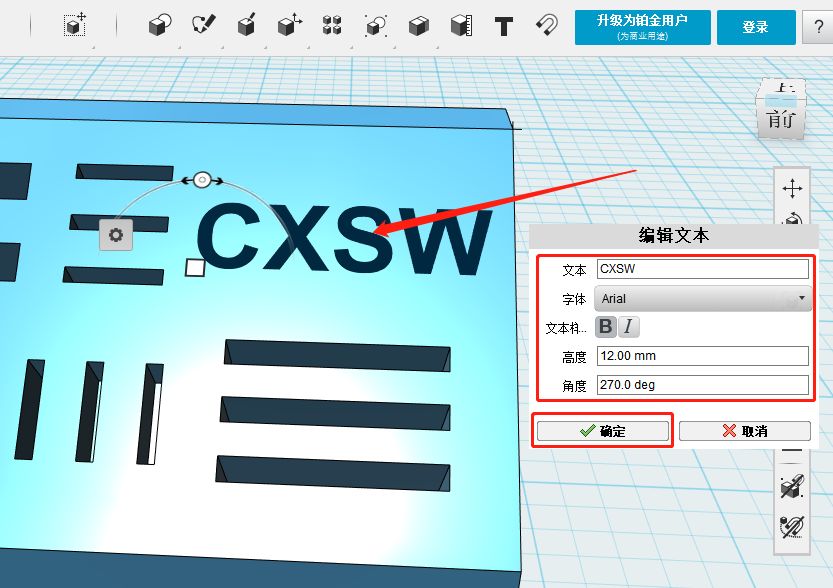
 8. Enter characters in the text box, for example:CXSW, and adjust the height to 12, then confirm.
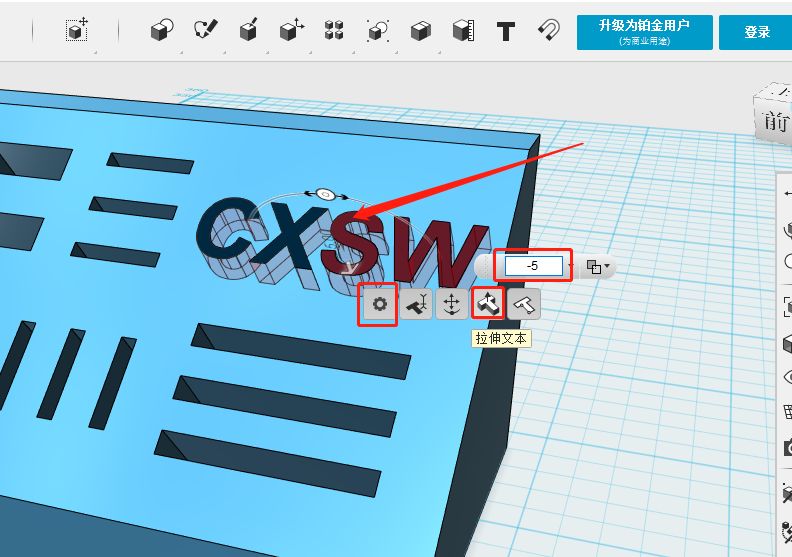
 9. Select the recently added text, click on the Extrude option, and extrude the height to -5, then confirm.
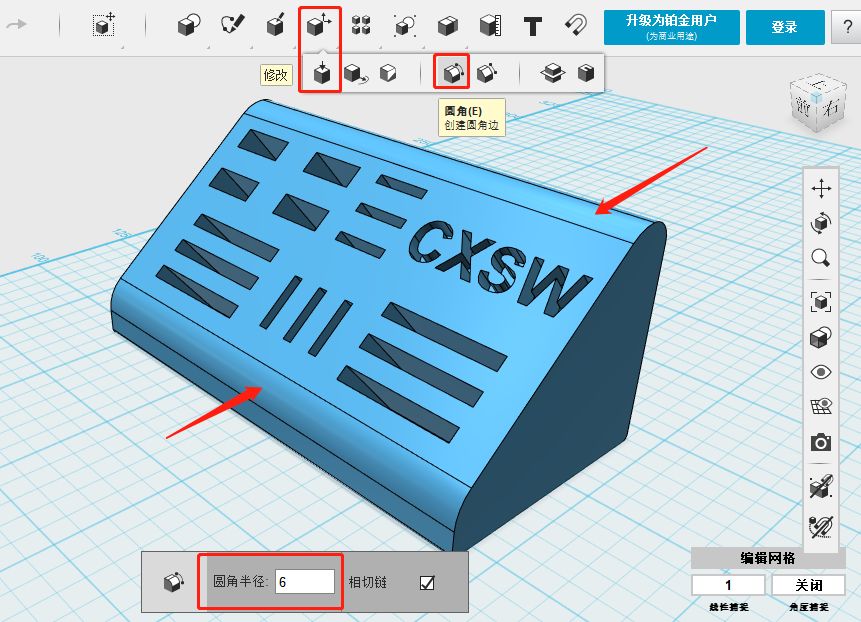
 10. Finally, round the edges of the overall shape to avoid hurting your hands. Click on modify → Round Corner command, enter a suitable corner radius, and confirm.
 Production Completed