3D Printer Manufacturing Process and Technology
(Reprinted from Guoke) The foreign technology is now quite mature, even DIY beginners can quickly get started with this tutorial. As seen later, there are countless methods to DIY a 3D printer by fully utilizing creativity, but the most important step is to make up your mind to start working.
Clearly, the superficial content in this article can only be considered an introductory guide. If you want to know more details, you can click the reference link for further knowledge and resources. First, let’s take a look at what additive manufacturing and subtractive manufacturing are.
Stratasys’s FDM process is well-known in the industry; their 3DP not only has much higher accuracy but also much faster speeds and richer functions. Here’s a video to scare everyone:http://v.youku.com/v_show/id_XNDk2NTMwNzI0.html By now, you should have a basic understanding of 3D printing, right? In fact, 3D printing technology is commonly referred to as additive manufacturing. You can see that the entire process is from nothing to something, built layer by layer. In contrast, traditional manufacturing processes often start with a blank and use various techniques to process that blank, which is called subtractive manufacturing. After showing off additive manufacturing technology, let’s take a look at subtractive manufacturing technology.http://v.youku.com/v_show/id_XNDkyODQ0Nzgw.htmlWhen you want to make a 3D printer, you first need to have a general concept of what it is. If someone around you has one, you can play around with it under the owner’s permission. If not, you can search for many working videos of 3D printers on video sites; you can also read some articles to understand the principles of 3D printers.
Step 1: Preparation Work
If you are not very familiar with mechanical and electronic knowledge, it is best to find some friends with relevant expertise, especially those with engineering experience, to serve as consultants; they can help you solve many confusions regarding principles and basic knowledge. However, try to do the debugging yourself.
Next, you should choose your basic plan. There are many options available in the open-source community; if you find it difficult to judge which plans are better, consider the most popular ones. If you have relevant professional skills, why not try designing your own plan? This can be quite fun, but you will encounter more difficulties accordingly. One more thing to note is to make your design compatible with other open-source plans at the interface level, so you can better utilize the resources in the open-source community.
If there are many processing factories nearby, you might be able to use their machines to complete the processing of 3D printer components. However, most people do not have such convenient conditions. At this time, try asking the omnipotent Taobao.
But if time is tight or energy is limited, you can also buy basic processing kits on Taobao, which only require assembly and debugging according to the steps. However, even so, understanding some design purposes and working principles is still very meaningful.
The budget given for each step is based on the assumption that a seasoned person will have a lower actual cost.
Step 2: Mechanical Structure
Budget: 2000 yuan
Reference list:
-
Plywood: 1m×2m (a single large board cannot be packaged and shipped, so it’s best to buy it yourself at a nearby building materials market or consider other options)
-
Standard parts: M6 screws, nuts, washers, M3 screws, nuts, washers, M3.5 screws, nuts, washers… (it is recommended to buy by the whole package)
-
Several 6mm inner diameter V-slot pulley bearings and circular bearings
-
42 stepper motors ×4 (one of which comes with a 300mm lead screw)
-
1m synchronous belt
-
Gears (specifications must match the stepper motor and synchronous belt)
-
Extruder
-
1m synchronous belt
-
Gears (specifications must match the stepper motor and synchronous belt)
-
Extruder nozzle
-
A set of screwdrivers
-
A caliper
-
A meter stick
-
Table saw: for cutting parts by yourself
-
Bench drill and corresponding twist drill: for drilling holes in parts by yourself
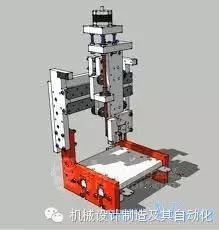
According to the principle of FDM, a driving system is needed for the nozzle to make precise relative movements with the platform. This driving system generally adopts a three-dimensional rectangular coordinate system, decomposing the motion in three-dimensional directions into three linear movements driven by one of the three axes to drive the nozzle or platform. The mechanical structure of the 3D printer should allow these three axes to be independently controlled. Common structures for each axis include lead screw structures and synchronous belt structures, typically driven by a stepper motor (usually a 42 stepper motor).
The part of the machine that melts and extrudes the molten plastic is called the extruder. During printing, the extruder must continuously supply plastic filament to the nozzle, so the extruder also needs to be equipped with a stepper motor feeding gear for feeding. To ensure that there is a certain driving force between the feeding gear and the plastic filament, without being too tight and jamming, precise clearance adjustments are necessary. This clearance can be processed with precision machine tools, or you can refer to the structure of whiteAnt and use manually processed parts for adjustment.
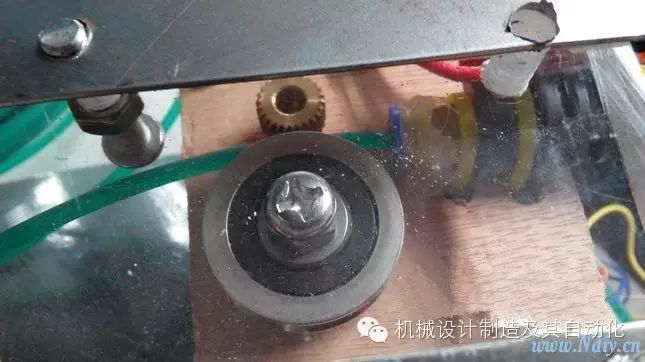
The feeding structure of the extruder, with the brass feeding gear on top, and the circular disk below that can rotate freely, with a guiding V-slot on the side
If you are making it by hand, consider using materials like plywood, which are easy to process and have a certain mechanical strength. If you find a factory to make parts, there are many materials to choose from. Recommended materials include acrylic sheets, which have high mechanical strength, are lightweight, and easy to process. If you have a bench drill, you can drill holes in the acrylic sheet yourself. You can also use metals like aluminum alloy or stainless steel. Alternatively, like RepRap, most structural components can use standard parts, with only a few 3D printed parts for connections. These materials can also be found on Taobao with corresponding raw material suppliers and processing factories. 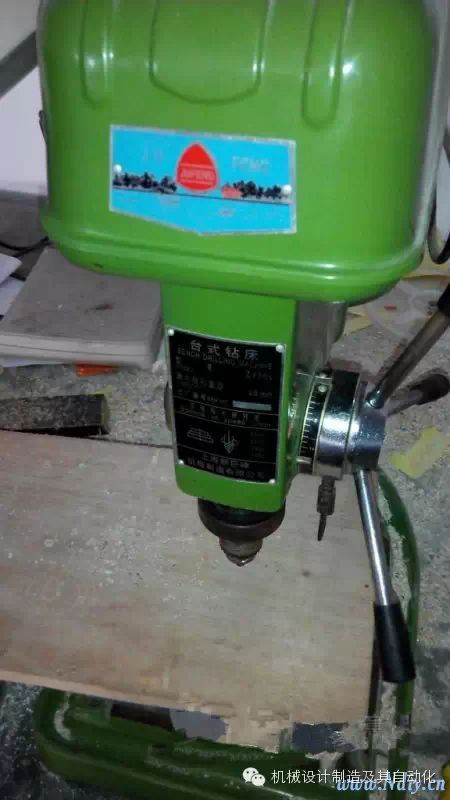
Bench drill and plywood
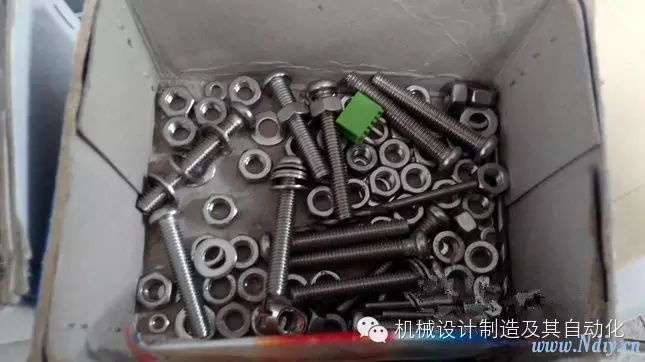
Standard parts (please ignore the small items that have intruded)
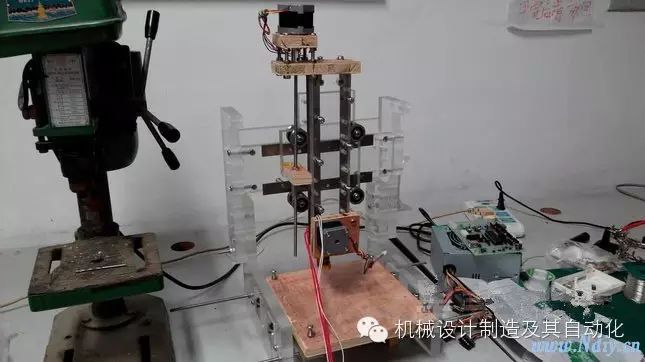
“Lens” 3D printer imitating whiteAnt’s mechanical structure, made of acrylic sheets, plywood, and metal sheets
The “Lens” uses the mechanical structure of whiteAnt, but to comply with national standards, some compatible modifications were made to the mechanical parameters of whiteAnt. The mechanical part of whiteAnt requires a lot of work, so it is recommended that beginners refer to the RepRap Prusa Mendel plan.
Tip: Acrylic sheets have a low melting point, so do not let the drill bit spin too fast while drilling; otherwise, the heat generated by friction will melt it. Moreover, acrylic sheets are not suitable for high-temperature parts, such as the build plate and certain parts of the extruder.
Tip: For those looking for outsourcing, please be sure to provide drawings that meet national standards.
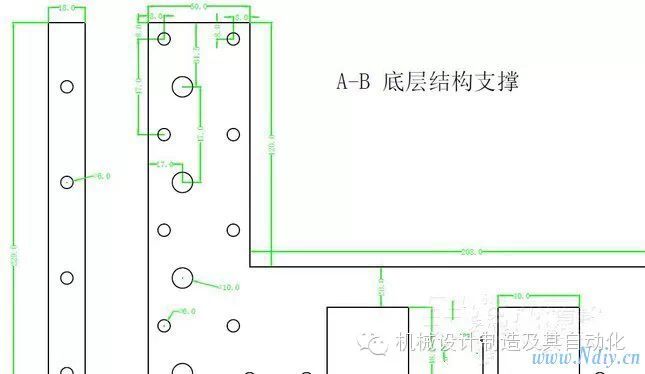
Part of the project drawings for the “Lens”
The nozzle of the extruder is a very precise component, and designing and manufacturing it by yourself can be quite challenging, so it’s better to purchase it directly.
On the build plate, you might consider adding a heated bed, which is an electric heating plate placed on the build plate to heat the already extruded plastic; its function is to keep the printed plastic at a high temperature to reduce deformation caused by thermal expansion and contraction during printing. Due to the properties of ABS material, a 3D printer using ABS must be equipped with a heated bed.
After assembling the mechanical parts, the circuit part is also needed to drive the machinery.
Step 3: Circuit Part
Budget: 700 yuan
Reference list:
-
Electronic components needed for the circuit: see specific plan
-
One digital multimeter
-
A full set of soldering tools: including soldering iron, soldering iron stand, high-temperature sponge, solder sucker, solder, etc.
The circuit mainly consists of several parts: power supply; main control microcontroller; driving the mechanical structure’s stepper motors and their driving circuits; heating resistors installed on the extruder and heated bed; temperature sensors next to the heating resistors; a chip specifically responsible for communication via USB with the computer; an optional heated bed; and so on.
Before assembling the circuit, it’s best to practice soldering skills.
Whether shopping online or purchasing at a local electronics market, it is advisable to buy common components in bulk to save on shipping costs.
Tip: Some components are difficult to find in China, but you can find similar replacements, for example, a high-power MOSFET IRLB8743 can usually be replaced with the more common IRF3205 in China.
When assembling the circuit, you can solder the circuit on a perfboard, but this makes wiring more complicated and can leave many hidden dangers, so it is recommended to use a printed circuit board (PCB). Most open-source circuit designs provide PCB diagrams. Finding a PCB manufacturing factory for prototyping is quite economical; for example, at Generation 7 Electronics, you can get five sample boards for just over a hundred yuan, and smaller sizes are even cheaper. Just provide the factory with a PCB diagram in a common format.
After obtaining the PCB, you also need to purchase the components and finished modules according to the bill of materials in the circuit design, leaving corresponding solder pads and interface space for components and modules when designing the PCB.
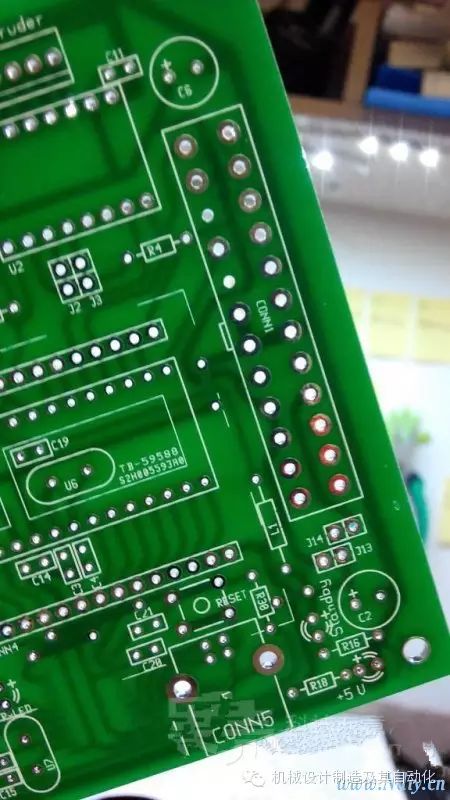
PCB processed by Generation 7 Electronics, PCB board without components soldered
Tip: When soldering components on the circuit board, pay attention to solder in order from low to high.
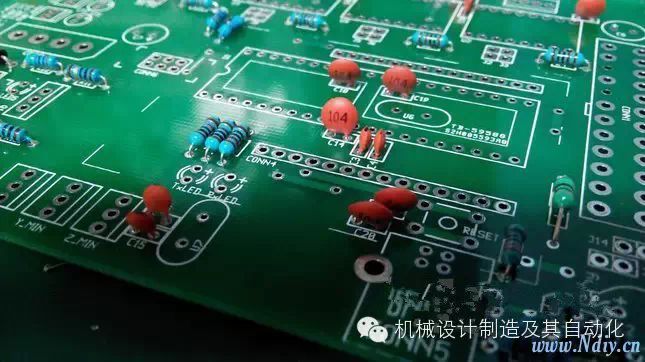
PCB with resistors and ceramic capacitors soldered, so now you can solder higher components
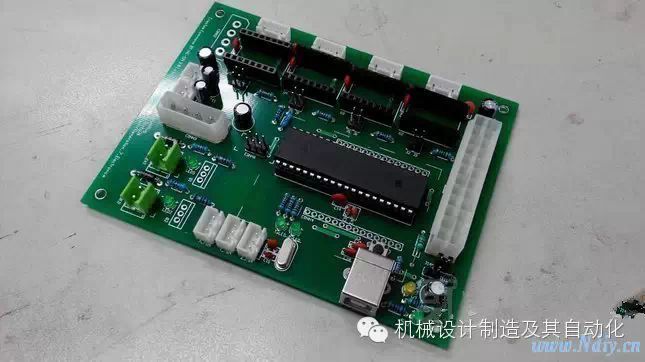
The circuit board is close to completion
Tip: Some components are easily damaged by static electricity and other factors, such as MOSFETs; these can be soldered last after checking the other parts of the circuit. At this time, you can ignore the previous tip.
Tip: The digital multimeter is very useful in measuring continuity between two points in the circuit when detecting shorts and opens.
The communication chip in the circuit needs to have drivers installed on the computer before formal use. The specific method is to download the driver and configuration tool from the official website of the communication chip, connect the computer to the circuit via USB, and after successful connection, configure the chip according to the chip instructions. If the connection fails, please check the wiring connections.
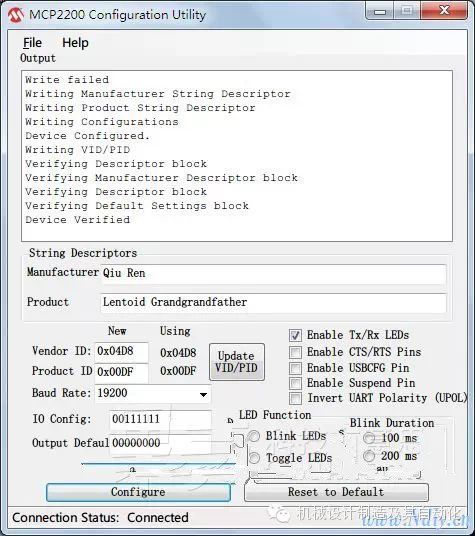
Configuration of the MCP2200 communication chip
If you want to design the circuit yourself, it is highly recommended to at least refer to one of the popular plans on the RepRap website. Especially when the pin definitions of the microcontroller are the same, it is easy to port other software to your circuit. For discussions about software, please see the next section.
Step 4: Software Part
Budget: 20 yuan
Reference list:
-
Programmer corresponding to the microcontroller
-
Connection cables
If you are using a plan from RepRap for the circuit part or a compatible plan you designed yourself, congratulations, you already have ready-made firmware. Next, you just need to burn the firmware onto the microcontroller. Please refer to the instructions in the circuit design.
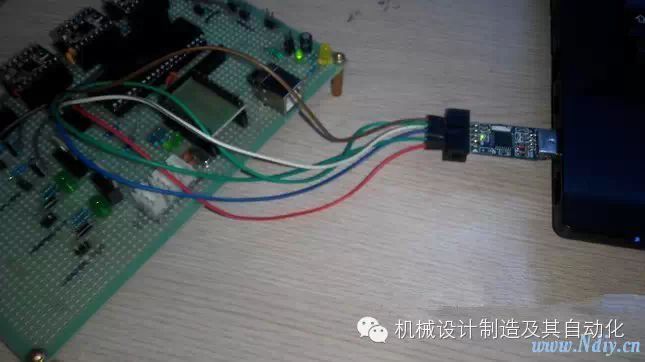
AVR microcontroller in the “Lens” requires firmware to be burned before initial use, so connect the AVR microcontroller to the computer via USBasp 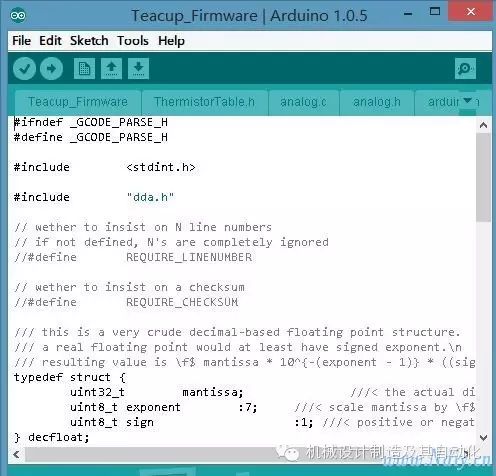
Part of the code in the Teacup firmware, here converting floating point operations to integer operations to improve efficiency
Tip: As for which firmware solution to choose, please refer to the recommendations in the circuit design.
If you are proficient in electromechanical knowledge, writing firmware yourself can be a very interesting task. Some common algorithms and G-code parsing will be used here. However, to optimize performance, it will take considerable effort.
During 3D printing, first parse the STL format model on the computer to obtain the printing path, then convert this path into G-code and send it to the microcontroller. This part of the work is done by the host software. Existing host software has a user-friendly interface; just import the STL model and connect to the 3D printer, and it can work!
Both firmware and host software require some parameters to be adjusted, which are explained in the software documentation. After making the final adjustments with a multimeter and caliper, you can proceed to test the machine.
Step 5: Debugging
I recommend starting debugging from the circuit. Power on the circuit and connect it to the computer; at this point, you can send some commands to the circuit through the host software. If there is a corresponding response, then the 3D printer can proceed to the final testing step. Otherwise, please check for problems carefully; there may be something stuck in the mechanics or the circuit may not be connected properly, etc.
Finally, please find an STL model file that can be printed with your 3D printer. You can look for it on Thingiverse, or try to create your own STL model. Print this model with the 3D printer, wait a few hours, and quietly enjoy the sense of achievement. (Although I still haven’t enjoyed it π_π)