Get the demo source code file at the end of the article ↓Software Platform: MCC v5.5.2, MPLAB X IDE v6.25Hardware:ATSAMC21J18AUsing MPLAB-Harmony Configuration ToolSet the system clock to 48MHz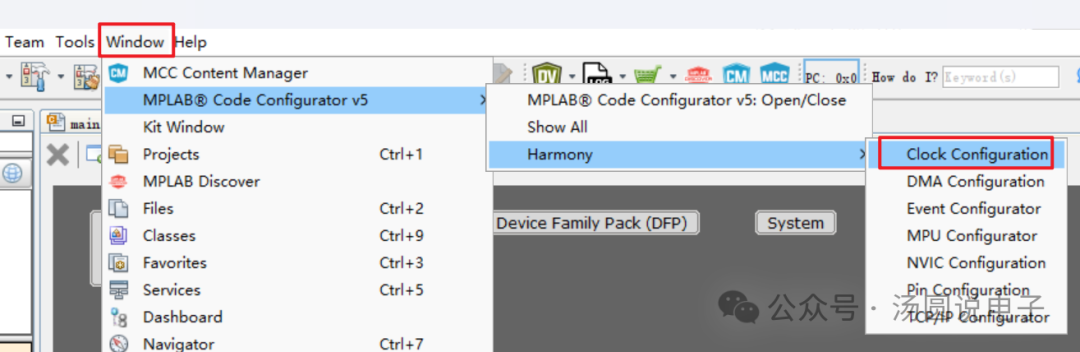 Set the corresponding option bits in the clock tree to make the CPU clock 48MHz
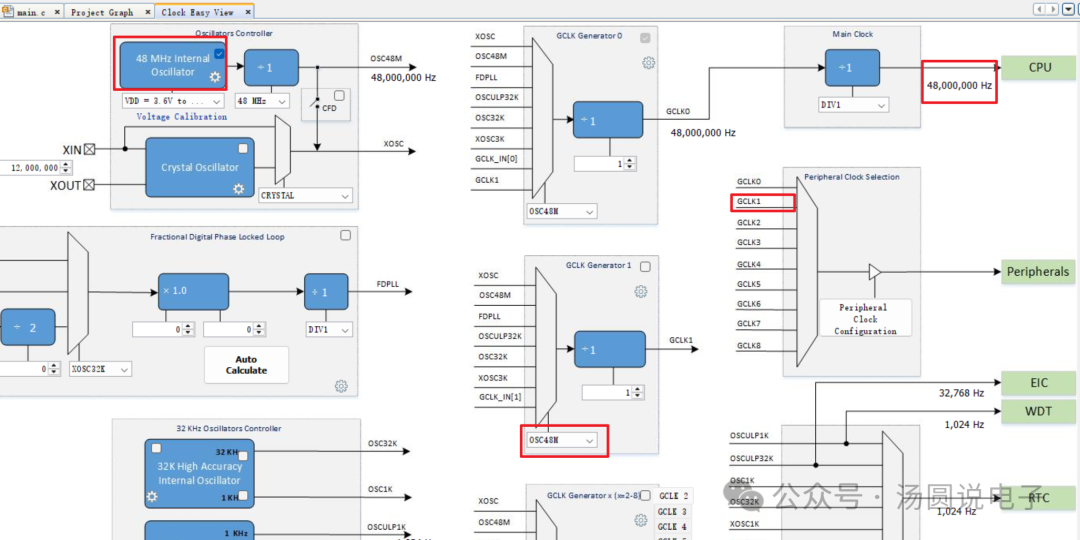 Open the pin configuration interface
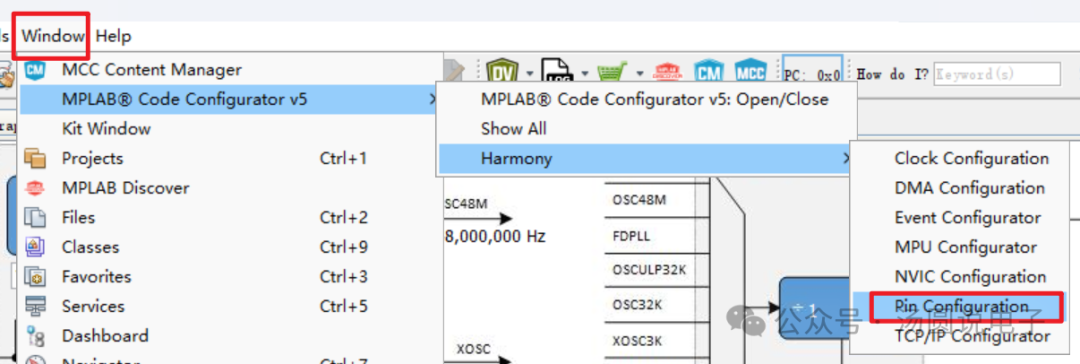 UART Pin and Function Parameter SettingsRefer toSAM C21 Xplained Prodevelopment board manual for serial port pins
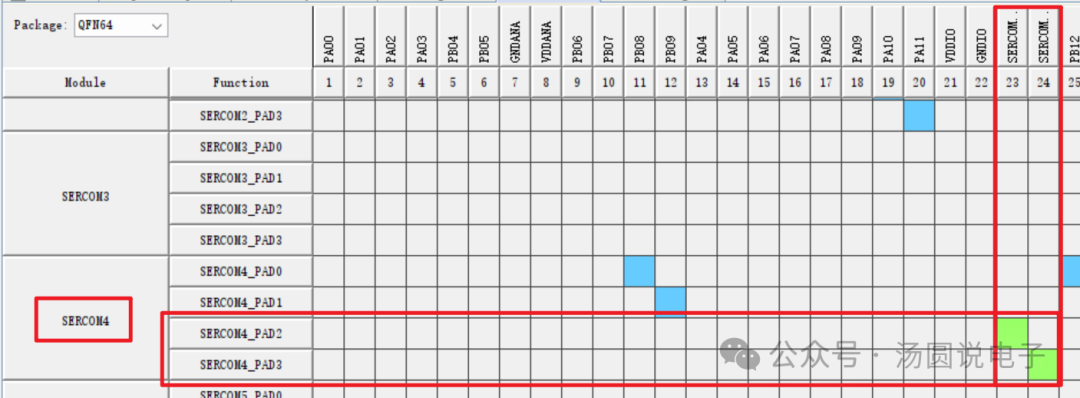
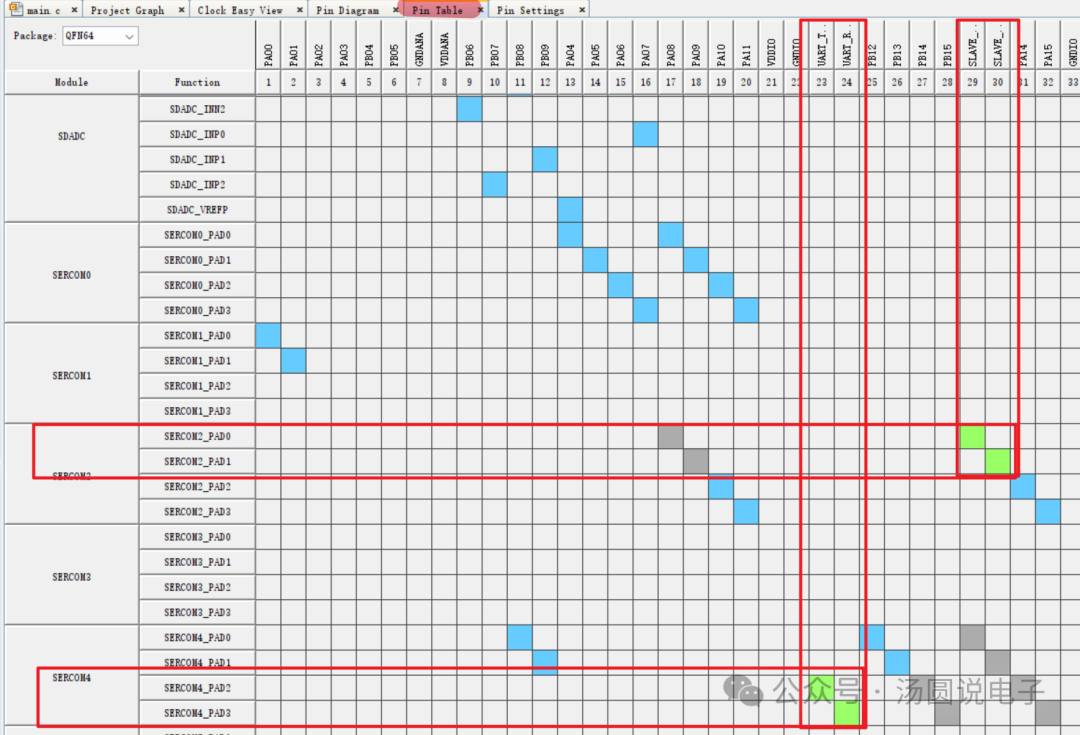
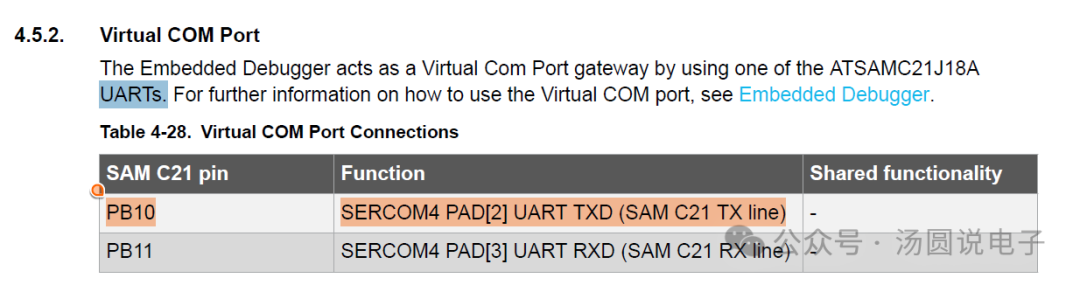 Set the serial port IO in the Harmony configuration tool
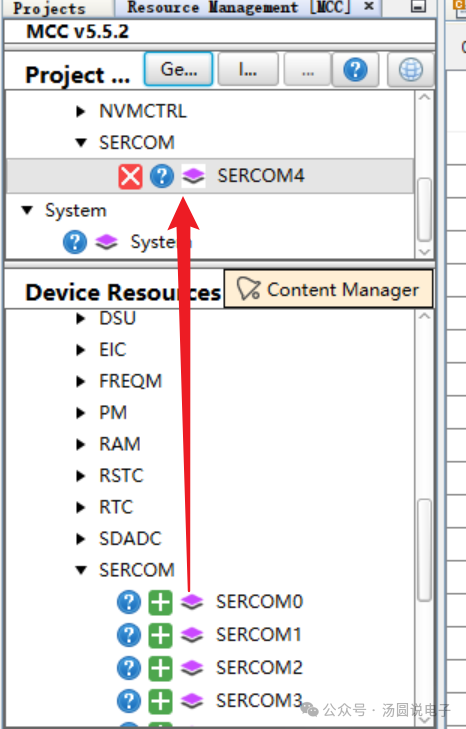
 Add SERCOM4 resource in the resource list and set it to UART function
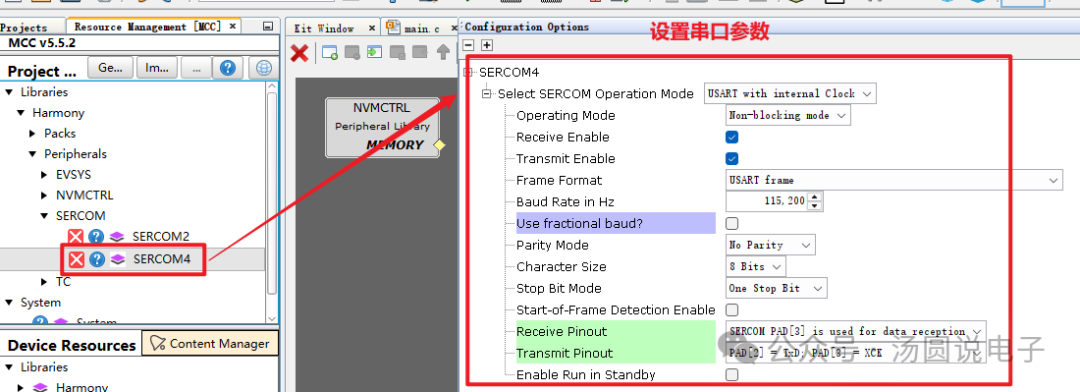
 Set serial port parameters
 Add SERCOM2, configure it as an I2C slave and set its parameters
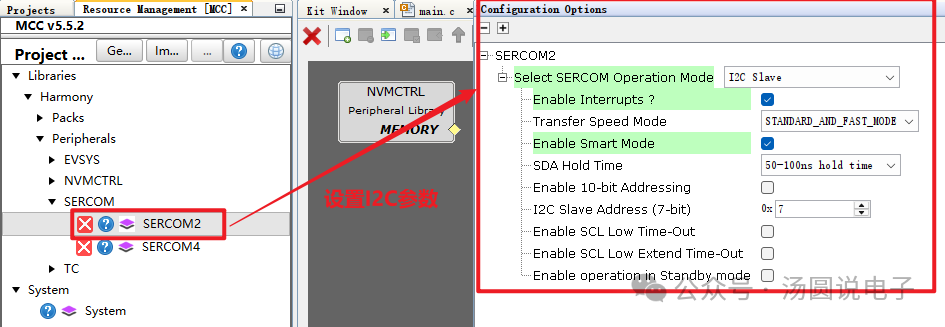 I2C Pin and Function Parameter SettingsRefer toSAM C21 Xplained Prodevelopment board manual for I2C pins
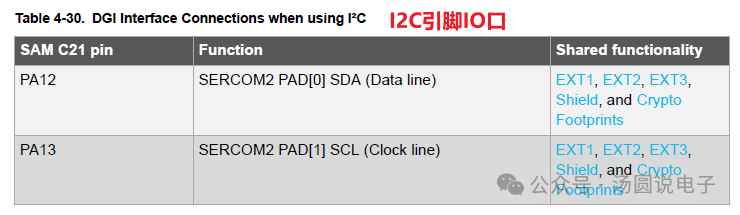 Set I2C slave IO ports
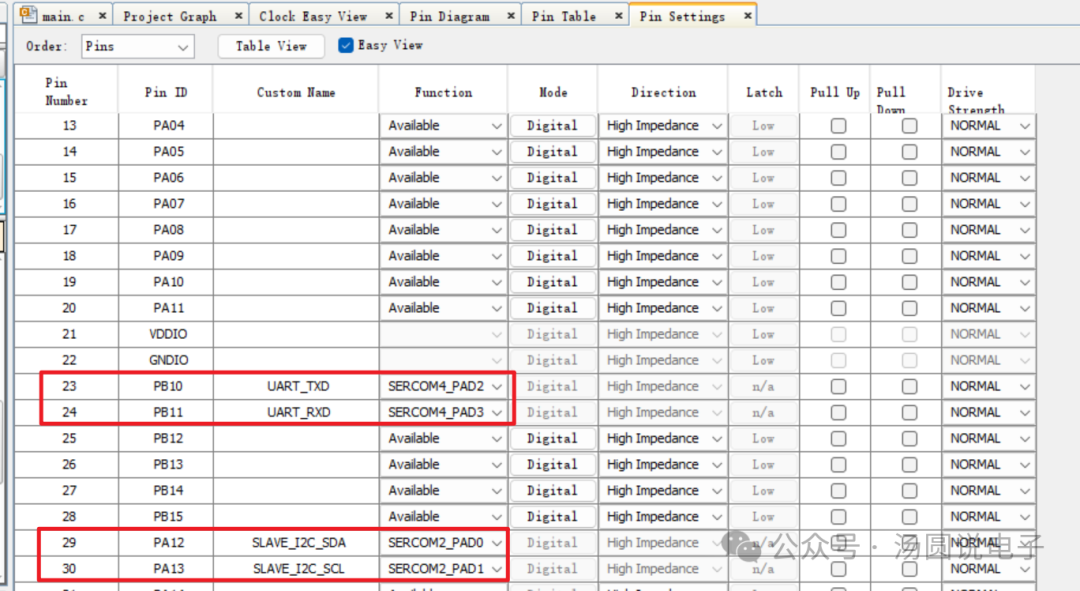
 Set the names of the IO ports for UART and I2C
 Add a timer, set the timer interval to 500ms
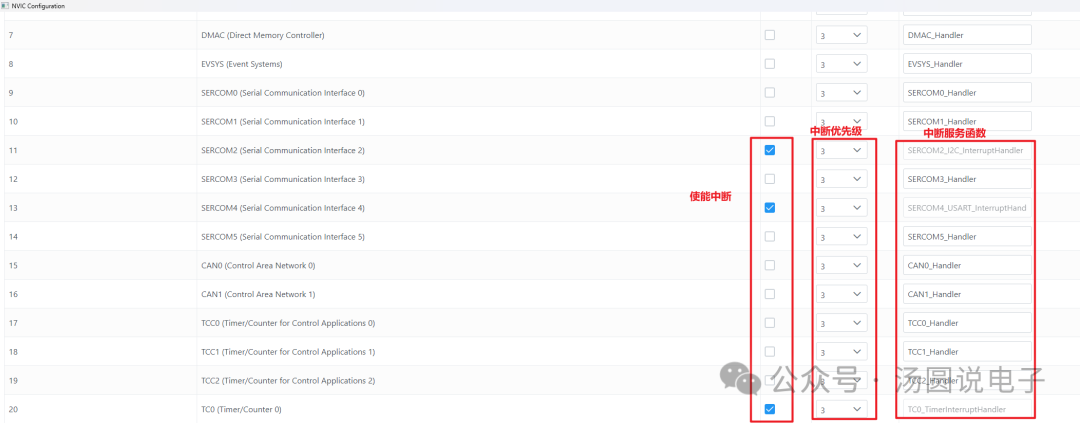
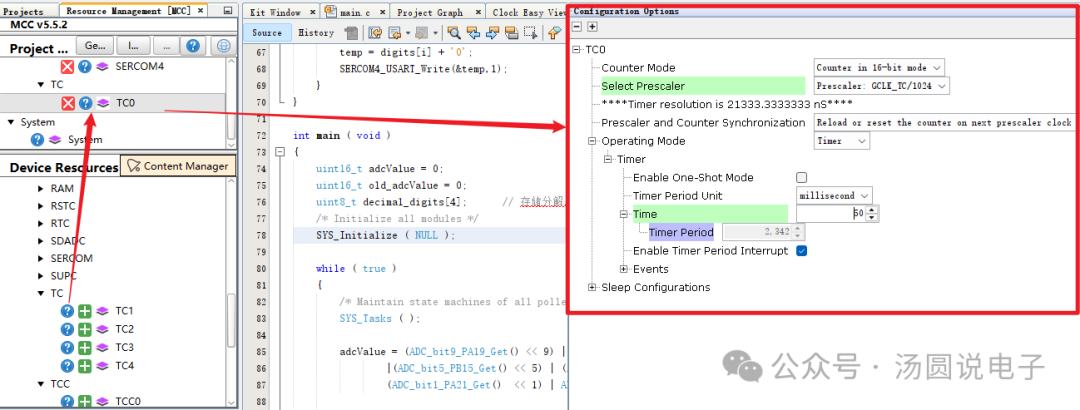 Harmony Interrupt Settings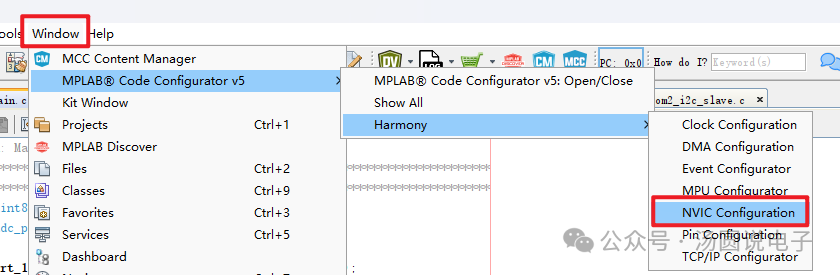
 Refer toSAM C21 Xplained Prodevelopment board manual for LED pins
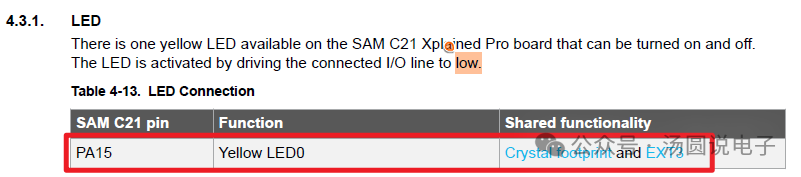 Set the IO port for the LED
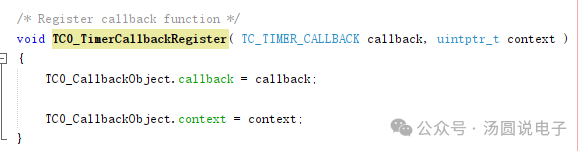
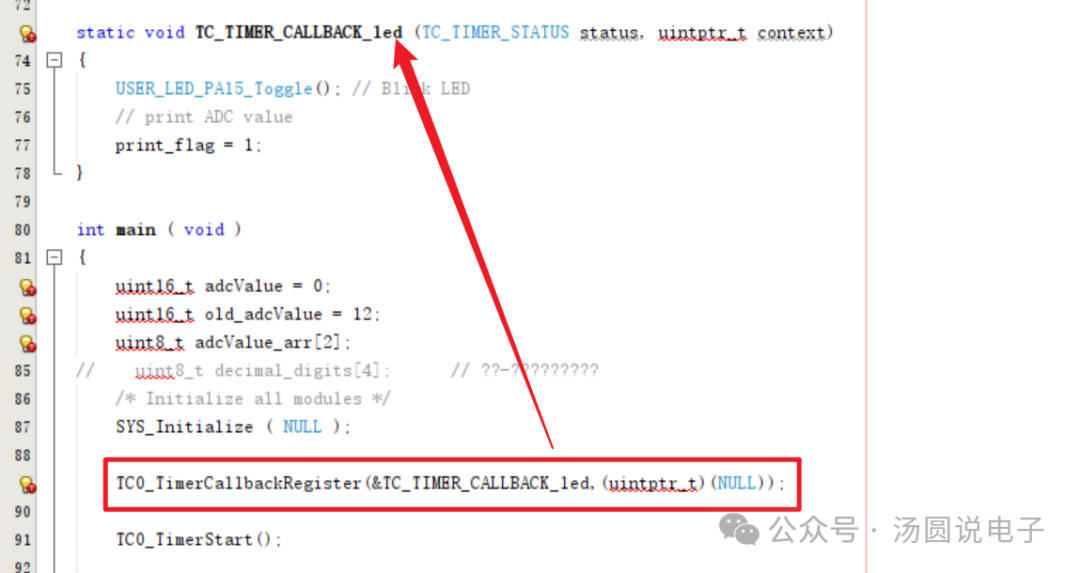
 Code WritingRegister the timer callback function
 In thetimercallback function, add the LED toggle code
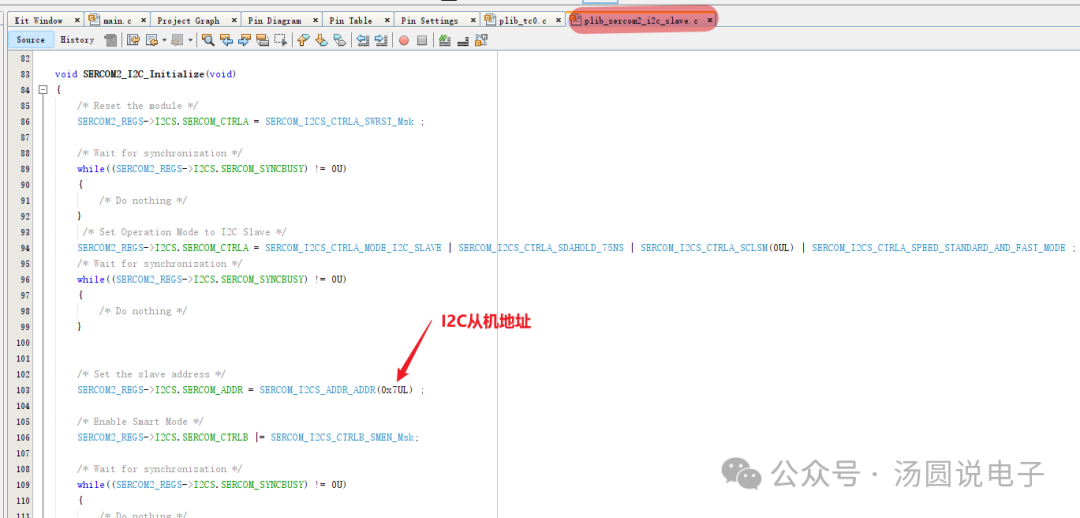
 I2C Slave Address
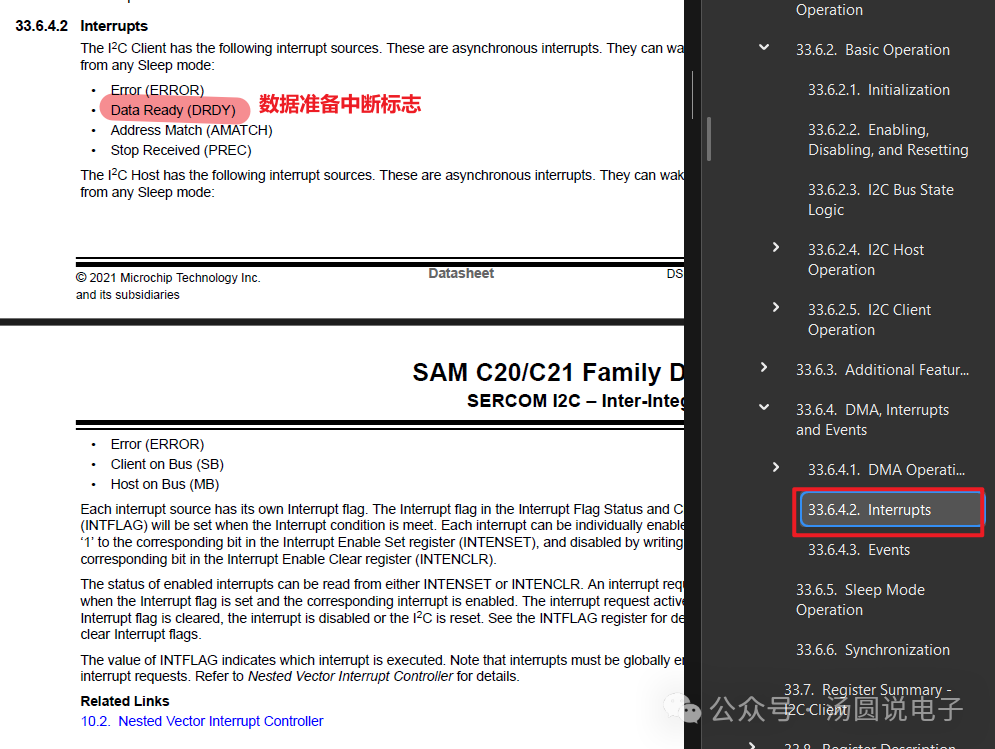
 Refer to the I2C interrupt section in the manual to understand the available I2C interrupts for subsequent use of interrupt callback functions.
 I2C Interrupt Service Function
void __attribute__((used)) SERCOM2_I2C_InterruptHandler(void){    uint32_t intFlags = SERCOM2_REGS->I2CS.SERCOM_INTFLAG;    SERCOM_I2C_SLAVE_TRANSFER_EVENT event = SERCOM_I2C_SLAVE_TRANSFER_EVENT_NONE;
    if((intFlags & SERCOM2_REGS->I2CS.SERCOM_INTENSET) != 0U)    {        uintptr_t context = sercom2I2CSObj.context;
        if ((intFlags & SERCOM_I2CS_INTFLAG_ERROR_Msk) != 0U)        {            event = SERCOM_I2C_SLAVE_TRANSFER_EVENT_ERROR;
            if (sercom2I2CSObj.callback != NULL)            {                (void)sercom2I2CSObj.callback(event, context);            }        }        if ((intFlags & SERCOM_I2CS_INTFLAG_AMATCH_Msk) != 0U)        {            sercom2I2CSObj.isBusy = true;
            sercom2I2CSObj.isFirstRxAfterAddressPending = true;
            sercom2I2CSObj.isRepeatedStart = ((SERCOM2_REGS->I2CS.SERCOM_STATUS & SERCOM_I2CS_STATUS_SR_Msk)  != 0U) ? true : false;
            event = SERCOM_I2C_SLAVE_TRANSFER_EVENT_ADDR_MATCH;        }
// DRDY is the data ready flag, indicating that the data to be received or sent via I2C is ready        if ((intFlags & SERCOM_I2CS_INTFLAG_DRDY_Msk) != 0U)        {            if (SERCOM2_I2C_TransferDirGet() == SERCOM_I2C_SLAVE_TRANSFER_DIR_WRITE)            {                event = SERCOM_I2C_SLAVE_TRANSFER_EVENT_RX_READY;            }            else            {                if ((sercom2I2CSObj.isFirstRxAfterAddressPending == true) || (SERCOM2_I2C_LastByteAckStatusGet() == SERCOM_I2C_SLAVE_ACK_STATUS_RECEIVED_ACK))                {                    sercom2I2CSObj.isFirstRxAfterAddressPending = false;
                    event = SERCOM_I2C_SLAVE_TRANSFER_EVENT_TX_READY;                }            }        }        if ((intFlags & SERCOM_I2CS_INTFLAG_PREC_Msk) != 0U)        {            sercom2I2CSObj.isBusy = false;
            event = SERCOM_I2C_SLAVE_TRANSFER_EVENT_STOP_BIT_RECEIVED;        }// Here, start using the callback function to handle subsequent tasks. Through the event parameter of the callback function, you can know// the current state. If the event is SERCOM_I2C_SLAVE_TRANSFER_EVENT_RX_READY// it is in receive state, if the event is SERCOM_I2C_SLAVE_TRANSFER_EVENT_TX_READY// it is in send state.        if (sercom2I2CSObj.callback != NULL)        {            (void)sercom2I2CSObj.callback(event, context);        }    }    SERCOM2_REGS->I2CS.SERCOM_INTFLAG = (uint8_t)intFlags;}
It is necessary to register the callback function, and then in the callback function, check the event status, and handle the corresponding tasks based on the event status.
// Register callback functionSERCOM2_I2C_CallbackRegister(&SERCOM_I2C_SLAVE_CALLBACK_ADCRES,(uintptr_t)(0));
static bool SERCOM_I2C_SLAVE_CALLBACK_ADCRES ( SERCOM_I2C_SLAVE_TRANSFER_EVENT event, uintptr_t contextHandle ){    // I2C SLAVE Read    if(event == SERCOM_I2C_SLAVE_TRANSFER_EVENT_RX_READY)    {        adc_testStruct.adcValue_res = SERCOM2_I2C_ReadByte();        adc_testStruct.print_flag = 1;
        SERCOM4_USART_Write("1",1);
        return true;
    }
    // I2C SLAVE Write    else if(event == SERCOM_I2C_SLAVE_TRANSFER_EVENT_TX_READY)    {
        SERCOM4_USART_Write("2",1);
        return true;
    }
    return false;}
In the interrupt function, variables must be modified using the volatile keyword, otherwise the variable values will not update!I2C Slave TestingUseMCP2221 I2C Host (I2C Master) to test the I2C Slave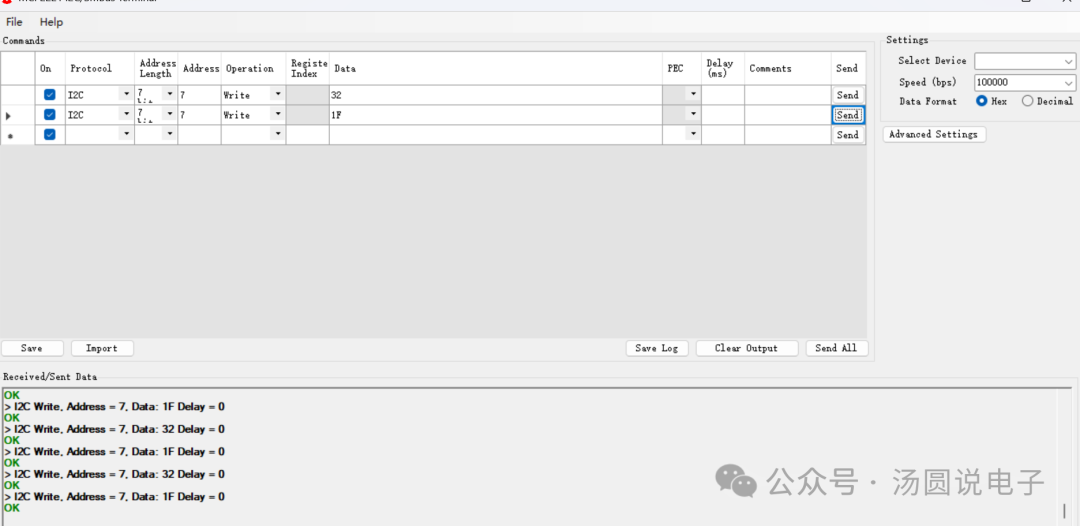 Use theEDBGvirtual serial port on the development board
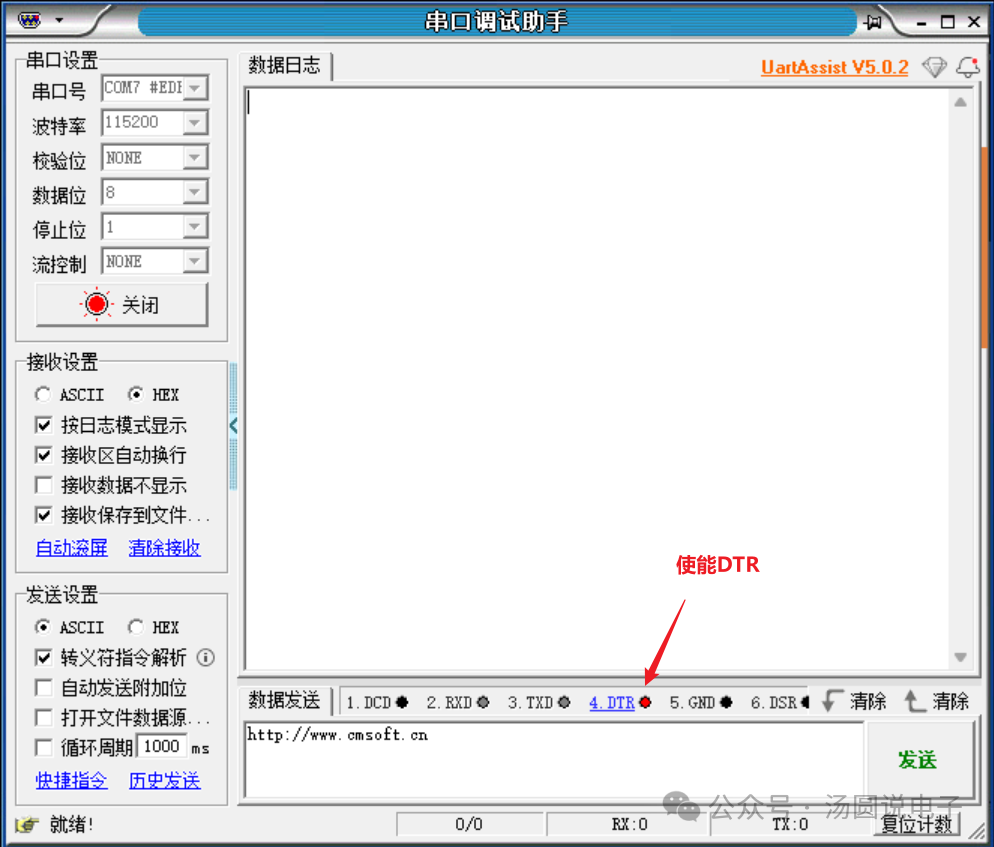
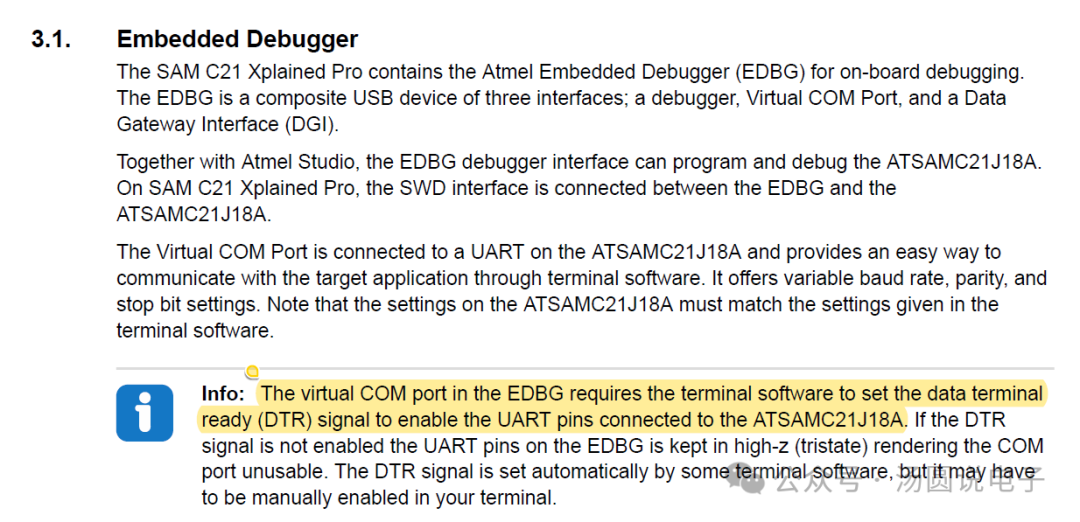 Set the EDBG virtual serial port in the serial port assistant, enabling the DTR bit
 Aboutuintptr_t type descriptionOn 64-bit machines, intptr_t and uintptr_t are aliases for long int and unsigned long int; on 32-bit machines, intptr_t and uintptr_t are aliases for int and unsigned int.
Link: https://pan.baidu.com/s/1Gas4RUq5wO3JE2TwDXyfcA
Note: Reply with the keyword “汤圆说电子” to get the extraction code for SAMC21-I2C-SLAVE,Get the extraction code