For those familiar with computers, the BIOS (that blue interface) may not be too strange, as it is the startup code for the computer. Without BIOS, a computer is destined to be a brick! The BIOS mainly does some preparatory work before booting, such as setting the system time and boot order… but I digress.
In fact, computers originated from microcontrollers, and microcontrollers also have startup code, although we usually do not care about it.
What exactly does the startup code do, and why is it necessary? Think about what you use in C language that is readily available: the heap and the stack! That’s right, it’s them. We know that the heap and the stack are areas allocated in memory, so why don’t we allocate them ourselves? Because the startup code helps you!!! Think about what configurations are overlooked when the microcontroller is working, but it can still function. The clock is one such thing; we can operate without configuring the clock, yet it has a default value! Again, the startup code is helping you.
Next, let’s take a closer look at the STM32 startup code. First, we need to know where the startup code is hidden: in a file called startup, which is written in assembly language. The startup code is the most basic configuration for the hardware, and it must be implemented in assembly language, which is the true hardware programming language.
Let’s interpret the startup code from top to bottom.
1. Define stack size

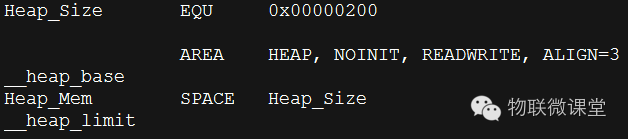
2. Define heap size
3. Interrupt vector address
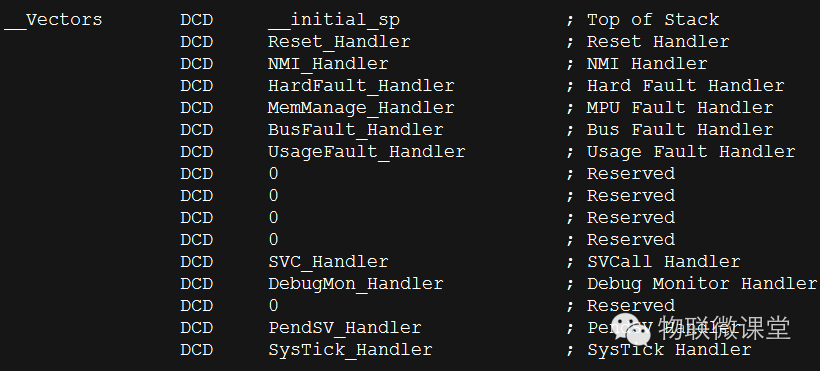
Note: The Cortex-M4 core requires that the first address in memory is the stack pointer, and the second address onwards is for the interrupt vector. The first entry in the interrupt vector must be the reset vector, because the code is executed from top to bottom, and the first thing encountered at boot is the reset.
4. Reset interrupt handler

Note 1: Pay close attention to two things: “SystemInit” is for clock initialization, and “__main” represents the jump to the “main” function. It is precisely because of this writing style for the reset that programs start executing from the main function.
Note 2: The specific implementation of “SystemInit” is in stm32fxxx.c, and “__main” is also associated with the actual main function somewhere.
5. Other interrupt handlers
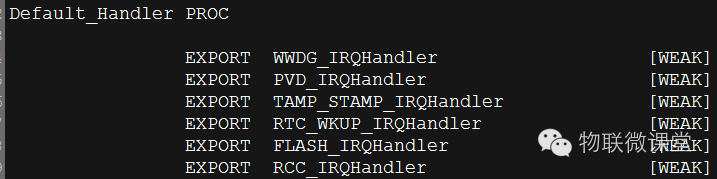
Note 1: Most interrupt implementations are not provided by the system, waiting for programmers to write them. However, we can see the names of the interrupts, and each name corresponds to the vector table above. We know that function names are actually addresses, and the entry address for interrupts is fixed; as long as you find the right name, you will find the right address.
Note 2: The entry address for interrupts is determined by the core and the chip and cannot be changed. Therefore, do not modify the interrupt vector table in the startup code.
6. Initialize heap and stack
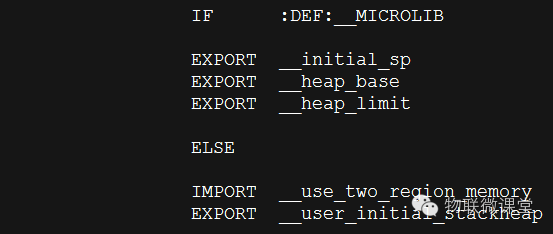 Note: Because the heap and stack have been initialized, your C language can execute smoothly.
The startup code is very critical; all CPUs have startup code. It completes the most basic initialization functions, especially the interrupt vector table. Each interrupt function name written by programmers must correspond to the vector table in the startup code; otherwise, the interrupt cannot be entered.